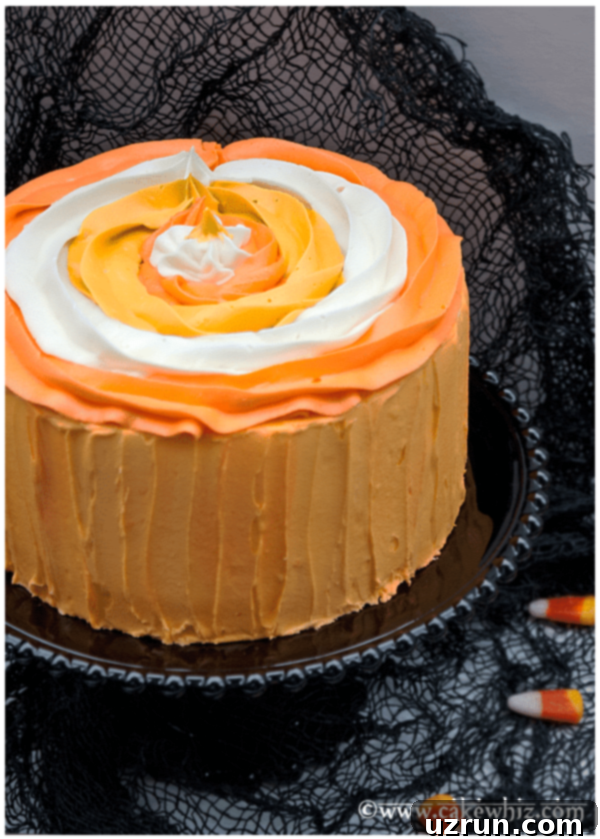
Easy Halloween Candy Corn Cake: Your Guide to Spooky Buttercream Delights
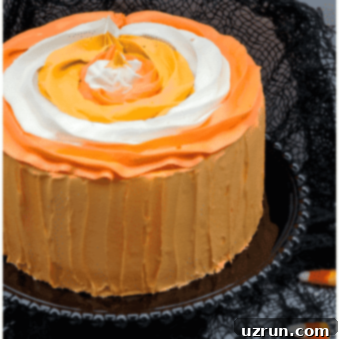
Get ready to add a splash of festive color and delicious flavor to your Halloween celebrations with this incredibly easy Candy Corn Cake! While it might look professionally decorated, this cake is designed with simplicity in mind, making it perfect for bakers of all skill levels. Forget complicated techniques, fondant, or specialized tools; all you’ll need is a spatula and one versatile decorating tip to create a stunning centerpiece for your spooky gathering.
Last year, I had an absolute blast creating this vibrant cake, and the inspiration, as you might guess, came from the iconic yellow, orange, and white hues of candy corn. It’s not actually made of candy corn (though you can certainly add some for extra flair!), but rather captures its whimsical spirit through layers of beautifully colored buttercream. If you’re someone who often looks for easy cake decorating ideas, you’re going to love how straightforward and rewarding this project is. No stress, just delicious fun!
Whether you’re hosting a ghoulish gala, a casual trick-or-treat party, or just want to bring some festive cheer into your home, this Halloween cake delivers on both visual appeal and taste. It’s a fantastic way to get creative in the kitchen without feeling overwhelmed. For more effortless Halloween treat ideas, don’t forget to check out our Easy Candy Cake {With Halloween Leftovers} or these adorable Easy Monster Cookies (Candy Corn Cookies)!
How to Create Your Easy Candy Corn Cake with Buttercream Icing
Crafting this festive Halloween cake is simpler than you might imagine. The key lies in preparing your components and then applying a few straightforward decorating steps. Here’s a detailed breakdown of how to achieve this vibrant candy corn effect:
- Bake Cakes: Begin by baking your preferred cake layers. Whether you choose a store-bought mix for ultimate convenience or a delicious homemade recipe, ensure your cakes are fully baked and, most importantly, completely cooled. This step is crucial, as attempting to frost warm cakes will lead to melted, sliding buttercream—a common baking mishap!
- Stack and Crumb Coat: Once your cakes are cool, place the first layer on your serving platter or cake stand. Spread a generous layer of white buttercream icing on top. Carefully place the second cake layer directly on top, pressing gently to secure it. Now, apply a thin, even layer of white buttercream over the entire cake (top and sides). This is known as a crumb coat, and it helps to seal in any loose crumbs, creating a smooth, pristine surface for your final decoration. Refrigerate for about 15-20 minutes to set the crumb coat.
- Prepare Piping Bags: Divide the remaining buttercream icing into three separate bowls. Tint one portion orange, another yellow, and leave the last portion white. Use gel food coloring for the best results, as it won’t thin out your icing. Fill three separate piping bags, one with each color. Attach a Wilton Tip 1M (or your preferred star tip) to each bag. Having separate bags and tips for each color will streamline your decorating process.
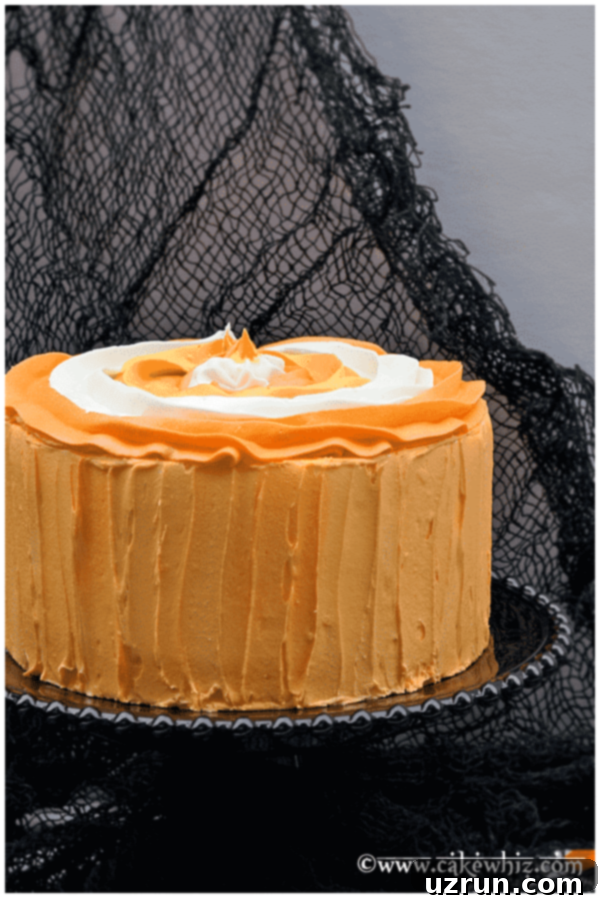
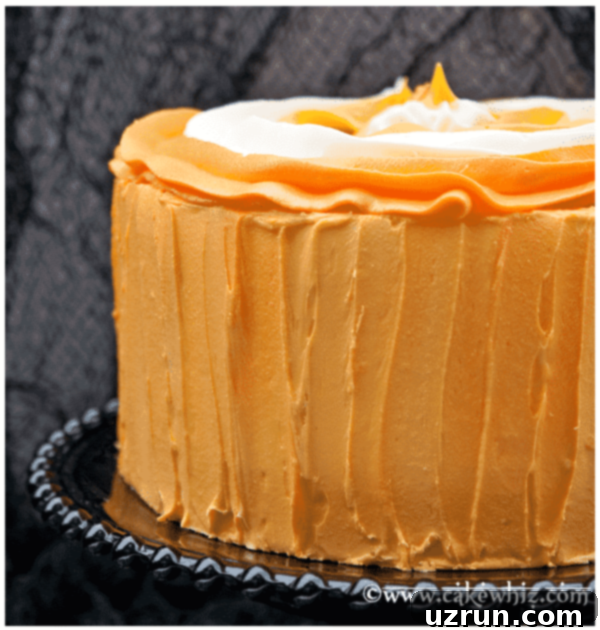
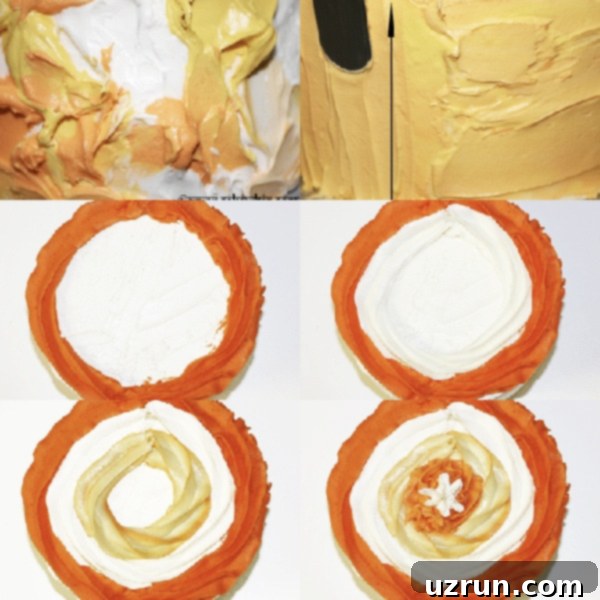
- Decorate the Cake Sides: This is where the magic happens! Hold your piping bag (start with yellow, for instance) and squeeze randomly around the base of the cake, creating small dollops or lines of color. Repeat with the orange and white icing, filling in gaps and overlapping slightly to create a colorful, textured effect reminiscent of candy corn stripes. Once all three colors are applied around the sides, take an offset spatula. Starting from the bottom edge of the cake, gently run the spatula in an upward motion, smudging and blending the colors together. Rotate the cake as you go, repeating this motion all around the cake for a beautifully abstract, striped finish.
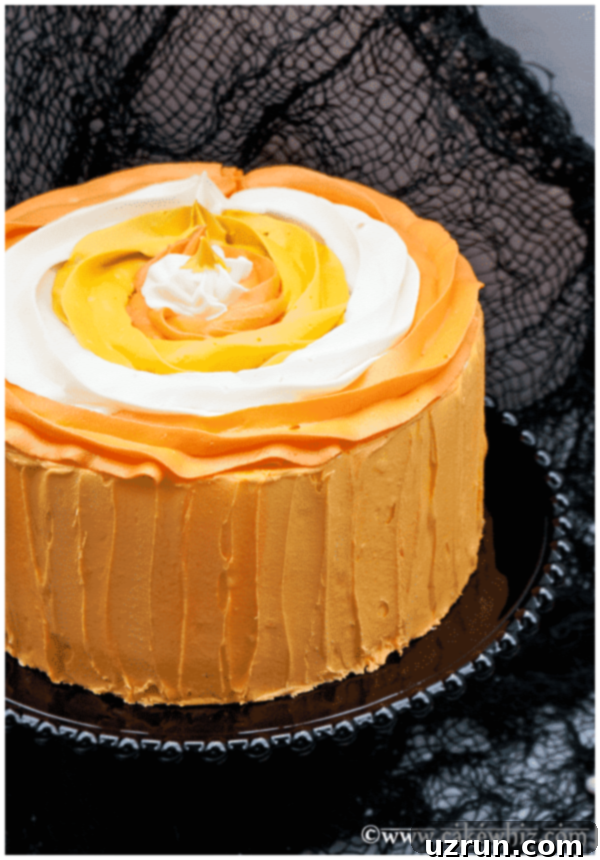
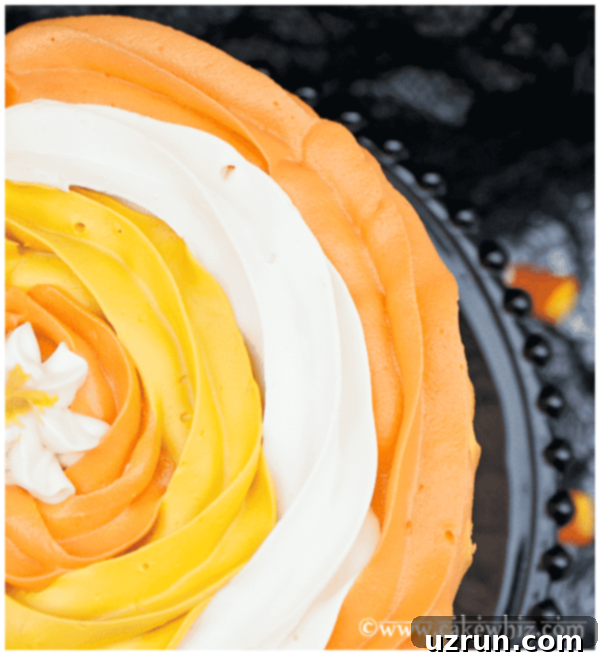
- Decorate the Cake Top: Now for the grand finale – the top of your cake! Using the same piping bags with their attached tips, pipe a swirl of orange frosting around the very outer edge of the cake, forming a neat circle. Inside this orange circle, pipe a swirl of white frosting. Then, inside the white, pipe a swirl of yellow. You can repeat this pattern if your cake top allows, or simply finish with a final small swirl or star in the center with one of the colors. This creates a captivating, concentric design that perfectly complements the side decoration. Slice, serve, and enjoy your stunning creation!
Creative Variations for Your Halloween Cake
This Candy Corn Cake design is incredibly versatile! Feel free to customize it to your heart’s content, adapting it to different flavors, themes, or personal preferences. Here are some exciting variations to inspire your next Halloween baking project:
Try Other Cake Flavors: While a classic vanilla or orange cake works wonderfully, don’t hesitate to experiment with different cake bases to elevate your Halloween dessert. Imagine the rich flavors of a Moist Triple Chocolate Cake {From Scratch}, a playful Funfetti/Confetti Cake {From Scratch} for a more whimsical touch, or even an Easy Rainbow Cake {With Cake Mix} where you only use the yellow, orange, and white layers. A pumpkin spice cake would also be absolutely perfect for the fall season and Halloween!
Add a Delicious Filling: A luscious filling between your cake layers can take your dessert from great to extraordinary. Consider adding a layer of sweet Dulce De Leche, a fruity Strawberry Pie Filling or Cherry Pie Filling, or a gooey Caramel Sauce. These additions not only boost flavor but also add a wonderful textural contrast to the soft cake and creamy buttercream.
Use a Different Cake Coating: While buttercream is fantastic for this design, you could opt for a different coating. For a super smooth, sculpted look, consider using fondant instead of buttercream for the initial crumb coat and then applying your colored buttercream decorations on top. This can provide a very clean backdrop for your candy corn colors. Alternatively, a ganache drip could add an extra touch of decadence before you pipe.
Experiment with Different Wilton Tips: The Wilton 1M tip creates beautiful swirls and star patterns, but don’t limit yourself! Using a different piping tip can dramatically change the look of your cake. A round tip (like Wilton 1A or 12) could create smooth dots or lines, while a basketweave tip could add a unique texture. Get creative with different designs and see what cool patterns you can achieve!
Enhance with Sprinkles: Sprinkles are a baker’s best friend for adding instant festivity! Coordinate your sprinkles with the candy corn theme by using yellow, orange, and white sprinkles, or lean into the Halloween spirit with spooky black, purple, or ghost-shaped sprinkles. A sprinkle border around the base or top of the cake always looks charming.
Incorporate Real Candy Corn: For an unmistakable candy corn theme, why not add actual candy corn pieces? Arrange them artistically on top of the cake, around the bottom border, or even press some gently into the buttercream sides. This adds an extra layer of fun, texture, and undeniable Halloween spirit!
Try Other Frosting Flavors: The color is central to this cake, but the flavor of your frosting is just as important. Experiment with different buttercream bases, such as a rich Marshmallow Frosting, a tangy Best Cream Cheese Frosting, or a decadent White Chocolate Buttercream Frosting. For those mindful of sugar intake, a Sugar-Free Frosting can also be easily dyed to achieve the iconic candy corn colors.
Create a Different Theme: The decorating technique used for this candy corn cake is incredibly adaptable. You can use the exact same method but simply swap out the colors to match any holiday or event! Imagine red, white, and green frosting for a festive Christmas cake, bright rainbow colors for a joyous birthday celebration, or even beautiful ombre shades for a chic baby shower or wedding. This technique is a fantastic foundation for endless cake decorating possibilities.
Essential Tips and Techniques for a Spooky Cake Success
Achieving a picture-perfect Halloween cake is all about attention to detail and a few clever techniques. Here are some insider tips to ensure your candy corn creation is both delicious and visually stunning:
Cool Cake Completely: This is a golden rule in baking, especially when decorating. It is absolutely impossible to properly frost a warm cake. The heat from the cake will melt your buttercream, causing it to slide off and create a messy, crumb-filled disaster. Always allow your cakes to cool completely to room temperature, and if possible, chill them in the refrigerator for 20-30 minutes before frosting for even firmer layers.
Work in a Cool Room: Just as warm cake layers are problematic, a hot kitchen can quickly sabotage your decorating efforts. High temperatures will cause your buttercream to melt and become too soft to pipe or spread neatly. Ensure the room where you’re frosting is comfortably cool. If your buttercream starts to get too soft, pop the piping bags or the entire cake (after crumb coating) into the refrigerator for a few minutes to firm up.
How to Pipe the Top of the Cake for a Perfect Swirl: For that captivating concentric design on top, precision helps. Start with one color (e.g., orange) and pipe a continuous swirl around the outer edge of the cake, forming a distinct circle. Then, take your next color (e.g., white) and pipe a smaller swirl just inside the orange circle. Follow with the third color (e.g., yellow) inside the white circle. You can repeat this pattern, alternating colors, until you reach the center. For the very center, a simple white star or a small dollop completes the look, creating a vibrant, layered effect.
Choosing the Right Tip: For the top decoration, I used Wilton’s Tip 1M, a classic open star tip that creates beautiful, defined swirls and rosettes. This tip is incredibly versatile and great for beginners. However, feel free to use a different star tip (like 21 or 32 for smaller stars) or even a large round tip (like 1A) for a different aesthetic. Experiment with what you have!
Opt for Gel Colors: When coloring your buttercream, always reach for gel food coloring over liquid varieties. Liquid food coloring can add too much moisture to your icing, making it thinner and harder to pipe or spread. Gel coloring is highly concentrated, meaning you need only a tiny amount to achieve vibrant hues without compromising the buttercream’s perfect consistency.
Consider Making Mini Cakes or Cupcakes: If a large cake feels like too much, or if you’re hosting a smaller gathering, this tutorial works beautifully for individual-sized treats! Use the same layering and decorating techniques to create festive candy corn cupcakes or charming mini cakes. They’re just as impressive and often easier to serve at a party.
Storage of Your Decorated Cake
To keep your beautiful Candy Corn Cake fresh and delicious, proper storage is key. Here’s how to ensure it tastes as good on day three as it does on day one:
Refrigerate: Any leftover cake should be stored in a sealed, airtight container. This protects the cake from drying out and absorbing odors from the refrigerator. It will stay fresh and moist in the fridge for up to 3 days.
Freeze: For longer storage, this cake freezes wonderfully. Place the cake (or individual slices) in a freezer-safe, airtight container. Ensure it’s well-wrapped to prevent freezer burn. It can be frozen for up to 2 months. When you’re ready to enjoy it, thaw the cake overnight in the refrigerator or for a few hours at room temperature before serving.
More Spooky Halloween Cake Recipes and Tutorials
Looking for more hauntingly good baking inspiration? Explore these other fantastic Halloween cake recipes and tutorials from CakeWhiz:
- Halloween Cake (Twizzler Cake)
- Easy Spider Web Cake
- Easy Mummy Cake {Halloween Cake}
- Easy Monster Cake
- Easy Eyeball Cake
Recipe
Easy Candy Corn Cake
Abeer Rizvi
Pin Recipe
Want to Save This Recipe?
Enter your email & I’ll send it to your inbox. Plus, get great new recipes from me every week!
By submitting this form, you consent to receive emails from CakeWhiz
Ingredients
- 2 Orange cakes Round, 8×2 each
- 6 cups Buttercream icing Colored orange, yellow, white
Instructions
-
Bake cakes and allow them to cool completely.
-
Place one cake on serving dish and spread white icing on top.
-
Place the other cake on top and press gently to secure into place.
-
Frost the entire cake in white buttercream icing.
-
Fill three piping bags- one with orange icing, one with yellow and one with white frosting. Attach Wilton’s Tip #1M to each bag.
-
Let’s decorate the side of the cake first- Squeeze yellow, orange and white icing randomly around the cake. Now, run your spatula in an upward direction. Do this all around your cake.
-
Let’s decorate the top of the cake now- Pipe a swirl of orange frosting around the outer edge of the cake in the shape of a circle. Pipe white frosting inside the orange circle. Pipe yellow frosting inside the white circle. Pipe orange frosting inside the yellow circle. Finally, pipe a white star in the center of the orange circle. Enjoy!
Notes
- Read all my tips above.
- Leftovers can be stored in a sealed container in the fridge for up to 3 days.
Nutrition
An automated tool is used to calculate the nutritional information. As such, I cannot guarantee the accuracy of the nutritional information provided for any recipe on this site.
We hope this detailed guide empowers you to create a fantastic Easy Candy Corn Cake for your next Halloween celebration. This recipe proves that you don’t need to be a professional baker to make a truly memorable and impressive dessert. With just a few simple ingredients and techniques, you can transform a basic cake into a festive masterpiece that will delight your guests.
Whether you stick to the classic candy corn colors or venture into new themes with different frosting shades, the joy of baking and decorating this cake is undeniable. So gather your ingredients, put on your apron, and get ready to whip up some spooky sweetness. Happy Halloween baking!
