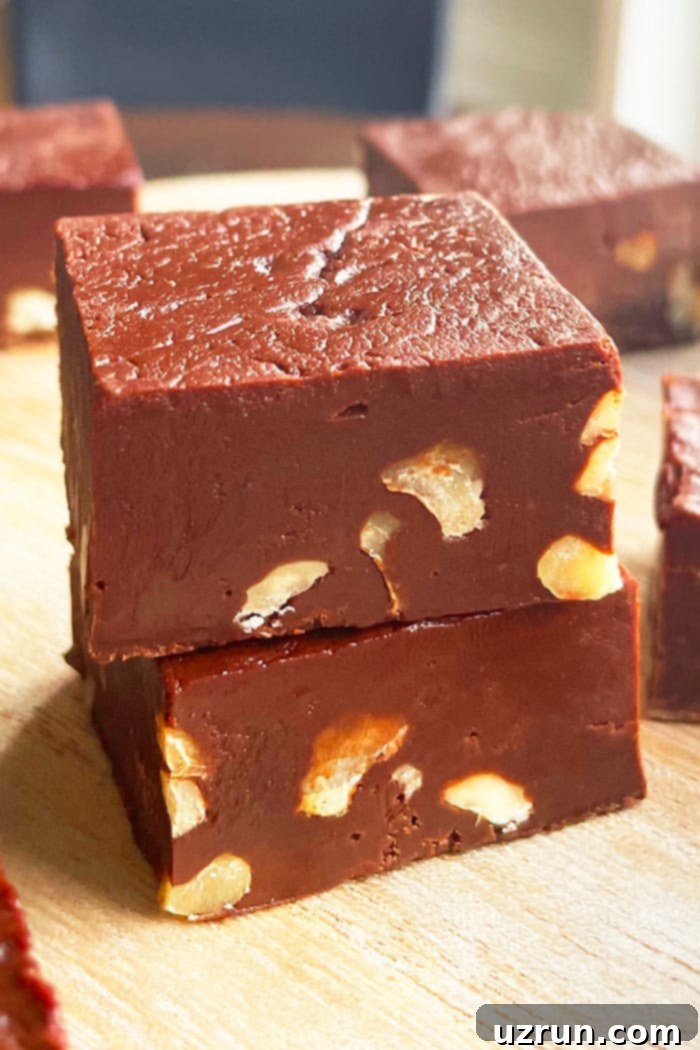
Perfect Original Fantasy Fudge Recipe: Your Guide to Creamy Homemade Chocolate Walnut Delight
Welcome to the ultimate guide for crafting the most luxurious and incredibly easy Original Fantasy Fudge recipe! This isn’t just any chocolate fudge; it’s a homemade marvel, designed for effortless preparation right in your microwave, using simple, readily available ingredients. Prepare to be amazed by its unbelievably creamy texture, enriched with luscious marshmallow creme and the delightful crunch of walnuts. This recipe promises a confectionery masterpiece that’s both deeply satisfying and wonderfully straightforward to make.
If you’re searching for a candy that truly melts in your mouth, look no further. This recipe yields a fudge so creamy and dreamy, it redefines homemade indulgence. The secret lies in the marshmallow creme, which imparts an unparalleled silkiness and a perfect touch of sweetness, creating a melt-in-your-mouth experience that simply can’t be rivaled. Complementing this velvety smoothness, the walnuts introduce a vital textural contrast with their distinct nutty crunch, elevating each bite from delicious to absolutely extraordinary. Trust us, your taste buds will thank you!
I absolutely love preparing a diverse array of candies for any celebration, whether it’s for hosting a party, assembling thoughtful homemade gifts, or crafting delightful party favors. This Original Fantasy Fudge is an essential addition to any sweet selection. For those looking to expand their confectionery repertoire, I highly recommend exploring other festive options like this delightful Christmas Fudge {Candy Cane Fudge}, perfect for the holiday season, or the ever-popular Oreo Fudge {Cookies and Cream Fudge}, a surefire crowd-pleaser that adds another layer of joy to your homemade treats. Crafting these treats not only fills your home with wonderful aromas but also brings immense joy to those who get to enjoy them.
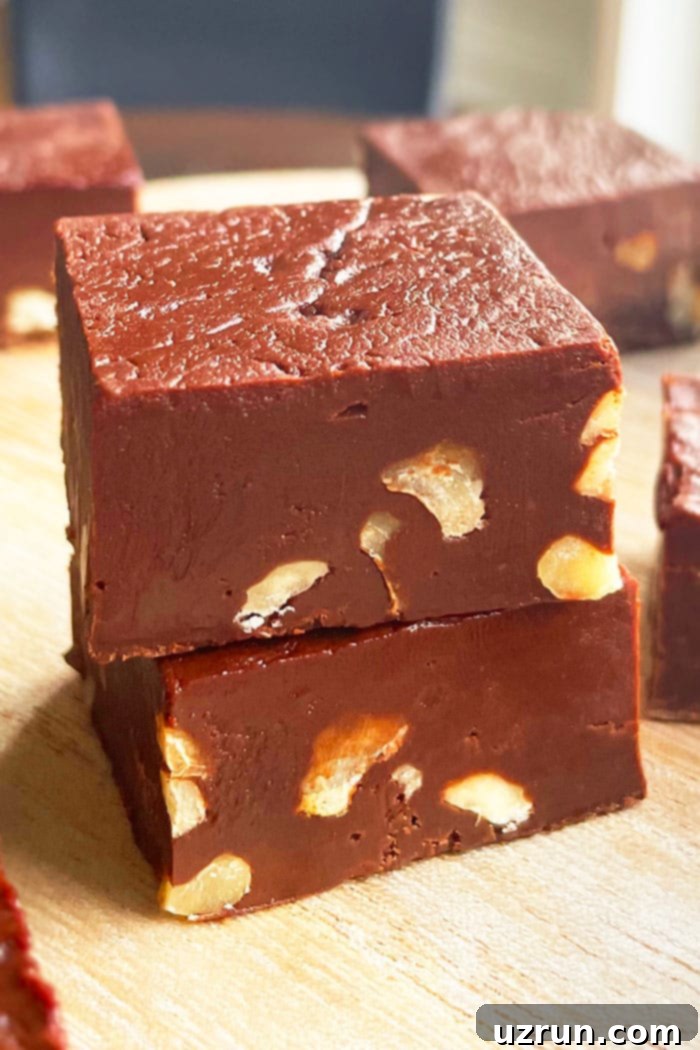
Table of contents
- What is Fantasy Fudge?
- How to Make Original Fantasy Fudge (Microwave & Stovetop)?
- Why is My Fudge Grainy?
- Why Did My Fudge Not Set? How to Harden It?
- Do I Need a Candy Thermometer?
- Delicious Variations for Microwave Chocolate Fudge
- Essential Tips and Techniques for Easy Jet-Puffed Fantasy Fudge
- Proper Storage for Homemade Fudge
- More Easy Fudge Recipes
What is Fantasy Fudge?
Fantasy Fudge is a legendary confection, a true classic that gained immense popularity for its incredible texture and ease of preparation. Its origins trace back to the packaging of marshmallow creme containers, where the original recipe was often printed, making it accessible to home bakers across generations. This delightful fudge became a holiday staple and a year-round favorite due to its remarkably creamy consistency, the straightforward process of making it, and the use of widely available, budget-friendly ingredients. At its core, the traditional Fantasy Fudge recipe features a harmonious blend of granulated sugar, rich butter, evaporated milk, essential marshmallow creme, crunchy walnuts, decadent chocolate, and a hint of vanilla. These ingredients combine to create a deeply satisfying treat that’s both nostalgic and irresistibly delicious, offering a perfect balance of sweetness and texture in every single bite.
How to Make Original Fantasy Fudge (Microwave & Stovetop)?
Whether you prefer the speed of a microwave or the traditional control of a stovetop, this Original Fantasy Fudge recipe is incredibly versatile. Both methods yield the same rich, creamy results, perfect for satisfying your sweet cravings. Here’s a detailed breakdown of how to prepare this classic dessert:
Microwave Method: Quick and Convenient
- Melt Butter: Begin by placing the unsalted butter in a large, microwave-safe mixing bowl. Heat it in the microwave until it is completely melted. This usually takes about 30-60 seconds, depending on your microwave’s power.
- Combine Sugars and Milk: Add the granulated sugar and evaporated milk to the melted butter. Whisk these ingredients together thoroughly until they are well combined and the sugar begins to dissolve.
- Heat Mixture: Return the bowl to the microwave. Heat the mixture for 2-3 minutes, stirring every 30 seconds. This step is crucial for dissolving the sugar and reaching the correct temperature for a smooth fudge. Ideally, you want the mixture to reach 234 degrees F on a candy thermometer for optimal setting, although it can be made without one with careful observation.
- Add Chocolate Chips: Once the mixture is hot and the sugar is dissolved (or reaches temperature), remove the bowl from the microwave. Immediately add the semisweet chocolate chips. Let them sit for a minute to begin melting before whisking.
- Whisk Until Smooth: Whisk vigorously until the chocolate chips are entirely melted and the mixture is silky smooth. Ensure there are no lumps of chocolate remaining.
- Incorporate Marshmallow Creme & Vanilla: Stir in the marshmallow creme and vanilla extract. Mix exceptionally well until there are no white streaks of marshmallow creme visible, ensuring a uniform, creamy consistency. This also helps in the fudge’s final texture.
- Fold in Walnuts: Gently fold in the roughly chopped walnuts. Distribute them evenly throughout the fudge mixture for a delightful crunch in every bite.
- Pour into Pan: Promptly pour the warm fudge mixture into your prepared 8 or 9-inch square pan, which should be lined with wax paper for easy removal. Smooth the top with a spatula if desired.
- Chill to Perfection: Allow the fudge to cool completely at room temperature, then transfer it to the refrigerator. Chill for 2-3 hours, or preferably overnight, until the fudge is firm and fully set.
- Slice and Serve: Once firm, lift the fudge out of the pan using the wax paper. Use a sharp, warm knife to cut it into small square pieces. Enjoy your delicious homemade Fantasy Fudge!
Stovetop Method: The Traditional Approach
- Melt Butter: In a heavy-bottomed saucepan, melt the unsalted butter over medium heat on the stovetop. A heavy-bottomed pan helps prevent burning.
- Add Sugar and Milk: Stir in the granulated sugar and evaporated milk. Whisk continuously until the sugar starts to dissolve.
- Boil to Temperature: Continue to heat the mixture over medium heat, stirring occasionally, until it reaches a full rolling boil. Place a candy thermometer in the mixture, ensuring it doesn’t touch the bottom of the pan. Continue boiling, stirring frequently, until the mixture reaches precisely 234 degrees F (soft-ball stage) on the candy thermometer. This critical temperature ensures proper setting.
- Remove from Heat & Add Chocolate: Immediately remove the saucepan from the heat once it reaches temperature. Stir in the semisweet chocolate chips, allowing them a moment to melt.
- Whisk Until Smooth: Whisk thoroughly until all the chocolate is completely melted and the mixture is smooth and glossy.
- Incorporate Marshmallow Creme & Vanilla: Add the marshmallow creme and vanilla extract. Mix well, ensuring no white streaks remain and the marshmallow creme is fully incorporated, contributing to the fudge’s signature creaminess.
- Stir in Walnuts: Gently stir in the roughly chopped walnuts, distributing them evenly throughout the rich fudge mixture.
- Pour and Chill: Pour the hot fudge into your prepared 8 or 9-inch square pan, lined with wax paper. Allow it to cool at room temperature before chilling it in the refrigerator for 2-3 hours, or until completely firm.
- Cut and Enjoy: Once chilled and firm, lift the fudge from the pan and cut it into small, even squares using a sharp knife. Serve and savor this delightful, homemade treat!
Why is My Fudge Grainy?
A grainy texture in fudge is a common and often frustrating issue, but it’s usually preventable. This problem typically arises for a couple of key reasons. Firstly, it could mean that your mixture has not been heated thoroughly enough, or more specifically, the sugar crystals haven’t fully dissolved. When sugar doesn’t fully dissolve, it recrystallizes as the fudge cools, leading to that undesirable gritty texture. To prevent this, ensure you stir constantly and heat the mixture until it becomes visibly smooth and the sugar is no longer grainy when rubbed between your fingers. It’s important to give it enough time on the heat, whether in the microwave or on the stovetop, while continuously whisking.
Secondly, a grainy texture can unfortunately also be a sign that the chocolate was overheated, leading to a burnt mixture. If the chocolate scalds or burns, it separates and can create a gritty, unpleasant taste and texture that cannot be fixed. If you detect a burnt smell or taste, or if the mixture turns clumpy and refuses to smooth out despite proper whisking, it’s best to discard it and start fresh. Always heat your chocolate gently and add it off the heat or at a lower temperature to prevent scorching, especially in the microwave where hot spots can occur. Patience and attention to detail during the heating and mixing phases are your best allies for achieving that perfectly smooth, creamy fudge.
Why Did My Fudge Not Set? How to Harden It?
When your homemade fudge fails to set and remains too soft or gooey, it’s usually due to an imbalance in the recipe or insufficient chilling. One common culprit is an incorrect ratio of chocolate to evaporated milk, often indicating that there might be too much milk in the fudge. Precision in measuring ingredients is paramount for fudge recipes, as even slight deviations can impact the final consistency. Always use proper measuring cups and spoons and level off ingredients for accuracy. If your fudge is too soft, avoid the temptation to add more liquid; instead, ensure your measurements are exact from the start.
Another frequent reason for unset fudge is simply not allowing it to chill for long enough. Fudge requires a significant amount of time in a cool environment for the ingredients to properly firm up and meld. After pouring your fudge into the pan, let it cool completely at room temperature first before transferring it to the refrigerator. Once in the fridge, it generally needs at least 2-3 hours to become firm, but often, leaving it overnight yields the best results. If your fudge hasn’t set after a few hours, just leave it to chill for a longer duration. Resist the urge to poke or prod it too frequently; let it do its thing undisturbed. With adequate chilling time and accurate measurements, your fudge should achieve that perfectly firm yet creamy texture we all love.
Do I Need a Candy Thermometer?
While a candy thermometer is highly recommended for achieving consistent, perfect fudge, especially with the stovetop method, it’s not strictly essential if you know how to perform the ‘cold water test.’ This traditional method allows you to gauge the doneness of your syrup without specialized equipment, though it requires a bit of practice and keen observation.
To perform the ‘cold water test,’ very gently drop a small amount of the hot liquid fudge mixture into a glass of very cold water. As the hot syrup falls to the bottom of the glass, it should cool rapidly and form a soft, pliable ball. If it forms a ball that you can pick up and flatten easily between your fingers, then your fudge has reached the critical ‘soft-ball stage,’ which corresponds to approximately 234 degrees F. This indicates that the fudge is cooked to the perfect temperature, ensuring that as it cools, it will set into that desired firm yet melt-in-your-mouth consistency that everyone expects from delicious fudge.
If the syrup dissipates into the water or is too runny to form a ball, it means the temperature is too low, and your fudge will likely be too thin and never properly set. Conversely, if the syrup forms a hard, brittle ball, it means the temperature is too high (reaching the ‘hard-ball’ or ‘crack’ stage), which will result in a harder, more caramel-like, or even crumbly consistency, rather than the smooth creaminess characteristic of Fantasy Fudge. The candy thermometer removes this guesswork, but with careful practice, the cold water test can be a reliable alternative.
Delicious Variations for Microwave Chocolate Fudge
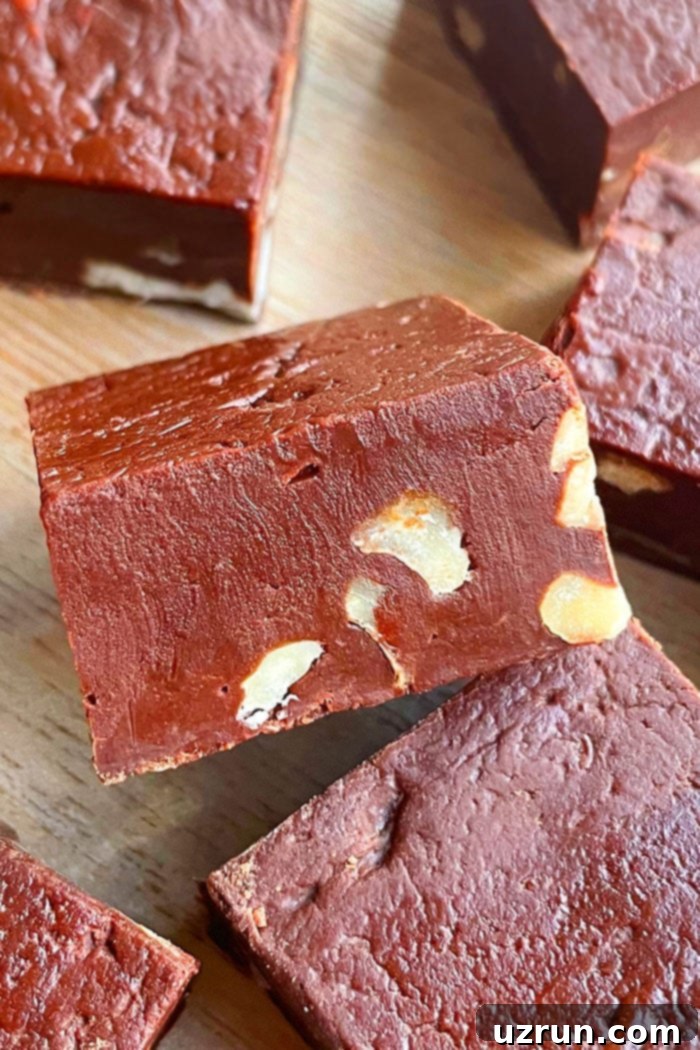
The beauty of this Microwave Chocolate Fudge recipe lies in its adaptability. Once you master the basic technique, a world of flavor combinations opens up! Here are some fantastic variations to inspire your culinary creativity and customize your fudge:
- Explore Other Nuts: While walnuts are classic, don’t hesitate to experiment with different nuts. Try crunchy pecans, creamy cashews, sweet almonds, buttery macadamia nuts, or salty peanuts. For an extra layer of complexity, you can even use a mix of finely chopped nuts. Toasting the nuts lightly before adding them can also enhance their flavor and aroma.
- Infuse with Dried Fruits: Add a chewy, fruity dimension by mixing in dried fruits. Dried cranberries offer a tart counterpoint to the sweet chocolate, while dried cherries provide a rich, sophisticated flavor. Other options include chopped dried apricots, raisins, or even candied orange peel for a citrusy twist.
- Experiment with Extracts: Vanilla extract is foundational, but different extracts can dramatically alter the flavor profile. Consider caramel extract for a deeper, buttery note, rum extract for a sophisticated warmth, coconut extract for a tropical hint, maple extract for a cozy autumn feel, almond extract for a delicate nuttiness, or amoretto for a hint of liqueur-like flavor. Just a small amount can make a big difference!
- Change the Chocolate Type: The recipe calls for semisweet chocolate chips, but feel free to switch it up! Use creamy milk chocolate chips for a sweeter, milder fudge, or rich dark chocolate chips for a more intense, slightly bitter cocoa experience. White chocolate chips can also be used for a non-chocolate base to which you can add colors or other flavors.
- Boost Nutty Flavors with Peanut Butter: For an irresistible peanut butter kick, mix in peanut butter chips alongside or instead of chocolate chips. Alternatively, swirl in a few tablespoons of creamy peanut butter (smooth or crunchy) at the end of the mixing process for a beautiful marbled effect and an undeniable nutty aroma.
- Incorporate Mini Marshmallows: If you love the visual appeal and soft texture of marshmallows, stir in mini marshmallows towards the very end of the mixing process. Add them just before pouring the fudge into the pan so they don’t completely melt, remaining visible and offering delightful pockets of chewiness within the fudge.
Essential Tips and Techniques for Easy Jet-Puffed Fantasy Fudge
Achieving perfect, consistently delicious Fantasy Fudge is easier than you think with these expert tips and techniques. Follow these guidelines to ensure your homemade treat is always a success, from prep to presentation:
- Serve at Room Temperature for Best Flavor: While chilling is essential for setting, fudge tastes its absolute best when allowed to come to room temperature before serving. The flavors mellow and become more pronounced, and the texture softens to that ideal creamy consistency. Take your fudge out of the fridge at least 30 minutes before you plan to serve it, especially for parties, to allow it to reach its peak deliciousness.
- Prevent Sticking with Wax Paper: To keep individual slices of fudge from sticking together, always store them in an airtight container separated by small sheets of wax paper. This simple trick ensures each piece remains perfectly intact and easy to retrieve, preventing a sticky mess and preserving its aesthetic appeal.
- Finely Chop Nuts and Dried Fruits: For an optimal texture balance and to ensure every bite is perfectly flavored, make sure any nuts or dried fruits you add are finely chopped. This prevents large, unwieldy chunks and allows for an even distribution, so you can enjoy a delightful blend of flavors and textures in each and every piece of fudge.
- The Importance of a Candy Thermometer: While the ‘cold water test’ can work, using a candy thermometer is highly recommended, particularly for stovetop methods. Reaching the critical temperature of 234 degrees F (the soft-ball stage) is vital. This precise temperature ensures the sugar dissolves completely and the mixture thickens correctly, allowing the fudge to mix properly and set with that desired smooth, creamy texture. Investing in one is a small step for consistently great results.
- Achieve Smooth, Perfect Slices: To get beautifully clean, sharp cuts without crumbling or sticking, employ this professional trick: run your sharp knife under hot water, wipe it completely dry with a paper towel, and then make your cut. Repeat this process for each slice. The hot, dry blade glides through the fudge, yielding perfectly smooth edges every time.
- Always Line Your Pan with Wax Paper: This is a non-negotiable step for easy removal and clean cutting. Lining your pan with wax paper, with a slight overhang on the sides, creates a non-stick surface. This allows you to easily lift the entire block of fudge out of the pan once it’s set, preventing it from sticking and potentially falling apart. Without it, getting those neat, clean-cut squares would be virtually impossible.
- Use Unsalted Butter: Stick to unsalted butter for this recipe. Using unsalted butter gives you complete control over the salt content, preventing your sweet treat from becoming unexpectedly salty. You can always add a pinch of salt if you desire, but starting with unsalted butter ensures the sweetness and chocolate flavors are perfectly balanced.
- Creative Fudge Packaging Ideas: If you’re planning to give your homemade fudge as gifts, presentation is key! For inspiration on attractive packaging, check out this guide on Food and Cookie Packaging Ideas. You can also craft a beautiful fudge box as a thoughtful holiday gift, offering a delightful alternative to traditional Christmas Cookie Boxes {Homemade Gifts}.
- Choosing the Right Pan Size: The pan size impacts the thickness of your fudge. Use an 8-inch square pan for thicker, more substantial pieces of fudge. Opt for a 9-inch square pan if you prefer thinner, flatter pieces. Both sizes work, just choose according to your preference for slice thickness.
- Optimal Chilling Time: Patience is key here. For the fudge to properly firm up and set, it needs sufficient chilling. Chill the fudge in the refrigerator for a minimum of 2-3 hours. For the absolute best results and a guaranteed firm set, chilling it overnight is highly recommended. Ensure it’s fully firm before attempting to cut.
Proper Storage for Homemade Fudge
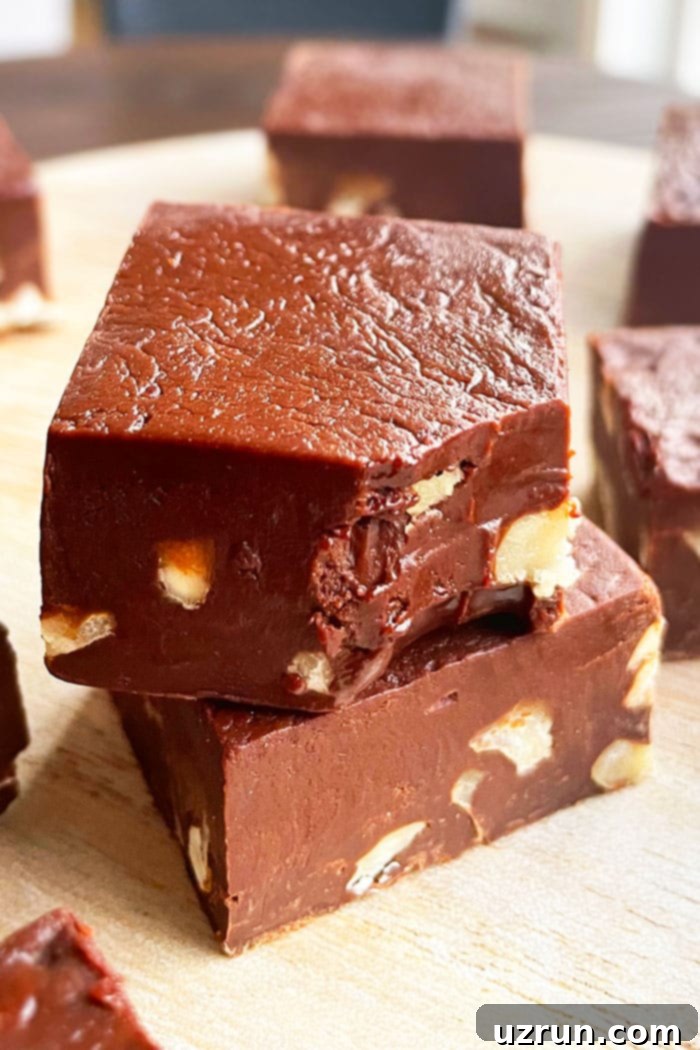
To ensure your delicious homemade Fantasy Fudge stays fresh and enjoyable for as long as possible, proper storage is crucial. Whether you plan to keep it for a few days or save it for later, here’s how to store it effectively:
- Refrigeration: For short-term storage, homemade fudge keeps beautifully in the refrigerator for up to 1 week. It’s essential to store it in a sealed, airtight container to prevent it from drying out or absorbing other odors from your fridge. For best results and to prevent the pieces from sticking together, separate individual layers or pieces with small sheets of wax paper. This also makes it easier to grab a single piece without disturbing the rest.
- Freezing: If you want to store your fudge for a longer period, freezing is an excellent option. To prevent freezer burn and maintain its quality, double-wrap the fudge tightly in plastic wrap, then place it in an airtight freezer-safe container or a heavy-duty freezer bag. Stored this way, it can last for up to 1 month. You can freeze the fudge as a whole block and then slice it after it has thawed, or you can pre-slice it before freezing. When you’re ready to enjoy it, simply thaw the fudge in the refrigerator overnight, or at room temperature for a few hours, then serve as desired.
More Easy Fudge Recipes
- Maple Fudge {With Maple Syrup}
- Easy Pumpkin Fudge Recipe {With Gingersnap Crust}
- Peanut Butter Fudge Recipe (3 Ingredients)
- Coffee Fudge
Recipe
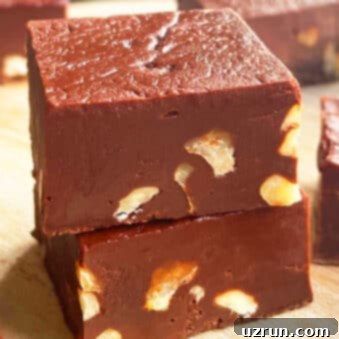
Original Fantasy Fudge (With Marshmallow Creme)
Abeer Rizvi
Pin Recipe
Want to Save This Recipe?
Enter your email & I’ll send it to your inbox. Plus, get great new recipes from me every week!
By submitting this form, you consent to receive emails from CakeWhiz
Ingredients
- ¾ cups Butter Unsalted
- 3 cups Granulated sugar
- ⅔ cups Evaporated milk
- 1 bag Semisweet chocolate chips 12 oz. bag
- 1 jar Marshmallow creme 7 oz. jar
- 1 teaspoon Vanilla extract
- ¾ cups Walnuts Roughly chopped, Original recipe used 1 cup
Instructions
-
In a large, microwave-safe mixing bowl, add butter and heat in the microwave until fully melted.
-
Add granulated sugar and evaporated milk to the melted butter and whisk until thoroughly combined.
-
Heat the mixture in the microwave for 2-3 minutes, whisking every 30 seconds, until the sugar is completely dissolved and your candy thermometer registers 234 degrees F. This temperature is crucial for proper setting.
-
Promptly remove the bowl from the microwave and immediately add the semisweet chocolate chips.
-
Whisk continuously until the chocolate is fully melted and the mixture achieves a smooth, glossy consistency.
-
Stir in the marshmallow creme and vanilla extract. Mix vigorously until no white streaks are visible, ensuring a uniform and creamy blend.
-
Gently stir in the roughly chopped walnuts, distributing them evenly throughout the fudge.
-
Pour the warm fudge mixture into an 8 or 9-inch square pan, which should be lined with wax paper for effortless removal. Use an 8-inch pan for thicker fudge pieces, or a 9-inch pan for thinner, flatter pieces.
-
Allow the fudge to cool completely at room temperature, undisturbed.
-
Once cooled, transfer to the fridge and chill for 2-3 hours, or preferably overnight, until the fudge is perfectly firm and set.
-
To serve, use a sharp, warm knife to cut the fudge into small, delectable square pieces. Enjoy your homemade Original Fantasy Fudge!
Notes
- For comprehensive guidance and troubleshooting, please read all the detailed tips and techniques provided in the sections above.
- Any leftover fudge can be stored in a sealed, airtight container in the fridge for up to 1 week. Remember to separate layers with wax paper to prevent sticking.
Nutrition
An automated tool is used to calculate the nutritional information. As such, I cannot guarantee the accuracy of the nutritional information provided for any recipe on this site.
