Easy & Delicious Father’s Day Cupcakes: Homemade Guinness Chocolate Treats with Edible Handyman Tools
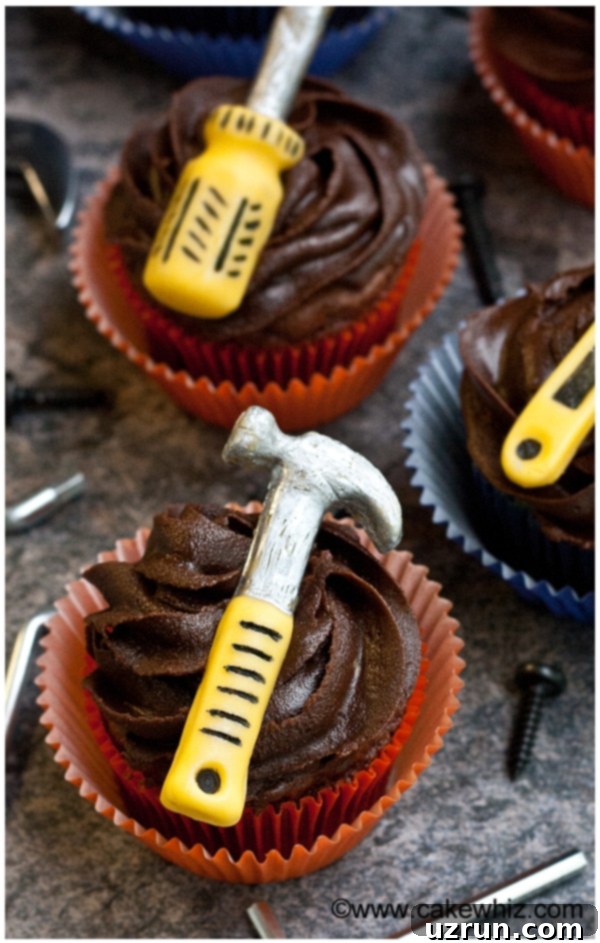
Celebrate the amazing dads in your life this Father’s Day with a truly unique and heartfelt treat: homemade Guinness beer chocolate cupcakes, adorned with charming, edible handyman tools! These easy-to-make cupcakes are not only incredibly delicious but also a fun and creative way to show appreciation for the handy hero in your family. Imagine the smile on his face as he discovers miniature edible pliers, screwdrivers, wrenches, and hammers atop a rich, moist chocolate cupcake. This recipe combines simple ingredients with a touch of playful creativity, resulting in a memorable dessert that’s perfect for any dad, grandpa, or father figure.
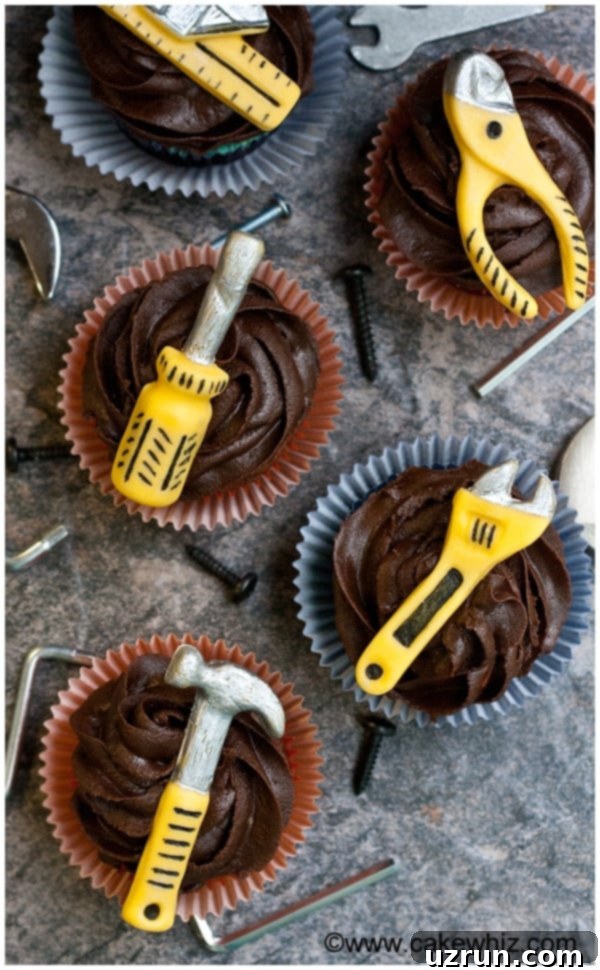
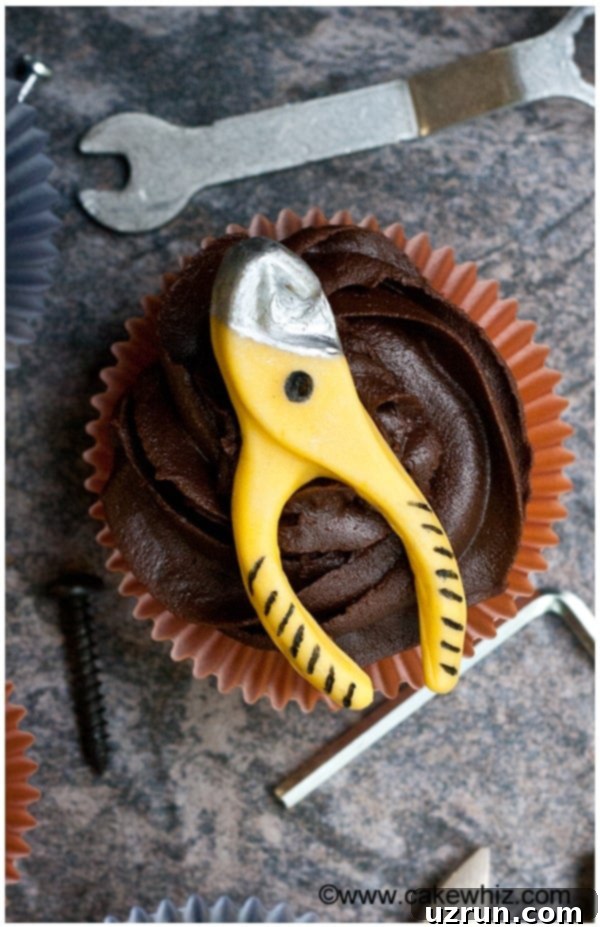
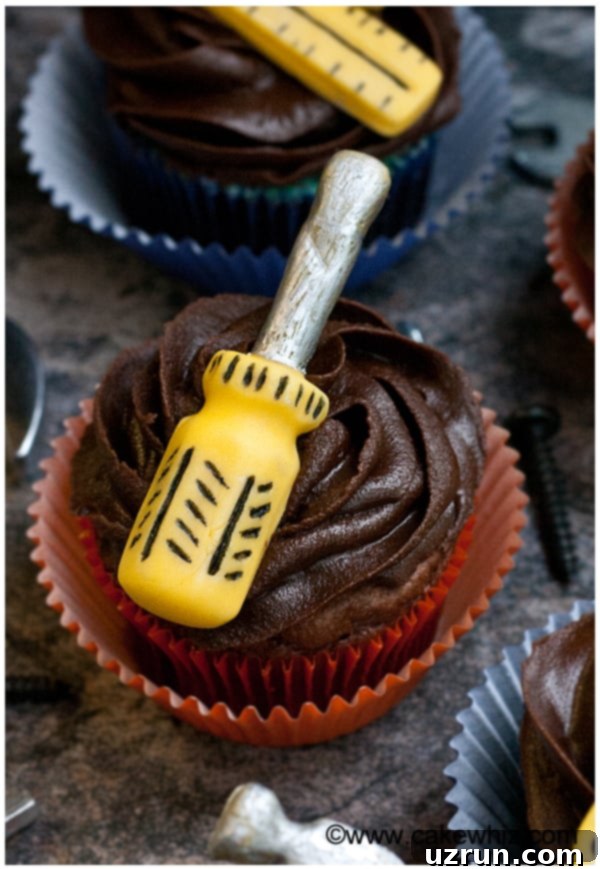
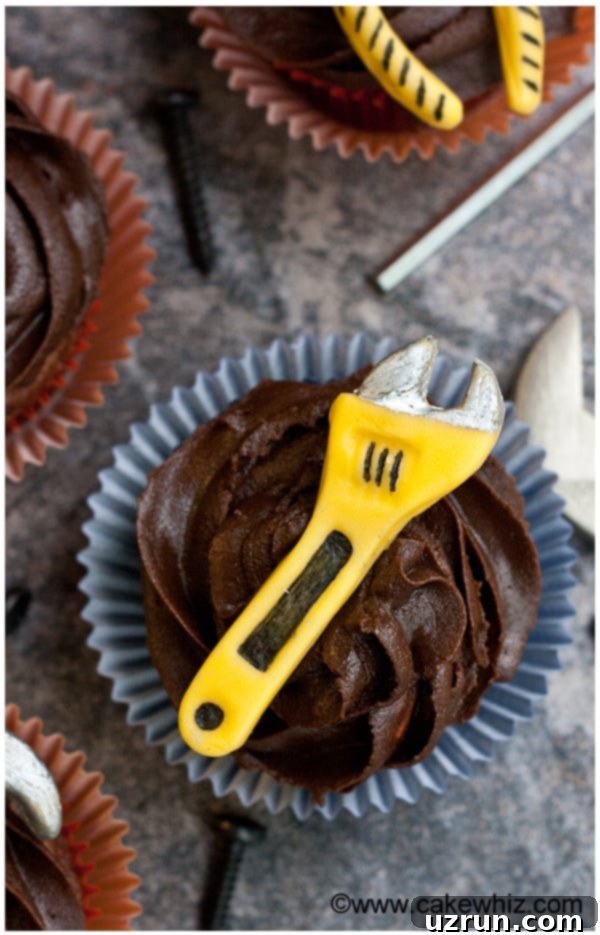
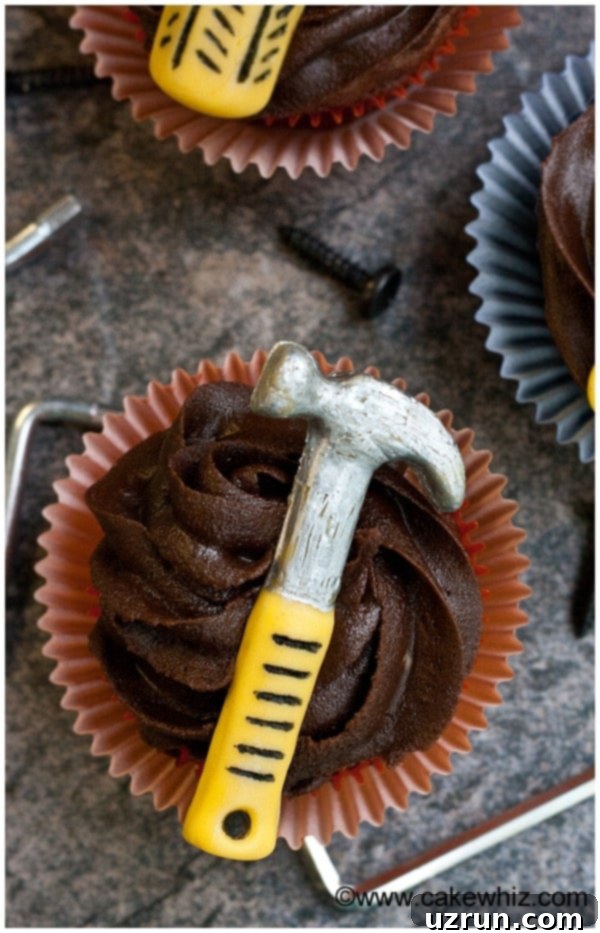
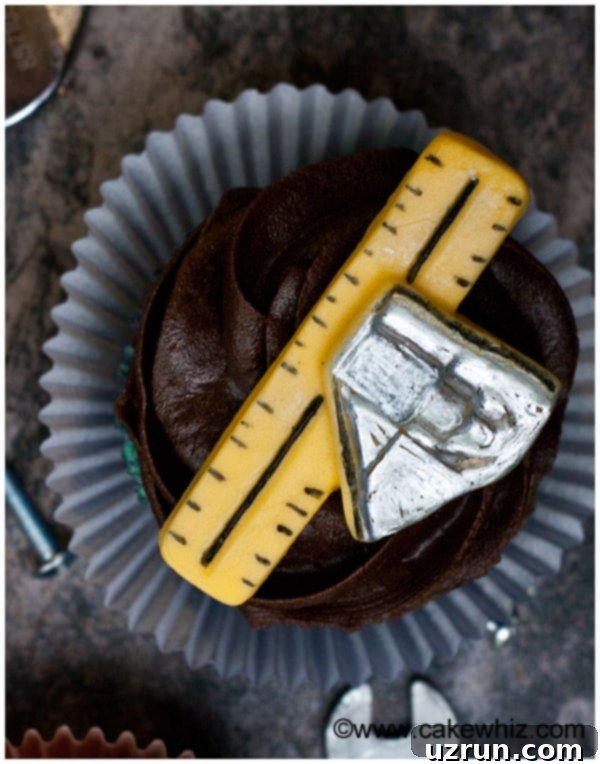
The inspiration for these delightful creations comes from our popular Father’s Day Tool Box Cake, a show-stopping dessert that delighted many a few years ago. We’ve taken that beloved concept and scaled it down into individual, perfectly portioned cupcakes, making them even easier to share and enjoy. While some incredibly talented cake decorators might craft these intricate tools freehand, we’re making it simple for everyone by utilizing handy candy molds. All the tools you see here – the trusty pliers, the versatile screwdriver, the essential wrench, the classic hammer, and even that intriguing, unidentifiable “ruler tool” (seriously, what is that called? And do we even own one? The mysteries of a husband’s toolbox!) – are entirely edible, crafted from vibrant gum paste.
Why These Father’s Day Cupcakes Are a Must-Bake
These Father’s Day cupcakes stand out for several reasons, making them an ideal choice for your celebration. First, the base is a rich, dark Guinness beer chocolate cupcake. The stout not only adds an incredible depth of flavor and a beautiful dark hue but also contributes to an incredibly moist and tender crumb that will have everyone reaching for seconds. Don’t worry, the alcohol bakes out, leaving only a sophisticated, malty chocolate taste that pairs perfectly with the sweet frosting.
Secondly, the edible handyman tools are a fantastic conversation starter and a personalized touch that speaks volumes. They transform a simple cupcake into a miniature work of art, tailored specifically for a dad who loves to fix things, build, or simply appreciates a clever, themed treat. They’re a testament to thoughtful effort, showcasing your creativity without requiring advanced decorating skills, thanks to the candy mold technique. Plus, they’re surprisingly simple to make, adding a fun craft element to your baking adventure that can even involve the kids in a safe way (decorating, not baking or using sharp knives!).
Step-by-Step: How to Make Easy Father’s Day Cupcakes from Scratch
Crafting these special Father’s Day treats is a straightforward process when you follow these simple steps. Each stage is designed to be enjoyable, from baking the perfectly moist cupcakes to decorating them with their edible tools.
- Bake Your Cupcakes: Our top recommendation for this theme is the rich and robust Guinness beer chocolate flavor. The malty notes of Guinness perfectly complement the dark chocolate, creating a deeply satisfying cupcake base. You can use our linked recipe for Guinness Beer Cake and adapt it for cupcakes, or use your favorite chocolate cupcake recipe if you prefer. Aim for uniform cupcakes to ensure even baking and a consistent presentation, typically filling liners about two-thirds full.
- Cool Completely: This step is absolutely crucial! Once your cupcakes are baked, carefully remove them from the muffin tin and transfer them to a wire rack. Allow them to cool completely to room temperature. This can take anywhere from 30 minutes to an hour. Attempting to frost or decorate warm cupcakes will inevitably lead to melted frosting and distorted gum paste tools, resulting in a sticky, unappealing mess. Patience here will be greatly rewarded.
- Prepare Your Chocolate Icing: While your cupcakes are cooling, prepare a batch of decadent chocolate icing. We suggest a rich Chocolate Ganache Frosting for its smooth texture, intense flavor, and glossy finish. For an extra layer of flavor complexity that ties into the cupcake base, feel free to add a splash of Guinness beer to your frosting as well. This will amplify the deep, malty notes and enhance the overall taste experience, creating a harmonious flavor profile.
- Create Edible Gum Paste Tools: This is where the magic happens and the fun really begins! Using a candy mold specifically designed for handyman tools, you’ll craft your adorable edible decorations. Gum paste is the ideal medium for this as it dries firm, holds intricate shapes beautifully, and provides a perfect canvas for edible paints and markers. We’ll dive into the detailed process for making these tools just below, providing all the tips you need for success.
- Add Fine Details to Your Tools: Once the gum paste tools are formed and carefully removed from their molds, it’s time to bring them to life with realistic touches. Use edible markers and food-safe paints to add intricate details like black grips, silver metallic finishes for metal parts, and distinct markings or rust effects if you’re feeling extra creative. This step truly elevates the tools from simple shapes to miniature, recognizable implements that will impress everyone.
- Allow Tools to Dry Thoroughly: After detailing, it’s absolutely essential to let your gum paste tools dry completely until they are hard and rigid. This isn’t a step to rush! Proper drying prevents them from bending, breaking, or losing their shape when handled or placed on the cupcakes. Depending on your environment’s humidity, this could take anywhere from 12 to 24 hours, or even longer. A well-dried tool ensures a perfect presentation.
- Assemble Your Masterpieces: Once everything is perfectly ready – cooled cupcakes, rich and ready-to-pipe frosting, and hard, beautifully decorated gum paste tools – it’s time for the final assembly. Pipe a beautiful swirl of your chocolate frosting onto the top of each cupcake. A piping bag fitted with a 1M star tip creates a classic, appealing, and professional-looking swirl. Finally, carefully place one edible handyman tool on top of each frosted cupcake. Arrange them artistically for the best presentation, creating a delightful “toolbox” of treats.
Crafting Edible Handyman Tools from Gum Paste: A Detailed Guide
The edible tools are undeniably the star of these Father’s Day cupcakes, and creating them is a rewarding and surprisingly accessible process. Gum paste is the preferred medium for these decorations because of its unique properties: it’s pliable enough to take on intricate details from a mold but dries hard and firm, ensuring your tools maintain their shape and integrity.
To begin, select a good quality silicone candy mold featuring a variety of handyman tools. Look for molds that include popular items like pliers, screwdrivers, wrenches, and hammers to give your collection variety. Before you even touch the gum paste, prepare your mold. This is a crucial step to ensure a clean release. Lightly grease the cavities of your mold with a solid shortening (like Crisco, not liquid oil), or dust them with a thin, even layer of powdered sugar. Either method acts as a non-stick agent. Remember, avoid using liquid oil, as it can make the gum paste greasy, sticky, and difficult to work with, potentially affecting its drying time and ability to hold shape.
Next, take a small piece of colored gum paste. For a realistic look, use yellow for tool handles, black for grips, or even silver directly for metallic parts if you have pre-colored gum paste. Press the gum paste firmly into a mold cavity, ensuring it fills all the details and corners without any gaps or air bubbles. Use your fingers to really push the paste in, meticulously working it into every crevice. Once satisfied, gently flip the mold over and press down on your work surface until the mold lies flat. This helps to create a smooth, even back for your tool and ensures a flat surface when placed on the cupcake. Carefully peel the gum paste piece out of the cavity. You might need to gently flex the silicone mold to release the delicate piece without distorting its shape. Place the newly formed tool onto a sheet of wax paper or parchment paper to prevent it from sticking to your work surface while it rests.
Once removed, use a small, sharp knife or an X-Acto blade to meticulously trim away any excess gum paste from around the edges. This creates clean, defined lines for each tool, making them look more professional and realistic. Then, with soft fingertips, gently smooth out any rough sides or corners. This step refines the appearance and gives them a polished finish. Repeat this process for all the tools you wish to create, aiming for a variety to make your cupcake set truly impressive.
To add the intricate and realistic touches, grab your edible markers and food-safe paints. For black details like grips on a hammer or screwdriver, fine-tipped black edible markers are perfect for precision. For metallic finishes, especially silver, you’ll need to create your own edible paint. Mix CK Nu-Silver luster dust (a common edible pigment) with a clear extract, such as clear vanilla extract, lemon extract, or even pure grain alcohol (like vodka). It’s vital to use a *clear* extract; regular vanilla extract with its inherent brown tinge will inevitably tint your silver paint, resulting in a dull, muddy metallic finish that lacks shine. Paint the silver details carefully using a fine brush, allowing each layer to dry slightly if you’re building up the color for more opacity.
Finally, and perhaps most importantly, allow your gum paste tools to dry completely. This is not a step to be rushed! Depending on the moisture and humidity levels in your area, this can take anywhere from 12 to 24 hours, or even longer. They must be rock hard before you attempt to handle them excessively or place them on the cupcakes; otherwise, they will bend, warp, or even break under their own weight or the slightest pressure. To speed up the drying process, you can point a small table fan at the pieces, which increases air circulation and helps evaporate moisture more quickly. Once fully dry, store them in an airtight container in a cool, dry place until you are ready to use them, protecting them from dust and humidity.
Creative Variations for Dad Cupcakes: Customize Your Treat
While our signature Guinness chocolate cupcakes with classic handyman tools are a surefire hit, there are plenty of ways to customize these treats to perfectly match your dad’s personality, favorite flavors, and unique preferences. Get creative and make them truly one-of-a-kind!
- Explore Different Color Combinations: We’ve opted for classic tool colors like yellow, black, and silver for a traditional and recognizable look. However, don’t feel limited! Consider other color palettes that your dad might love. Does he have a favorite sports team? Use their team colors for the tools! Is he a fan of a particular hobby, like fishing or golfing? You could adapt the tool colors or even find molds related to those interests. Bright blues, vibrant reds, metallic golds, or even subtle pastels can add a unique flair to your edible tools, making them even more personalized.
- Experiment with Other Cupcake Flavors: If Guinness isn’t his preferred brew, or if you simply want to try something different, these charming tools will look great on almost any cupcake base.
- Yellow Cupcakes: A classic, light, and airy option that provides a cheerful contrast to the dark or metallic tools. Their mild flavor makes them universally appealing.
- Mocha Cupcakes (Coffee Cupcakes): For the coffee-loving dad, a rich mocha base offers a sophisticated twist and complements chocolate flavors beautifully. The subtle bitterness of coffee enhances the sweetness.
- Classic Vanilla Bean Cupcakes: A simple yet elegant choice, allowing the intricate tool decorations and the frosting’s flavor to truly shine and take center stage.
- Rich Red Velvet Cupcakes: A vibrant and slightly tangy option that’s always a crowd-pleaser, providing a striking color contrast and a delicious cocoa-vanilla flavor.
- Spiced Carrot Cake Cupcakes: For a dad who prefers warm spices and a hearty cake, carrot cake cupcakes with cream cheese frosting would be a delicious canvas for your tools.
- Switch Up Your Frosting Flavors: The chocolate ganache frosting is undeniably divine, but feel free to explore other delicious options to top your cupcakes, especially if you changed the cupcake base.
- Caramel Frosting: A sweet and buttery choice that pairs wonderfully with chocolate, vanilla, or even apple-flavored cupcakes, adding a layer of luxurious sweetness.
- Peanut Butter Frosting: A creamy, savory-sweet frosting that’s a perfect match for chocolate cupcakes, creating a flavor combination many dads adore (think peanut butter cups!).
- Tangy Cream Cheese Frosting: A rich and slightly tart option, especially good with red velvet, carrot cake, or pumpkin spice cupcakes, balancing the sweetness.
- Fluffy Swiss Meringue Buttercream: For a light, less sweet, and incredibly smooth finish, this buttercream is always a winner and can be flavored with various extracts like mint, almond, or even a hint of bourbon.
- Lemon Buttercream: A bright and zesty frosting that would be a refreshing contrast to chocolate or a lovely pairing with vanilla or yellow cupcakes.
- Add a Surprise Filling to Your Cupcakes: Elevate your cupcakes by adding a delicious, hidden center! Once baked and cooled, use a cupcake corer or a small knife to carefully remove a bit of cake from the center, then fill it with one of these tempting options for an extra burst of flavor and texture:
- Fruity Jams and Preserves: Raspberry, strawberry, cherry, or apricot jams add a delightful fruity burst that complements many cake flavors.
- Homemade Dulce De Leche: A rich, thick, caramel-like milk confection that’s utterly decadent and adds a luxurious chewiness.
- Creamy Nut Butters: Peanut butter, almond butter, hazelnut spreads like Nutella, or Biscoff spread provide a creamy, nutty, and highly addictive surprise.
- Mini Candies and Sprinkles: For a fun and colorful surprise for the young at heart, or to match a playful theme.
- Homemade Caramel Sauce: A warm, gooey center that’s pure indulgence and perfect for adding a touch of sophisticated sweetness.
- Extra Chocolate Ganache: For an additional dose of intense chocolatey goodness, creating a molten center experience.
- Whipped Cream or Mousse: A light and airy filling for a refreshing contrast, though these would require refrigeration.

Essential Tips and Techniques for Perfect Dad Birthday Cupcakes
Achieving bakery-quality results with your Father’s Day cupcakes, especially when working with delicate edible decorations like gum paste tools, comes down to understanding and implementing a few key techniques and considerations. Heed these expert tips to ensure your cupcakes are a triumph, both in taste and presentation!
- Never Frost or Decorate Warm Cupcakes: This is perhaps the most critical rule in all of cupcake decorating, and it cannot be overstated. The residual warmth from the cupcake will inevitably melt your delicate icing, causing it to slide off, lose its piped shape, and create a sticky, unappealing mess. More importantly, warm cupcakes will also soften and potentially ruin your gum paste tools, making them lose their crisp shape, bend, or even dissolve if exposed to enough heat. Always, always allow your cupcakes to cool completely to room temperature before beginning any frosting or decorating. Plan this cooling time into your baking schedule.
- Melted Chocolate vs. Gum Paste for Molds: Understanding the Differences: You have a choice between using melted chocolate or gum paste for creating your molded tools, and each has distinct advantages and disadvantages.
- Melted Chocolate: Chocolate, especially candy melts or tempered chocolate, will set and harden much quicker than gum paste. This can be a significant advantage if you’re short on time and need to produce decorations rapidly. However, painting fine details onto chocolate can be more challenging. Edible paints and markers don’t always adhere or show up as vibrantly and smoothly on chocolate surfaces as they do on gum paste, and chocolate’s surface can be somewhat waxy.
- Gum Paste: Gum paste takes longer to dry and set, but it offers a superior, matte surface for detailed painting, coloring, and adding intricate details with edible markers. This allows for more precise, vibrant, and realistic designs. Once dry, gum paste creates a firmer, more durable decoration that holds up well. For these intricate handyman tools, where details are key, gum paste is generally the recommended and superior choice.
- Avoid Using Fondant in the Molds for Best Results: While fondant might seem similar to gum paste and is a popular choice for cake covering, it’s generally not recommended for use in candy molds, especially for intricate designs like these tools. Fondant is softer and more pliable than gum paste, which makes it much harder to remove from molds without distorting the shape, tearing, or losing fine details. Furthermore, fondant takes an exceptionally long time to dry and harden sufficiently to hold a rigid shape, which can significantly delay your decorating process and result in flimsy, easily damaged decorations. Stick to gum paste for molded items.
- Prepare Your Molds Properly: Grease or Dust with Powdered Sugar: To ensure your molded gum paste pieces pop out effortlessly and retain their perfect, intricate shape, always prepare your candy molds. Lightly grease the cavities with a solid, flavorless shortening (Crisco is a common and effective brand). Alternatively, you can dust them thoroughly with a thin layer of powdered sugar. Both methods create a non-stick barrier. An important distinction: remember to use shortening, not liquid cooking oil. Liquid oil can make gum paste greasy, affect its texture, and impair its drying process, leading to a less ideal final product.
- Allow Gum Paste Tool Pieces to Completely Dry: This cannot be overstressed and is a critical step for success. For durable, long-lasting edible tools that won’t bend, warp, or break when handled or placed on cupcakes, they must be allowed ample time to dry until they are completely hard and rigid. If they are even slightly soft or flexible, they will be prone to damage, especially when handled. Rushing this step will lead to disappointment.
- Gum Paste Drying Time Varies Greatly: Factors to Consider: The amount of time required for your gum paste pieces to dry fully will depend heavily on the environmental conditions, specifically the moisture and humidity levels in your area. Areas with higher humidity will naturally experience a slower drying time, potentially extending it significantly. To significantly speed up the drying process and ensure your tools are ready when you need them, consider pointing a small table fan at your edible pieces. This increases air circulation around the decorations and helps evaporate moisture more quickly, potentially cutting drying time in half or more. Ensure they are in a well-ventilated area.
- Use Clear Extract for Making Silver Edible Paint: When mixing luster dusts (like the silver used for tool details) to create edible paint, always, always use a clear extract as your liquid medium. Clear vanilla extract, clear lemon extract, or even pure grain alcohol (such as vodka) works perfectly for this purpose. If you use a regular vanilla extract, which has an inherent brown tinge, it will inevitably tint your silver paint. This will result in an “awful” (as the original stated) or dull, muddy, and unattractive metallic finish that completely lacks the desired shine and realism.
- Use Gel Colors to Tint Gum Paste: For coloring your gum paste itself, always opt for high-quality gel food coloring over regular liquid food coloring. Liquid food coloring contains a significant amount of water, which will introduce too much moisture into the gum paste, making it sticky, tacky, difficult to knead, and nearly impossible to mold and shape effectively. Gel colors, on the other hand, are highly concentrated and add minimal moisture, thus maintaining the optimal consistency of your gum paste for easy molding, shaping, and precise detailing.
Storage and Make-Ahead Instructions for Your Father’s Day Cupcakes
Proper storage is key to keeping your decorated Father’s Day cupcakes fresh, delicious, and beautiful. Here’s how to ensure they taste great and look perfect for your celebration, whether you’re serving them immediately or preparing them in advance.
- Room Temperature Storage for Short Term: Decorated cupcakes, especially those with gum paste tools and stable frostings like buttercream or chocolate ganache, can typically be left at cool room temperature for up to 24 hours. This is ideal if your home environment is cool and dry and if the cupcakes do not contain any highly perishable fruit fillings, fresh cream, or dairy-based components that inherently require refrigeration. Always store them in an airtight container to prevent them from drying out and to protect the decorations from dust.
- Refrigeration for Leftovers: If by some miracle you have any delicious leftovers (which is often a rare occurrence with these!), they can be stored in a sealed, airtight container in the refrigerator for up to 3 days. However, it’s important to be aware of the impact on gum paste decorations. The inherent moisture and humidity within a refrigerator can cause fondant and gum paste decorations to become slightly sticky, tacky, or even soft to the touch. While this won’t typically affect the taste of the cupcake, the texture and appearance of the edible tools might change slightly. To minimize this, you can choose to remove the gum paste tools before refrigerating the cupcakes separately, then re-add them just before serving.
- Freezing for Extended Storage: For extended storage, or if you want to get a significant head start on your baking, unfrosted cupcakes and frostings can be frozen separately. Once your cupcakes are completely cooled, place them in a single layer in an airtight container or a heavy-duty freezer bag. They can be frozen for up to 1 month. Similarly, most frostings (like buttercream or ganache) can also be stored in an airtight container in the freezer for the same duration. When you’re ready to enjoy these delightful treats, simply let the frozen cupcakes thaw overnight in the refrigerator. Allow the frosting to come to room temperature and re-whip it if necessary to restore its smooth consistency, then decorate as per the instructions above. This method is excellent for preparing components well in advance, saving you time on the big day.
- Make-Ahead Instructions: These Father’s Day cupcakes are fantastic candidates for making ahead, which can significantly reduce stress on the day of your celebration. You can bake and completely decorate them up to 1 day in advance of your event. Once fully decorated, store them in an airtight container at cool room temperature. This allows the gum paste tools to remain firm and prevents the frosting from becoming too chilled and hard. This preparation method means you can focus on other Father’s Day festivities, knowing your dessert is already perfectly prepared and ready to impress!
More Creative Father’s Day Ideas from Our Kitchen
Looking for even more delightful ways to celebrate Dad with delicious, themed treats? Explore these other fantastic Father’s Day ideas from our collection that are sure to impress and delight the special men in your life!
- Sports Cookies (Basketball, Baseball, Soccer, Tennis, Volleyball)
- Tie Dye Shirt Cake
- Shirt Cupcakes
- Spicy Chocolate Fudge Footballs
- Pull Apart Football Cupcake Cake
- Shirt Cake
Discover More Decorated Cupcake Inspirations
If you’ve enjoyed the creative process of decorating these Father’s Day cupcakes, you’ll love exploring our other decorated cupcake recipes. We have a wide array of ideas to spark your imagination and help you create edible works of art for any occasion. There’s a whole world of delicious and visually stunning treats waiting for you!
- Watermelon Cupcakes (Pull Apart Cupcakes)
- Easy Flower Cupcakes (Fondant Pansy)
- Ladybug Cupcakes
These Father’s Day cupcakes are more than just a dessert; they’re a labor of love, a delicious tribute to the incredible dads who build, fix, and support us every day. With their rich Guinness chocolate flavor and charming edible handyman tools, they are guaranteed to be the sweetest surprise. Happy baking, and happy Father’s Day to all the wonderful fathers out there!
Recipe
Easy Father’s Day Cupcakes
Abeer Rizvi
Pin Recipe
Want to Save This Recipe?
Enter your email & I’ll send it to your inbox. Plus, get great new recipes from me every week!
By submitting this form, you consent to receive emails from CakeWhiz
Ingredients
- 24 Guinness beer cupcakes Use this cake recipe to make cupcakes.
- 4 cups Chocolate ganache frosting
- 2 cups Gum paste
Instructions
-
Bake cupcakes and allow them to cool completely.
-
Make chocolate ganache frosting while the cupcakes and baking and cooling.
-
To make edible tools, rub shortening or sprinkle powdered sugar in the cavities of a candy mold. Place some yellow gum paste into the cavity and start pressing with your fingers.Flip the mold and press down until the mold is lying flat on your table. Flip your mold back again.Gently, peel your gum paste out of the cavity and place it on a sheet of wax paper or parchment paper. Use a sharp knife to cut out all the excess and smooth out all the sides and corners with your fingers.
-
Use a fine tip black edible marker to draw out all the black details. To add silver details, mix clear vanilla extract and CK Nu-Silver luster dust and paint silver where needed. Make as many tools as you need.
-
Allow them to dry for 24 hours.
-
Pipe a swirl of frosting on top of cupcakes using TIP 1M and place one edible tool on top of each one. Enjoy!
Notes
- Read all my tips above.
- Leftovers can be stored in a sealed container in the fridge for up to 3 days.
Nutrition
An automated tool is used to calculate the nutritional information. As such, I cannot guarantee the accuracy of the nutritional information provided for any recipe on this site.
