Easy Buttercream Penguin Cake: Your Ultimate Guide to a Fun & Festive Winter Dessert
Dive into the delightful world of cake decorating with this comprehensive tutorial, guiding you through the creation of an adorable and remarkably easy penguin cake using smooth, luscious buttercream icing. Whether you’re planning a cozy winter gathering, a cheerful Christmas party, or a memorable birthday celebration, this charming penguin cake is guaranteed to be the star of your dessert table and bring smiles to everyone’s faces.
Penguins, with their distinctive waddle and endearing charm, are already incredibly cute in real life. This cake takes that cuteness to an entirely new, edible level! What makes this project even more appealing is its surprising simplicity. You don’t need an arsenal of complex tools or years of decorating experience. All you truly require are a couple of standard round cake layers, two common Wilton piping tips, and a few simple decorative accents. It’s an absolutely fantastic starting point for anyone new to the art of cake decorating, offering a high-impact result with minimal fuss. To amplify your penguin-themed festivities, consider adding these delightful Nutter Butter Penguin Cookies to your spread, creating a cohesive and utterly charming dessert experience for any winter or birthday celebration.
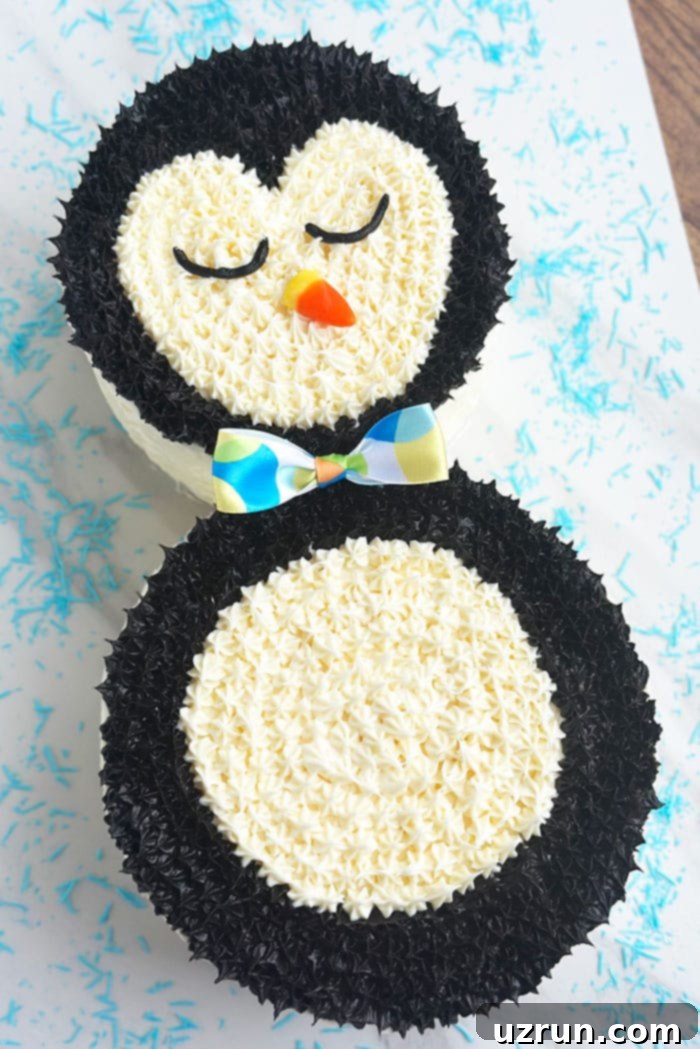
Table of Contents
- How to Make an Easy Penguin Cake with Buttercream Icing
- Creative Variations for Your Penguin Birthday Cake
- Expert Tips and Techniques for a Perfect Winter Cake
- Another Idea: Crafting a Fondant Penguin Topper
- Optimal Storage for Your Homemade Decorated Cake
- More Delicious Winter Desserts to Explore
How to Make an Easy Penguin Cake with Buttercream Icing
Creating this whimsical penguin cake is a straightforward and enjoyable process. Follow these detailed steps to bring your adorable winter friend to life:
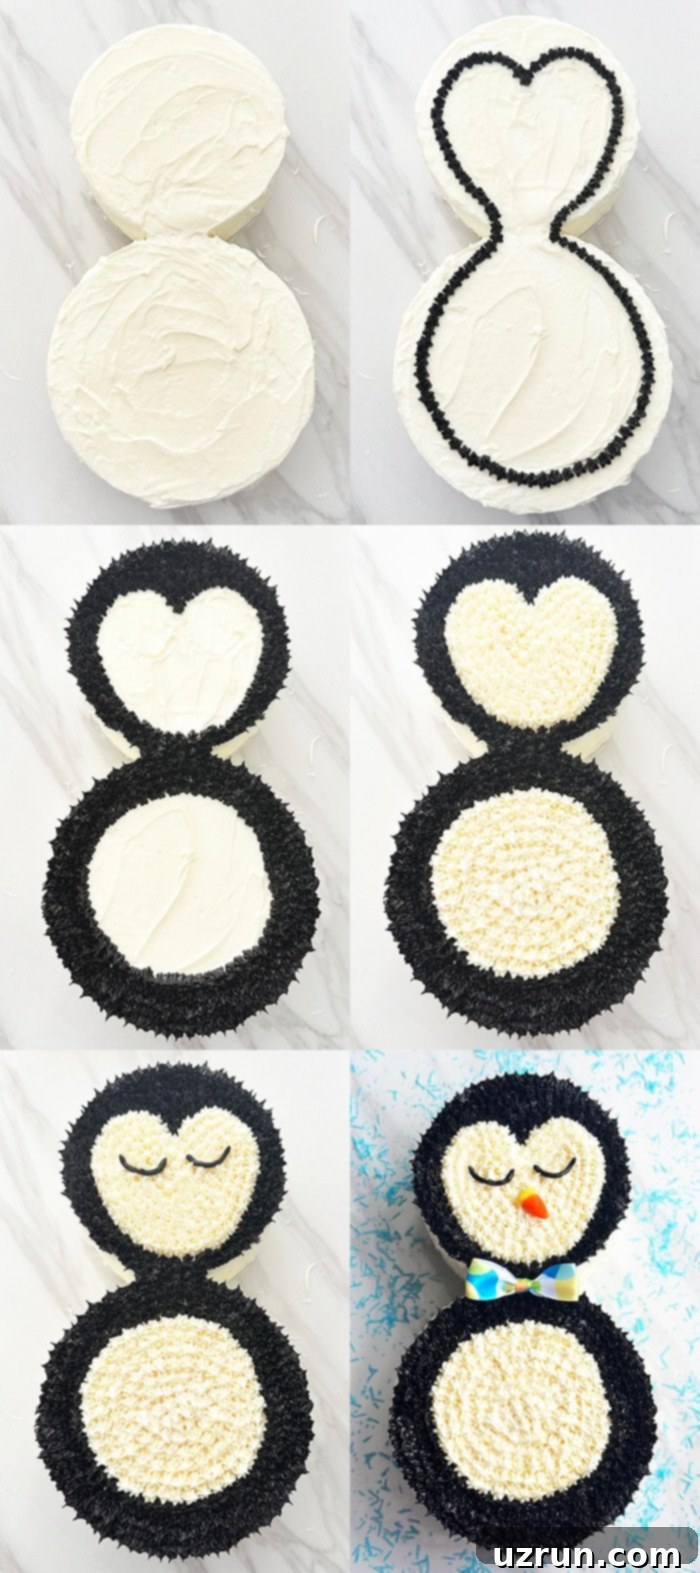
- Bake and Cool Your Cakes: Begin by baking two round cakes of different sizes (e.g., a 6-inch for the head and an 8-inch for the body, as suggested below). Allow them to cool completely on a wire rack. This is a critical step; warm cakes will melt your frosting, leading to a messy outcome. While the cakes are cooling, prepare your buttercream frosting, ensuring it’s the right consistency for piping.
- Cut, Frost, and Stack Cakes: Once thoroughly cooled, carefully level your cake layers if needed. Slice each round cake horizontally into two layers. Apply a thin, even layer of your chosen buttercream icing between the layers of each cake. This creates a delicious filling and helps keep the cake moist. Stack the layers back together, ensuring they are even.
- Secure on a Large Cakeboard: Select a sturdy cakeboard significantly larger than your combined cake shape. Position the larger cake (the body) at the bottom, and the smaller cake (the head) on top, slightly overlapping to create a classic penguin silhouette. Use a dab of frosting or double-sided tape underneath each cakeboard to secure them firmly to the large baseboard. This prevents any accidental sliding during decoration or transport.
- Map Out Face and Body Shape: With a clean toothpick, gently sketch the outline of the penguin’s white belly and face area onto the frosted cakes. This light indentation acts as a guide for your piping, ensuring symmetry and accuracy without committing to a permanent frosting line. You can easily erase and redraw a toothpick line if needed.
- Pipe Outer Portion with Black Buttercream: Prepare a piping bag filled with black buttercream and fitted with a Wilton Tip #18 (a small star tip). Carefully pipe small black stars along the toothpick outline you created, forming the outer “feather” layer of the penguin’s body and head. Once the outline is complete, fill in the entire area outside this outline with more black buttercream stars, creating a textured, feathered effect.
- Add White Stars for the Belly and Face: Switch to a piping bag filled with white buttercream, also fitted with a Wilton Tip #18. Now, fill in the area *inside* the toothpick outline with white buttercream stars. This will form the penguin’s characteristic white belly and face area, contrasting beautifully with the black “feathers.”
- Pipe Eyes with Black Icing: Using a piping bag with black icing and a very small round tip (Wilton’s Tip #3 is ideal), pipe two small, perfectly round dots for the penguin’s eyes on the white face area. A steady hand is key here for neat, expressive eyes.
- Add a Beak/Mouth: For the finishing touch, carefully place a large orange candy corn or a pre-cut orange fondant triangle to form the penguin’s beak, positioning it just below the eyes. Press gently to secure it to the buttercream. And just like that, your adorable buttercream penguin cake is ready to be admired and enjoyed!
Creative Variations for Your Penguin Birthday Cake
While the classic black and white penguin is charming, there are many ways to customize your cake to suit the specific occasion or personal preference. Get creative with these ideas:
Use Candy Eyeballs: For a quick and easy alternative to piping the eyes, simply adhere pre-made candy eyeballs. They come in various sizes and instantly add a playful, cartoonish touch to your penguin, saving you time and ensuring perfectly uniform eyes.
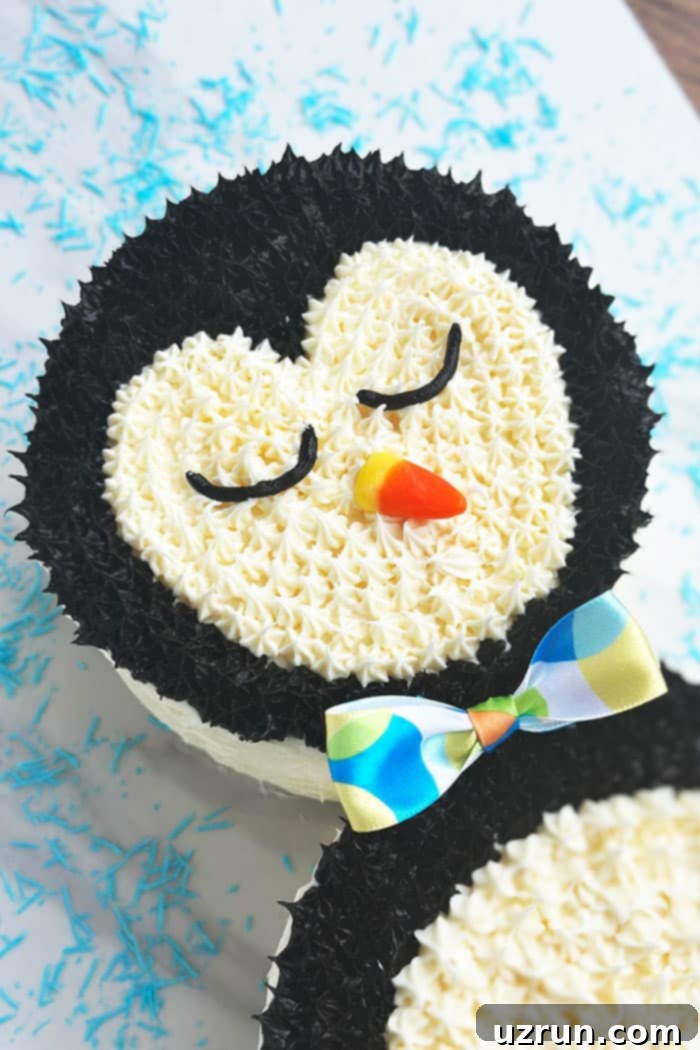
Add a Bow or Accessories: To personalize your penguin, especially for a birthday, consider adding a bow. For a girl’s birthday cake, a dainty bow placed on the penguin’s head or as a bowtie beneath its chin adds an endearing touch. You can follow this How To Make Easy Fondant Bows guide to craft edible fondant bows, or simply use a small, food-safe ribbon bow for a charming effect. For a winter theme, a tiny knitted scarf or hat can add warmth and character.
Experiment with Another Cake Flavor: The base cake flavor can significantly impact the overall experience. Instead of a standard vanilla or rainbow cake, try rich Moist Triple Chocolate Cake {From Scratch} for a decadent treat, a classic and comforting Best Vanilla Cake Recipe {From Scratch}, or a vibrant and celebratory Funfetti Cake / Confetti Cake {From Scratch}. Other delightful winter options include spiced gingerbread or festive red velvet.
Try a Different Frosting: While American buttercream is fantastic, other frostings can offer unique textures and flavors. Explore the silky smoothness of White Chocolate Buttercream Frosting, the tangy richness of Best Cream Cheese Frosting, or the light and airy texture of How to Make Homemade Stabilized Whipped Cream. Each will give your penguin a slightly different character and taste profile.
Enhance with a Delicious Filling: A well-chosen cake filling can elevate your dessert from good to extraordinary. Consider a fruity burst with How to Make Strawberry Pie Filling, a rich and smooth Chocolate Ganache Frosting {2 Ingredients}, or a creamy, homemade Homemade Vanilla Custard {Easy}. Other popular choices include lemon curd, raspberry jam, or even a crushed cookie cream filling for an extra textural dimension.
Opt for Fondant for the Beak/Mouth: If you prefer a more sculpted or defined look, use orange fondant instead of candy corn for the beak. Fondant allows for precise shaping and can be made slightly in advance to harden, giving it a neat, polished appearance.
Embrace Different Frosting Colors: Don’t feel limited to traditional black and white! For a truly whimsical penguin, consider using an icy blue frosting for its body, or even a soft pink. This playful approach is perfect for unique winter baby showers, gender reveal parties, or simply for creating a vibrant, memorable boy or girl birthday cake that stands out.
Expert Tips and Techniques for a Perfect Winter Cake
Achieving a professional-looking and delicious penguin cake is easier with a few key tips and techniques in mind:
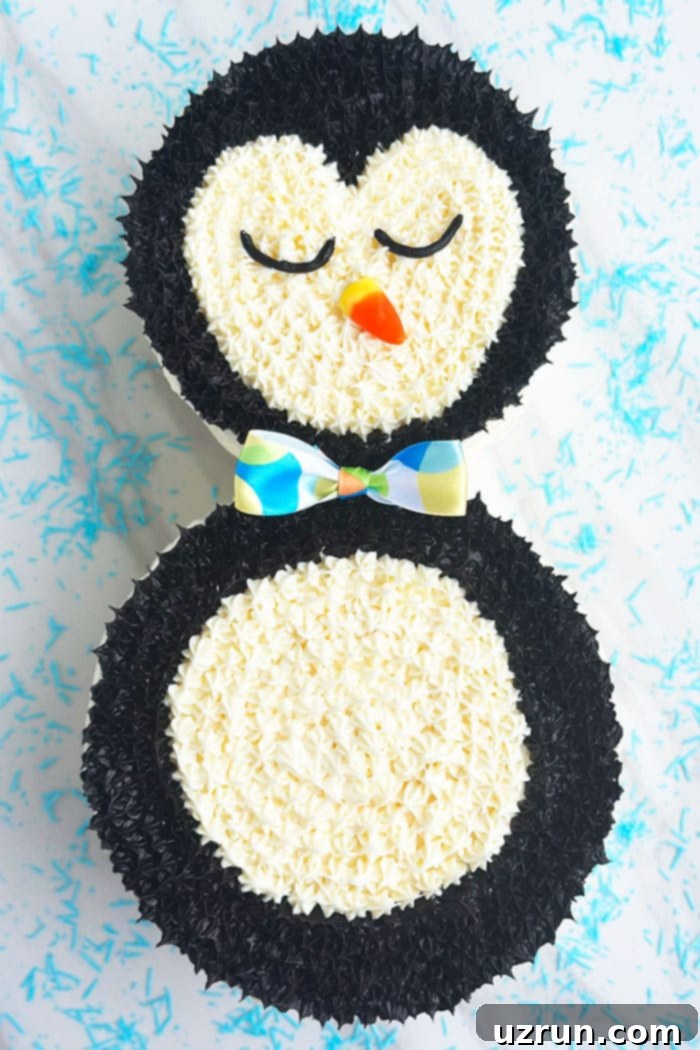
How Many Does This Cake Feed? This two-tier penguin cake, utilizing 6×3 and 8×3-inch round pans, typically yields approximately 20 servings. This makes it ideal for medium-sized gatherings and parties.
Cool Cakes Completely Before Slicing and Icing: This cannot be stressed enough! Attempting to slice or frost cakes that are still warm will inevitably lead to crumbling, torn edges, and a melted, sliding mess of frosting. Always allow your cakes to cool completely to room temperature, and for best results, chill them in the refrigerator for 20-30 minutes before handling and decorating. This firms up the cake and makes it much easier to work with.
Secure Cakes onto the Cakeboard: To prevent your beautifully decorated creation from shifting or sliding off its base, always secure the individual cakeboards to the larger display board. A simple dab of buttercream or a few pieces of strong double-sided tape applied to the underside of the smaller cakeboards will keep everything firmly in place. This is crucial for stability, especially if you plan to transport the cake.
What Piping Tips Will I Need for This Cake? For this particular design, I primarily used two Wilton piping tips: the small star Wilton Tip #18 for creating the textured black and white “feathers” of the penguin, and the small round Wilton Tip #3 for piping the precise black dots for the eyes. These are versatile tips that are great additions to any beginner’s decorating kit.
Use a Toothpick to Map Out the Penguin Face and Body: Before you commit to piping, lightly sketch the outline of the penguin’s white belly and face area directly onto the frosted cake with a toothpick. This allows you to adjust the shape and ensure symmetry without damaging the cake. A toothpick line is easily erased or adjusted, whereas correcting a piped frosting line is much more challenging and can mess up your smooth base layer.
What Size Cake Pans to Use? For the ideal penguin shape, I recommend using a 6×3 inch round cake pan for the head and an 8×3 inch round cake pan for the body. These dimensions create a pleasing proportion that clearly defines the penguin’s features.
What Size Cakeboards to Use? You will need three cakeboards for this project: one that matches the 6×3 inch cake (for the head), one that matches the 8×3 inch cake (for the body), and then a much larger, sturdy baseboard (e.g., 10 or 12 inches) to serve as the foundation for both stacked cakes. The larger board provides stability and makes it easier to handle and transport the finished cake.
Achieve True Black Buttercream: Getting a deep, true black buttercream can be tricky. Start with chocolate buttercream, which is already dark, then add black gel food coloring. Gel colors are highly concentrated and won’t thin your frosting. Let the black buttercream sit for an hour or two; the color will deepen over time. Avoid using liquid food coloring as it will water down your frosting.
Practice Your Piping: If you’re new to piping, take a few minutes to practice on a piece of parchment paper before applying frosting to the actual cake. This allows you to get a feel for the pressure needed and the movement required to create consistent stars or dots, building your confidence.
Room Temperature Buttercream: Ensure your buttercream is at a good working consistency – not too stiff, not too runny. If it’s too cold, it will be hard to pipe. If it’s too warm, it will be too soft and won’t hold its shape. A quick stir can often bring it to the perfect consistency.
Another Idea: Crafting a Fondant Penguin Topper
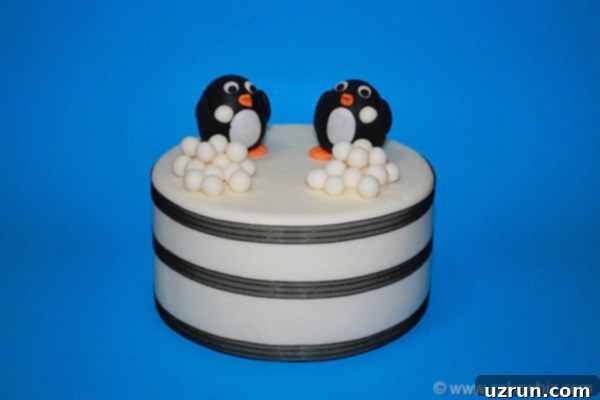
If you prefer a smooth, elegant cake with a detailed focal point, or if you’re looking for a project that can be prepared in advance, a fondant penguin topper is an excellent alternative. You can bake a simple round cake, frost it smoothly in a complementary color (like icy blue or white to simulate snow), and then add one or more of these adorable fondant figures to finish it off. Imagine creating a whimsical scene with several penguins, perhaps even having a playful snowball fight! Fondant figures are fantastic because they can be made weeks in advance. Once they’ve dried and become firm, you can safely store them in a cardboard box, away from direct heat and moisture, until you’re ready to decorate your cake. Beyond fondant, you can also use gum paste for more delicate and durable figures, or modeling chocolate, which offers a smoother finish and a delicious taste. The choice of medium is entirely up to you and what you feel most comfortable working with.
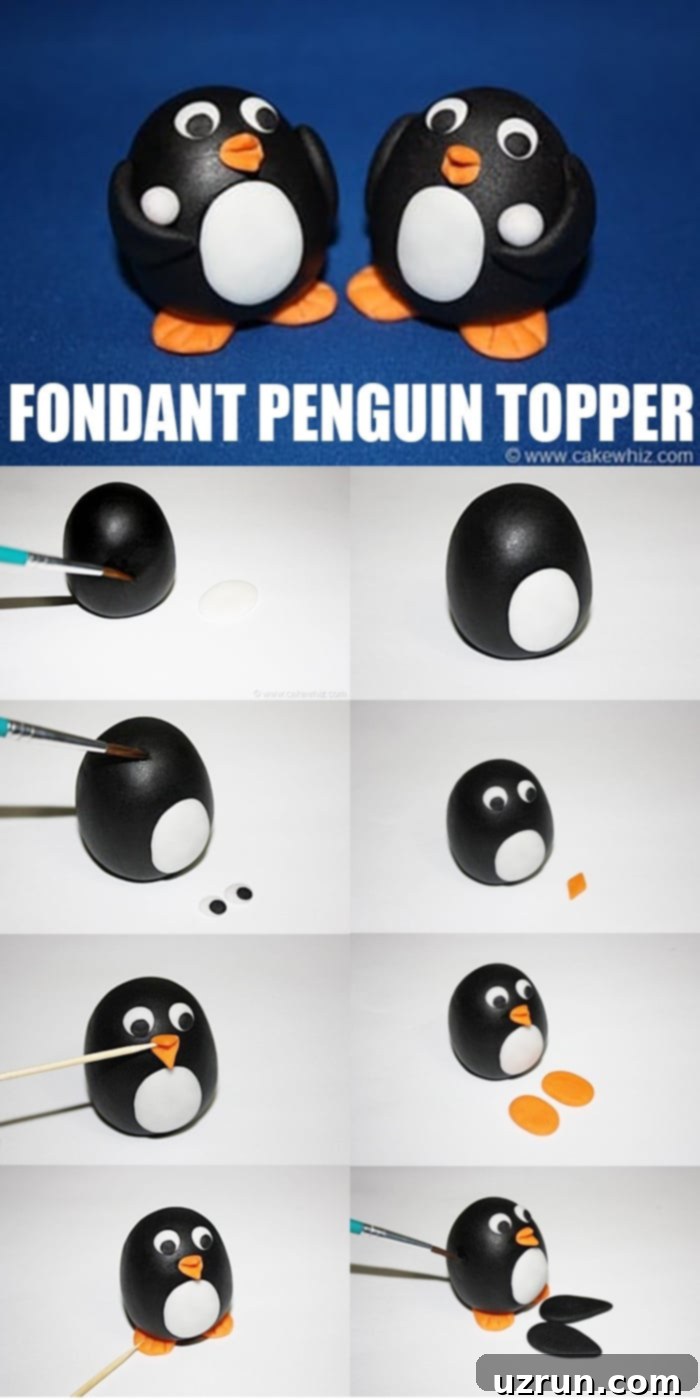
Step 1: Forming the Body and Head
Begin by rolling out a generous piece of black fondant on a lightly cornstarch-dusted surface, aiming for a smooth, uniform egg shape. This elongated oval will cleverly form both your penguin’s body and head in one piece, saving time and creating a seamless look. Next, take a smaller ball of white fondant and flatten it into a neat oval shape, which will become the penguin’s belly. Lightly brush a small amount of water onto the center of your black penguin body – this will act as a gentle edible adhesive.
Step 2: Attaching the White Belly
Carefully position the white oval-shaped fondant onto the moist spot on the black body. Gently press it into place, ensuring it adheres smoothly and securely without distorting the shapes. This creates the classic black and white contrast that defines a penguin.
Step 3: Crafting the Eyes
For the eyes, roll out two small, equal-sized balls of white fondant and flatten them into perfect circles. These will form the whites of the eyes. To complete them, roll two even smaller balls of black fondant for the pupils. Place the black pupils on top of the white circles and gently press them together. Lightly brush a tiny amount of water onto the upper portion of the black penguin body where the eyes should be. Carefully place both eyes onto these water marks, pressing gently to secure them in position and bring your penguin to life.
Step 4: Shaping the Beak
To create the beak, roll out a small ball of orange fondant. Flatten it into a circle, then, using your fingers, delicately shape this circle into a distinct diamond or triangular form. This shape will give your penguin a friendly, expressive face.
Step 5: Positioning the Beak
Gently press the center of the orange diamond beak with a toothpick. This creates a small indentation and helps you handle the delicate piece without leaving fingerprints. Brush a small amount of water on the penguin’s face where you want the beak to be. Carefully use the toothpick to guide and press the beak onto the water mark, securing it firmly in place on the face.
Step 6: Preparing the Feet
For the feet, roll out two small balls of orange fondant. Flatten each ball into an oval shape. These ovals should be proportionate to your penguin’s body, providing a stable and cute base.
Step 7: Attaching and Texturing the Feet
Brush the very bottom of the black penguin body with a little water. Carefully stick the orange feet into place, ensuring they are evenly spaced and secure. To add realistic detail and character, use a toothpick to gently press three small indentations on each foot, creating the appearance of toes.
Step 8: Adding the Wings and Final Touches
Finally, for the wings, roll out two balls of black fondant and flatten them into circles. Using your fingers, carefully mold these circles into elongated petal shapes. If you have a petal cutter, it can be used for perfect uniformity. Brush the sides of the penguin’s body with a small amount of water and attach the petal-shaped wings securely. As a charming final touch, give your penguins little white fondant “snowballs” to hold, or place them around your cake for an enchanting winter scene. Your detailed fondant penguin topper is now complete!
Optimal Storage for Your Homemade Decorated Cake
Proper storage is key to keeping your beautiful penguin cake fresh and delicious for as long as possible. Follow these guidelines:
Refrigerate: For immediate enjoyment, store your decorated buttercream cake in an airtight container in the refrigerator. This will keep it fresh for up to 3 days. Make sure the container is sealed well to prevent the cake from absorbing odors from other foods or drying out. For best flavor and texture, allow the cake to come to room temperature for about 30-60 minutes before serving.
Freeze: If you need to store the cake for a longer period, it can be frozen. First, chill the decorated cake in the refrigerator for about an hour to firm up the buttercream. Then, wrap the entire cake tightly in several layers of plastic wrap, followed by a layer of aluminum foil. Place it in a freezer-safe container or a heavy-duty freezer bag. The cake can be stored in the freezer for up to 1 month. When you’re ready to enjoy it again, thaw the cake in the refrigerator overnight, or at room temperature for several hours, before unwrapping and serving. This slow thawing process helps maintain moisture and prevents condensation from forming on the frosting.
More Delicious Winter Desserts to Explore
If you’ve enjoyed making this adorable penguin cake, you’ll love these other festive winter-themed dessert ideas. Perfect for holiday parties, cozy evenings, or just embracing the winter spirit!
- Snowman Cupcakes {With Donut Toppers} – These charming cupcakes feature adorable snowman toppers made from donuts, a delightful and easy treat.
- Easy Snowman Cake {Frosting & Fondant} – Learn to create a cute snowman cake using a combination of frosting and fondant for a festive look.
- Snowman Cookies {Snowman Oreos} – Transform simple Oreos into delightful snowman cookies, a fun activity for kids and adults alike.
- White Snowflake Cake {Winter Cake} – A stunning winter cake adorned with delicate white chocolate snowflakes, perfect for an elegant holiday display.
- Snowflake Cookies {Snowflake Oreos} – Another creative way to turn Oreos into beautiful snowflake-themed treats, great for a winter party.
- Snowflake Cupcakes {Winter Cupcakes} – These cupcakes are decorated with enchanting snowflake designs, ideal for any winter gathering.
- Snow Ice Cream Recipe – A unique and fun dessert that uses real snow to create a creamy, delightful treat.
Recipe
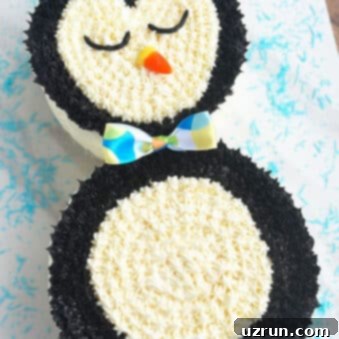
Easy Penguin Cake
Abeer Rizvi
Pin Recipe
Want to Save This Recipe?
Enter your email & I’ll send it to your inbox. Plus, get great new recipes from me every week!
By submitting this form, you consent to receive emails from CakeWhiz
Ingredients
- 2 Round Cakes One 6×3 inch cake (for head), one 8×3 inch cake (for body). Any flavor like vanilla, chocolate, or rainbow will work!
- 6 cups Buttercream Icing Prepared and divided into black and white colors.
- 1 Large Candy Corn Or any large orange triangular candy (or a piece of orange fondant) for the beak.
Instructions
-
Bake and Cool Cakes: Bake your two round cakes (one 6×3 inch, one 8×3 inch) according to your chosen recipe. Ensure they cool completely on a wire rack before proceeding.
-
Prepare Frosting: While the cakes are cooling, prepare your buttercream frosting, dividing and coloring it black and white as needed for decoration.
-
Level and Fill Cakes: Once completely cool, level each cake if necessary. Cut each cake in half lengthwise to create two layers per cake. Spread a thin, even layer of your chosen icing (e.g., white buttercream) between these layers.
-
Stack Layers: Place the other halves of the cakes back on top, gently pressing to secure them and create two complete, filled cake rounds.
-
Place on Cake Boards: Place each filled cake onto a round cake board that matches its size (6-inch cake on a 6-inch board, 8-inch cake on an 8-inch board).
-
Crumb Coat and Smooth Frosting: Apply a smooth crumb coat of white buttercream to each cake. Chill for 15-20 minutes, then apply a final, smooth layer of white icing to each cake.
-
Assemble Penguin Shape: Place the larger (8-inch) iced cake on your large display cake board (the body). Position the smaller (6-inch) iced cake on top, slightly overlapping the larger cake to form the penguin’s head. Secure both cakeboards to the large display board using a small amount of frosting or tape underneath to prevent sliding.
-
Map Out Design: Use a toothpick to lightly sketch the rough outline of the penguin’s white face and belly area onto the smooth, white-iced cakes. This acts as a guide for your piping.
-
Pipe Black Outline: Fill a piping bag with black buttercream and attach a small star tip (Wilton’s Tip #18). Pipe small black stars meticulously along the toothpick outline you’ve drawn.
-
Fill Black Areas: Continue to fill in the entire area *outside* the black star outline with more small black buttercream stars, creating the penguin’s main body and head color.
-
Fill White Areas: Refill a clean piping bag with white buttercream and attach the same small star tip (Wilton’s Tip #18). Fill in the area *inside* the black star outline with white buttercream stars to form the penguin’s white belly and face.
-
Pipe the Eyes: Fill a piping bag with black icing and attach a small round tip (Wilton’s Tip #3). With a very steady hand, pipe two small, perfectly round dots for the penguin’s eyes on the white face area.
-
Add the Beak: Carefully stick a large orange candy corn (or a cut orange fondant triangle) just below the eyes for the beak/mouth. Press gently to secure. Your adorable penguin cake is now complete!
Notes
- Refer to the detailed tips and techniques section above for best results, especially on cooling cakes and piping.
- Leftovers can be stored in a sealed container in the fridge for up to 3 days. For longer storage, refer to freezing instructions above.
Nutrition
An automated tool is used to calculate the nutritional information. As such, I cannot guarantee the accuracy of the nutritional information provided for any recipe on this site.
