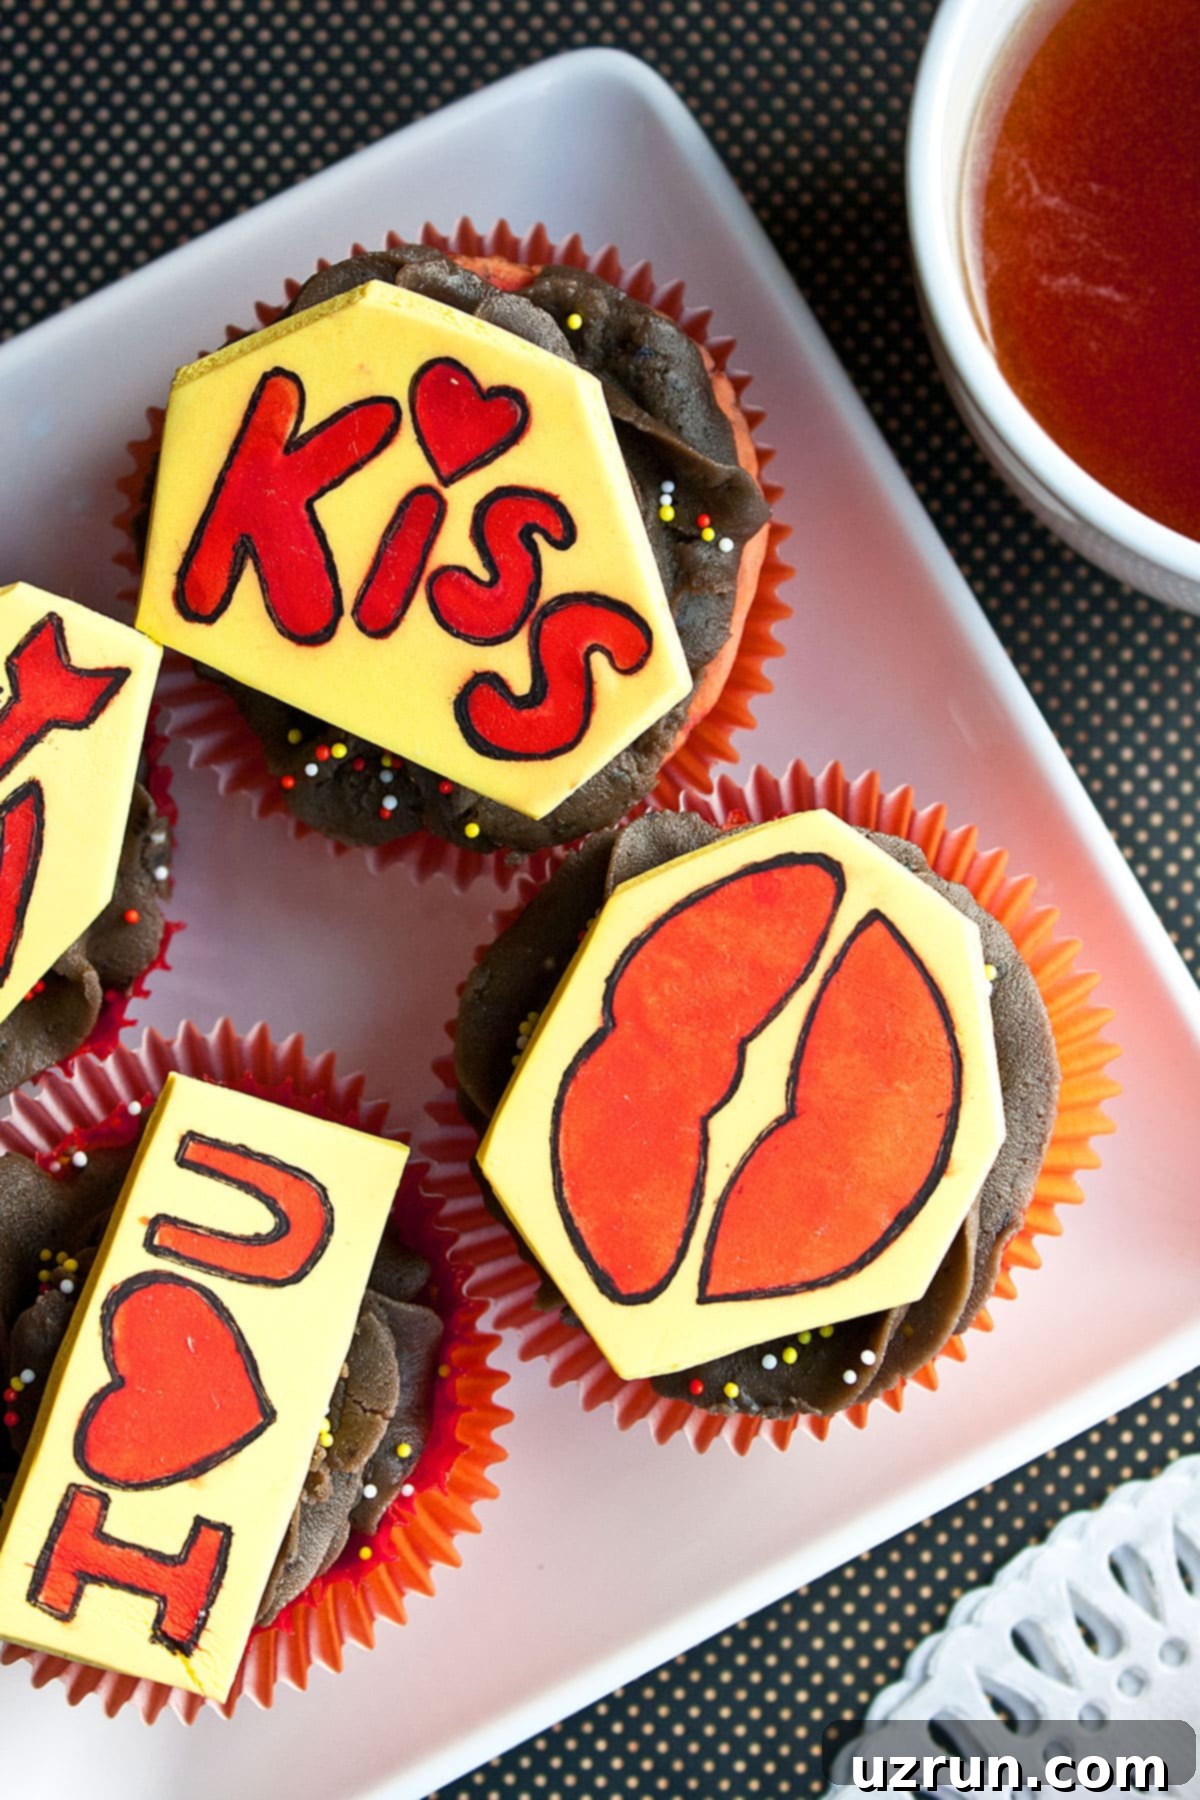
Unlock Stunning Cake Designs: The Beginner’s Guide to Stenciling with Edible Sprays on Fondant & Buttercream
Cake decorating can seem daunting, but with the right techniques, even beginners can create professional-looking desserts with ease. One of the most effective, yet surprisingly simple methods, is using cake stencils in conjunction with edible sprays. This dynamic duo allows you to achieve intricate, vibrant designs and a beautiful “airbrushed” effect without needing expensive equipment or advanced artistic skills. It’s a fast, fun, and truly transformative technique for decorating any cake, cupcake, or cookie, turning a simple baked good into a show-stopping masterpiece!
I recently discovered the magic of combining cake stencils with edible sprays, and it has quickly become my absolute favorite cake decorating obsession! While stencils are traditionally used with royal icing for a classic look, edible sprays offer a unique and modern advantage: they provide a vibrant, uniform color application that beautifully mimics an airbrush machine, but with significantly less hassle, cleanup, and upfront cost. For this comprehensive tutorial, I’ll be demonstrating with Wilton’s “Color Mist” edible sprays. I find them to be a fantastic, affordable, and readily available option that consistently delivers impressive results. We’ll be creating stunning designs using festive Valentine’s Day stencils and a rich red edible spray, perfect for adding a touch of romance or celebration to your treats. To give the stenciled patterns an extra pop and definition, I’ll also show you a simple trick: outlining them with a black edible marker. If you’re looking to perfect your cake’s base before diving into these decorative techniques, be sure to check out my detailed How to Frost a Cake Smoothly tutorial.
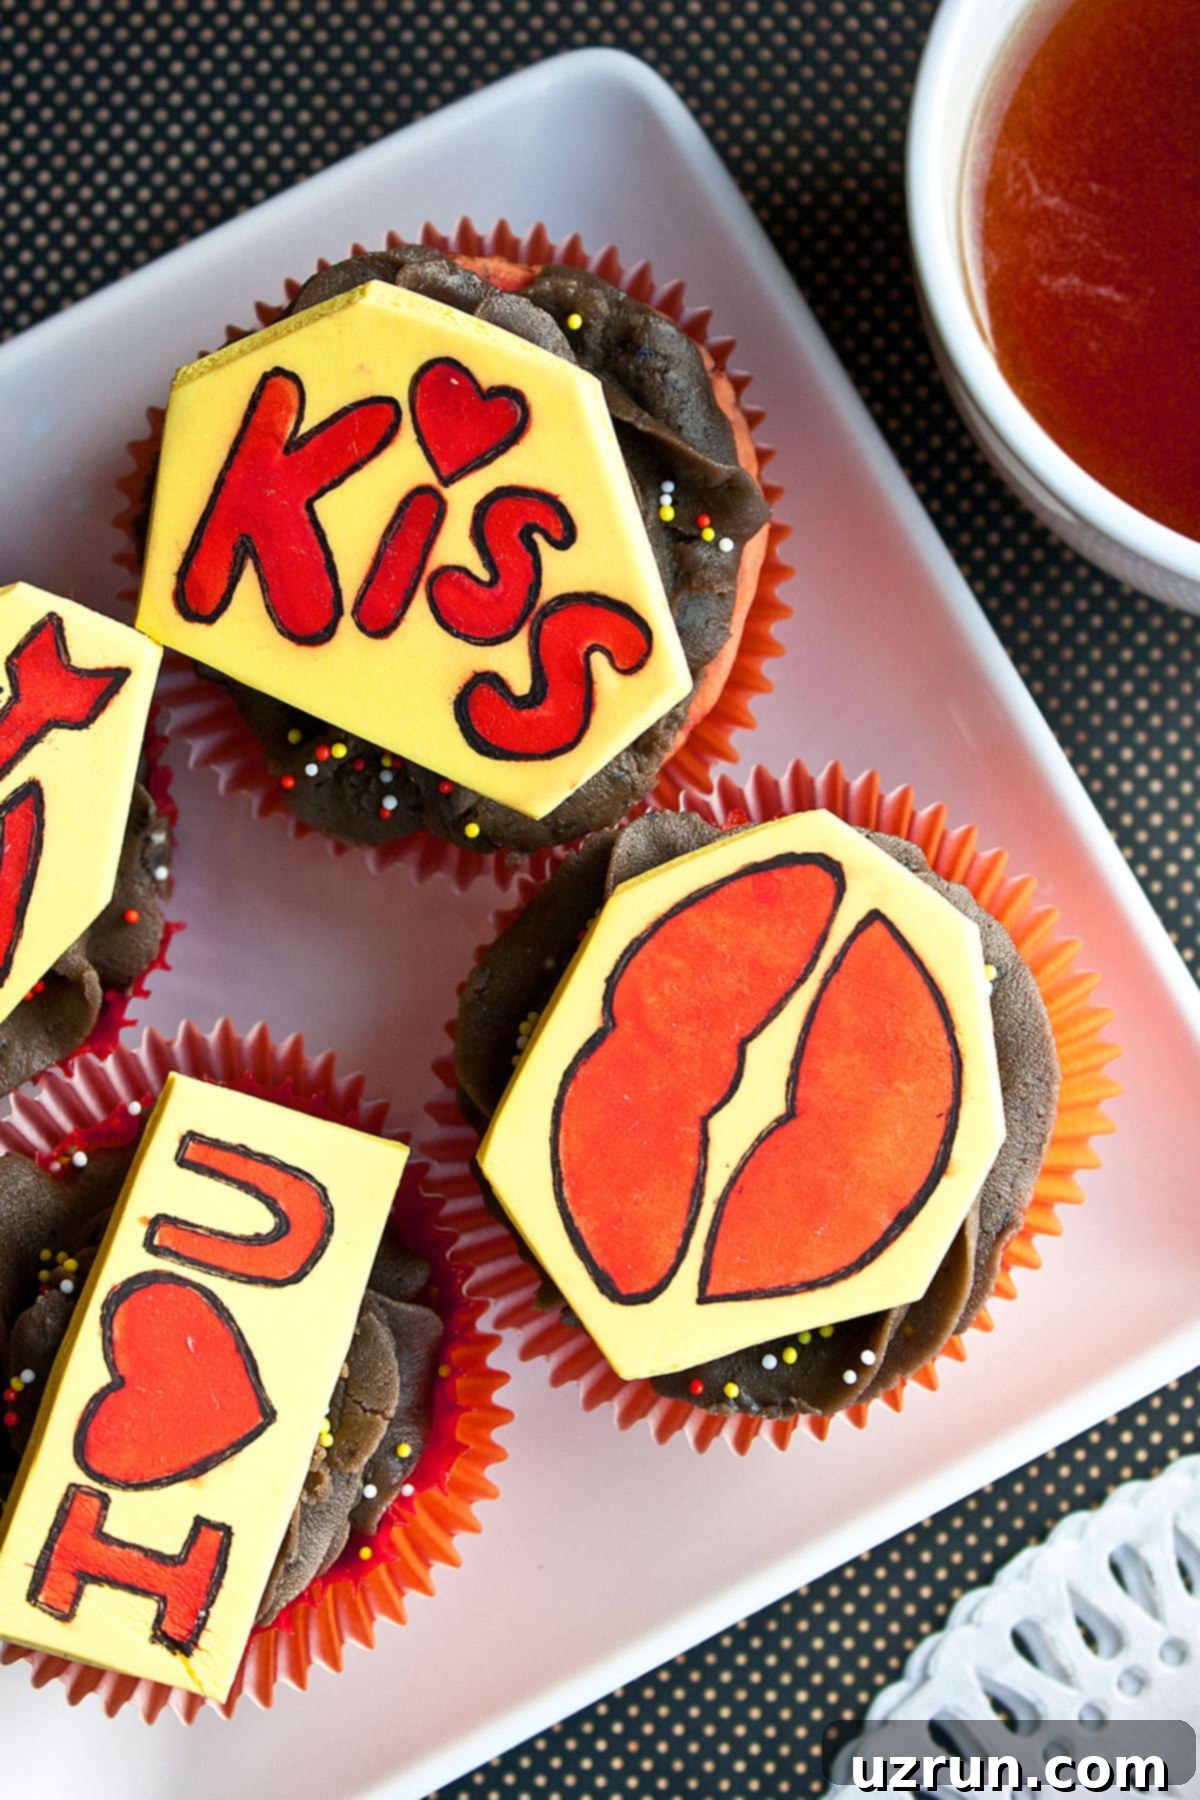
Table of Contents
- How to Use Stencils for Cake Decorating on Fondant
- How to Use Stencils for Decorating on Buttercream Icing
- Key Ingredients & Tools for Stencil Decorating
- Creative Variations & Alternative Methods for Stenciled Designs
- Essential Tips and Expert Techniques for Flawless Stenciling
- Storage Solutions for Stenciled Desserts
- More Cake Decorating Tutorials
How to Use Stencils for Cake Decorating on Fondant
Decorating fondant-covered cakes with stencils and edible sprays is incredibly satisfying and yields beautifully crisp designs. The smooth, firm surface of fondant provides an ideal, forgiving canvas for intricate patterns, making it a favorite method for many decorators, especially beginners. Here’s a detailed, step-by-step guide to achieving perfect results:
Step 1: Preparing Your Fondant Canvas
Before you even think about placing a stencil, ensure your cake is impeccably prepared. This means it should be properly filled, frosted, and covered in a perfectly smooth, even layer of fondant. After covering your cake or cupcakes, allow the fondant to air-dry for at least 10-15 minutes, or even up to an hour, in a dry environment. This crucial step helps to get rid of any residual moisture and allows the fondant to firm up slightly. A dry, firm, and non-sticky surface is absolutely crucial; attempting to stencil on soft or tacky fondant can cause the stencil to adhere unevenly, pull away pieces of fondant, or allow the edible spray to bleed underneath the edges, ruining your crisp design.
Step 2: Securing the Stencil
Once your fondant surface is properly dried and ready, carefully position your chosen stencil exactly where you want the design to appear on the cake. Precision is key here, as once the spray is applied, it’s difficult to correct. To prevent any movement during the application of your chosen medium, you can gently pin the stencil in place using small, sharp dressmaker pins. Ensure these pins only pierce the outermost edges of the stencil, avoiding the actual design areas. For larger stencils, or if you’re working on a curved surface, a very light spritz of edible adhesive spray (or even a tiny bit of water applied *very* sparingly to the back of the stencil, away from the design areas) can help it adhere temporarily without damaging the fondant. Alternatively, for smaller areas like cupcake toppers, simply hold the stencil firmly in place with one hand, applying gentle, even pressure.
Step 3: Applying Your Decorating Medium
You have a few excellent options for transferring your design onto the fondant:
- With Buttercream or Royal Icing: If you’ve opted for a more textured or raised design using royal icing or thick buttercream, use an offset spatula to spread a very thin, even coating of your chosen icing directly over the stencil. Ensure the icing is thick enough to hold its shape but thin enough that it doesn’t seep under the stencil. Use a clean, sharp spatula to scrape off any excess icing, leaving only the stencil’s cut-out portions filled. The thinner and more even the layer, the crisper and more defined your design will be.
- With Edible Sprays (The “Airbrushed” Effect): This is where you achieve that seamless, airbrushed look! Hold your edible spray can upright and at a consistent distance of approximately 6-8 inches (15-20 cm) from the stencil. Begin spraying in short, controlled, sweeping motions, moving across the stencil rather than holding the spray in one static spot. Apply thin, even bursts of color, gradually building up the intensity. This technique prevents overspraying, which can lead to unsightly puddles, concentrated dark spots, or color bleeding underneath the stencil.
Step 4: The Gentle Reveal
Once your chosen medium is applied to your satisfaction, it’s time for the big reveal. Carefully remove any pins (if used) and then, very gently and slowly, peel off the stencil. For icing applications, it’s often best to peel it off immediately. For edible sprays, you can peel it off fairly quickly, but ensure the spray isn’t so wet that it might smudge. Lift the stencil straight up without dragging it across the freshly applied design. For edible sprays, avoid touching the sprayed area for at least 10-15 minutes (or until completely dry) to allow the color to fully set and prevent any smudges. A perfectly peeled stencil will unveil a crisp, vibrant, and professional-looking design that will impress everyone!
How to Use Stencils for Decorating on Buttercream Icing
Working with stencils on buttercream can be slightly trickier than on fondant due to its softer, more delicate texture, but with the right preparation and technique, you can achieve equally stunning results. The absolute key to success when stenciling on buttercream lies in meticulous temperature control and careful application.
Step 1: The Chilling Imperative for Buttercream
This is arguably the most critical step when stenciling on buttercream. Your frosted cakes and cupcakes absolutely *must* be thoroughly chilled and firm before you attempt to place any stencil on them. Place your frosted desserts in the freezer for a minimum of 20-30 minutes, or in the refrigerator for at least an hour, until the buttercream icing is completely firm to the touch and no longer sticky or soft. Attempting to stencil on soft or wet icing is a recipe for disaster; the stencil will inevitably stick to the buttercream, pull away pieces of your perfectly smooth frosting, and completely ruin the design you’ve worked so hard on. The firm, chilled surface allows the stencil to rest lightly on top without embedding itself into the frosting, providing a stable foundation for your decoration.
Step 2: Applying the Stencil and Medium
Once your buttercream is firm and cold, carefully place the stencil onto the surface. For buttercream, it’s generally best to hold the stencil firmly in place with one hand, maintaining light, even pressure to prevent any shifting. You can also gently use dressmaker pins along the very edges of the stencil, ensuring not to press too deeply into the buttercream to avoid leaving marks. If you’re using edible spray, maintain the recommended distance of 6-8 inches and use light, even, rapid bursts. Move quickly across the design, applying thin layers to build color without saturating the buttercream. Excessive spraying can potentially re-soften the buttercream, leading to bleeding under the stencil or an uneven finish.
Step 3: The Gentle Peel and Drying
Immediately after applying your chosen medium (especially with edible spray), gently and slowly peel the stencil away from the buttercream. Do not hesitate or pull abruptly. The goal is to lift the stencil straight up and away from the dessert without dragging it across the freshly applied design. Allow the sprayed or iced buttercream to air dry for at least 10-15 minutes before handling, touching, or adding any further decorations to prevent smudges and allow the color to set completely. This patience will be rewarded with a beautiful, clean design.
Key Ingredients & Tools for Stencil Decorating
To embark on your cake stenciling journey and achieve beautiful results, you’ll need a few essential items. While the exact “ingredients” vary slightly depending on your chosen method and desired effect, these are the core components and tools that will empower you to create stunning designs:
- Your Dessert Base: This is your primary canvas! Whether you’re decorating a beautifully frosted cake, individual cupcakes, or perfectly baked cookies, ensure your dessert is fully prepared and cooled, and frosted or covered as described in the previous sections. For this particular project, we’re using delicious brownie cupcakes as our delightful base.
- Cake Stencils: These are the absolute heart of this decorating technique. Cake stencils come in an incredible variety of patterns, sizes, and materials (common types include thin plastic for general use and flexible mesh stencils for very fine details). Choose designs that complement your theme, occasion, and even your current skill level. Having a good collection allows for endless creative possibilities.
- Edible Spray: My personal favorite for ease of use, vibrant results, and achieving that sought-after “airbrushed” effect is Wilton’s Color Mist. These convenient sprays provide a fantastic, even finish with minimal effort and are available in a wide range of brilliant colors. They are truly a game-changer for achieving professional-looking results quickly and efficiently.
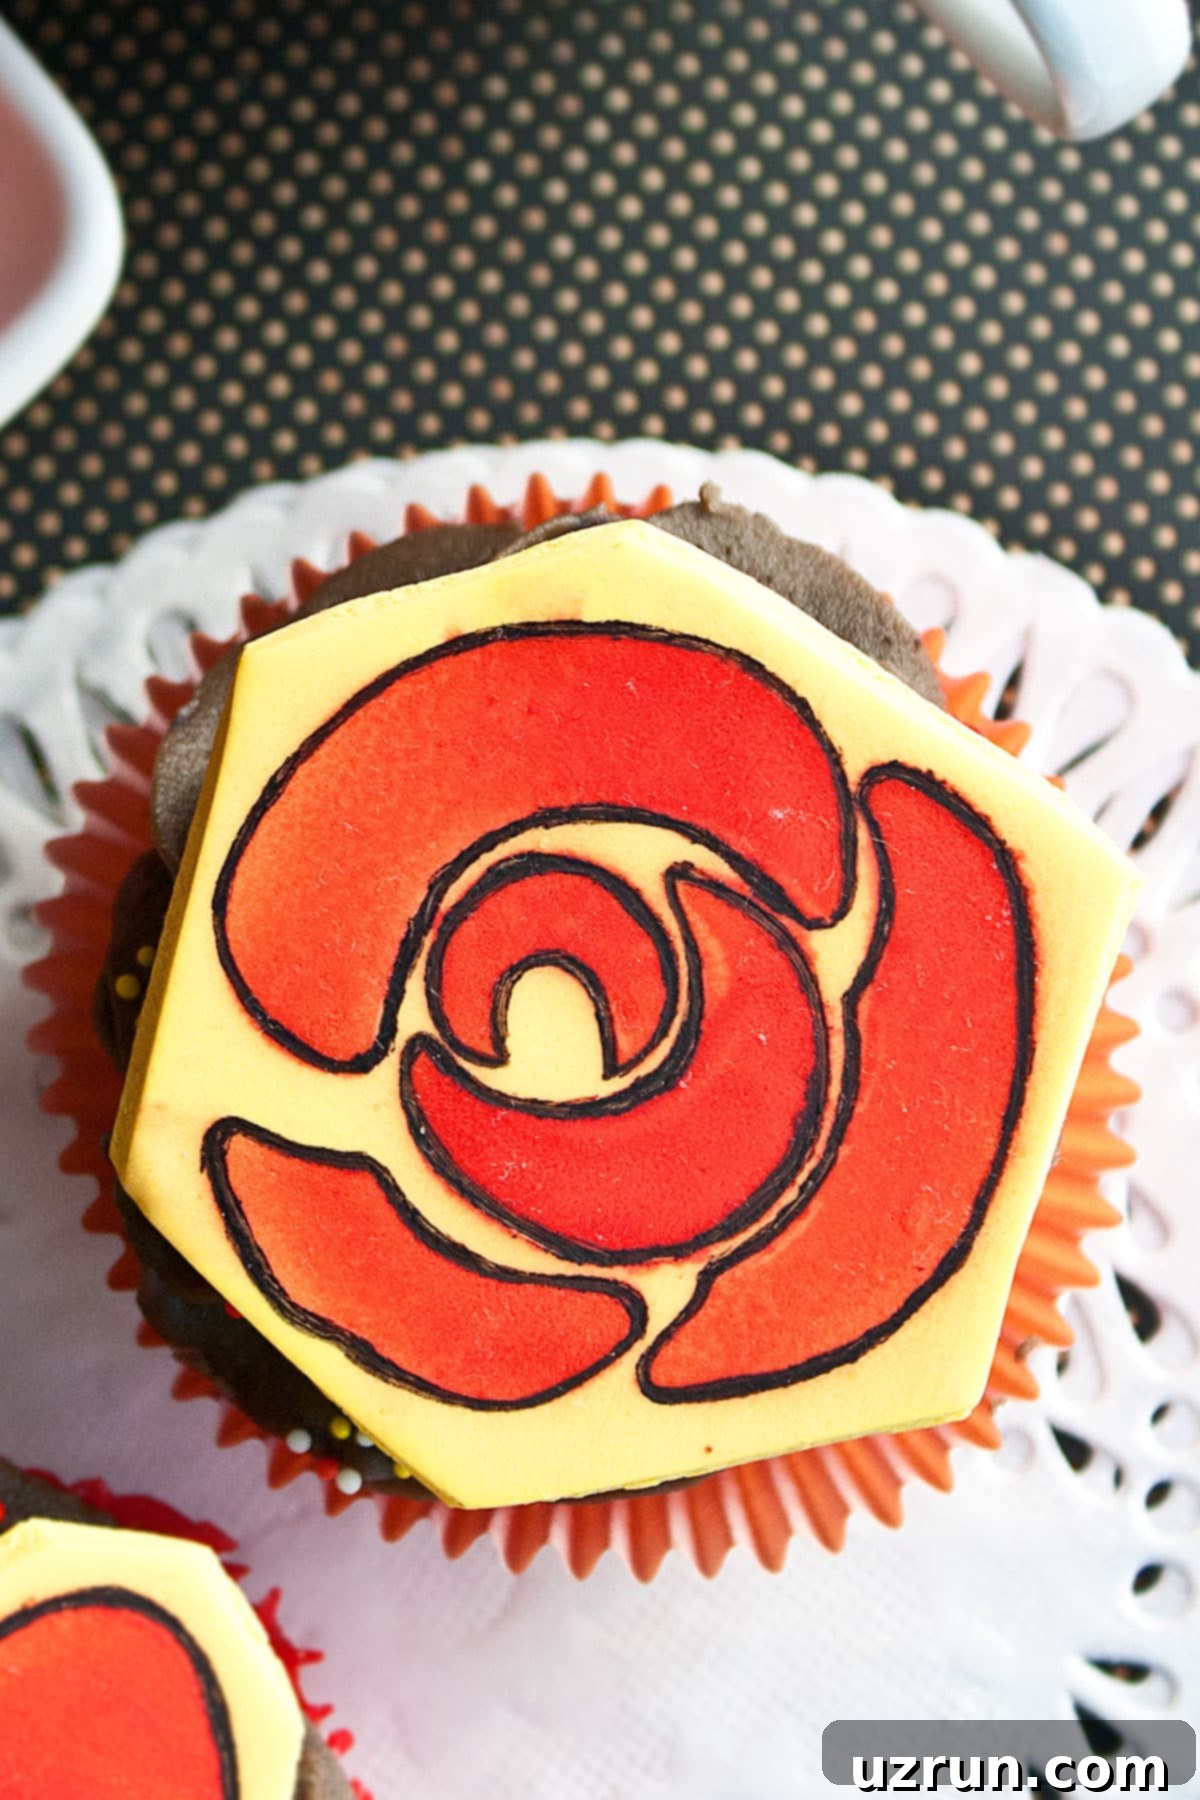
- Optional: Edible Markers: For an extra touch of sophistication and clarity, a good quality edible marker (like those from Wilton or FooDoodlers) in a contrasting color (often black) can add incredible definition and crispness to your stenciled designs, making them truly pop and giving them a more finished, artistic appearance.
- Optional: Offset Spatula: If you plan to use royal icing or thick buttercream through your stencils, a small offset spatula is indispensable for spreading and scraping away excess icing for clean lines.
- Optional: Dressmaker Pins: These tiny pins are incredibly useful for temporarily securing stencils to your cake surface, preventing unwanted movement during application.
Creative Variations & Alternative Methods for Stenciled Designs
While edible sprays offer a fantastic way to utilize cake stencils, the world of cake decorating is vast and full of creative possibilities. Don’t limit yourself to just one technique; experiment with these exciting variations to add depth, texture, and diversity to your decorating repertoire, truly making your desserts stand out:
1. Stenciling on Cookies with Hard-Drying Icing:
Cookies provide a perfect miniature canvas for intricate stencil work. The process starts with a smooth, firm foundation. First, flood your cookies with a hard-drying icing such as Royal Icing or Glace Icing. This base layer should be applied evenly and allowed to fully set and dry, typically overnight or for several hours, to create a perfectly smooth and non-tacky surface. Once the base icing is completely dry, carefully place your chosen stencil on top of the iced cookie. For best results, hold it securely in place, either with your fingers for smaller designs or with a gentle, minimal application of edible glue (applied *very* sparingly to the back of the stencil) for larger, more intricate patterns. Using a small offset spatula, spread a very thin, even coating of a contrasting color of thick royal icing or glace icing over the stencil. Use the clean edge of the spatula to scrape off any excess icing, ensuring only the design cut-outs are filled. Then, gently and slowly peel off the stencil to reveal your pristine edible artwork.
2. Using Powders, Glitters, or Sprinkles with Stencils:
For a softer, more delicate, or shimmering effect, stencils can also be beautifully utilized with dry ingredients. This method works best on thoroughly chilled and firm frosted desserts. Your cake or cupcakes should be iced and then placed in the freezer for 20-30 minutes until the frosting is completely firm and cold. This firm surface is essential to prevent the powders or glitters from embedding into the frosting or spreading outside the stencil lines. Place the stencil precisely where you want the design to appear. If using cocoa powder or powdered sugar, use a fine mesh sieve or a small tea strainer to gently dust a thin, even layer directly over the stencil until the design is completely covered. For edible glitter or very fine sprinkles, use a small spoon to carefully sprinkle them over the cut-out portions of the stencil. The key here is even distribution without disturbing the stencil. Gently peel away the stencil, being extremely careful not to dislodge or spread the topping. Be mindful that these dry applications may not adhere as permanently as sprays or icing and can sometimes shift with abrupt movement or during transportation. A very light mist of edible adhesive spray *after* removing the stencil can sometimes help to set them, but always test this on a scrap piece first.
3. Upgrading to an Airbrush Machine:
If you find yourself frequently stenciling and are ready to take your precision and creative control to the next level, investing in an airbrush machine is a fantastic option. Unlike edible spray bottles, an airbrush system allows you to mix and customize colors, create stunning gradients, and achieve incredibly fine, detailed applications with unparalleled precision. While it requires a bit more practice and a larger upfront investment, for serious decorators, an airbrush opens up a vast world of possibilities for intricate and professional-grade stencil work and other decorating techniques.
4. Enhancing Designs with Edible Markers:
Once your stenciled design (whether applied with spray, icing, or powder) has dried and set, you can add an extra layer of visual interest and definition with edible markers. Tracing the outline of your stencil pattern with a black or contrasting colored edible marker will make the design pop, giving it a much crisper, more refined, and more defined appearance. This simple yet effective step can elevate a good stencil design to a truly outstanding one, adding a precise, hand-drawn touch and emphasizing the intricate details of your chosen stencil.
5. Multi-Layer Stenciling for Complex Designs:
Don’t be afraid to think beyond a single stencil or a single color! You can create incredibly complex and rich designs by utilizing multiple stencils or applying different colors in layers. For elaborate patterns, you might use one stencil for a base color or a specific element, allow it to dry completely, and then apply a second, complementary stencil over a different area, or even a second layer on the same area with a different color to add depth and dimension. This advanced technique allows for incredibly rich, detailed, and visually captivating patterns, adding significant depth and artistic interest to your cakes. The golden rule here is to ensure each layer is completely dry and set before applying the next to prevent any bleeding or smudging.
Essential Tips and Expert Techniques for Flawless Stenciling
Achieving perfect stencil designs is a blend of good tools and smart techniques. Even with the best intentions, a few common mistakes can hinder your results. Follow these essential tips and expert techniques to ensure your decorating process is smooth, efficient, and your results are consistently spectacular:
- Work in a Well-Ventilated Area: Edible sprays, while safe for consumption, can produce surprisingly strong odors due to their propellants. Always ensure your workspace is open and well-ventilated to avoid inhaling concentrated fumes. Opening a window, using a kitchen exhaust fan, or working outdoors can make a significant difference in comfort and safety.
- Protect Your Work Area: The fine mist from edible sprays can travel further than you might expect! Before you begin, lay down newspaper, scrap paper, a disposable plastic tablecloth, or even paper towels to generously cover your work surface and any surrounding areas. This foresight makes cleanup a breeze and protects your countertops and kitchen surfaces from any colored residue or overspray.
- Easy Cleanup is a Bonus: Despite the potential for a bit of mess during application, edible sprays are remarkably easy to clean from non-food surfaces. A damp cloth, a kitchen cleaning wipe, or a sponge with warm soapy water is usually all you need to effortlessly wipe away any overspray. Your stencils can also be cleaned promptly with warm water and a soft brush.
- Shake Your Bottle Vigorously Before Each Use: This is a crucial, often-overlooked step that can dramatically affect your results. Shaking the spray can ensures that the color pigments and the propellant are thoroughly mixed and evenly dispersed. Neglecting this step can lead to inconsistent color application, blotches, a weaker, watery spray, or even just propellant coming out. I once forgot this and ended up with strange, uneven splatters instead of a smooth finish!
- Always Test Spray First: Before you apply any spray to your actual dessert, always do a quick test spray on a scrap piece of paper or an extra piece of fondant. This crucial step allows you to gauge the spray’s pressure, check the color intensity, and practice how far you need to hold the bottle for an even, controlled mist. It’s like a mini-rehearsal that helps you prevent costly mistakes on your beautifully prepared cake.
- Maintain Optimal Spraying Distance: Do not spray too closely to your cake or fondant. The ideal distance is typically 6-8 inches (about 15-20 cm) from your work surface. Spraying too close concentrates the color, creating dark, heavy spots or unsightly puddles, which can also lead to bleeding. Conversely, spraying too far away results in a faint, dispersed color that might require excessive application.
- Avoid Over-Spraying: Resist the urge to drench the stencil in color in one go. Applying too much spray too quickly will not only create unattractive puddles of color but can also cause the color to seep underneath the stencil, blurring your crisp lines and ruining the intricate details. Build up the color gradually with light, even layers, allowing a few seconds between coats if necessary.
- Allow Sufficient Drying Time: Patience is truly a virtue in stencil decorating! Do not touch your cake or fondant pieces immediately after spraying or applying icing. Allow them ample time to air dry completely, typically at least 10-15 minutes, or until the surface is dry to the touch. Rushing this step will almost certainly result in smudges, fingerprints, and a ruined design, undoing all your careful work.
- Ensure the Stencil is Flush Against the Surface: For the cleanest, sharpest lines, your stencil must lie perfectly flat and flush against the surface of your dessert. Any tiny gaps, bubbles, or unevenness will allow the spray (or icing) to seep underneath the edges, leading to a blurry, messy, and unprofessional-looking design. Use pins or your fingers to gently but firmly press down the stencil edges, especially around the design areas, to create a tight seal.
- Clean Your Stencils Promptly: As soon as you remove a stencil from your dessert, clean it immediately. For edible sprays, a quick rinse under warm water and a gentle scrub with a soft brush or sponge will usually remove most residue. If using icing, scrape off any excess before washing. Dried icing or spray is much harder to remove and, over time, can damage delicate stencil patterns, shortening their lifespan.
- Choose the Right Stencil Material: Stencils come in various materials, including thin plastic, thicker acrylic, and flexible mesh. Plastic stencils are versatile and great for sprays and thicker icings, while mesh stencils are specifically designed for very fine details with royal icing, as their mesh structure helps prevent bleeding of very liquid mediums. Choose your stencil based on your project and the medium you’ll be using.
Storage Solutions for Stenciled Desserts
Proper storage is essential to maintain both the beauty of your stenciled designs and the freshness of your delicious creations. Here’s how to best preserve your decorated desserts:
- Refrigerate: For cakes and cupcakes that contain perishable fillings or frostings and thus require refrigeration, store them in an airtight, covered box or container. This will help maintain their freshness for approximately 2-3 days. Please note that fondant decorations, especially those adorned with edible spray, may become slightly sticky or develop condensation due to the moisture and temperature changes within the refrigerator. This is a normal phenomenon and typically does not affect the taste or overall quality of the dessert, but always handle them gently to avoid smudging the design.
- Freeze: If you need to store your stenciled desserts for a longer duration, they can be successfully frozen. Place them in a sealed, freezer-safe container to prevent freezer burn and absorb odors. They can be stored for up to 1 month. When you’re ready to enjoy them, transfer them to the refrigerator overnight to thaw gradually. Similar to refrigeration, the fondant and sprayed designs may become slightly sticky from moisture as they thaw. For the best appearance, allow them to come to room temperature and air dry for a short while before serving. This will help evaporate some of the surface moisture.
More Cake Decorating Tutorials
- How to Make Ombre Cake (Blue)
- How to Make Buttercream Flowers (Russian Piping Tips)
- How to Marble Fondant
- How to Color Fondant
Recipe
How to Use Stencils For Cake Decorating
Abeer Rizvi
Pin Recipe
Want to Save This Recipe?
Enter your email & I’ll send it to your inbox. Plus, get great new recipes from me every week!
By submitting this form, you consent to receive emails from CakeWhiz
Ingredients
- 12 Brownie cupcakes
- 4 cups Chocolate frosting
- 2 cups Marshmallow fondant Yellow
Instructions
-
Begin by baking your favorite brownie cupcakes according to your recipe. Allow them to cool completely on a wire rack to ensure they are perfectly level and firm before frosting or adding toppers.
-
While your cupcakes are baking and cooling, prepare your chosen frosting. If you plan to stencil directly onto buttercream, ensure your frosted cupcakes are chilled in the freezer for 20-30 minutes until the icing is firm. For fondant toppers, you can prepare these ahead of time.
-
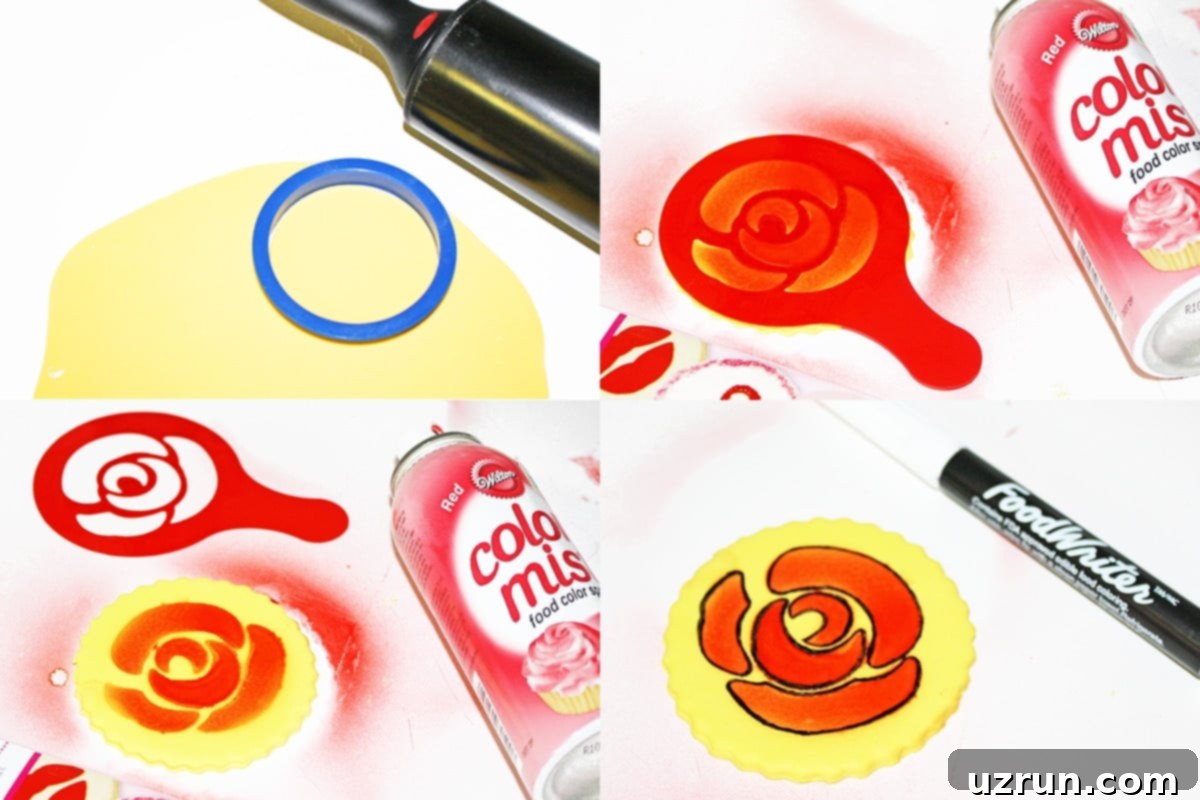
To create the stenciled cupcake toppers, roll out your yellow marshmallow fondant evenly on a lightly dusted surface. Aim for a consistent thickness of about ⅛ inch (3-4mm) to create a smooth, sturdy base for your stencil design.
-
Using a circle cutter that matches the size of your cupcake tops, cut out individual fondant pieces. These will serve as your blank canvases for the stencil work.
-
Carefully place your desired stencil on top of a fondant circle. Make sure it is centered and lying completely flat against the fondant surface to prevent any bleeding.
-
Shake your edible spray bottle vigorously for a few seconds to ensure the color is well mixed. Hold the bottle 6-8 inches away from the stencil. Apply the spray in short, even bursts, sweeping across the stencil until the design is filled to your desired color intensity. It’s crucial that your stencil does not shift during this process; you can secure it gently with small pieces of tape on the edges or hold it firmly with your fingers, being careful not to touch the design area.
-
Once you’ve achieved the desired color, gently peel the stencil away from your fondant piece. Lift it straight up rather than dragging it to prevent any smudging or blurring of the design.
-
Allow the sprayed color to air dry completely for 10-15 minutes before proceeding to the next step. This is essential to prevent any smudging or sticky residue when handling.
-
(Optional) For an extra layer of definition and a more polished look, use a black edible marker to carefully outline the stenciled design. This step truly makes the patterns stand out and gives them a crisp, professional finish.
-
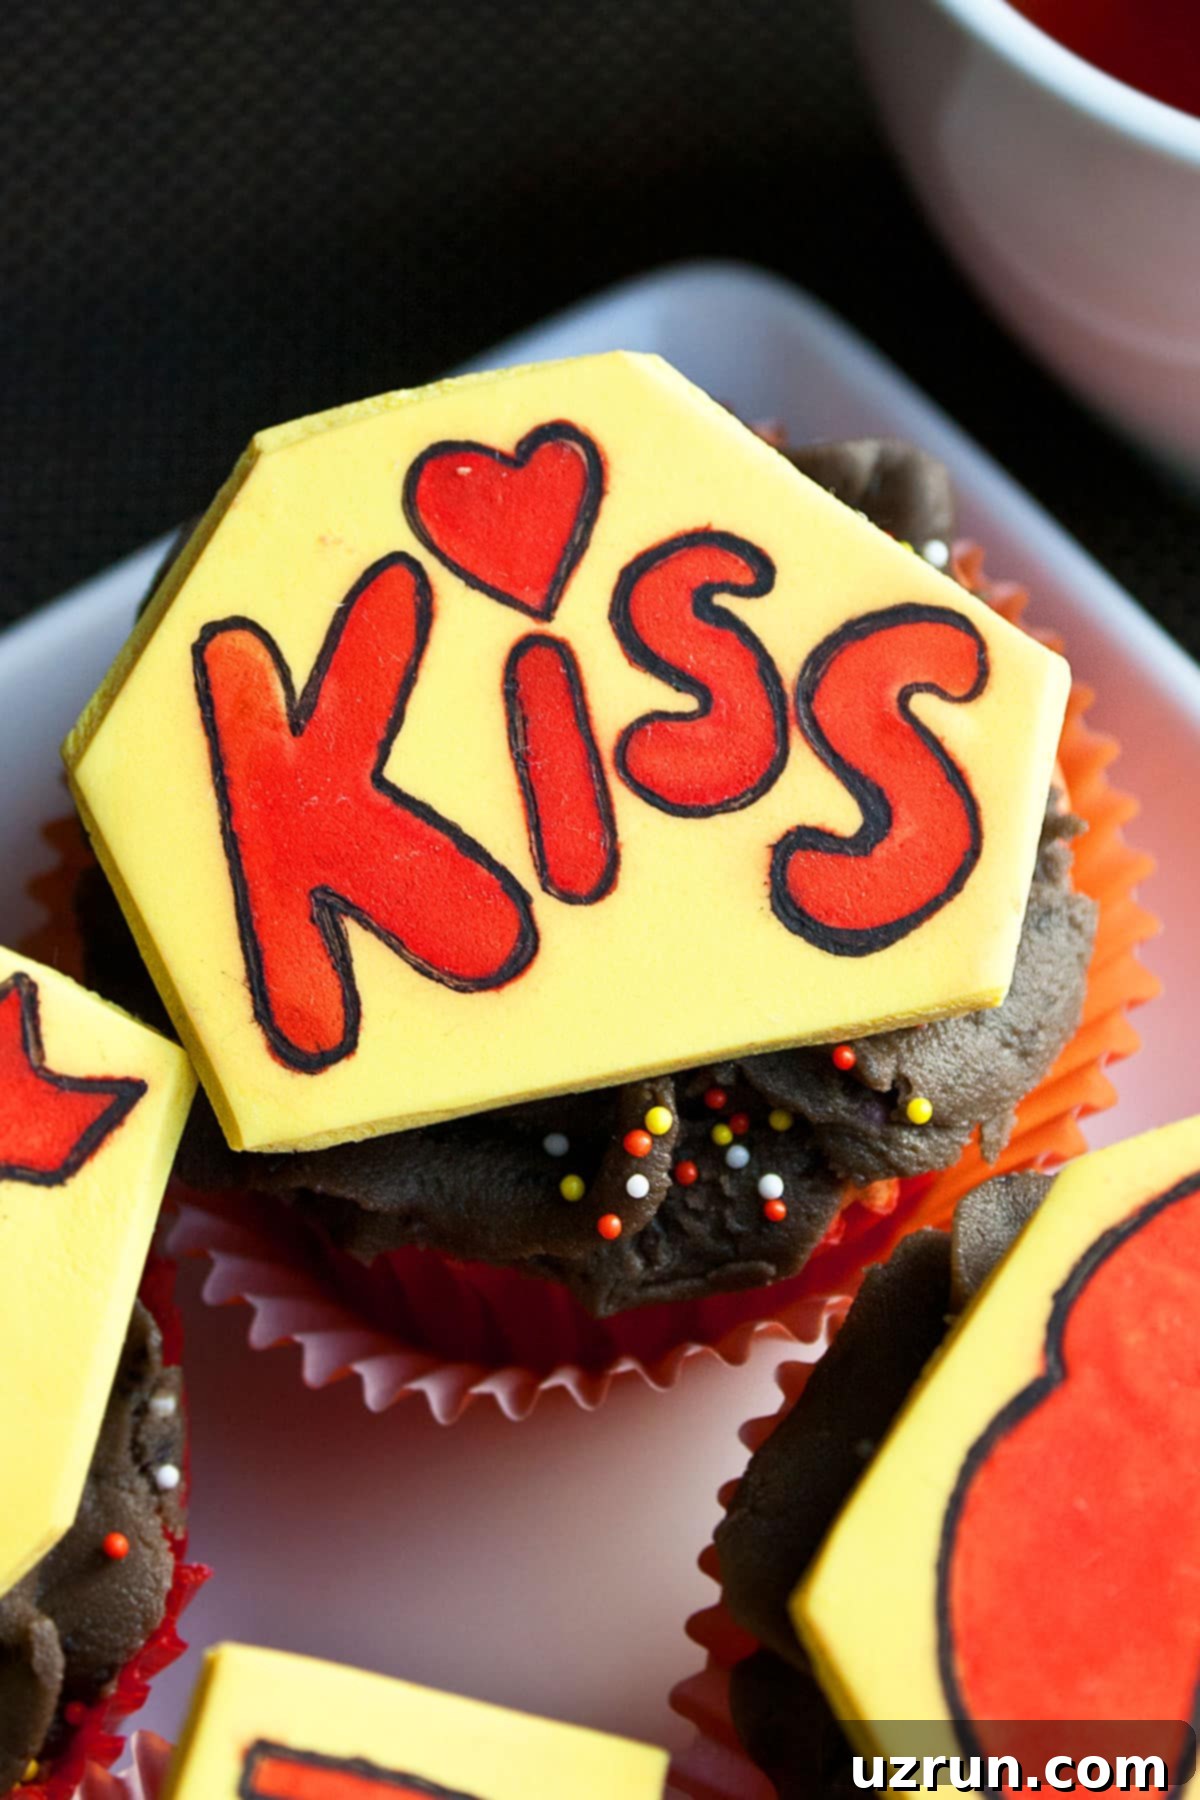
(Optional) If you prefer an artistic, less uniform look, use a small knife or a craft blade to cut your stenciled fondant piece into a random, abstract shape. Otherwise, the round fondant piece works beautifully as is.
-
To assemble your stunning cupcakes, pipe a generous swirl of chocolate icing on top of each cooled brownie cupcake. If you like, you can sprinkle a few edible decorations over the icing for added flair. Finally, carefully place a stenciled fondant topper onto the center of each cupcake. Serve and enjoy your beautifully decorated treats, sure to impress!
Notes
- For best results and effective troubleshooting, thoroughly read all the detailed tips and techniques provided above in the main article. These insights are key to avoiding common pitfalls and achieving professional-quality designs.
- Leftovers of stenciled desserts can be stored in a covered box in the fridge for 2-3 days. Please be aware that fondant decorations might become slightly sticky due to the moisture in the refrigerator, but this typically does not affect taste or safety.
- Always work in a well-ventilated area when using edible sprays, as the fumes can have a surprisingly strong odor.
- Protect your workspace by generously covering it with newspaper or scrap paper to catch any spray residue and make cleanup significantly easier.
- Maintain an optimal spraying distance of about 6-8 inches from your dessert to ensure even coverage and prevent concentrated puddling of color.
- Do not over-spray! Applying too much in one go can create unsightly puddles of paint and can cause the color to bleed under the stencil, ruining your crisp lines. Build color with light, even layers.
- Ensure your stencil lies perfectly flush against the dessert surface to prevent the spray or icing from seeping underneath and blurring your design. Use gentle pressure or pins to secure it.
Nutrition
An automated tool is used to calculate the nutritional information. As such, I cannot guarantee the accuracy of the nutritional information provided for any recipe on this site.
