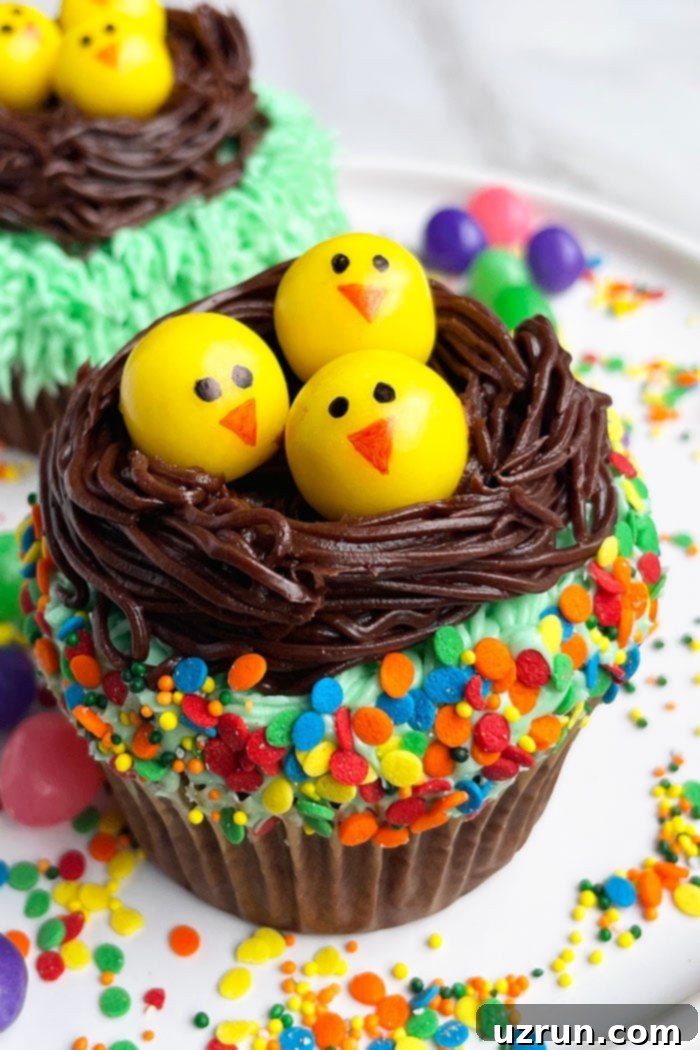
Easy Easter Chick Cupcakes: Adorable & Simple Nest Creations for Your Spring Celebration
Welcome the arrival of spring and Easter with these utterly adorable and incredibly easy Easter cupcakes! Perfectly homemade with simple, readily available ingredients, these delightful chick cupcakes are a guaranteed showstopper. Each cupcake is transformed into a charming mini nest, artfully decorated with creamy buttercream icing, a scattering of vibrant sprinkles, and topped with the sweetest little yellow candy chicks. They are not just visually appealing; they are a joy to make, bringing smiles to faces long before the first bite.
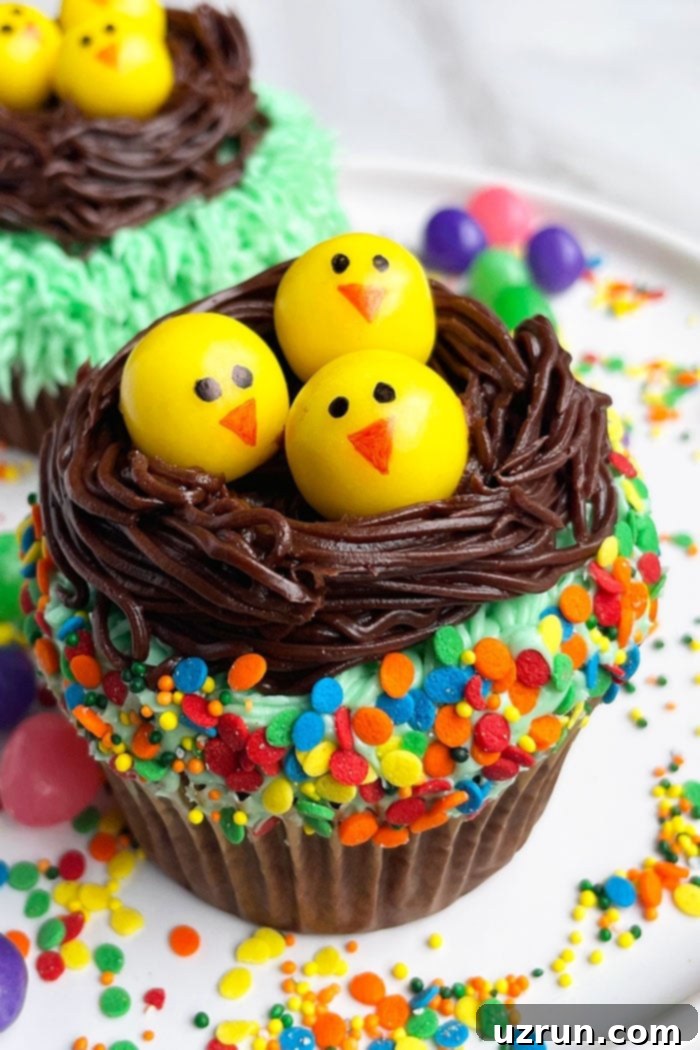
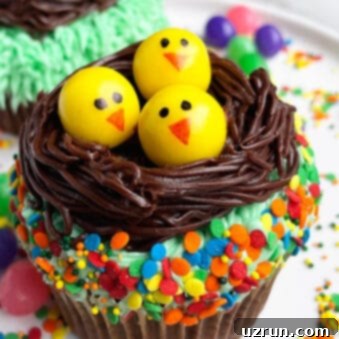
Seriously, just look at those charming little chicks, nestled snugly in their cozy, creamy chocolate nests! These cupcakes are designed for simplicity, making them an ideal baking project for the whole family. Their straightforward decorating process means even your youngest helpers can get involved, adding their personal touch to these festive treats. Whether you’re a seasoned baker or just starting out, you’ll find immense satisfaction in creating these edible masterpieces.
Easter is a time for renewal, joy, and delicious treats, and these chick cupcakes embody all of that. They are perfect for Easter brunches, family gatherings, school parties, or simply as a special homemade dessert to celebrate the season. Their vibrant colors and playful design capture the essence of spring, making them a delightful addition to any celebration. Plus, who can resist a cupcake that’s as cute as it is delicious?
If you’re looking to explore more animal-themed cupcakes for your next birthday or themed event, we have plenty of other charming ideas. Why not try these Bee Cupcakes for a buzzing good time, whimsical Ladybug Cupcakes, or even adventurous Dinosaur Cupcakes? Each recipe offers a unique way to bring your favorite creatures to life through baking.
Crafting Your Adorable Easter Chick Cupcakes: A Step-by-Step Guide
Making these delightful Easter chick or nest cupcakes is easier than you might think. Follow these simple steps to bring your spring dessert vision to life. The process is broken down into manageable tasks, ensuring a fun and stress-free decorating experience.
- Bake cupcakes and cool completely: Start by baking your favorite cupcake recipe, whether it’s from scratch or a convenient box mix. The most crucial step here is to allow them to cool down entirely. Attempting to frost warm cupcakes will lead to melted, sliding frosting, and a less-than-perfect result. Patience is key!
- Frost cupcakes with green frosting: Once cooled, gently spread a layer of green buttercream frosting over the top of each cupcake. This green layer serves as the “grass” foundation for your little chicks, providing a vibrant and fresh base for the nest. You can use an offset spatula or a butter knife for a smooth application.
- Roll the sides of each cupcake with sprinkles: To add a playful touch and extra texture, carefully roll the sides of each frosted cupcake in a dish filled with colorful sprinkles. This creates a festive border that enhances the overall spring theme and adds a delightful crunch.
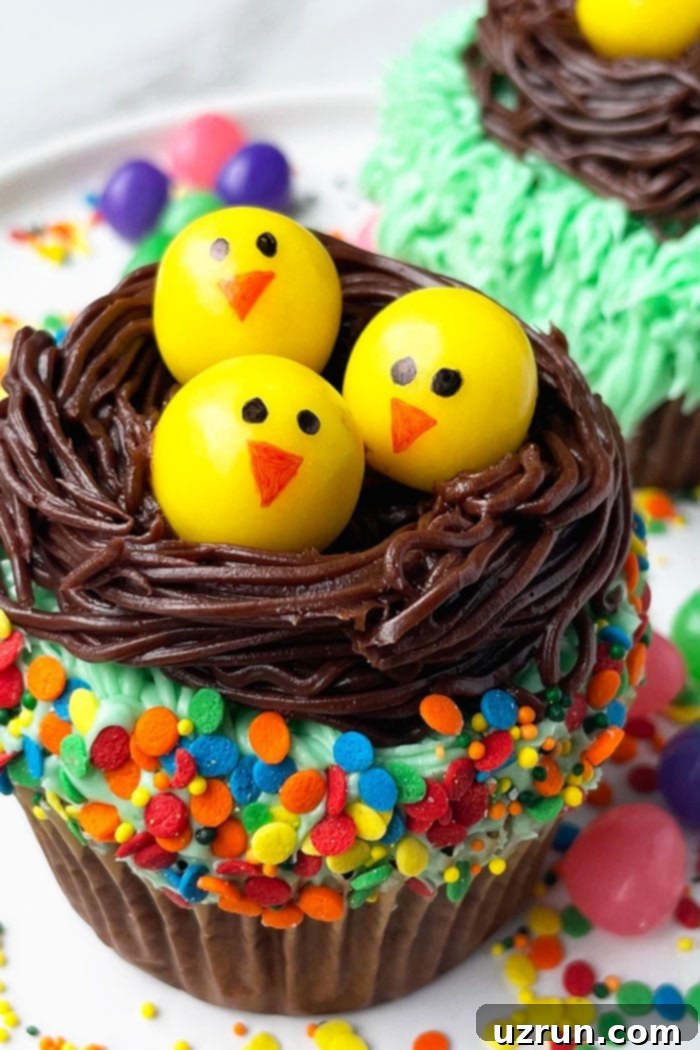
- Pipe a nest with chocolate icing: Prepare a piping bag fitted with a Wilton tip #233 (also known as a grass tip). Fill it with chocolate buttercream frosting. Using gentle pressure, pipe a circular nest shape in the center of each cupcake, creating a textured, cozy bed for your chicks. The grass tip is perfect for achieving that realistic nest look.
- Draw eyes and beaks on yellow candy balls: This is where the chicks truly come to life! Using an edible food marker (black for eyes, orange for beaks), carefully draw small, expressive eyes and tiny triangular beaks on your yellow candy balls. These small details make each chick uniquely adorable.
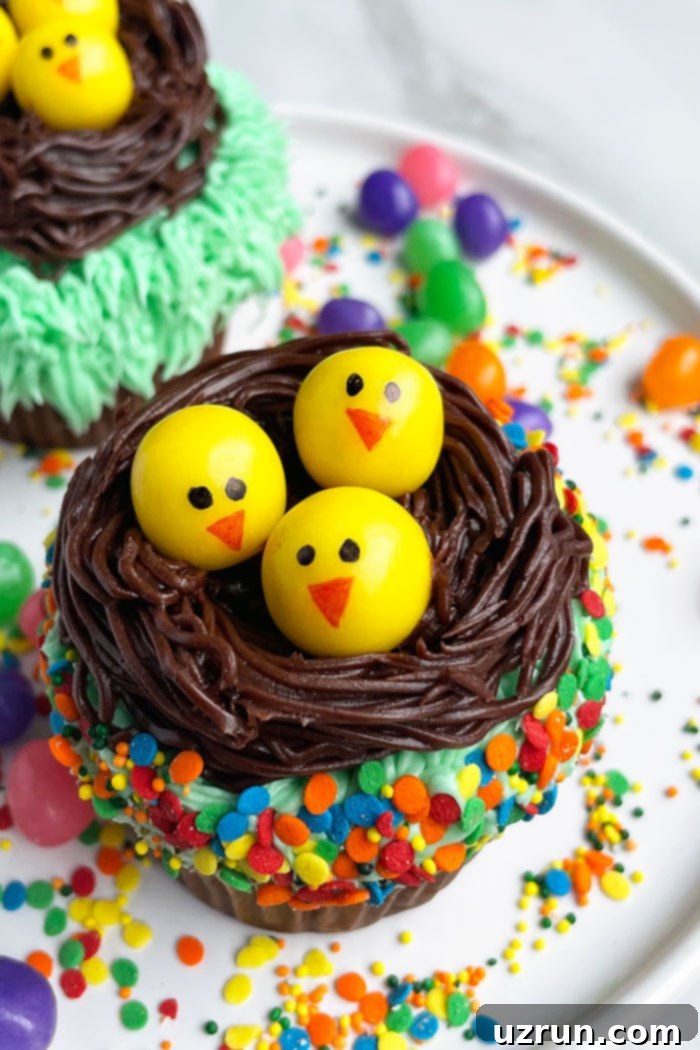
- Add 3 chicks in the nest of each cupcake: Finally, gently place three of your decorated yellow candy chicks into the chocolate nest on each cupcake. Arrange them as if they are peeking out, adding to the charm and creating a truly irresistible Easter treat. Now, they’re ready to be enjoyed!
Creative Variations for Your Easter Cupcakes
While the classic chick and nest design is always a hit, don’t be afraid to get creative and personalize your Easter cupcakes. Here are some fantastic variations to inspire your baking and decorating:
- Experiment with other frosting flavors: The choice of frosting can significantly alter the taste profile of your cupcakes. Instead of classic buttercream, consider the tangy richness of Cream Cheese Frosting, the delicate sweetness of Maraschino Cherry Frosting, the light and fluffy texture of Marshmallow Frosting, or the luxurious taste of White Chocolate Buttercream Frosting. Each offers a unique flavor complement to your chosen cupcake base.
- Consider different cupcake flavors: The base cupcake itself is a canvas for flavor. While chocolate cherry cupcakes are delicious, you could try vibrant Rainbow Cupcakes for a colorful surprise, classic Yellow Cupcakes for a comforting taste, decadent Chocolate Chip Cupcakes, rich Brownie Cupcakes, popular Oreo Cupcakes, or bright and zesty Lemon Cupcakes for a truly spring-like treat.
- Enhance with edible flowers: To add an extra touch of spring elegance, decorate your cupcakes with edible flowers. Options include delicate Fondant Pansy Flowers, intricate Fondant Flowers, classic Royal Icing Flowers, or even charming Buttercream Flowers made with Russian piping tips.
- Create baby robin chicks with blue candy balls: For a different take on the bird theme, use blue candy balls instead of yellow ones. This allows you to create adorable baby robin chicks, reminiscent of a beautiful Pinata Cake (Robin Egg Cake). The subtle color change offers a lovely alternative.
- Skip the side sprinkles for a full nest top: If you prefer a simpler, more rustic nest appearance, you can skip rolling the sides of the cupcake in sprinkles. Instead, pipe the chocolate nest across the entire top surface of the cupcake, creating a grander and more prominent bird’s nest effect.
- Replace the frosting nest with toasted coconut or cookies: For an alternative texture and flavor, consider using toasted shredded coconut as your nest. Its slightly chewy, nutty flavor complements many cupcake bases beautifully. You could even top them with crunchy Birds Nest Cookies for an extra layer of deliciousness and visual interest.
- Fill the cupcakes for a surprise inside: Add an exciting element of surprise by filling your cupcakes. Transform these into Pinata Cupcakes by hollowing out the center and filling it with small candies or sprinkles before adding the frosting and chick decorations. It’s a delightful treat that reveals a secret!
- Try other sprinkles: Don’t limit yourself to colorful round sprinkles. Experiment with different types like classic jimmies, nonpareils, edible glitter, or even themed Easter sprinkle mixes to match your desired aesthetic.
Essential Tips and Techniques for Perfect Cupcakes
Achieving bakery-quality cupcakes at home is all about mastering a few key tips and techniques. These insights will help ensure your Easter chick cupcakes are not only beautiful but also perfectly baked and decorated:
- Always cool cupcakes completely: This cannot be stressed enough! Allowing your cupcakes to cool completely to room temperature is paramount. If you attempt to frost warm cupcakes, the heat will melt the buttercream, causing it to slide right off and ruin your beautiful decorations.
- How to know cupcakes are done? A simple trick is the toothpick test. Insert a clean toothpick into the center of a cupcake. If it comes out clean or with a few moist crumbs attached (but no wet batter), your cupcakes are perfectly baked and ready to be removed from the oven.
- Consider making a bigger batch: If you’re hosting a large Easter gathering or simply want to spread the joy, don’t hesitate to double all the ingredients in your cupcake and frosting recipes. This will yield a larger batch, perfect for a big party or for sharing with friends and neighbors.
- How to make faces on the chicks? The edible markers are your best friend here. For the eyes, use a black edible marker to draw two small dots. For the beak, use an orange or yellow edible marker to draw a tiny triangle. A steady hand and a light touch are all you need to bring these candy chicks to life.
- How to fill a piping bag? Filling a piping bag can be tricky, but there’s an easy method. Place your piping bag, tip-down, into a tall glass or a large measuring cup. Fold the edges of the bag over the rim of the glass. This creates a stable opening, allowing you to easily spoon your icing into the bag without making a mess.
- Use room temperature ingredients: For both cupcakes and especially for buttercream frosting, using room temperature ingredients (like butter, eggs, and milk) helps them emulsify better. This results in a smoother, more uniform batter and a perfectly creamy, lump-free frosting.
- Don’t overmix the batter: Overmixing can lead to tough, dense cupcakes. Once you’ve added the dry ingredients, mix only until just combined. A few small lumps are perfectly fine and often preferred.
- Invest in good cupcake liners: Quality cupcake liners can make a big difference. They prevent your cupcakes from sticking to the pan and often add an extra decorative element that complements your theme.
Storage Solutions for Your Decorated Cupcakes
Proper storage is essential to keep your decorated Easter chick cupcakes fresh and delicious for as long as possible. Here’s how to store them, ensuring they maintain their flavor and aesthetic appeal:
- Refrigerate: If your cupcakes contain perishable fillings or frostings (like cream cheese frosting), or if you simply want to extend their shelf life, store them in a sealed airtight container in the refrigerator for up to 3 days. Ensure the container is large enough so the frosting and decorations aren’t smushed.
- Room temperature: If your cupcakes are decorated with stable buttercream (like American buttercream) and do not have any perishable fillings, they can be stored in a covered cardboard box or an airtight container at cool room temperature for 8-10 hours. Avoid direct sunlight or warm environments, as this can cause the frosting to melt.
- Freeze: For longer storage, you can freeze unfrosted or undecorated cupcakes and frosting separately. Place unfrosted cupcakes in an airtight container or freezer bag for up to 1 month. The frosting can also be stored in an airtight container. Thaw them overnight in the fridge before decorating them according to the instructions. This is a great way to prep ahead for a busy holiday.
- Make ahead instructions: For ultimate convenience, these Easter chick cupcakes can be baked and fully decorated 1 day in advance. This allows you to focus on other holiday preparations, knowing your festive dessert is ready to go. Simply store them appropriately (usually refrigerated if decorated) until serving time.
More Delightful Easter Desserts to Try
Beyond these charming chick cupcakes, the Easter season offers a plethora of opportunities for delicious baking. Explore these other fantastic Easter dessert recipes to complete your holiday feast or simply enjoy a sweet treat:
- Peanut Butter Eggs {4 Ingredients}: A wonderfully simple and incredibly popular no-bake treat that combines creamy peanut butter with a rich chocolate coating, perfect for little hands to help make.
- Easy Lamb Cake {With Marshmallows}: A symbolic and adorable centerpiece for your Easter table, this lamb cake is surprisingly easy to make, even without a special mold, and adorned with fluffy marshmallows.
- Strawberry Linzer Cookies {With Jam}: Delicate and buttery shortbread cookies, traditionally filled with a sweet and tart strawberry jam, making for an elegant and flavorful addition to any dessert platter.
- Easy Key Lime Cake {With Cake Mix}: Bright, zesty, and incredibly moist, this cake uses a convenient cake mix base to deliver the refreshing taste of key lime in a simple-to-prepare dessert.
Recipe
Easter Cupcakes (Chick Cupcakes)
Authored by Abeer Rizvi
Easy Easter cupcakes, homemade with simple ingredients. These chick cupcakes are decorated with buttercream icing nest, colorful sprinkles and yellow candies.
Pin Recipe
Want to Save This Recipe?
Enter your email and we’ll send it directly to your inbox. Plus, get great new recipes from us every week!
By submitting this form, you consent to receive emails from CakeWhiz.
Ingredients
- 24 Chocolate cherry cupcakes
- 2 cups American buttercream frosting (Colored green)
- 1 cup Colorful sprinkles
- 2 cups Chocolate buttercream frosting
- 3 cups Yellow candy balls
Instructions
- Bake cupcakes and allow them to cool completely.
- Use a spatula to spread green icing on top of each cupcake.
- Roll the sides of each cupcake in a dish, filled with sprinkles.
- Fill a piping bag with chocolate icing and attach Wilton’s tip # 233.
- Pipe a circular nest in the center of each cupcake.
- Draw eyes and beaks on yellow candy balls, using edible markers.
- Stick 3 chicks in the nest of each cupcake. Enjoy!
Notes
- Read all my tips above for best results.
- Leftovers can be stored in a sealed container in the fridge for up to 3 days.
Nutrition
Carbohydrates: 125 g
Protein: 26 g
Fat: 74 g
Saturated Fat: 16 g
Polyunsaturated Fat: 24 g
Monounsaturated Fat: 30 g
Sodium: 3633 mg
Potassium: 1469 mg
Fiber: 11 g
Sugar: 188 g
Vitamin A: 13 IU
Calcium: 650 mg
Iron: 20 mg
An automated tool is used to calculate the nutritional information. As such, I cannot guarantee the accuracy of the nutritional information provided for any recipe on this site.
Tried this recipe?
Leave a comment below or rate and tag @cakewhiz on social media!
