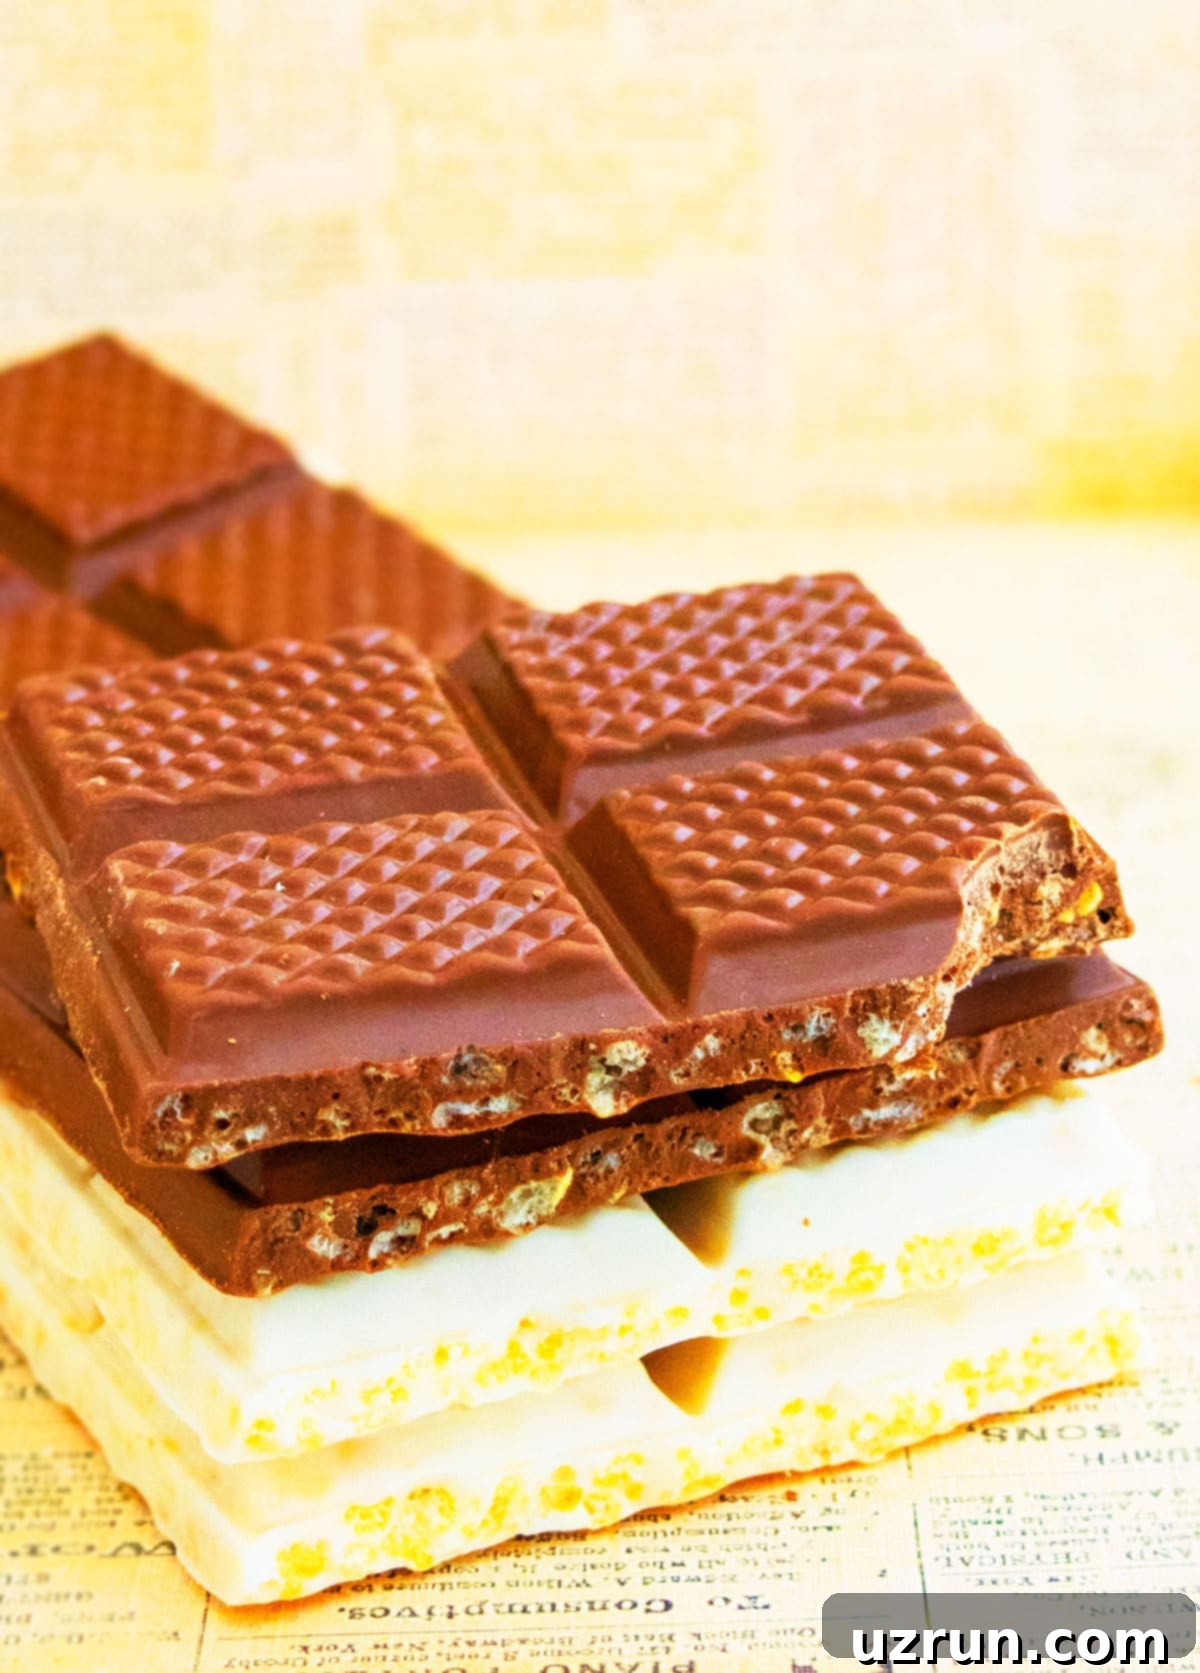
Easy No-Bake Chocolate Peanut Butter Crunch Bars: A 3-Ingredient Delight
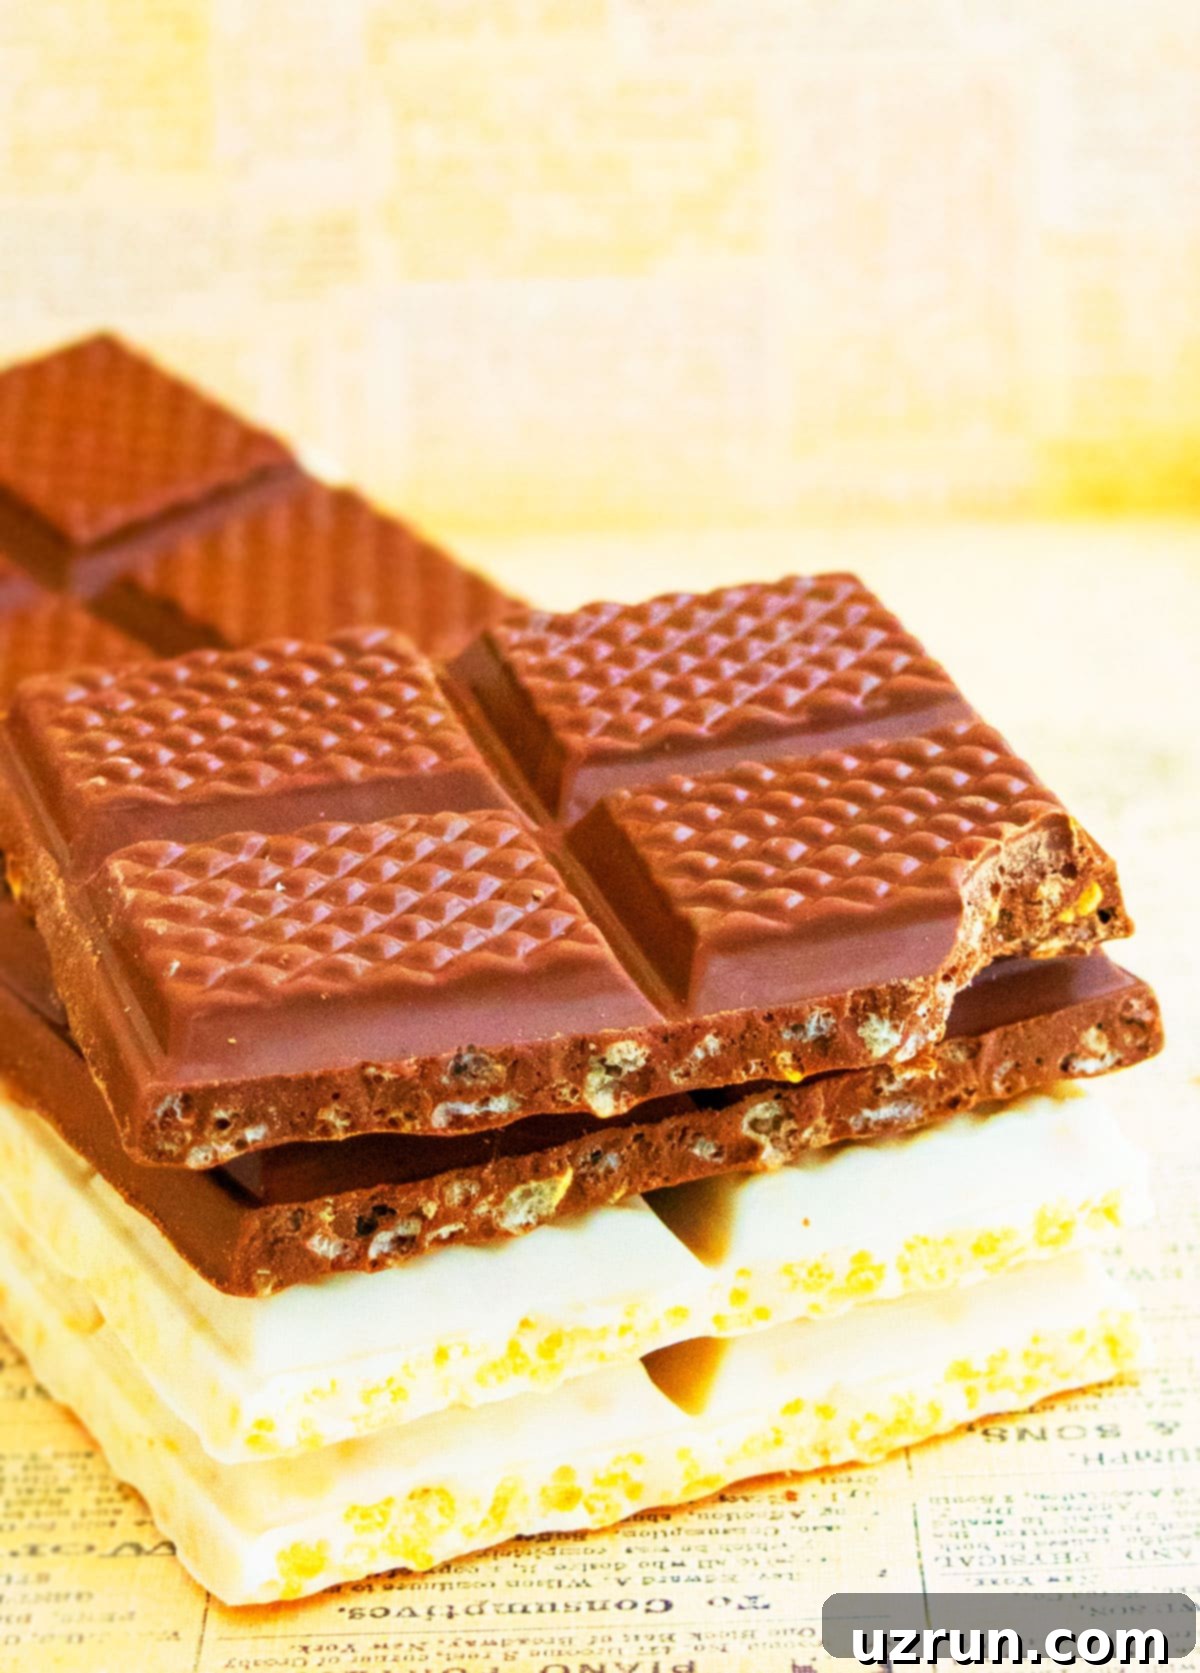
There’s something incredibly satisfying about a dessert that comes together in minutes, requires no oven, and tastes absolutely divine. These No-Bake Chocolate Crunch Bars are precisely that – a simple, homemade treat made with just three core ingredients. Perfect for satisfying a sweet tooth, whipping up a quick snack, or even preparing a thoughtful homemade gift, these peanut butter candy bars are versatile and always a hit. Whether you prefer the rich depth of dark chocolate, the creamy sweetness of milk chocolate, or the distinct flavor of white or semisweet, this recipe adapts effortlessly to your preferences, promising a delightful crunch in every bite.
*Thank you Vital Proteins for sponsoring today’s post so that I could share this recipe with all of you. As always, all opinions are mine.*
I genuinely can’t pinpoint the exact moment I started making these delightful bars, but they’ve become a staple in my kitchen for good reason. There’s almost always a batch chilling in my fridge, ready to rescue me from any sudden sweet cravings. Beyond being a personal favorite, this recipe holds a special place in my heart as it was one of the first few dishes I ever made with my son when he was just a little boy. It’s a fantastic way to get kids involved in the kitchen without the complexities of baking or dangerous hot ovens. These bars share the same glorious simplicity as my Homemade Chocolate Bars (Dark, Milk, White), my indulgent Chocolate Chip Cookie Dough Bars, and even those surprisingly addictive Chocolate Covered Potato Chips. They prove that you don’t need a long ingredient list or complicated steps to create something truly delicious and memorable.
Why You’ll Fall in Love with These Chocolate Crunch Bars
These aren’t just any chocolate bars; they’re a revelation for anyone seeking a quick, satisfying, and utterly delicious treat. Here’s why these no-bake wonders deserve a permanent spot in your recipe collection, promising a delightful experience for both the maker and the eater:
- Effortlessly Easy: With only three primary ingredients and absolutely no oven required, this recipe is perfect for beginners, busy parents, or anyone short on time but craving something sweet. The steps are simple and intuitive.
- Lightning Fast: From the initial mixing to the final moment of setting, you can have a fresh batch of homemade chocolate crunch bars ready to enjoy in approximately 30 minutes, including a brief chill time. Instant gratification guaranteed!
- Customization King: The basic recipe serves as an incredible blank canvas. Easily swap out different types of chocolate, experiment with various nut or seed butters, and integrate a wide array of mix-ins to craft endless flavor combinations tailored to your taste.
- Kid-Friendly Fun: The straightforward nature of this recipe makes it an ideal culinary project for cooking with children. It’s a safe and engaging way to introduce them to the joy of making food.
- Perfect for Any Occasion: Whether you need a casual afternoon snack, an impressive dessert for unexpected guests, a delicious contribution to a potluck, or a thoughtful homemade gift for friends and family, these bars fit every bill with their universal appeal.
- Always a Crowd-Pleaser: The irresistible texture and flavor combination of smooth, rich chocolate and airy, crispy cereal appeals to nearly everyone, making them a guaranteed hit at any gathering.
Essential Ingredients for Your Perfect Crunch Bars
The beauty of this incredibly simple recipe lies in its minimal ingredient list, yet each component plays a crucial role in creating the perfect no-bake chocolate crunch bar. Paying attention to the quality of these few ingredients will significantly elevate your final treat, transforming it from good to truly exceptional.
- Chocolate: This is the very foundation of your bars, so choosing a good quality chocolate is paramount. The better the chocolate, the richer and more indulgent your bars will taste. You have the freedom to select your favorite type:
- Dark Chocolate: Opt for a variety with 60-75% cacao for a deep, intense flavor with less sweetness, appealing to those who prefer a more sophisticated profile.
- Semisweet Chocolate: A wonderfully balanced option, offering a rich chocolatey taste without being overly sweet, making it a universal favorite.
- Milk Chocolate: For a classic, creamy, and distinctly sweeter profile that brings a comforting, often nostalgic, flavor.
- White Chocolate: A sweeter, buttery, and vanilla-infused option for a different flavor dimension and a beautiful contrast.
Ensure your chosen chocolate is melted smoothly and evenly, as this will be key to coating the cereal effectively.
- Rice Krispies Cereal: This ingredient is literally where the “crunch” in “Chocolate Crunch Bars” comes from! These iconic puffed rice cereals provide that delightful, airy, and distinct crispness that creates a wonderful textural contrast with the smooth chocolate. It’s crucial not to substitute with heavier, denser cereals, as they will not yield the same light and satisfying crunch.
- Peanut Butter: We recommend using smooth, creamy peanut butter for the best consistency and ease of mixing. It acts as a binding agent, helping to hold the cereal and chocolate together, adds a wonderfully creamy texture, and, of course, contributes that irresistible nutty flavor that is a classic pairing with chocolate. While creamy is preferred for its smooth incorporation, a natural peanut butter (ensure it’s stirred very well to combine oils) can also work, though it might make the mixture slightly thicker to handle.
- Protein Powder (Optional): As kindly highlighted by Vital Proteins, a scoop of protein powder can be incorporated for an added nutritional boost. I personally used their vanilla coconut flavored collagen peptides, which not only enhanced the health benefits but also imparted a lovely subtle aroma and additional flavor to the bars. If you don’t have protein powder on hand, or simply prefer to stick to the core three ingredients, feel free to omit it. It will not affect the structural integrity or the primary delicious taste of the bars.
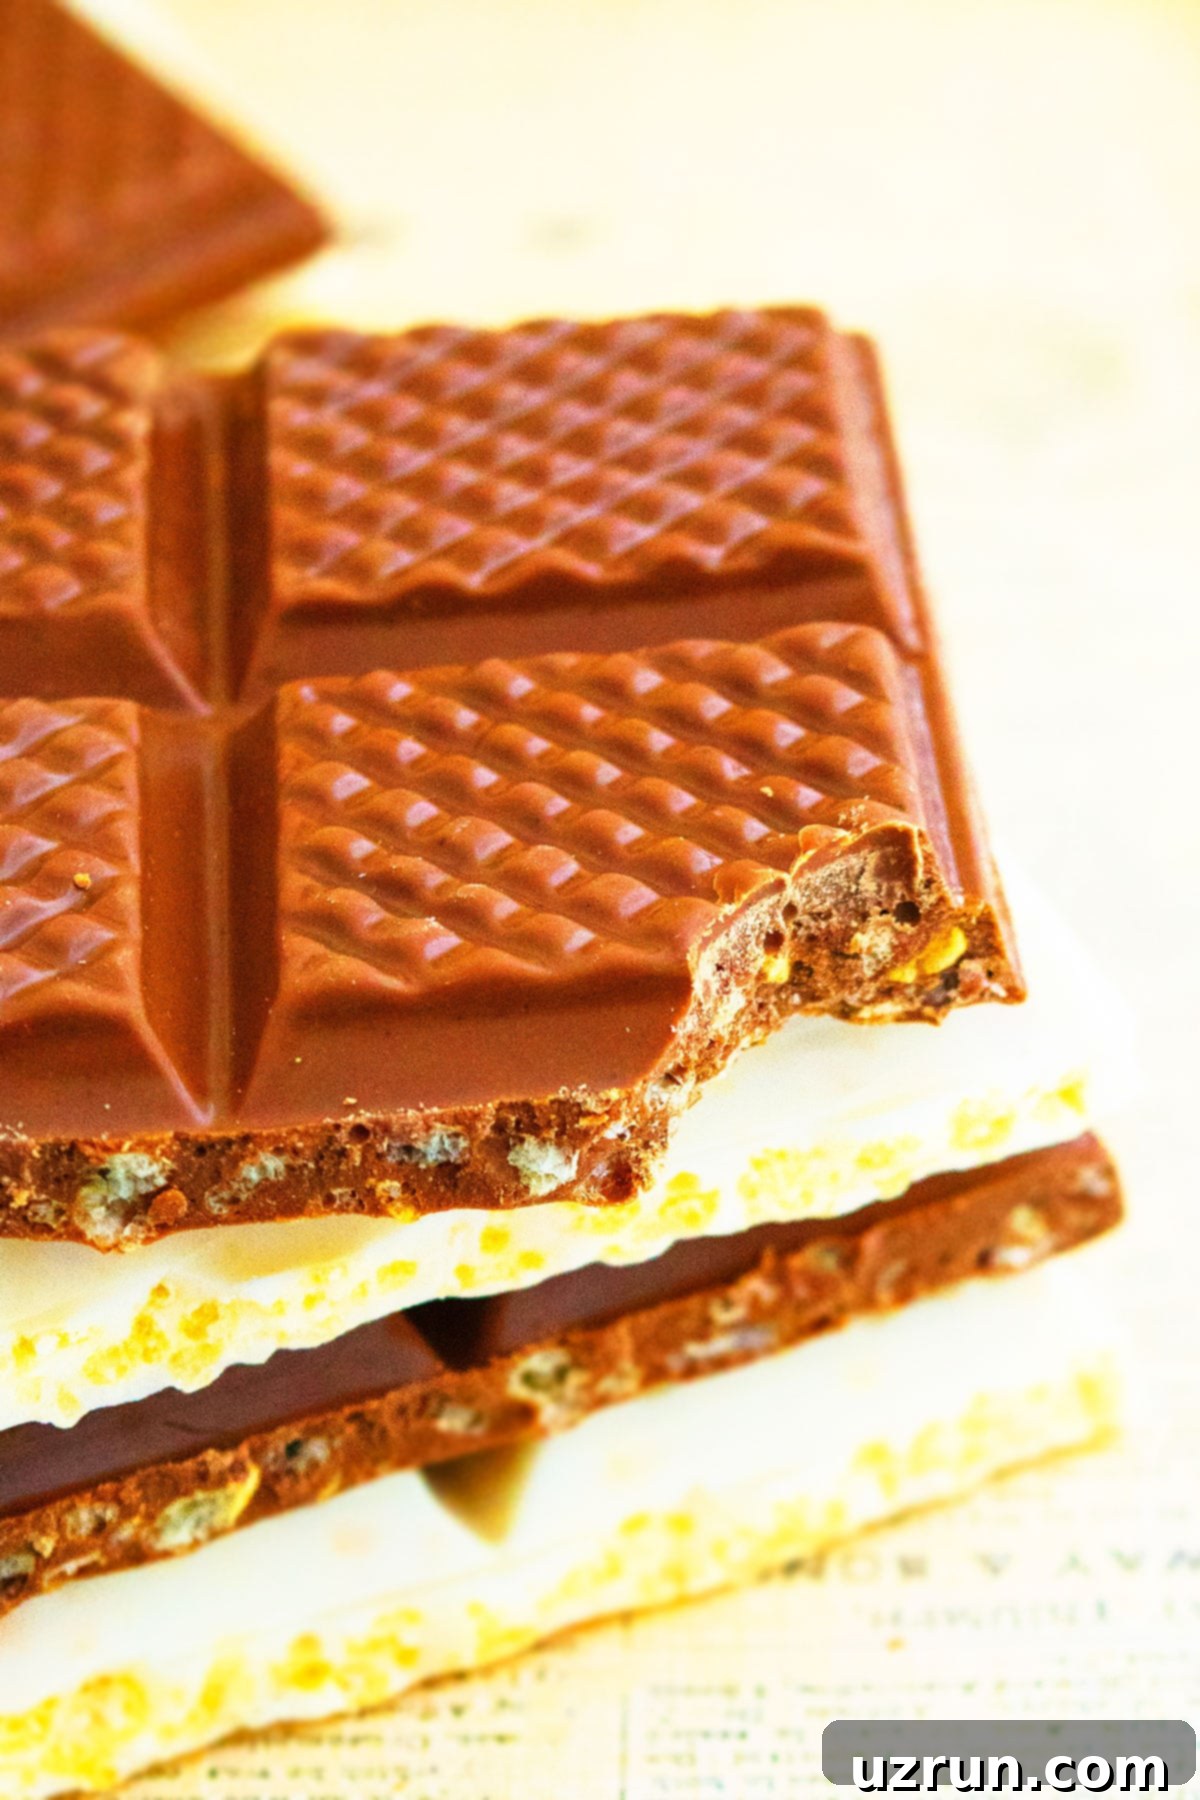
Creative Variations to Customize Your Crunch Bars
While the classic chocolate and peanut butter combination in these crunch bars is undeniably delicious and universally loved, the recipe is incredibly adaptable. This versatility allows you to unleash your culinary creativity and experiment with exciting variations to craft your unique signature treat, suitable for any preference or dietary need:
- Experiment with Different Chocolates: The type of chocolate used profoundly influences the final flavor profile and sweetness of your bars:
- Dark Chocolate: For a more sophisticated, intensely chocolatey, and less sweet bar, perfect for adult palates or those who appreciate a deeper cacao flavor.
- Semisweet Chocolate: A perennially popular choice that offers a perfect balance between sweetness and rich chocolate notes, making it a crowd-pleaser.
- White Chocolate: Creates a sweeter, creamier bar with a distinct vanilla note. Consider enhancing it with a few drops of peppermint extract for a festive, holiday-themed delight!
- Vegan Version: It’s incredibly easy to make these delicious bars suitable for a vegan diet. Simply ensure you select high-quality dairy-free or vegan chocolate chips/bars. Additionally, omit any collagen peptides or other animal-derived protein powders, as most peanut butters are naturally vegan.
- Alternate Nut and Seed Butters: If peanut allergies are a concern, or if you simply wish to explore new flavor dimensions, a variety of other nut or seed butters work beautifully in this recipe:
- Almond Butter: Offers a milder, subtly sweeter, and more delicate nutty flavor.
- Pistachio Butter: For a truly gourmet touch and a unique, slightly earthy, and vibrant taste.
- Cashew Butter: Known for its exceptional creaminess and a very subtle, sweet flavor.
- Sunflower Seed Butter (SunButter): An excellent and safe nut-free alternative for individuals with severe nut allergies, offering a distinct and pleasant flavor.
For a simpler, albeit slightly firmer and less chewy, chocolate crunch, you can even omit the nut butter entirely.
- Exciting Mix-Ins: Elevate both the texture and flavor of your bars with additional ingredients stirred into the melted chocolate mixture before it chills:
- Chopped Nuts: Almonds, walnuts, pecans, or additional chopped peanuts provide an extra layer of crunch and intensified nutty flavor.
- Shredded Coconut: Both sweetened and unsweetened shredded coconut can add a delightful chewiness and a tropical twist.
- Finely Chopped Dried Fruits: Cranberries, golden raisins, or finely diced apricots can introduce a lovely chewiness and a burst of fruitiness.
- Mini Marshmallows: For a fun, rocky road-inspired crunch bar, adding softness and sweetness.
- Sprinkles: A fantastic way to add a festive pop of color, especially for birthdays, holidays, or themed parties.
- Crunchy Ice Cream Topping: Don’t limit yourself to bars! Once the chocolate crunch mixture is set, simply chop it into smaller, irregular pieces. These make an absolutely incredible and irresistible crunchy topping for ice cream sundaes, yogurt parfaits, or even as a unique garnish for pancakes or waffles!
- Healthier Cereal Options: For a slightly healthier take on these delightful treats, consider substituting traditional Rice Krispies with alternative puffed grains:
- Puffed Quinoa: Adds a delicate, nutty crunch and provides a beneficial boost of protein and fiber.
- Puffed Rice (unsweetened): A great alternative if you are looking to manage sugar content or prefer a more natural, whole-grain cereal option.
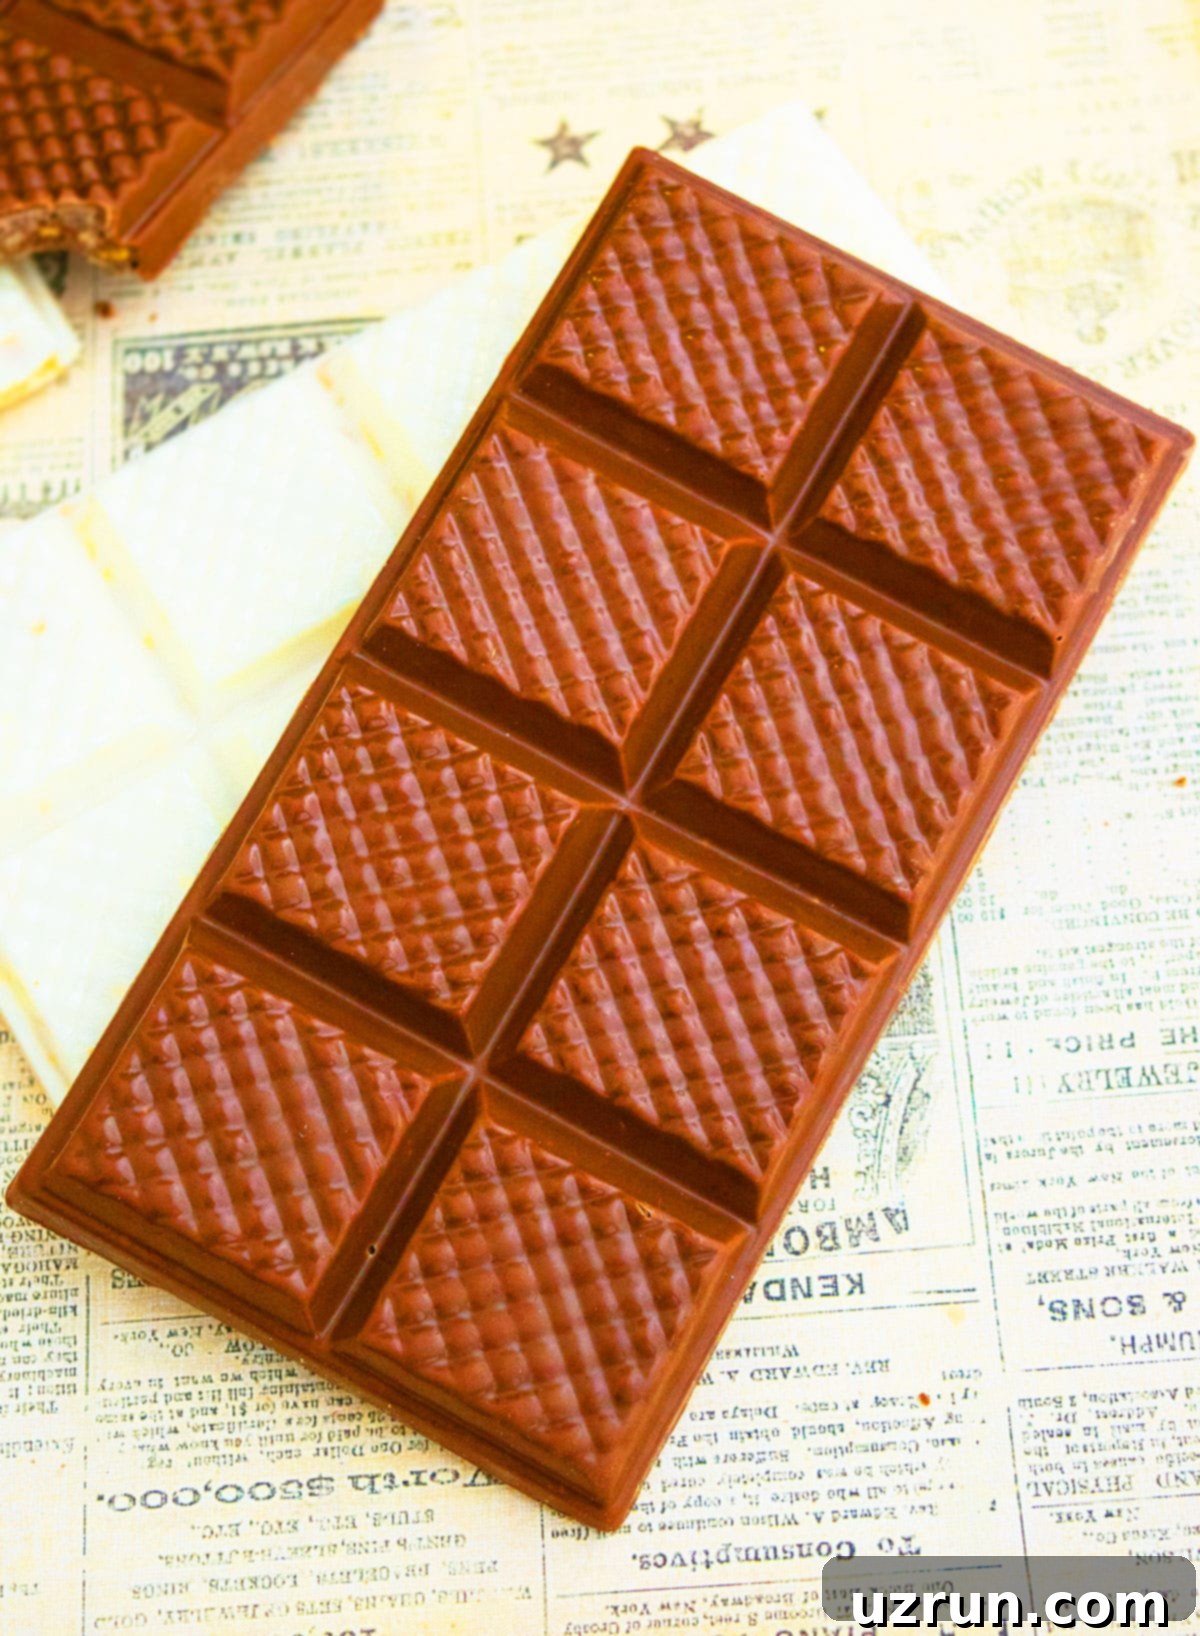
Crafting Your Easy Chocolate Crunch Bars from Scratch: A Simple Guide
Making these no-bake chocolate crunch bars is incredibly straightforward, proving that you don’t need extensive culinary skills to create a show-stopping dessert. Follow these clear, step-by-step instructions for perfect, crispy, and delicious results every single time:
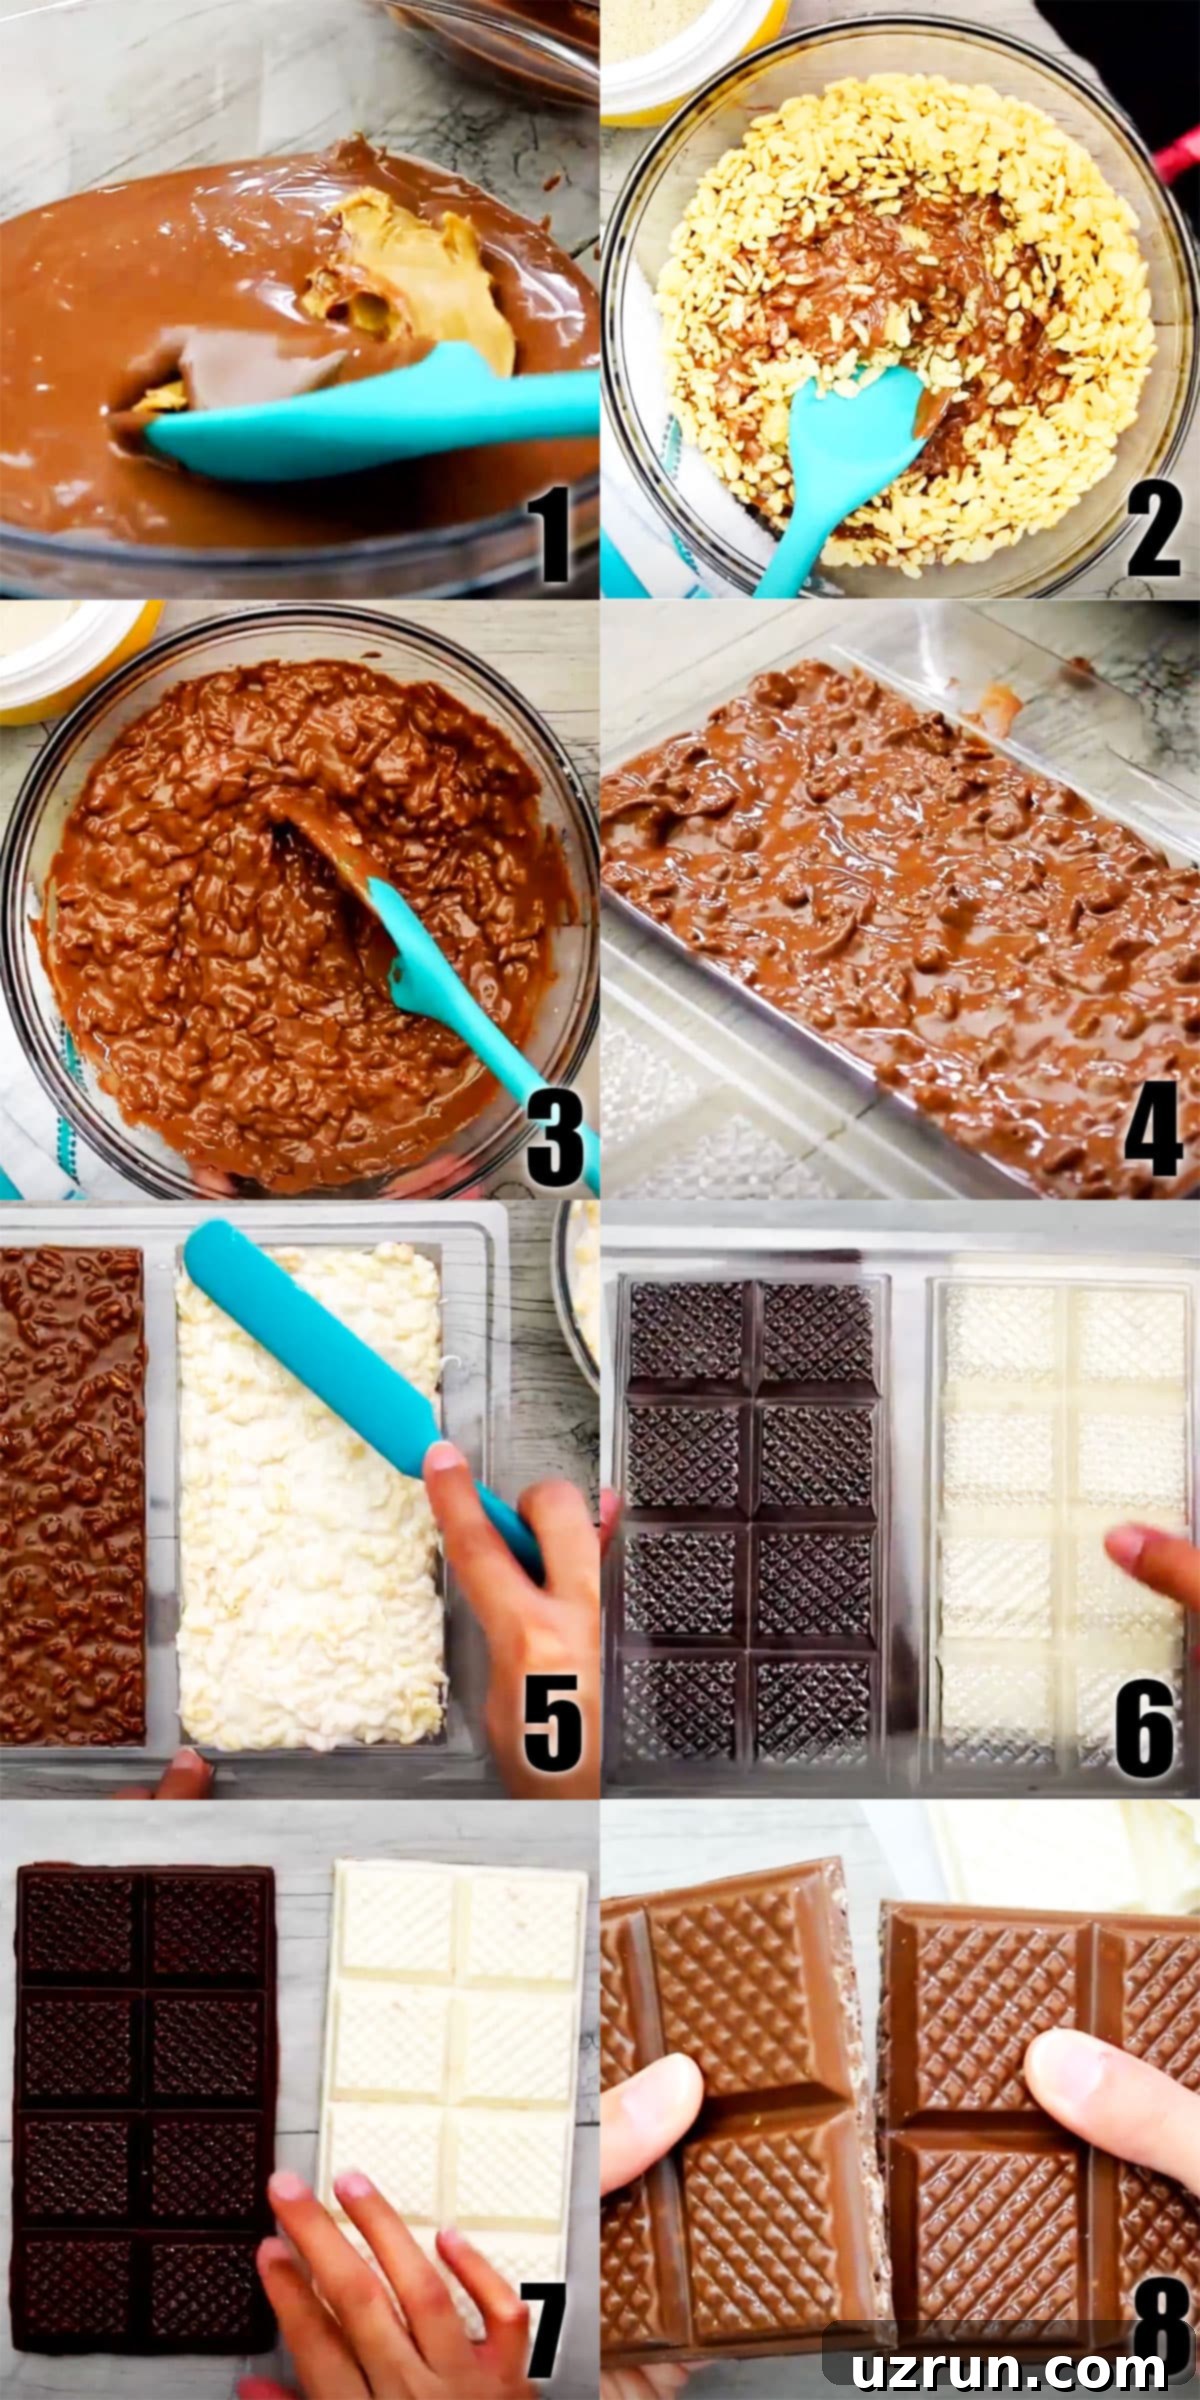
- Prepare the Chocolate Mixture: In a medium to large mixing bowl, combine your perfectly melted chocolate with the creamy peanut butter. Stir them together using a spatula or spoon until you achieve a wonderfully smooth, homogenous mixture. The peanut butter will help thicken the chocolate slightly and impart its distinct nutty flavor, creating a rich base.
- Incorporate Rice Krispies: Gently and gradually fold the Rice Krispies cereal into your luscious chocolate and peanut butter mixture. Adding it slowly helps prevent the cereal from clumping and ensures a more even distribution throughout.
- Mix Thoroughly: Continue mixing until every single piece of cereal is beautifully and thoroughly coated in the chocolate mixture. This crucial step ensures an even distribution of flavor and that delightful crunch in every single bite. Be gentle but persistent to achieve full coverage without crushing the cereal.
- Shape and Spread: Carefully transfer the coated mixture into your chosen molds. This could be specialized candy bar molds, a small baking dish lined with parchment paper, or even fun cookie cutters for unique shapes. Use a spatula or the back of a spoon to spread the mixture evenly into the molds and press it down firmly. This compactness is vital for helping the bars hold their shape once set. Tap the mold gently on the counter a few times to release any trapped air bubbles and ensure a smooth top.
- Chill to Perfection: Place your filled molds or baking dish into the refrigerator. Chilling is an essential step that allows the chocolate to set completely and firm up, which typically takes about 20-30 minutes. This is a crucial phase for achieving the perfect firm, non-sticky texture that defines these crunch bars.
- Careful Removal: Once the chocolate is thoroughly chilled and feels firm to the touch, it’s time to release your creations. If using silicone molds, gently bend them back and forth to loosen the edges, then carefully pop the chocolate bars out. If you used a lined baking dish, simply lift the parchment paper out and transfer the slab to a cutting board.
- Portion and Serve: Separate the chocolate bars into your preferred serving sizes. You can cut them into large, indulgent bars, or smaller, bite-sized squares perfect for snacking or sharing.
- Enjoy and Share: Now comes the most rewarding part – savoring your homemade chocolate crunch bars! Their irresistible combination of smooth chocolate and satisfying crunch makes them incredibly addictive. You’ll likely want to share them with friends and family (if you can manage to resist eating them all yourself, that is!).
Expert Tips for Flawless Chocolate Crunch Bars
Achieving perfectly set and delicious no-bake chocolate crunch bars is remarkably easy when you keep a few simple yet effective techniques in mind. These pointers will help you ensure the best results, whether you’re a novice or an experienced home cook:
- No Need to Grease Molds: Unlike many conventional baking recipes that require greasing, you will generally find that there’s no need to grease your candy bar molds for these particular treats. The inherent fat content present in both the chocolate and the peanut butter typically provides enough lubrication to prevent sticking, allowing the bars to release effortlessly once they have fully set. However, if you’re using a baking dish to make a larger slab, lining it with parchment paper is always a wise decision for the easiest, no-fuss removal.
- Refrigeration is Key, Avoid the Freezer: While it might be tempting to accelerate the chilling process by placing your freshly made bars in the freezer, it’s a temptation best resisted! A sudden and drastic drop in temperature can unfortunately cause a phenomenon known as “chocolate bloom.” This manifests as ghastly white or gray streaks or spots appearing on the surface of your chocolate. While completely harmless to eat, bloom significantly detracts from the visual appeal and can slightly alter the smooth texture. The refrigerator, on the other hand, offers a slower, more consistent, and gentle chill, which is ideal for achieving beautifully smooth, shiny, and perfectly firm chocolate bars.
- Patience for Setting: This cannot be emphasized enough: do not, under any circumstances, attempt to remove the chocolate from its mold or cut into portions until the mixture has solidified completely and is firm to the touch. Premature removal will almost certainly lead to a sticky, crumbling, and frustrating mess rather than perfectly formed, elegant bars. Trust the chilling process – usually 20-30 minutes is ample time, but feel free to extend it if your kitchen is warm or if you used a thicker mixture.
- Scaling the Recipe with Ease: This recipe is incredibly adaptable and forgiving, making it perfect for preparing larger quantities for events, parties, or for creating thoughtful homemade gifts. It can easily be doubled or even tripled without any issues or modifications to the ratios. Just ensure you have adequately larger molds or baking dishes and sufficient refrigerator space to accommodate the increased volume.
- Mastering Chocolate Melting: Melt your chocolate slowly and with great care. The best methods include using a double boiler over gently simmering water or employing a microwave in short, controlled 15-second intervals. After each interval in the microwave, stir the chocolate thoroughly with a spatula to distribute the heat evenly. This prevents burning and helps achieve a perfectly smooth, glossy, and lump-free consistency. Overheated chocolate can seize, becoming thick and grainy, which will compromise the texture of your bars.
- Firm Pressing for Stability: When you transfer and spread the chocolate-cereal mixture into your molds or baking dish, it’s important to press it down firmly and evenly. This compaction ensures that the bars are dense, hold their shape exceptionally well once set, and do not crumble or fall apart when you cut or handle them. A well-pressed bar has a superior, satisfying bite.
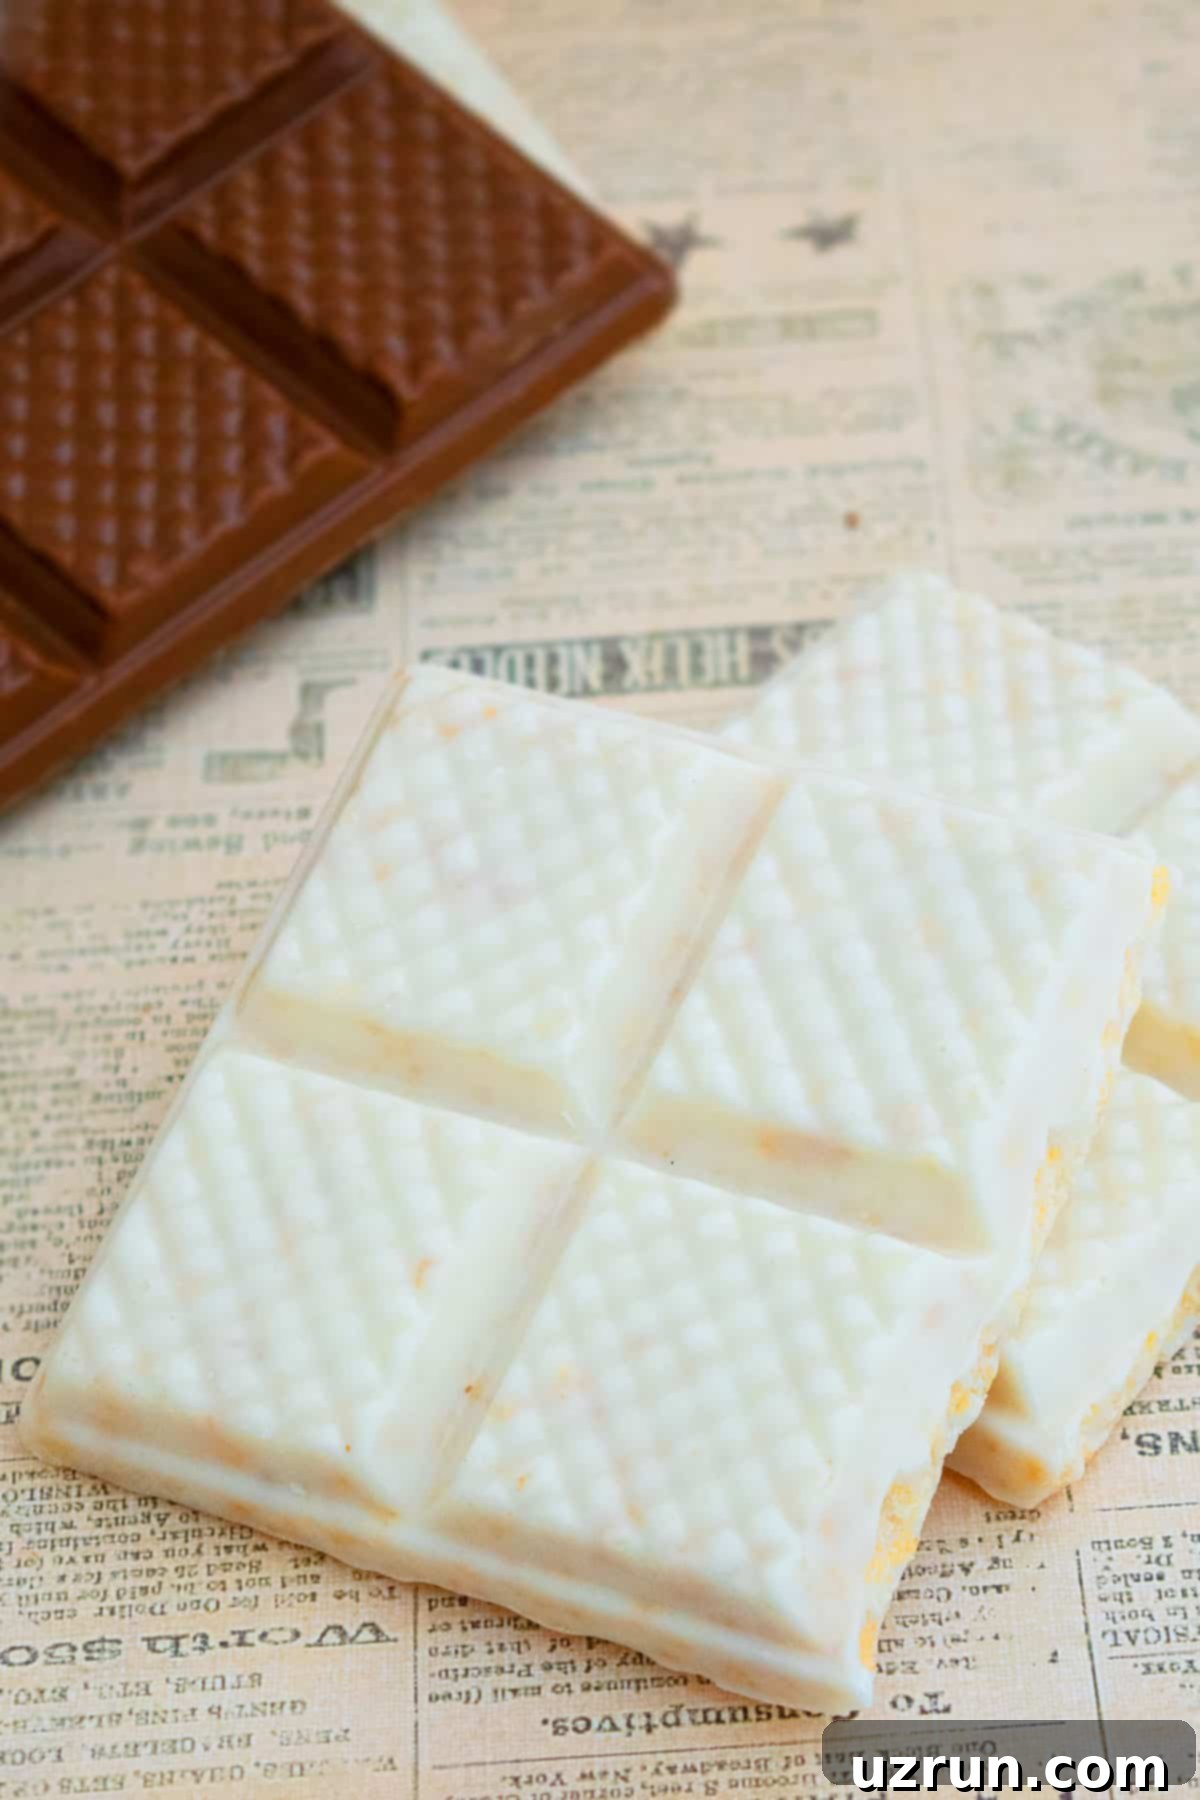
On a related note, I recently had the distinct pleasure of trying the vanilla and coconut flavored Vital Proteins collagen peptides. I must say, I was genuinely impressed! Not only is it packed with beneficial nutrients that are excellent for overall body wellness, but its aroma and taste are absolutely incredible – truly a delightful sensory experience. I found myself wishing my entire home could smell that good all the time. Adding a scoop to this recipe was a fantastic way to subtly boost its nutritional profile without compromising on the delicious flavor or appealing texture of the bars, making these delightful treats a little bit better for you.

Frequently Asked Questions About Chocolate Crunch Bars
Got questions about making these delightful no-bake chocolate crunch treats? Here are some common queries and their detailed answers to help you along the way and ensure your success:
The secret to perfectly melted chocolate lies in low heat and patience. The safest methods are a double boiler or the microwave. For the microwave, place your chocolate in a microwave-safe bowl and heat it in very short bursts – typically 15-second increments. After each interval, remove the bowl and stir the chocolate thoroughly with a rubber spatula, even if it doesn’t look fully melted. The residual heat will continue to melt the chocolate. Continue this process until the chocolate is smooth and fully melted, but not overheated. Overheating can cause it to burn, seize (become thick and grainy), or develop a chalky texture.
The most crucial step is to ensure the chocolate is completely set and firm throughout. Attempting to demold it too soon will almost certainly lead to breakage or deformation. Once thoroughly chilled and hardened, if you’re using flexible silicone molds, gently bend the molds back and forth to loosen the edges of the bars. Then, tip them upside down over a clean surface (such as a sheet of wax paper or a cutting board) and gently tap the bottom until the chocolate bars fully release. For harder plastic molds, a slightly firmer tap might be necessary, but always handle with care to avoid cracking the chocolate.
You have several excellent options for shaping these delicious bars. Flexible silicone candy bar molds are fantastic because their pliability makes demolding incredibly easy. You can find a wide variety of designs, patterns, and sizes of these molds readily available on Amazon, at craft stores like Hobby Lobby, or even at larger retailers like Walmart, typically ranging in price between $3-$5. If specialized candy bar molds aren’t available, a simple square (like an 8×8 inch) or rectangular baking dish (such as a 9×5 inch loaf pan) lined with parchment paper works perfectly. Once the chocolate is set, you can simply lift the parchment paper and the hardened slab out of the dish, then cut it into your desired bar shapes.
Absolutely! While smooth peanut butter is typically recommended for its consistent texture, which makes mixing easier and yields a smoother final product, crunchy peanut butter can certainly be used. If you opt for crunchy, be aware that it will introduce an additional layer of nuttiness and a more varied texture to the bars. Many people actually prefer this extra crunch! The overall mixture might be slightly thicker and a little harder to spread evenly into the molds, but the end result will still be delicious.
These versatile bars are incredibly easy to customize for any holiday or special occasion! For Christmas, try adding a few drops of peppermint extract to your melted chocolate, then drizzle the set bars with white chocolate and sprinkle with crushed candy canes. For Halloween, you could use orange-tinted white chocolate for a spooky hue, or embed candy eyeballs into the top. For Valentine’s Day, use heart-shaped molds and decorate with pink and red sprinkles. The possibilities are truly endless – let your imagination guide you!
Storage Guidelines for Your Homemade Crunch Bars
Proper storage is essential to ensure your delicious chocolate crunch bars remain fresh, crispy, and delightful for as long as possible. Following these guidelines will help you maintain their perfect texture and flavor:
- Make Ahead Convenience: These no-bake bars are truly an excellent make-ahead treat. They are ideal for busy weeks, upcoming parties, packed lunchboxes, or simply for having a convenient, satisfying snack readily available. They hold up exceptionally well, maintaining their crispness and delicious flavor for a considerable amount of time.
- Room Temperature Storage: In cooler climates or during colder months, you can comfortably store these bars in a sealed airtight container on your kitchen counter for up to 1 week. However, it’s crucial to exercise caution in warm or humid environments, as the chocolate will undoubtedly melt and become soft, losing its desired firm texture. If your home is prone to warmth, especially during summer, always opt for refrigeration to preserve their quality.
- Refrigerate for Longer Freshness: For optimal freshness, to ensure the firmest texture, and to prevent any melting, store any leftover chocolate crunch bars in a sealed airtight container in the refrigerator for up to 1 week. This method is particularly recommended for bars made with milk or white chocolate, as these types tend to soften more easily at room temperature compared to dark chocolate.
- Freezing for Extended Shelf Life: If you’ve prepared a large batch or simply wish to enjoy these delectable bars over an extended period, you’ll be pleased to know they freeze beautifully! To freeze, place the bars in a single layer in an airtight freezer-safe container, or wrap them individually in plastic wrap before transferring them to a container. They will maintain their quality in the freezer for up to 1 month. When you’re ready to enjoy them, thaw the bars in the refrigerator for a few hours or at room temperature for approximately 15-30 minutes until they reach your preferred eating temperature and texture.
More Irresistible Homemade Candies to Try
If you’ve thoroughly enjoyed the simplicity, speed, and deliciousness of these no-bake chocolate crunch bars, then you’re undoubtedly in for a treat with more delightful recipes! Here are additional fantastic homemade candy recipes from CakeWhiz that are just as easy and wonderfully satisfying to prepare, perfect for expanding your repertoire of sweet delights:
- Easy Chocolate Blueberry Truffles: These elegant yet surprisingly simple truffles are bursting with a harmonious blend of fruity blueberry and rich chocolate flavor, perfect for a sophisticated touch.
- White Chocolate Fudge (2 ingredients): Believe it or not, you can create incredibly rich, creamy, and velvety fudge with just two core ingredients! This recipe is a testament to culinary magic.
- Chocolate Date Balls: A wonderfully healthier and naturally sweet option, these date balls are not only delicious but also packed with energy, making them a guilt-free indulgence.
- Peanut Brittle (Microwave): Achieve that classic, satisfying brittle snap and sweet-nutty flavor without the need for a candy thermometer, all conveniently made right in your microwave.
- Easy Buckeyes (Peanut Butter Balls): A timeless and beloved combination of creamy peanut butter and rich chocolate, these delightful balls are an absolute classic and perfect for any occasion or craving.
Recipe Card
Easy Chocolate Crunch Bars (With Peanut Butter)
Abeer Rizvi
Pin Recipe
Want to Save This Recipe?
Enter your email & I’ll send it to your inbox. Plus, get great new recipes from me every week!
By submitting this form, you consent to receive emails from CakeWhiz
Ingredients
- 1 ½ cups Chocolate Melted, Semisweet, dark or white chocolate
- 1 tablespoon Peanut butter Creamy
- 1 cup Rice krispies cereal
- 1.5 tablespoon Protein powder Optional, I used Vital Proteins vanilla coconut flavor
Instructions
-
In a mixing bowl, add melted chocolate, peanut butter, rice cereal and a scoop of collagen peptides. Mix everything together.
-
Dump this mixture into candy bar molds and spread evenly with a spatula. Tap the mold a few times on the table to remove all air bubbles.
-
Chill in the fridge for 20-30 minutes or until chocolate becomes firm.
-
Flip the mold onto a sheet of wax paper and tap the top slightly until the chocolate bars fall out. Enjoy!
Video
Notes
- Cereal Substitutions: While Rice Krispies provide the iconic crunch, feel free to experiment with other puffed cereals like puffed quinoa, cornflakes, or even crushed pretzels for a salty-sweet twist.
- Flavor Enhancers: Elevate the taste with a few drops of extracts such as vanilla, almond, or peppermint. You can also add a pinch of cinnamon or a tiny bit of orange or lemon zest for a subtle fragrant lift.
- Texture & Taste Boosters: For an even richer experience, incorporate chopped nuts (like pecans, walnuts, or almonds), dried fruits (cranberries, cherries, or finely diced apricots), or shredded coconut into the chocolate mixture for added flavor and texture.
- Comprehensive Guidance: Remember to review the “Tips and Techniques” and “Variations” sections earlier in this article for more in-depth advice on customization and successful preparation.
- Optimal Storage: For the best quality, store your leftover chocolate crunch bars in an airtight container. They will remain fresh at room temperature for up to 3 days, or significantly longer – up to 1 week – when kept in the refrigerator.
Nutrition
An automated tool is used to calculate the nutritional information. As such, I cannot guarantee the accuracy of the nutritional information provided for any recipe on this site.
