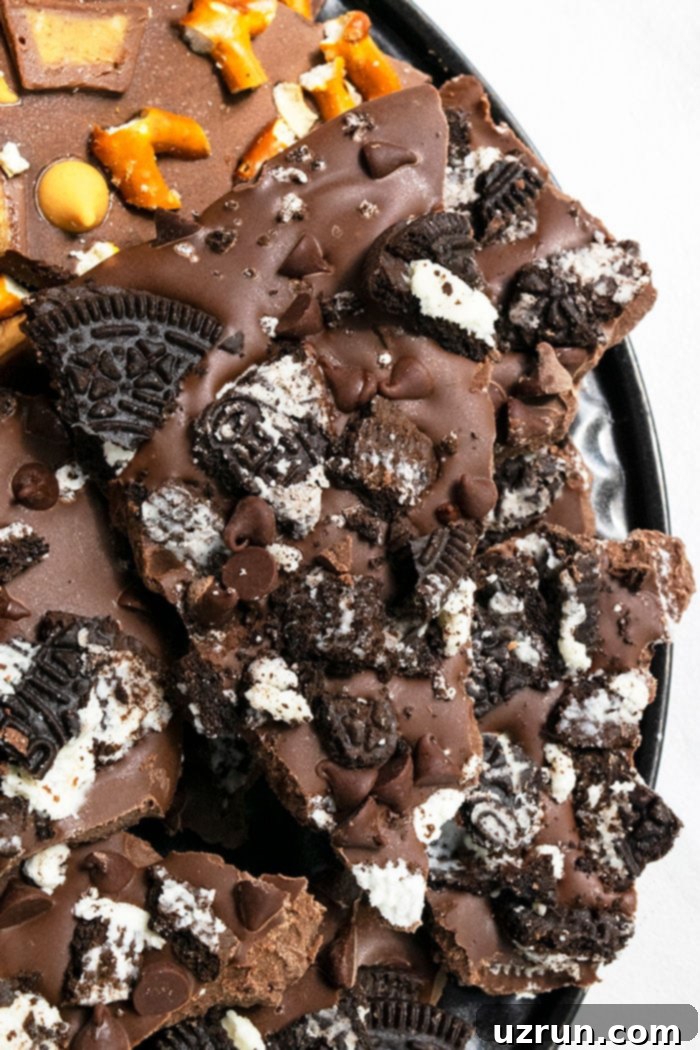
Easy Homemade Chocolate Bark: The Ultimate Guide to Simple & Delicious Treats
Discover the delightful world of homemade chocolate bark, a remarkably simple yet incredibly versatile dessert perfect for any occasion. Whether you’re a seasoned baker or a complete novice, learning how to make chocolate bark is a rewarding experience. With just two main ingredients – your favorite chocolate and a selection of exciting toppings – you can create stunning, customizable treats that are as fun to make as they are to eat. This comprehensive guide will walk you through everything you need to know, from selecting the best chocolate to creative topping ideas and expert tips for perfect results every time. Get ready to impress your family and friends with this quick, easy, and endlessly adaptable confection, especially as a thoughtful homemade gift during the festive Christmas holidays.
Chocolate bark holds a special place in the hearts of many, particularly during the holiday season. Its undeniable charm lies in its effortlessness and the sheer joy it brings. Much like these Easy Grinch Cupcakes or these delightful Homemade Chocolate Bars, chocolate bark is a fantastic project that delights both children and adults alike. It’s an edible canvas for culinary creativity, allowing you to experiment with a myriad of flavors and textures, making each batch uniquely yours. In just a short amount of time, you can transform simple ingredients into an elegant, satisfying confection that’s ready to be devoured or shared.
What Exactly is Chocolate Bark?
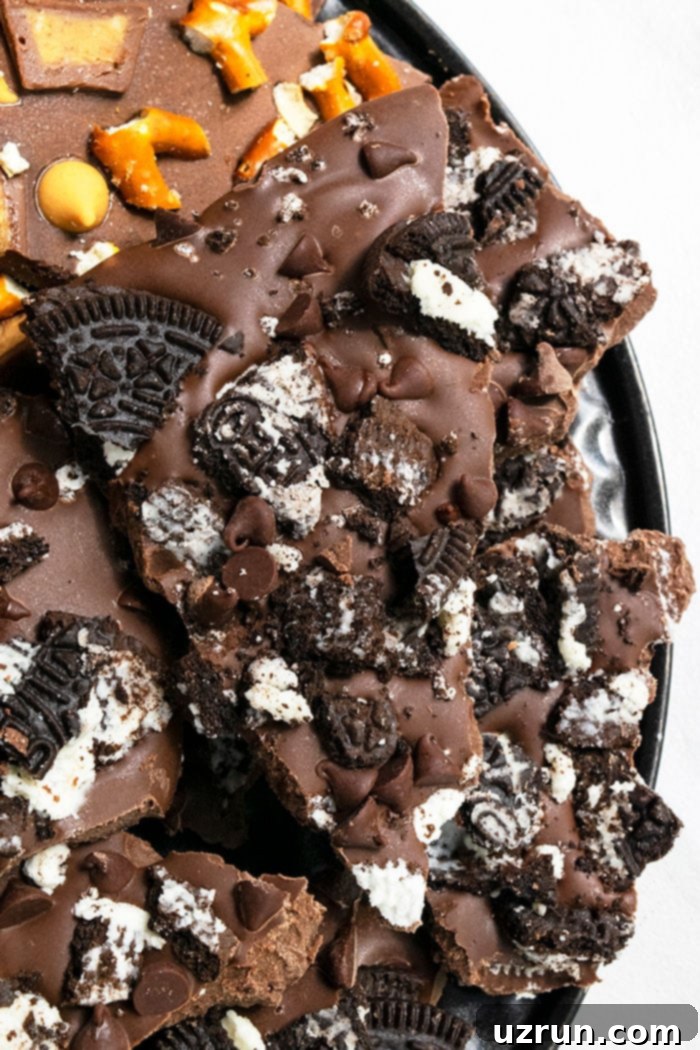
At its core, chocolate bark is a flat sheet of melted chocolate, spread thinly and adorned with various delectable toppings, which is then allowed to harden and subsequently broken into irregular, rustic pieces. The name “bark” derives from its resemblance to tree bark once it’s broken, with its jagged edges and organic shapes. This delightful confection has become a staple dessert, especially during festive periods like Christmas, Thanksgiving, and Easter, serving not only as a wonderful treat to enjoy at home but also as a highly appreciated homemade gift for family and friends. Its appeal lies in its simplicity, the satisfying crunch, and the endless possibilities for customization, catering to every palate and preference imaginable. It’s a quick fix for chocolate cravings and a dazzling addition to any dessert table.
Why Homemade Chocolate Bark is a Must-Try
Opting to make chocolate bark at home comes with a plethora of advantages that store-bought versions simply can’t match. First and foremost is the unparalleled customization. You have complete control over the type of chocolate (dark, milk, white, or a combination!), the quality of ingredients, and an infinite array of toppings. This allows you to tailor each batch to specific tastes, dietary needs, or even holiday themes, ensuring every piece is exactly as you desire. Secondly, it’s incredibly cost-effective. While high-quality chocolates can be expensive, making bark yourself often proves to be more economical than buying gourmet versions, especially when preparing gifts for multiple people or large gatherings. Thirdly, the process itself is wonderfully therapeutic and fun, making it an excellent activity for families and kids. It’s a great way to introduce younger ones to the joys of baking and decorating. Lastly, a homemade gift carries a personal touch that speaks volumes, conveying thoughtfulness and care that mass-produced items simply can’t replicate. It’s more than just a sweet treat; it’s a gesture of love.
Essential Ingredients for Perfect Chocolate Bark
The beauty of chocolate bark truly lies in its minimal ingredient list: primarily, chocolate and toppings. However, selecting the right quality for each can elevate your bark from good to extraordinary.
- High-Quality Chocolate Chips or Bars: This is the foundation of your bark, so choose wisely. You can use semi-sweet, milk, dark, or white chocolate. For the best results, opt for reputable brands like Ghirardelli, Lindt, Scharffen Berger, or Callebaut, which melt smoothly and have a superior flavor profile. These brands use higher quality cocoa butter, which contributes to a glossy finish and a delightful melt-in-your-mouth texture. Nestle Toll House is a more budget-friendly yet still reliable option for a great everyday bark. The quality of your chocolate directly impacts the final taste and texture, so avoid “chocolate-flavored” melts that contain excessive waxes, as they often don’t set as nicely or taste as rich. Ensure the chocolate is fresh and not past its expiration date for optimal melting and flavor.
- Your Choice of Toppings: This is where the magic happens and your creativity can truly shine. From crunchy nuts and salty pretzels to chewy dried fruits and colorful candies, the possibilities are limitless. We’ll delve deeper into specific topping ideas in a dedicated section below, but remember to choose fresh, high-quality toppings that complement your chosen chocolate base. Consider texture and flavor contrasts for the most exciting results.
Tools You’ll Need
Gathering your tools beforehand ensures a smooth and efficient bark-making process. You don’t need fancy equipment, just a few kitchen essentials to get started:
- Baking Sheet or Cookie Tray: A standard 10×15 inch baking sheet is ideal for spreading your chocolate evenly. A larger sheet might result in a thinner bark, while a smaller one will make it thicker. Choose based on your preference for bark thickness.
- Parchment Paper or Wax Paper: Absolutely crucial! Lining your pan with parchment or wax paper prevents the chocolate from sticking and makes it incredibly easy to remove and break once set. Do not skip this step, as trying to pry hardened chocolate from an unlined pan can be a messy and frustrating experience.
- Microwave-Safe Bowl or Double Boiler: For melting your chocolate. A sturdy, microwave-safe bowl is convenient for quick melting, or a double boiler provides a more controlled, gentle melting environment, ideal for delicate chocolates or beginners.
- Rubber Spatula or Offset Spatula: Essential for spreading the melted chocolate smoothly and evenly across the lined baking sheet. An offset spatula works particularly well for creating a uniform layer.
- Optional: Small bowls for toppings: Pre-measuring and preparing your toppings in separate bowls will allow you to work quickly once the chocolate is melted and spread, which is important for even adherence.
How to Make Chocolate Bark: A Simple Step-by-Step Guide
Making chocolate bark is a straightforward process that yields impressive results with minimal effort. Follow these detailed steps for a perfect batch every time:
- Prepare Your Workspace and Toppings: Before you even start melting chocolate, ensure your baking sheet is lined with wax paper or parchment paper. This non-stick surface is vital for easy removal. Have all your chosen toppings prepped – chopped, crushed, or simply ready to sprinkle. Speed is key in the next steps, as melted chocolate sets quickly, so having everything ready will prevent a rushed and uneven topping application.
- Melt the Chocolate:
- Microwave Method: Place your chocolate chips or finely chopped chocolate in a clean, completely dry microwave-safe bowl. Heat in 30-second intervals on medium power, stirring thoroughly with a dry spatula after each interval. Continue this process until the chocolate is almost completely melted and smooth. The residual heat will melt any remaining small lumps as you stir. Be careful not to overheat, as this can cause the chocolate to seize, burn, or develop a grainy texture.
- Double Boiler Method: If you prefer a more gentle and controlled approach, set a heatproof bowl over a saucepan of simmering water (ensure the bottom of the bowl does not touch the water). Add your chocolate to the bowl and stir constantly with a dry spatula until it’s fully melted and wonderfully smooth. This method offers more precise temperature control and significantly reduces the risk of burning or seizing.
Remember: Ensure your bowl and spatula are absolutely dry. Even a tiny drop of water can cause chocolate to seize and become thick and grainy, rendering it unusable for bark.
- Spread the Chocolate Evenly: Once melted and perfectly smooth, quickly pour the glossy chocolate onto your prepared baking sheet. Use a rubber or offset spatula to spread it out into an even layer. Aim for a thickness of about ¼ inch. Consistency is important here; if it’s too thick, it will be hard to bite into, potentially cracking teeth, and if too thin, it may break too easily and lack satisfying body.
- Sprinkle Your Toppings: Immediately after spreading the chocolate, sprinkle your prepared toppings generously and evenly over the entire surface. Gently press larger pieces into the chocolate with the back of a spoon or your fingertips to ensure they adhere well as the chocolate begins to set. Work swiftly, as the chocolate will cool and harden fairly quickly, making it harder for toppings to stick effectively.
- Allow the Chocolate to Set: Let the chocolate bark sit undisturbed at cool room temperature until it is completely firm and hardened. This typically takes about 20-30 minutes, but can vary depending on the room temperature and the type of chocolate used. Avoid the temptation to chill it in the fridge or freezer. Rapid chilling can cause “sugar bloom” (a dull, whitish film) or condensation, which makes the bark unattractive and can affect its texture, giving it a waxy feel.
- Break and Enjoy: Once fully set and hard, carefully peel the hardened chocolate away from the wax paper. You can then use your hands to break it into rustic, random-sized pieces – this is the traditional method and gives the bark its charming, natural, and inviting look. For cleaner, more uniform cuts, you can use a sharp, warm knife, though the appeal of bark is often in its organic shapes. Serve and enjoy your homemade masterpiece!
Endless Variations and Toppings for Your Chocolate Bark
The true magic of chocolate bark lies in its incredible versatility. With an array of toppings, you can create a new flavor experience with every batch, limited only by your imagination. Here are some popular and creative ideas:
- Nutty Combinations:
- Chocolate Almond Bark: Almonds are a classic, beloved companion to chocolate. Sprinkle about ¼ cup of chopped toasted almonds for a delightful crunch and earthy flavor that perfectly complements the sweetness of the chocolate.
- Other nuts like walnuts, cashews, pecans, or pistachios also add a wonderful texture and richness. For an extra special touch, you can add crushed Peanut Brittle or these delightfully crunchy Candied Nuts.
- Fruity Delights:
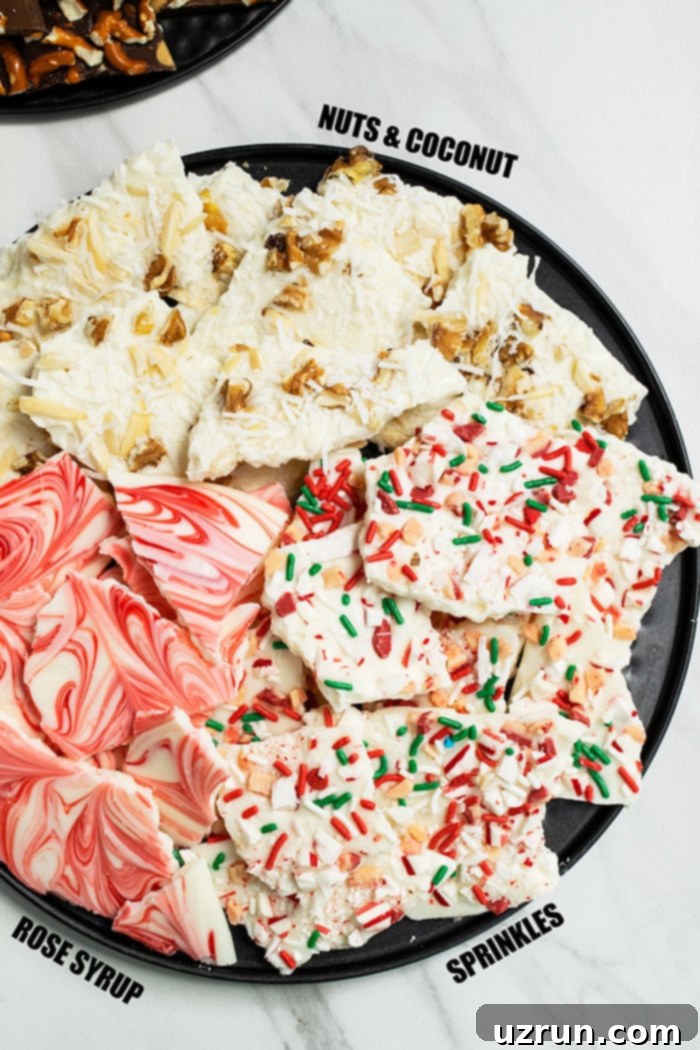
- Dried Fruits: Shredded coconut, finely chopped dried apricots, tart cranberries, sweet raisins, or even candied orange peel introduce a lovely chewy texture and a sweet, tangy counterpoint to the chocolate. Their vibrant colors also make your bark visually appealing and festive.
- Sweet & Salty Sensations:
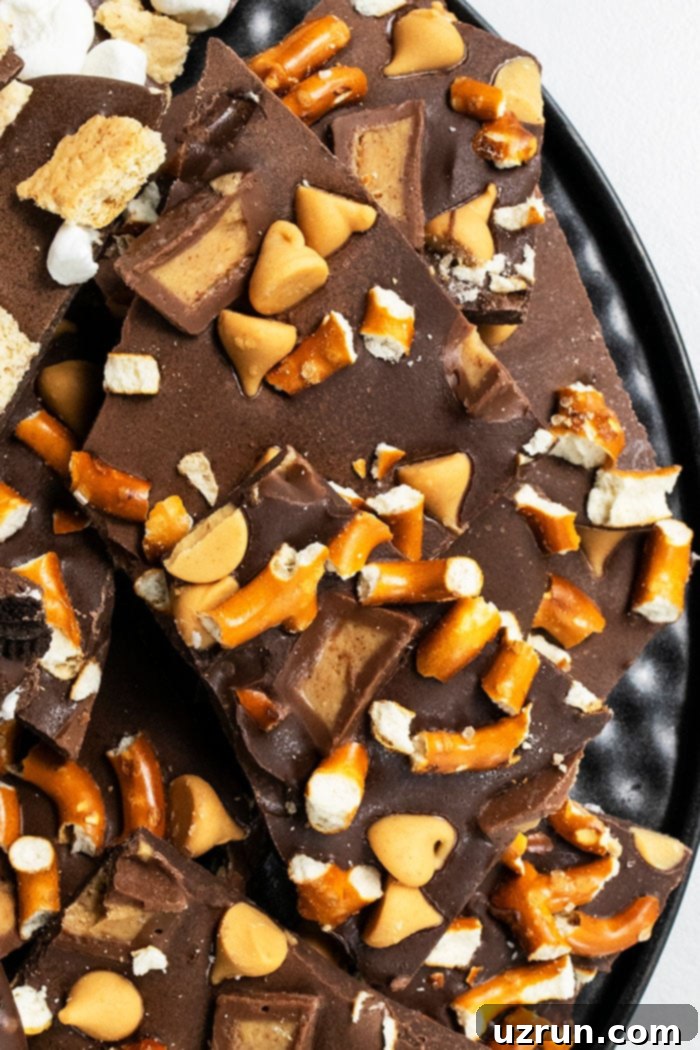
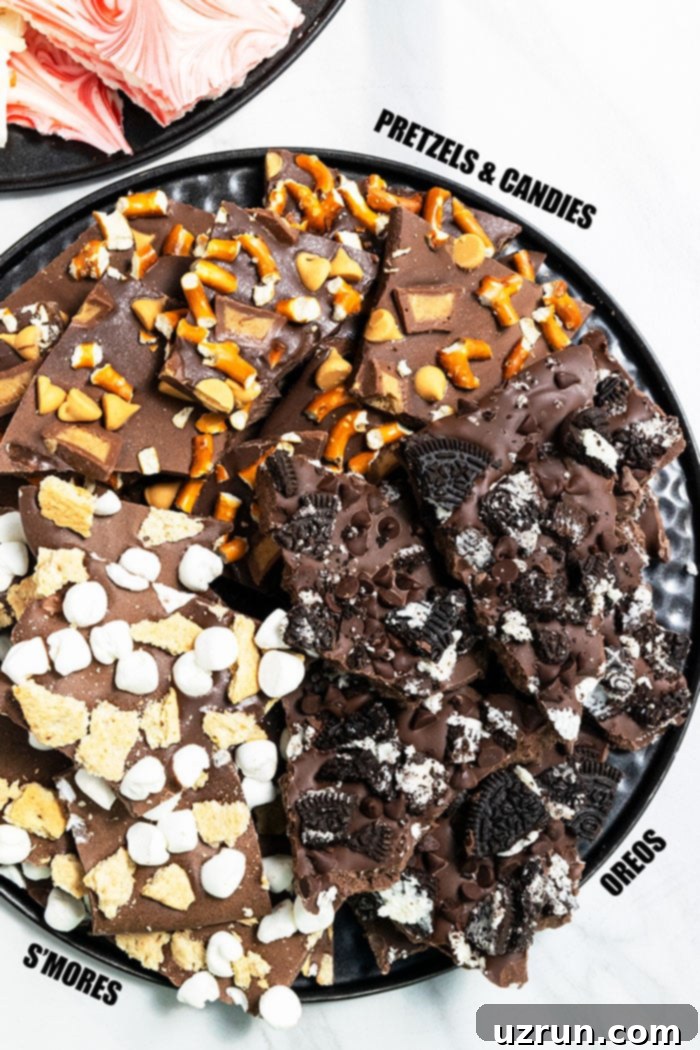
- Chocolate Pretzel Bark: This is a fan favorite for a reason! Crush thin pretzels (mini twists or sticks work best) and scatter them generously over the melted chocolate. The irresistible combination of sweet chocolate and salty, crunchy pretzels is truly addictive and creates a wonderful flavor contrast.
- Consider adding flaky sea salt as a finishing touch for any chocolate bark to enhance the flavors.
- Candy Overload:
- Chocolate Peppermint Bark: A quintessential holiday treat! Sprinkle crushed peppermint candies or candy canes generously on top. White chocolate often serves as a beautiful, contrasting base for peppermint, creating a stunning red and white festive dessert.
- Assorted Candies: M&M’s, Reese’s Pieces, Mini Peanut Butter Cups, chopped Twix, Snickers, Rolos, or any other favorite bite-sized candies you can imagine. The options are truly endless for a burst of color, texture, and flavor. You can even drizzle caramel or fudge for an added layer of sweetness.
- Cookie Crunch:
- Chopped Cookies: Crushed Oreo cookies (for the popular Cookies and Cream Bark), chocolate chip cookies, graham crackers, or shortbread cookies add an amazing textural dimension and a familiar, comforting taste that chocoholics will adore.
- Creamy Swirls & Drizzles:
- Nut Butters: Gently warm peanut butter, Nutella, or any other nut butter until it has a thinner, pourable consistency. Drizzle it artfully over the melted chocolate and use a toothpick or skewer to swirl the two together, creating beautiful, abstract patterns. For a delicious example, you absolutely must try this Peanut Butter Chocolate Bark.
- Playful Touches:
- Mini Marshmallows: A handful of mini marshmallows can add a soft, chewy element, perfect for a “rocky road” style bark.
- Sprinkles: Go wild with sprinkles of any color, shape, or theme! They are fantastic for holiday barks, birthday parties, or any themed celebration, adding instant festivity and a touch of fun.
- Different Chocolate Bases:
- White Chocolate Bark: Replace semi-sweet chocolate with creamy white chocolate for a different flavor profile and a lighter base, perfect for contrasting colorful toppings. Check out this dedicated White Chocolate Bark recipe.
- You can also layer different chocolates, like dark chocolate with a swirl of white chocolate, or milk chocolate with a drizzle of dark, for visual interest and complex flavor combinations.
- Beyond Snacking:
- Decorate Cakes: Chocolate bark pieces aren’t just for eating straight from the tray! They make stunning garnishes for cakes, like this gorgeous Chocolate Bark Cake, adding height, texture, and a gourmet touch to your baked creations.
Expert Tips and Troubleshooting for Flawless Chocolate Bark
While chocolate bark is easy to make, a few expert tips can ensure your creation is always picture-perfect and delicious. Here’s how to avoid common pitfalls and achieve professional-looking results every single time:
- The Right Thickness Matters: Aim to spread your melted chocolate evenly at approximately ¼ inch thick. This thickness provides the perfect balance of satisfying snap and ease of biting. If the layer is too thin, it becomes overly fragile and difficult to handle without crumbling. Conversely, if it’s too thick, the bark will be overly hard to bite into, diminishing the enjoyment. Use an offset spatula for the smoothest, most consistent spread.
- Work Quickly and Efficiently: Once chocolate is melted, it begins to cool and set rather rapidly. Time is of the essence when adding toppings. Have all your toppings measured, chopped, and ready to go before you even start melting the chocolate. This way, you can sprinkle them over the liquid chocolate immediately and strategically, ensuring they adhere properly before the chocolate hardens too much.
- Crucial Role of Wax or Parchment Paper: Lining your baking sheet with wax paper or parchment paper is non-negotiable. This creates a non-stick surface that prevents the melted chocolate from adhering to the pan, making it incredibly easy to peel off the bark once it has set. Attempting to make bark directly on a greased pan or aluminum foil often leads to frustration, breakage, and a sticky mess.
- Let it Set at Room Temperature: Resist the urge to speed up the setting process by placing your bark in the refrigerator or freezer. Rapid chilling can lead to “sugar bloom,” a phenomenon where moisture condenses on the chocolate’s surface, dissolving some sugar, and causing a dull, unattractive whitish or grayish film as it recrystallizes. This doesn’t necessarily affect the taste but significantly compromises the visual appeal. Allow it to set naturally at a cool room temperature (around 68-72°F or 20-22°C) for the best results in both appearance and texture.
- Understanding Chocolate Bloom: There are two main types of bloom that can affect your chocolate bark:
- Sugar Bloom: As mentioned, this is caused by moisture condensing on the chocolate, dissolving sugar, and recrystallizing on the surface. Avoid rapid temperature changes and high humidity.
- Fat Bloom: Appears as a grayish film and occurs when the cocoa butter separates and rises to the surface. This is often due to improper tempering, storage at too warm temperatures, or significant temperature fluctuations. While it’s more common in solid chocolate bars, it can happen in bark. Using good quality chocolate and proper storage can prevent this.
- Melting Chocolate Safely and Smoothly: Whether you choose the microwave or a double boiler, proper technique is key to avoiding issues.
- Microwave: Use short intervals (30 seconds), stirring vigorously after each to distribute heat evenly and prevent scorching. Stop heating when there are still a few small lumps, and let residual heat melt them as you stir until completely smooth.
- Double Boiler: Ensure no water splashes into the chocolate, as this will cause it to seize. Use indirect heat for gentle melting and constant stirring for a silky smooth finish.
- Why is My Bark Soft? The most common reason is that the chocolate hasn’t had enough time to set fully. Patience is a virtue here. If your room is very warm, it will take longer for the chocolate to harden. Ensure it’s completely firm to the touch before attempting to break it.
- Why is My Bark Grainy? This usually happens due to two main reasons: either the chocolate overheated and burnt, or it came into contact with even a tiny drop of water, causing it to seize. Always use absolutely dry bowls, spatulas, and utensils when working with melted chocolate. Overheating can also cause a grainy, gritty texture even without water, so melt slowly and stir constantly.
- When to Break the Bark: Only break the bark into smaller pieces once it is completely and firmly hardened. If the chocolate is still soft, it will smudge with fingerprints, create messy, uneven breaks, and look unprofessional. A clean snap indicates it’s ready.
- Consider Topping Freshness: Be mindful that some toppings, like pretzels, certain cookies, or very soft dried fruits, can go stale or become soggy faster than hard candies or nuts, especially if exposed to air. If making bark for gifting or longer storage, consider toppings that retain their freshness well, or advise recipients to consume quickly.
Storage and Packaging for Freshness and Gifts
Proper storage is essential to maintain the freshness, texture, and quality of your homemade chocolate bark. And if you’re planning to share your delicious creation, thoughtful and attractive packaging can make all the difference, especially when presenting it as a gift.
How to Store Chocolate Bark
To keep your chocolate bark at its best, store it in an airtight container at cool room temperature (ideally between 65-70°F or 18-21°C) for up to one week. Ensure it’s away from direct sunlight, strong odors, and heat sources, which can cause the chocolate to melt, soften, or develop bloom. If you have multiple layers of bark pieces, it’s a good idea to separate them with small sheets of parchment paper to prevent them from sticking together and to maintain their pristine appearance. Avoid extreme temperature fluctuations during storage.
Can You Freeze Chocolate Bark?
While technically possible, freezing chocolate bark is generally not recommended for aesthetic reasons. Thawing frozen bark often results in condensation forming on the surface, creating unattractive little water marks and a slightly dull appearance (sugar bloom). This doesn’t necessarily spoil the taste or make it unsafe to eat, but it does detract significantly from the visual appeal and can give the chocolate a waxy texture. For optimal freshness and presentation, stick to room temperature storage in an airtight container.
How to Package Bark for a Homemade Gift
Homemade chocolate bark makes an incredibly thoughtful and appreciated gift, especially during the holidays. Here’s how to package it beautifully to make a lasting impression:
- Elegant Gift Boxes: Carefully arrange several pieces of bark in a small, food-safe gift box. Line the box with wax paper or parchment paper beforehand to prevent any oil stains on the box and to give it a professional, clean look. Arrange the pieces artfully, perhaps layering different types of bark for variety.
- Charming Cellophane Bags: For a simpler yet charming presentation, pack a few pieces into clear cellophane candy bags. These allow the colorful toppings to shine through. Tie the top securely with a festive ribbon, twine, or a decorative twist tie.
- Decorative Mason Jars: Layer pieces of bark in a clean, decorative mason jar. This creates a lovely visual display, especially if your bark has colorful and varied toppings. A tag tied around the neck of the jar can add extra charm.
- Finishing Touches: Always add a personalized tag. Include a handwritten message, specify the type of bark (e.g., “White Chocolate Peppermint Bark”), and list key ingredients, which is especially helpful for allergen awareness. A simple ribbon or elegant twine can elevate any package from ordinary to extraordinary.
More Delightful Homemade Candy Recipes to Try
If you’ve enjoyed the simplicity and versatility of making chocolate bark and are looking for more sweet adventures in your kitchen, here are some other fantastic homemade candy recipes that are equally rewarding and delicious. These treats are perfect for expanding your confectionery skills or for creating more wonderful edible gifts:
- Rocky Road Fudge
- Homemade Nougat
- Sugared Cranberries (Candied Cranberries)
- Chocolate Mint Truffles
- Red Velvet Truffles
Easy Homemade Chocolate Bark Recipe

Easy Homemade Chocolate Bark
Abeer Rizvi
Pin Recipe
Want to Save This Recipe?
Enter your email & I’ll send it to your inbox. Plus, get great new recipes from me every week!
By submitting this form, you consent to receive emails from CakeWhiz
Ingredients
- 3 cups Chocolate chips Semisweet, Milk, Dark, or White
- ¾ cup Toppings of your choice Chopped up nuts, dried fruits, candies, coconut, pretzels, mini marshmallow e.t.c
Instructions
-
Add chocolate chips in a microwave-safe bowl and heat in the microwave at 30 second intervals.
-
Stir often until chocolate is fully melted and smooth.
-
Pour chocolate on a cookie tray (Dimensions 10×15), lined with wax paper.
-
Use a spatula to spread it out evenly at a thickness of about ¼ inches.
-
Sprinkle toppings of your choice.
-
Let the chocolate set and harden at room temperature (about 20-30 minutes).
-
Peel the chocolate away from the wax paper.
-
Break it up into random pieces and enjoy!
Video
Notes
- Refer to the detailed tips and techniques section above for best results and troubleshooting common issues.
- Leftovers can be stored in a sealed airtight container at cool room temperature for up to 1 week. Freezing is not recommended as it can cause sugar bloom and condensation upon thawing.
Nutrition
An automated tool is used to calculate the nutritional information. As such, I cannot guarantee the accuracy of the nutritional information provided for any recipe on this site.
We hope this comprehensive guide inspires you to create your own batches of irresistible homemade chocolate bark. It’s truly a treat that offers endless possibilities for flavor combinations and a wonderful way to share a little sweetness with those you love. Until next time, tata my lovelies!
