Master the Art of Ombre Cakes: Easy Recipes & Decorating Techniques
Welcome to the captivating world of ombre cakes, where colors beautifully blend and transition from one shade to another, creating a truly mesmerizing dessert! If you’ve ever dreamt of baking a show-stopping cake that looks professionally made but is surprisingly simple to achieve, then you’ve come to the right place. This comprehensive guide will walk you through the process of creating an easy ombre cake recipe from scratch, covering everything from coloring your batter to applying breathtaking gradient frosting or fondant.
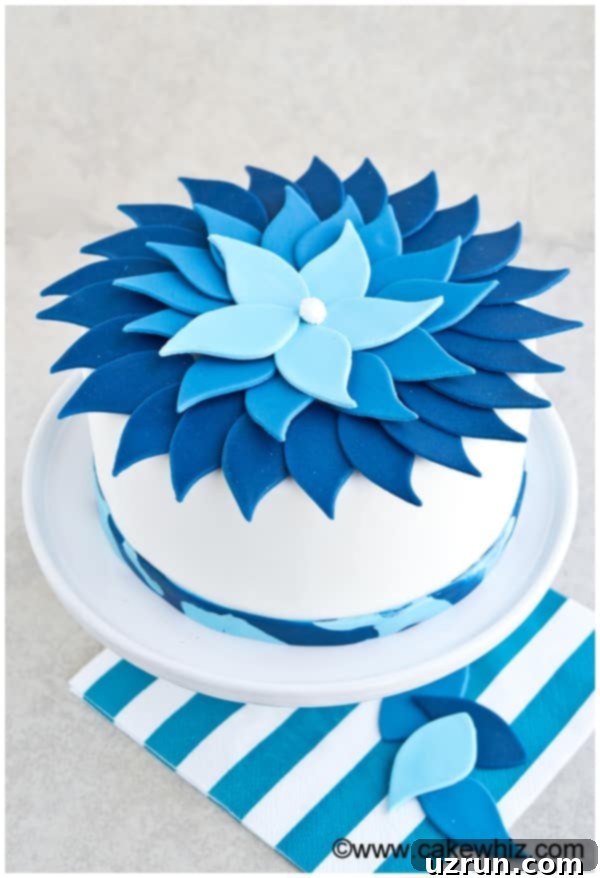
Ombre cake designs have taken the baking world by storm and continue to be an incredibly popular trend in cake decorating. Their appeal lies in their stunning visual impact and versatility, making them perfect for birthdays, weddings, baby showers, or any special occasion. While these cakes might appear intricate and challenging, the reality is that the technique is quite straightforward, much like mastering other decorative elements such as how to marble fondant. Get ready to impress your friends and family with your newfound ombre cake skills!
Table of Contents
- What is an Ombre Cake?
- Why Make an Ombre Cake?
- Essential Tools and Ingredients
- Understanding the Crumb Coat
- Creating Ombre Cake Layers
- Ombre Frosting and Fondant Basics
- Decorating Your Ombre Cake: Step-by-Step
- Creative Variations and Expert Tips
- Storage Guidelines for Your Ombre Cake
- Explore More Cake Decorating Tutorials
- Easy Ombre Cake (Blue) Recipe Card
What is an Ombre Cake?
An ombre cake, simply put, is a cake adorned with a beautiful color gradient. The term “ombre” itself comes from the French word meaning “shaded” or “graduated in tone,” perfectly describing the visual effect. These cakes are characterized by a gradual transition of color, typically moving from a darker shade to a lighter one (or vice-versa) within the same color family. This gradient can be applied to the cake’s exterior (using frosting or fondant), its interior layers, or even both for a truly cohesive and stunning effect.
Imagine slicing into a cake and finding layers of vibrant blue, each one a slightly lighter hue than the last, culminating in a delicate sky blue at the top. This captivating visual journey is what makes ombre cakes so special and highly sought after for celebrations. It’s a subtle yet impactful way to add elegance and creativity to your dessert spread, making every bite an experience.
Why Make an Ombre Cake?
- Visually Stunning: The gradient effect is incredibly eye-catching and makes for a fantastic centerpiece.
- Highly Customizable: You can choose any color palette to match your party theme, season, or personal preference.
- Impressive, Yet Achievable: Despite its sophisticated appearance, the techniques are manageable for home bakers of all skill levels.
- Versatile: Suitable for various occasions, from elegant weddings to playful children’s birthdays.
- Fun to Make: The process of creating the color gradient can be a very enjoyable and creative baking project.
Essential Tools and Ingredients
Before you dive into the magic of ombre cake decorating, ensure you have the right tools and ingredients at hand. A well-prepared workspace makes the process smoother and more enjoyable. Here’s what you’ll generally need:
- Cake Pans: Multiple pans of the same size (typically 3 or 4) are crucial for baking distinct ombre layers.
- Mixing Bowls: Several bowls for dividing and coloring your cake batter and frosting.
- Electric Mixer: Handheld or stand mixer for efficient batter and frosting preparation.
- Gel Food Coloring: Essential for vibrant, concentrated colors without altering consistency.
- Offset Spatula: For spreading frosting smoothly and evenly.
- Bench Scraper/Cake Smoother: To achieve sharp edges and a polished finish on your frosted cake.
- Piping Bags & Tips (Optional): For specific frosting designs like rosettes.
- Fondant Rolling Pin (if using fondant): For rolling fondant to an even thickness.
- Cookie Cutters (if using fondant shapes): To create decorative elements.
- Turntable (Optional but Recommended): Makes frosting and decorating much easier.
- Measuring Cups & Spoons: For accurate ingredient measurements.
Understanding the Crumb Coat
A crumb coat is a thin, initial layer of frosting applied to your assembled cake. Its primary purpose is to seal in any loose crumbs, preventing them from mixing into your final, decorative layer of frosting or fondant. Think of it as a primer for your cake, creating a smooth and clean canvas for your beautiful ombre design. After applying the crumb coat, the cake is typically chilled in the refrigerator or freezer for 15-30 minutes. This allows the frosting to firm up, effectively locking all those stray crumbs in place. Once chilled, you can proceed with your final, thicker layer of frosting or fondant, confident that your cake will have a pristine finish without any rogue crumbs disrupting its perfection.
Neglecting the crumb coat can lead to a frustrating decorating experience, as crumbs can easily get mixed into your final frosting, marring the smooth surface and vibrant colors of your ombre design. It’s a small but vital step that makes a huge difference in the overall appearance of your finished cake.
Creating Ombre Cake Layers
Creating the ombre effect within your cake layers is a fantastic way to enhance the overall gradient design. Here’s how to achieve beautifully colored cake batter:
- Prepare Your Base Batter: Start by preparing a single batch of your favorite vanilla or white cake batter. Ensure it’s well-mixed and ready for coloring.
- Divide the Batter: Evenly divide the prepared cake batter into 3 or 4 separate mixing bowls, depending on how many distinct color layers you desire. For a classic ombre, three shades (dark, medium, light) are a great starting point.
- Color Each Batter: Add a small amount of gel food coloring to each bowl. For instance, if you’re making a blue ombre cake, add a generous amount of blue gel to one bowl for the darkest shade, a moderate amount to the second for the medium shade, and just a tiny speck to the third for the lightest shade. For the lightest shade, you might even consider leaving one portion white for a true gradient if your color is very potent.
- Gently Mix Colors: Carefully mix the food coloring into each bowl until the color is uniform. Be careful not to overmix, which can lead to a tough cake. Gel food colorings are highly concentrated, so start with a small amount and add more gradually until you achieve your desired hue.
- Bake Separately: Pour each colored batter into separate, greased, and floured cake pans of the same size. Bake them according to your recipe’s instructions. Baking separate layers ensures distinct and vibrant color separation.
- Cool Completely: Once baked, allow the cakes to cool in their pans for a few minutes before inverting them onto a wire rack to cool completely. This step is crucial; attempting to frost warm cakes will result in melting frosting and a messy situation.
Ombre Frosting and Fondant Basics
Whether you choose frosting or fondant for your exterior, the principle of achieving the ombre effect remains the same: gradually varying shades of a single color. Typically, you’ll start with a base of white vanilla buttercream frosting or white marshmallow fondant and then tint it to create your gradient.
For frosting, once your white buttercream is ready, divide it into bowls and color each batch with increasing amounts of gel food coloring. Gel colors are highly recommended as they provide intense color without thinning out your frosting’s consistency, unlike liquid food colorings. Similarly, for fondant, knead in gel coloring to achieve your desired shades. Remember to always start with a small amount of color, as it’s easier to add more than to lighten a shade.
Decorating Your Ombre Cake: Step-by-Step
Once your cake layers are baked and cooled, and your frosting or fondant is colored, it’s time for the fun part: decorating! Here are two popular techniques to achieve a stunning ombre exterior.
Frosting Technique
- Assemble and Crumb Coat: Stack your cooled cake layers, filling each layer with your chosen icing (and cherry filling, if using, as per the recipe). Once stacked, apply a thin, even layer of white buttercream as a crumb coat. Chill the cake in the refrigerator for 15-20 minutes until the crumb coat is firm.
- Divide the Cake Side: Remove the chilled cake. Using a toothpick or a small knife, gently mark the side of the cake into 3 (or more, depending on your desired number of shades) equal horizontal sections. This will guide your frosting application.
- Apply Darkest Frosting: Starting with your darkest shade of blue frosting, apply a generous amount to the bottom section of the cake. Use an offset spatula or a piping bag to spread it evenly around the circumference.
- Apply Medium Frosting: Next, apply the medium shade of blue frosting to the middle section of the cake. Ensure it meets the top edge of the darkest frosting.
- Apply Lightest Frosting: Finally, apply the lightest shade of blue frosting to the top section of the cake, extending it up to the top edge. At this point, you’ll have three distinct bands of color around the sides of your cake.
- Smooth and Blend: Using a long bench scraper or offset spatula, gently smooth the frosting around the sides of the cake. As you smooth, slightly drag the scraper upwards and downwards across the color lines to subtly blend them, creating a seamless gradient. You may need to clean your scraper frequently to prevent colors from muddying.
- Decorate the Top: For the top of the cake, you can create a similar ombre effect. Start from the outer edge of the cake with the lightest shade, frosting your way inwards with the medium, then the darkest shade. Alternatively, you can frost the entire top in one solid color or use decorative piping techniques with your ombre shades.
Fondant Technique
This method offers a crisp, clean look and is perfect for precise decorative elements.
- Assemble and Crumb Coat: Stack your cakes with filling and apply a white buttercream crumb coat. Chill until firm, as described in the frosting technique.
- Cover with White Fondant: Roll out a large piece of white fondant and carefully cover the entire cake. Smooth it over the cake using fondant smoothers, trimming any excess at the base with a pizza cutter or sharp knife. This provides a clean, neutral base for your ombre design.
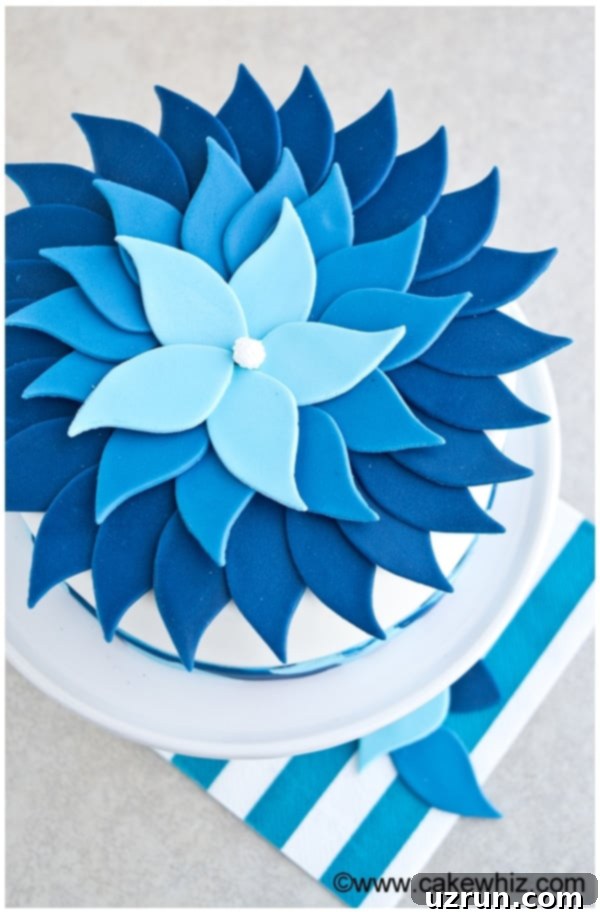
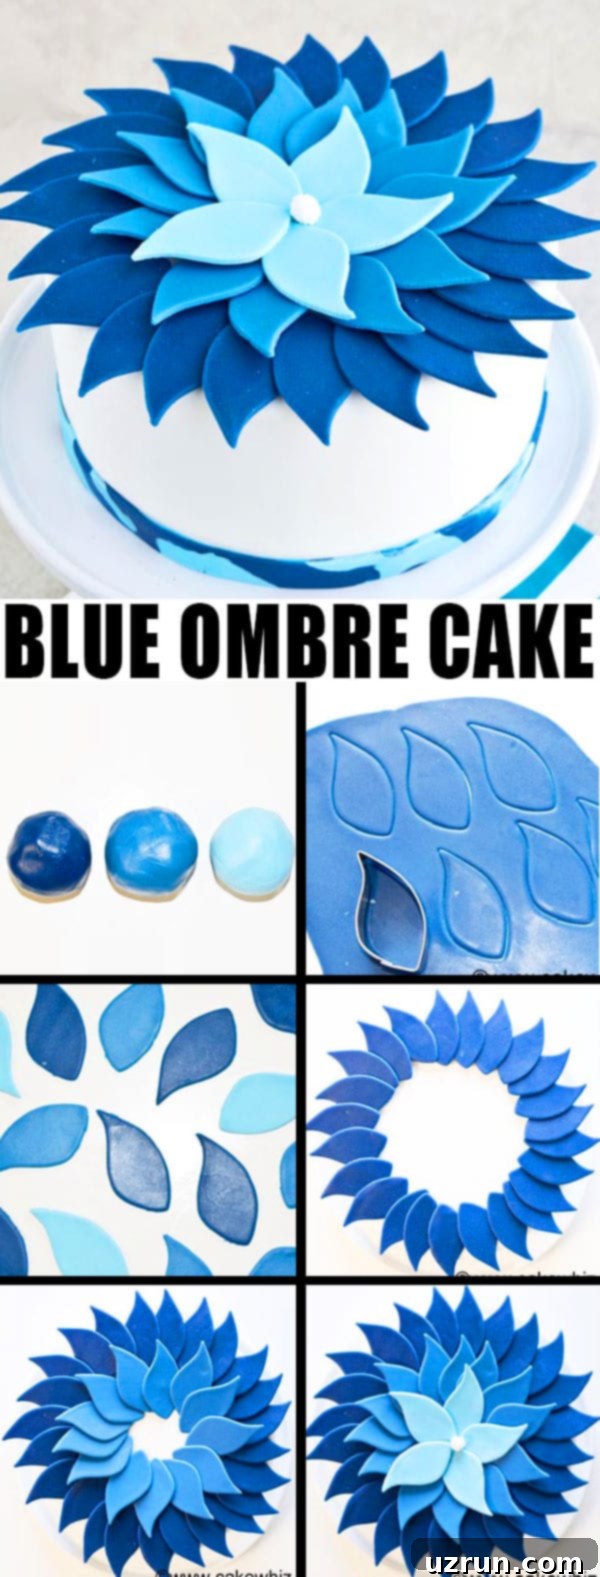
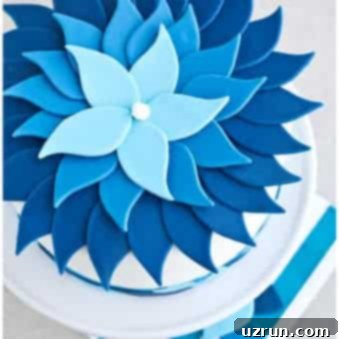
- Prepare Ombre Fondant Pieces: Roll out your 3 varying shades of blue fondant separately. Using a cookie cutter (a petal cutter, circle, oval, or even square works wonderfully), cut out numerous pieces from each shade.
- Air Dry Fondant Pieces: For best results and to prevent distortion, allow these cut fondant pieces to air-dry and harden overnight (or for several hours) on a flat surface. This will make them easier to handle and attach to the cake without losing their shape.
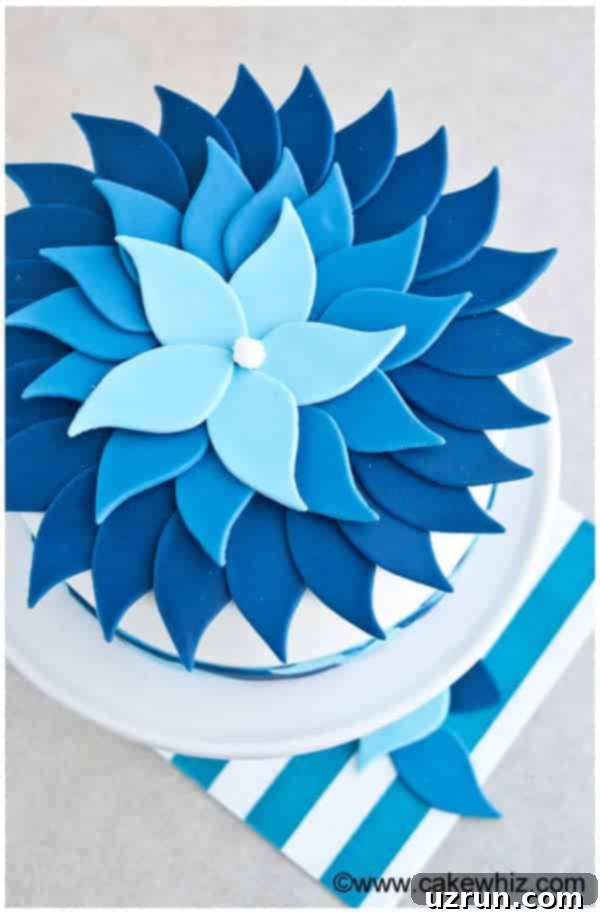
- Attach Fondant Pieces: Using a tiny dab of buttercream frosting or edible glue, begin sticking the hardened fondant pieces onto the side or top of your fondant-covered cake. Start with the darkest shade at the bottom (or outer edge for the top) and work your way upwards (or inwards) with the medium and then the lightest shades, creating your desired ombre gradient. Overlap the pieces slightly for a layered, textured look.
Creative Variations and Expert Tips
The beauty of ombre cakes lies in their adaptability. Here are some ideas and tips to personalize your creation:
- Experiment with Cake Flavors: Don’t limit yourself to vanilla! Consider a rich Banana Chocolate Chip Cake or a zesty lemon cake for your base. Ensure the flavor complements your chosen color scheme.
- Explore Different Frostings: While American buttercream is popular, try a different frosting for a unique taste and texture. White Chocolate Buttercream Frosting or a silky Swiss meringue buttercream can add an extra layer of decadence.
- Mini Ombre Cakes: Scale down the technique to create individual-sized ombre cupcakes or mini cakes. These are perfect for parties and allow guests to enjoy their own little gradient masterpiece.
- Coordinated Inside and Out: For a truly immersive ombre experience, color your cake batter in varying shades to match the exterior frosting or fondant. This surprise element upon slicing makes the cake even more impressive.
- Diverse Fondant Cutters: While a petal cutter creates a beautiful texture, get creative with other shapes. Circles, ovals, squares, or even custom shapes can give your cake a distinct and modern look. The application instructions remain the same.
- Chocolate Ombre Cake: Achieve a gradient of browns by varying the amount of cocoa powder in your chocolate cake batter. For the frosting or fondant, use different shades of brown gel coloring for a rich, earthy ombre.
- Elegant Pink Rosette Cake: Use varying shades of pink fondant to craft delicate Easy Fondant Roses (Ribbon Roses). Arrange them on the cake in a light-to-dark gradient. Alternatively, use a star decorating tip (like 1M) with pink ombre buttercream for a textured rosette effect.
- Broaden Your Color Palette: Beyond blue, popular ombre choices include vibrant pinks, soothing purples, or fresh greens. For a softer look, explore pastel shades. Feeling adventurous? Try a rainbow ombre for a burst of color!
- Buttercream Piping Designs: If you’re skilled with a piping bag, create intricate designs like waves, scallops, or abstract patterns on the cake top using your three shades of blue icing and various piping tips.
- Opt for Gel Food Colors: Always use gel food coloring. They are more vibrant, concentrated, and, crucially, do not alter the consistency of your fondant or icing, ensuring your decorations hold their shape and color.
- Work with Cooled Cake: Never attempt to decorate a warm cake. The heat will cause your buttercream to melt and slide, and fondant to become sticky and difficult to handle. Patience is key!
- Clean Your Tools: Regularly clean your spatulas and scrapers between color applications, especially when blending, to prevent colors from muddling and to maintain crisp gradients.
- Practice Makes Perfect: If it’s your first time, don’t aim for absolute perfection. Each cake is a learning experience. The beauty of ombre lies in the blend, so slight imperfections often add to its charm.
Storage Guidelines for Your Ombre Cake
Proper storage ensures your beautiful ombre cake stays fresh and delicious for as long as possible. Here’s how to store it:
- Refrigeration: A decorated ombre cake, especially one with buttercream or fondant, can be stored in an airtight cake box or container in the refrigerator for 2-3 days. Be mindful of your fridge settings; excessively cold temperatures can sometimes cause fondant to become sticky or crack, and certain fillings to dry out. Allow it to come to room temperature for about 30 minutes before serving for optimal flavor and texture.
- Freezing Unfrosted Components: Unfrosted cake layers and buttercream frosting can be prepared in advance and stored separately. Wrap unfrosted cake layers tightly in plastic wrap, then foil, and place them in a freezer-safe bag for up to 1 month. Buttercream can be stored in an airtight container for the same duration. When ready to assemble, thaw the cake layers and frosting overnight in the refrigerator, then proceed with decorating as instructed.
- Room Temperature: While some plain cakes can withstand room temperature for a day, this is generally not recommended for decorated cakes, especially those with dairy-based frostings, fresh fruit fillings, or in the case of this specific recipe, a cherry filling that can spoil quickly outside of refrigeration. Always check the specific ingredients of your cake and filling.
Explore More Cake Decorating Tutorials
Inspired to try more cake decorating adventures? Here are some other tutorials to expand your skills:
- How to Make Naked Cake (Blue Velvet Cake)
- How to Make Pinata Cake (Easter Robin Egg Cake)
- How to Make Buttercream Ruffle Cake
- How to Make Buttercream Flowers (Russian Piping Tips)
- How to Make Easy Fondant Bows
Recipe Card: Easy Ombre Cake (Blue)
Easy Ombre Cake (Blue)
Abeer Rizvi
Pin Recipe
Want to Save This Recipe?
Enter your email & I’ll send it to your inbox. Plus, get great new recipes from me every week!
By submitting this form, you consent to receive emails from CakeWhiz
Ingredients
- 1 Black forest cake
- 3 cups American buttercream icing
- 3 cups Marshmallow fondant White and 3 shades of blue (dark, medium and light)
Instructions
-
Bake cakes and let them cool completely.
-
Fill with icing and cherry filling and frost the entire cake in buttercream icing.
-
Roll out white fondant.
-
Spread it over the iced cake and cut off excess along the base with a pizza cutter. Keep aside.
-
Roll out blue fondant and use a petal cutter to cut out lots of petal shapes in all three shades of blue fondant.
-
Let the pieces air-dry and harden overnight.
-
Stick the pieces on top of the prepared cake, using buttercream. Work your way from the outside to the inside with dark petals on the outside and lighter ones towards the center.
-
Stick a big white edible pearl in the center. Enjoy!
Notes
- Read all my tips above.
- Leftovers can be stored in a sealed container in the fridge for up to 3 days.
Nutrition
An automated tool is used to calculate the nutritional information. As such, I cannot guarantee the accuracy of the nutritional information provided for any recipe on this site.
With these detailed instructions and creative tips, you are now well-equipped to bake and decorate a magnificent ombre cake. Remember, practice makes perfect, and every cake is an opportunity to learn and express your creativity. Don’t be afraid to experiment with colors, flavors, and decorating styles. Enjoy the process of bringing your vision to life, and delight in the reactions of those who get to enjoy your beautiful, gradient masterpiece!
