Easy & Delicious Cranberry Pineapple Upside Down Cake with Cake Mix
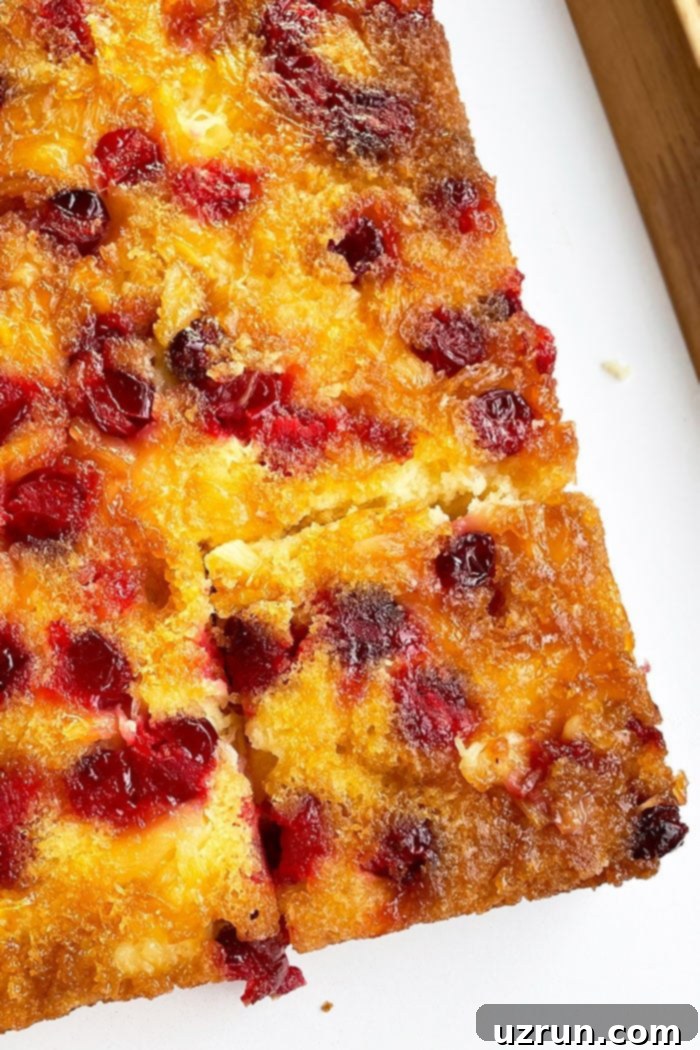
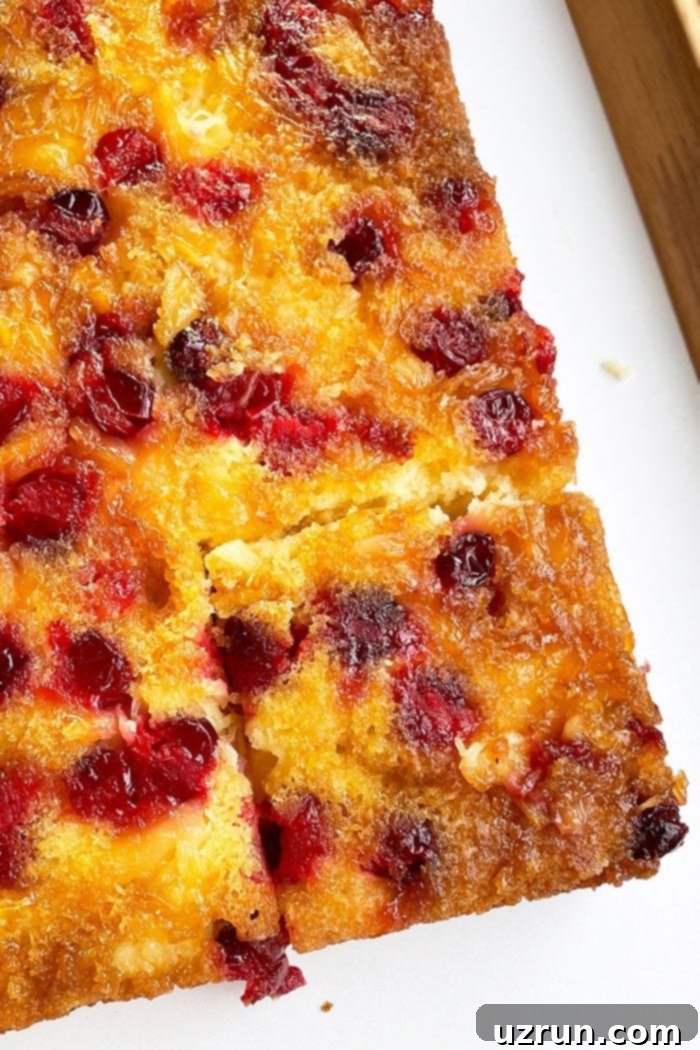
Prepare to delight your taste buds with this incredibly easy and utterly delicious Cranberry Pineapple Upside Down Cake. Perfect for the holiday season, this recipe takes the classic charm of an upside-down cake and infuses it with vibrant, festive flavors. Crafted with a convenient yellow cake mix and simple ingredients, it delivers a super soft, wonderfully moist, and beautifully caramelized dessert that’s sure to impress everyone at your Christmas table.
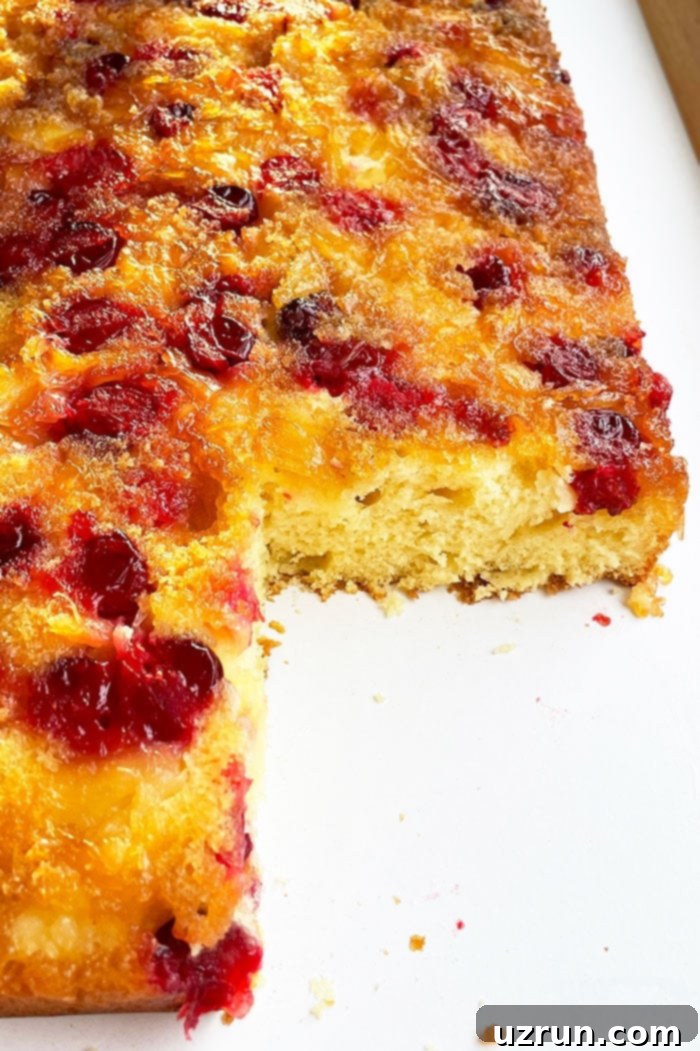
What truly sets this particular upside-down cake apart is the star ingredient: cranberries! While everyone adores the timeless appeal of a traditional upside-down cake, the addition of tart, juicy cranberries brings a burst of seasonal flavor and a stunning visual appeal that elevates this dessert to a new level. Complemented by sweet pineapples and fragrant orange zest, each slice offers a delightful balance of sweet and tangy notes. If you’re a fan of these delightful creations, you might also enjoy our Pear Cake {Pear Upside Down Cake}, a delightful twist inspired by our beloved Homemade Pineapple Upside Down Cake. Be sure to explore these variations for endless dessert possibilities!
How To Make Cranberry Upside Down Cake With Cake Mix?
Creating this festive Cranberry Upside Down Cake is surprisingly simple, especially when you use a reliable cake mix. Here’s a quick overview of the straightforward process:
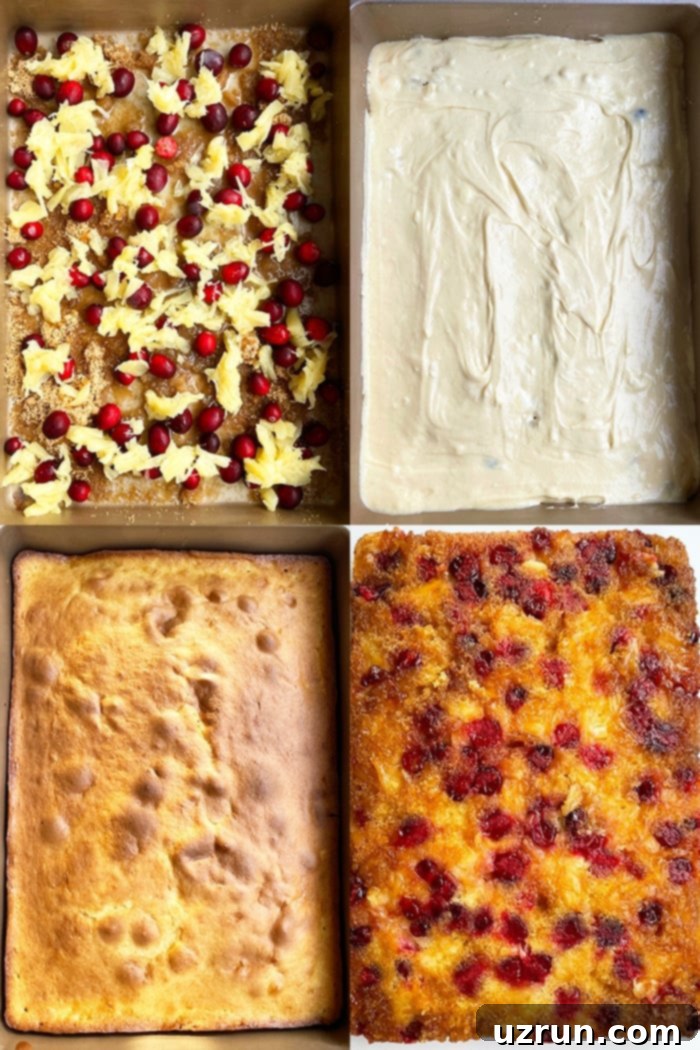
- Prepare the Upside-Down Topping: Begin by creating the luscious caramelized layer directly in your baking pan. This involves melting butter, sprinkling brown sugar, and evenly distributing the pineapple tidbits and fresh cranberries.
- Prepare the Yellow Cake Batter: Follow the instructions on your yellow cake mix box to prepare the batter. This shortcut ensures a consistently delicious and fluffy cake with minimal effort. Don’t forget to add the suggested orange zest for an extra layer of flavor!
- Assemble the Cake: Carefully pour the prepared cake batter over the fruit and caramel mixture in the baking pan, spreading it gently to cover everything evenly.
- Bake to Perfection: Transfer the pan to your preheated oven and bake until the top is golden brown and a toothpick inserted into the center comes out clean.
- Flip and Enjoy: After a crucial cooling period, carefully loosen the cake from the pan and invert it onto a large serving dish. The beautiful fruit and caramel topping will be revealed, ready for you to slice and savor!

Why Did My Cake Stick To The Pan? How To Remove It?
A common frustration with upside-down cakes is having them stick to the pan. However, with a few simple precautions and techniques, you can ensure a flawless release every time. The primary reason a cake might stick is insufficient greasing of the pan. It’s absolutely crucial to generously grease your baking pan before adding any ingredients. Use cooking spray or butter, making sure to coat every crevice, especially the corners and sides, where fruit and batter can easily adhere.
Another critical factor is timing. After baking, resist the urge to immediately flip the cake. Allow it to cool for about 10 minutes in the pan. This brief cooling period allows the cake to firm up slightly and the caramelized topping to set, making it less likely to break apart. Once the 10 minutes are up, gently run a thin knife or spatula along the entire perimeter of the cake, separating it from the sides of the pan. Then, confidently place your serving plate over the cake pan and, holding both firmly together, quickly invert them. Give the bottom of the cake pan a few gentle taps to help release the cake fully, then carefully lift the pan away to reveal your perfectly intact, beautifully topped creation.
When Should I Flip My Cake Upside Down?
The timing of flipping your upside-down cake is key to its success and presentation. The ideal window is to let it cool in the pan for approximately 10 minutes after removing it from the oven. This specific timeframe is vital for two main reasons:
- If you flip it immediately: The cake will be too hot and fragile. The structure hasn’t fully set, and the hot, gooey topping might cause the cake to tear or completely fall apart, leading to a messy rather than magnificent presentation.
- If you let it cool completely: Conversely, if you allow the cake to cool down entirely in the pan, the caramelized sugar and fruit topping can solidify and act like a strong adhesive, causing the cake to firmly stick to the bottom of the pan. This makes it incredibly difficult to remove without damaging the beautiful top layer you worked so hard to create.
The 10-minute mark strikes the perfect balance, allowing the cake to set just enough to hold its shape while the caramel is still warm and pliable, ensuring a smooth, clean release onto your serving dish. This results in that picture-perfect, glossy fruit topping we all adore.
How Do You Keep Pineapple Upside Down Cake From Getting Soggy?
A well-made upside-down cake should indeed be moist, but there’s a fine line between moist and unpleasantly soggy. The main culprit for excessive sogginess, especially with pineapple, is too much liquid. Pineapple, whether canned or fresh, contains a significant amount of juice that can leach into the cake batter during baking, making the cake dense and wet rather than light and fluffy. To prevent this, it’s crucial to properly prepare your pineapple:
- Drain Thoroughly: If using canned pineapple tidbits, always drain them very well. Don’t just pour them out of the can; let them sit in a fine-mesh sieve for several minutes to allow all the excess syrup to drip away.
- Partially Squeeze Juices: For an even drier result, after draining, you can gently press the pineapple pieces with a spoon in the sieve, or even lightly squeeze them in a cheesecloth or paper towel. The goal is to remove any obvious excess liquid without completely drying out the fruit. This ensures the pineapple still contributes flavor and natural moisture but doesn’t over-saturate the cake batter.
By taking these steps, you’ll achieve that perfectly moist texture that’s characteristic of a great upside-down cake, without any unwelcome sogginess.
Storage & Freezing Tips for Your Cranberry Cake
Proper storage is essential to keep your delicious Cranberry Upside Down Cake fresh and enjoyable for as long as possible. Given that this cake contains fresh fruit, refrigeration is a must.
Refrigerate: Once the cake has cooled completely to room temperature, transfer it to an airtight container. This helps to prevent it from drying out and absorbing odors from other foods in your fridge. Stored this way, your cake will remain fresh and delicious for up to 3 days. We recommend bringing it to room temperature for about 30 minutes before serving to enhance its flavor and texture.
Freeze: If you’re looking to extend the life of your cake or prepare it in advance, freezing is an excellent option. Allow the cake to cool down completely after baking. Then, wrap individual slices or the entire cake tightly in several layers of plastic wrap (saran wrap) to prevent freezer burn. Follow this with a layer of aluminum foil for extra protection. Place the well-wrapped cake in a freezer-safe bag or an airtight container. It can be stored in the freezer for up to 1 month. When you’re ready to enjoy it, transfer the cake from the freezer to the refrigerator and let it thaw overnight. You can then warm it slightly in the microwave or oven if desired before serving, or enjoy it at room temperature.
What To Pair With Cranberry Cake?
This Cranberry Upside Down Cake is wonderful on its own, but adding a complementary topping can elevate the experience even further. While a scoop of classic vanilla ice cream is always a fantastic pairing, offering a warm and cool contrast, there are many other delightful additions to consider:
- Homemade Whipped Cream: Light, airy, and subtly sweet, whipped cream adds a delicate touch that perfectly balances the cake’s richness and the cranberries’ tartness. You can even infuse it with a hint of orange or vanilla.
- American Buttercream Frosting: For those who love a bit more sweetness and decadence, a smooth and creamy buttercream provides a luxurious topping that contrasts beautifully with the fruit.
- Maraschino Cherry Frosting: A unique and vibrant choice, this frosting introduces a touch of playful sweetness and a festive pink hue, complementing the fruit flavors.
- White Chocolate Buttercream Frosting: The subtle sweetness and creamy texture of white chocolate buttercream create a sophisticated pairing, enhancing the cake’s flavors without overpowering them.
- Homemade Caramel Sauce: Drizzling warm, gooey caramel sauce adds another layer of rich, sweet, and buttery flavor that harmonizes wonderfully with the caramelized topping of the cake.
- Homemade Dulce De Leche: Similar to caramel but with a deeper, milkier flavor, dulce de leche offers a comforting and indulgent pairing that’s truly irresistible.

Creative Variations for Your Cranberry Christmas Cake
This Cranberry Upside Down Cake is incredibly versatile, allowing for many delicious variations to suit your taste or occasion. Feel free to get creative with these ideas:
- Add Coconut: For a delightful tropical twist and added texture, sprinkle some shredded or flaked coconut into the topping mixture with the cranberries and pineapples. It adds a wonderful chewiness and a subtle nutty flavor.
- Experiment with Zest: While orange zest is highly recommended for its bright, complementary flavor, don’t hesitate to try other citrus zests. Lemon zest can provide a sharper, more refreshing tang, while lime zest offers a unique aromatic quality.
- Introduce Nuts: For a delightful crunch, fold toasted almonds, walnuts, or pecans into the cake batter, or sprinkle them over the fruit layer in the pan. The nuts will add a lovely textural contrast and rich flavor.
- Cranberry Orange Cake: Enhance the orange flavor profile by adding both orange zest (as in the recipe) and a teaspoon of orange extract to the cake batter. This creates a vibrant, aromatic, and truly festive “Cranberry Orange Cake” experience.
- Avoid Dried Cranberries: While it might seem like a convenient substitute, we strongly advise against using dried cranberries in this recipe. Fresh cranberries burst with juice during baking, contributing essential moisture and a pleasant tartness to the cake. Dried cranberries, on the other hand, tend to result in an unpleasantly chewy texture and don’t provide the same juicy burst of flavor.
- Add Other Extracts: Beyond orange, consider other extracts to infuse different flavors. Almond extract pairs beautifully with cranberries and adds a sophisticated note. Coconut extract can further enhance the tropical vibe if you’re also adding shredded coconut.
- Rum Sauce Drizzle: For an adult-friendly holiday treat, some people enjoy drizzling a homemade rum sauce over the warm cake. While not tested with this specific recipe, a simple butter-rum sauce would undoubtedly add a rich, boozy depth of flavor.
- Top with Frosting, Whipped Cream, or Caramel: As mentioned in the pairing section, a dollop of frosting, whipped cream, a drizzle of melted chocolate, or a generous pour of caramel sauce can transform this cake into an even more indulgent dessert.
- Substitute with Other Berries: If cranberries aren’t your preference, or you want to try something new, you can experiment with other berries like raspberries, blueberries, or blackberries for a different fruity upside-down cake experience. Just be mindful of their moisture content and adjust accordingly.
Essential Tips and Techniques for the Perfect Cranberry Upside Down Cake
Achieving a perfectly moist, flavorful, and beautifully inverted Cranberry Pineapple Upside Down Cake is easy when you follow these key tips and techniques:
- Fresh Cranberries are Best: For this recipe, fresh cranberries are highly recommended over frozen ones. Frozen cranberries tend to release a significant amount of water during baking, which can make the cake soggy and compromise its delicate texture. Fresh cranberries hold their shape better and burst with natural juices, adding a perfect balance of tartness and moisture.
- Butter for Unbeatable Flavor: When it comes to the topping, butter is the undisputed champion. It not only contributes to the rich, golden caramelization but also infuses the entire cake with an unparalleled depth of flavor that oil simply cannot replicate. Don’t substitute!
- Brown Sugar is Non-Negotiable: The unique molasses content in brown sugar is essential for creating that signature deep, rich, and gooey caramelized topping. Granulated sugar or other sweeteners will not yield the same delicious, complex flavor or sticky texture. Stick to brown sugar for the best results.
- Knowing When Your Cake Is Done: Bake your cake at 350 degrees F (175 degrees C) for approximately 40 minutes. The most reliable way to check for doneness is to insert a toothpick into the very center of the cake. If it comes out clean (without any wet batter attached), your cake is ready. If it’s still wet, bake for a few more minutes and re-test.
- Embrace the Bumpy Top: Don’t be alarmed if the top of your baked cake (which will become the bottom once flipped) appears odd, bumpy, or uneven. This is completely normal and expected, especially with fruit-laden toppings. There’s absolutely no need to smooth it out or try to “fix” it, as this side will be hidden once the cake is inverted onto its serving dish.
- Canned vs. Fresh Pineapples: While this recipe primarily uses canned pineapple tidbits for their convenience and consistent moisture level, you can experiment with fresh pineapple. However, if using fresh, be aware that its water content might differ, potentially requiring more thorough squeezing. I have not specifically tested this recipe with fresh pineapples, so results may vary.
- Pineapples Must Be Partially Squeezed: This step is critical! After draining your pineapple tidbits, gently squeeze out any excess juices using a sieve or a clean cheesecloth. This prevents the cake batter from becoming overly wet, which is the secret to avoiding a soggy cake and ensuring a perfectly moist crumb.
- Choosing Your Cake Mix: For the cake batter, a standard yellow cake mix or butter cake mix works wonderfully and provides a classic, comforting flavor. A white cake mix can also be used if you prefer a lighter-colored crumb that allows the vibrant fruit topping to stand out even more.
- Preheat Your Oven: Always preheat your oven completely before placing the cake inside. This ensures even baking from the start and helps the cake rise properly.
- Measure Accurately: Especially when it comes to the topping ingredients (butter, brown sugar) and the liquids in your cake mix, accurate measurement is vital for the correct consistency and flavor.
More Delicious Cranberry Desserts to Explore
If you love the festive flavor of cranberries, here are more delightful recipes to add to your baking repertoire:
- Orange Cranberry Bread
- Cranberry Pie {No Bake}
- Apple Cranberry Crisp {Cranberry Crumble}
- Cranberry Orange Cookies {Shortbread}
- Cranberry Orange Scones {With Orange Glaze}
- White Chocolate Oatmeal Cranberry Cookies
- Coconut Cranberry Cake {With Cake Mix}
- Chocolate Truffles
More Festive Christmas Cakes for Your Holiday Table
Beyond this cranberry delight, explore these other wonderful cakes perfect for Christmas and holiday celebrations:
- Easy Christmas Cake
- Easy Black Forest Cake {With Cake Mix}
- Easy Gingerbread Recipe {Gingerbread Cake}
- Easy Ginger Cake {With Ginger Frosting}
- Moist Red Velvet Cake Recipe
- Snowman Cake
- Chocolate Snowflake Cake
- Peppermint Cake
Recipe Card: Cranberry Upside Down Cake (With Cake Mix)

Cranberry Upside Down Cake (With Cake Mix)
Abeer Rizvi
Pin Recipe
10 minutes
40 minutes
50 minutes
Dessert
American
16
Slices
128
kcal
Want to Save This Recipe?
Enter your email & I’ll send it to your inbox. Plus, get great new recipes from me every week!
By submitting this form, you consent to receive emails from CakeWhiz
Ingredients
-
½
cup
Butter
Unsalted, Melted -
1
cup
Brown sugar -
1
can
Pineapple tidbits
Drained and excess juices partially squeezed out in sieve or cheese cloth -
1 ¼
cup
Cranberries
Fresh, Washed, Patted dry -
1
box
Yellow cake mix
Plus ALL the ingredients listed on the box -
2
teaspoon
Orange zest -
1
teaspoon
Orange extract
Optional but highly recommended
Instructions
-
Grease a rectangle cake pan (Dimensions: 13×9 inches is ideal) thoroughly with oil spray, ensuring all corners and sides are coated to prevent sticking.
-
Pour the melted butter evenly into the prepared pan, tilting to spread it across the entire bottom.
-
Sprinkle the brown sugar uniformly over the melted butter layer, creating a consistent base for the caramelization.
-
Arrange the drained pineapple tidbits artistically and as evenly as possible over the brown sugar layer.
-
Distribute the fresh cranberries evenly among the pineapples, ensuring a burst of flavor in every bite.
-
Set the pan aside while you prepare the cake batter.
-
Prepare the yellow cake batter according to the specific instructions provided on the box, using all listed ingredients.
-
Gently fold in the orange zest and optional orange extract into the cake batter for an enhanced flavor profile.
-
Carefully pour the prepared cake batter over the cranberry and pineapple mixture in the pan.
-
Using a spatula, gently spread the batter as evenly as possible, ensuring it covers all the fruit without disturbing the arrangement too much.
-
Bake in a preheated oven at 350 degrees F (175 degrees C) for approximately 40 minutes, or until a toothpick inserted into the center of the cake comes out clean. Remember, the top of the baked cake will naturally have an odd, bumpy, and uneven appearance, which is completely normal and expected.
-
Once baked, remove the pan from the oven and let it cool on a wire rack for precisely 10 minutes. This cooling period is crucial for a clean release.
-
After 10 minutes, run a thin knife or spatula carefully along all sides of the cake pan to loosen the cake from the edges.
-
Place a large serving platter or cake dish upside down over the cake pan. Holding both firmly together, gently but quickly flip the cake onto the dish. Tap the bottom of the cake pan a few times to ensure the cake has fully released.
-
Carefully lift off the cake pan, revealing your beautifully caramelized Cranberry Upside Down Cake.
-
Allow the cake to cool completely before slicing and serving. If desired, add decorative swirls of homemade whipped cream on top once it’s fully cooled. Enjoy this festive and flavorful treat!
Notes
- For best results, please read all the detailed tips and techniques provided above before you begin baking.
- Leftovers of this delicious cake can be stored in an airtight container in the refrigerator for up to 3 days.
- This cake freezes beautifully! Once completely cooled, wrap it tightly in plastic wrap and then foil. Store in the freezer for up to 1 month. Thaw overnight in the refrigerator before serving.
Nutrition
Calories:
128
kcal
Carbohydrates:
20
g
Protein:
1
g
Fat:
6
g
Saturated Fat:
4
g
Cholesterol:
15
mg
Sodium:
55
mg
Potassium:
69
mg
Fiber:
1
g
Sugar:
19
g
Vitamin A:
200
IU
Vitamin C:
5
mg
Calcium:
19
mg
Iron:
1
mg
An automated tool is used to calculate the nutritional information. As such, I cannot guarantee the accuracy of the nutritional information provided for any recipe on this site.
Tried this recipe?
Leave a comment below or rate and tag @cakewhiz on social
