Easy Beach Cake: Your Ultimate Step-by-Step Guide to a Perfect Summer Dessert
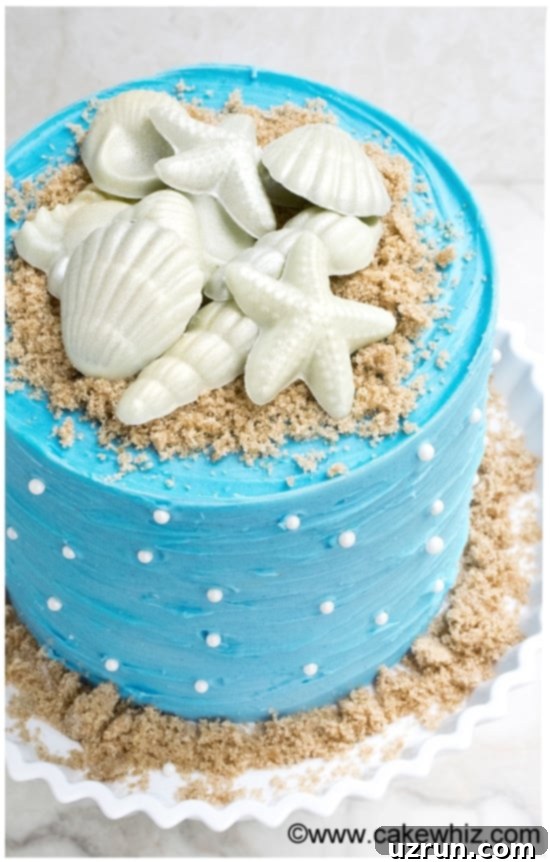
Escape to a tropical paradise with this incredible yet surprisingly easy beach cake! Perfect for any summer gathering, birthday, or just to brighten a gloomy day, this dessert is designed to evoke the serenity of the ocean. Imagine fluffy cake layers covered in beautiful blue frosting, adorned with realistic homemade chocolate seashells and a sprinkle of golden brown sugar “sand.” Even if you’re a complete beginner or don’t consider yourself a cake decorator, this comprehensive guide will walk you through every step to create a stunning, Instagram-worthy masterpiece.
This delightful beach cake offers a refreshing escape, regardless of the weather outside. While some summers might be filled with rain and clouds, this vibrant dessert promises to bring sunshine and smiles indoors. Much like our popular Bumblebee Cake (Spring Cake) or the festive Watermelon Cake, this recipe is crafted to be approachable for anyone. It’s about enjoying the creative process and the delicious outcome, without needing advanced decorating skills.
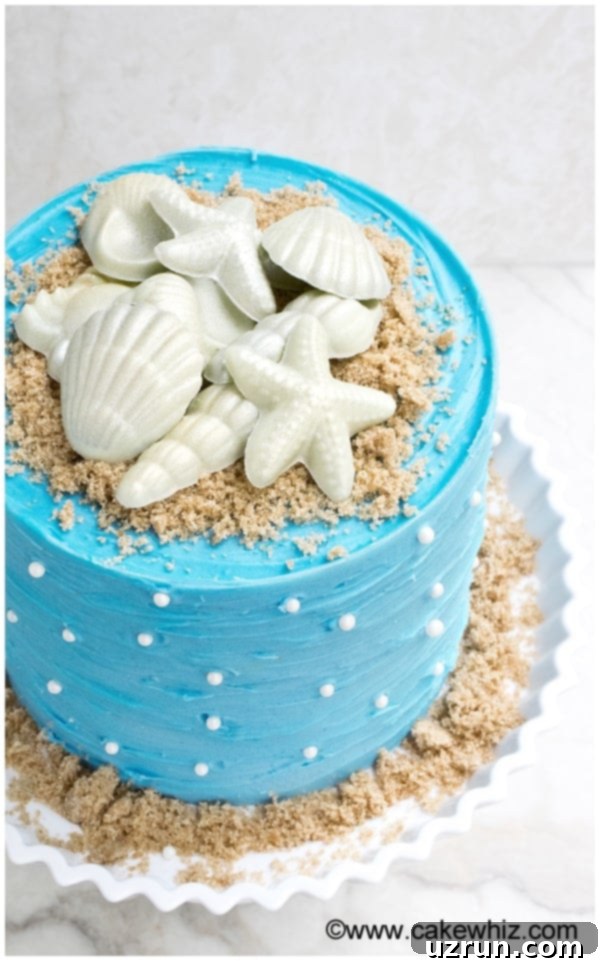
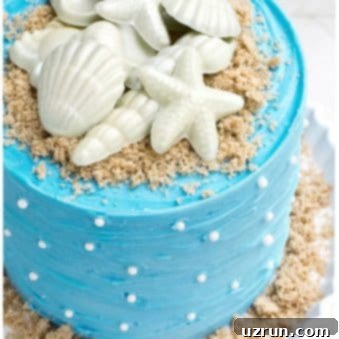
Our beach cake stands tall as a captivating double-barrel creation, symbolizing the vast blue sea with its rich, azure frosting. The top layers are artfully decorated with an array of meticulously crafted chocolate seashells, nestled within a scattering of brown sugar that perfectly mimics soft, golden beach sand. To add a final touch of oceanic charm and sparkle, delicate edible pearls are gently tossed across the cake’s surface, giving it that extra touch of magic and elegance.
Why You’ll Love This Easy Beach Cake
This beach-themed cake isn’t just visually appealing; it’s a fantastic project for many reasons:
- Beginner-Friendly: Designed with simplicity in mind, this cake avoids complex techniques, making it ideal for those new to cake decorating.
- Stunning Visuals: The combination of blue frosting, brown sugar ‘sand’, and realistic chocolate seashells creates an incredibly picturesque dessert that’s sure to impress.
- Perfect for Summer: Its vibrant colors and refreshing theme make it the ultimate centerpiece for summer parties, barbecues, and beach-themed celebrations.
- Customizable: Easily adapt cake and frosting flavors to suit your preferences, making it a versatile recipe for any palate.
- Homemade Charm: Crafting your own chocolate seashells adds a unique, personal touch that store-bought decorations simply can’t match.
- Joyful Baking Experience: The process of bringing this cake to life is as enjoyable as eating it, promising a fun and rewarding baking adventure.
Essential Ingredients and Tools for Your Beach Cake
Before you dive into creating your oceanic masterpiece, gather these key ingredients and tools:
Key Ingredients:
- Baked Cake Layers: Your favorite sturdy cake recipe (like the Orange Cake suggested in the recipe card) baked into four 8×2 inch rounds.
- Cream Cheese Frosting: Enough to generously frost a tall cake, colored blue.
- Brown Sugar: For the realistic sand effect.
- White Edible Pearls: To add sparkle and mimic sea foam or tiny bubbles.
- White Chocolate Chips: For crafting your custom seashells.
- Blue Gel Food Coloring: To achieve that perfect ocean hue for your frosting without altering consistency.
- Optional: Gold and silver color mist for an iridescent shimmer on your seashells.
Essential Tools:
- Cake Pans: 8×2 inch round pans for baking your cake layers.
- Mixing Bowls and Spatulas: For preparing cake batter and frosting.
- Electric Mixer: Handheld or stand mixer for creamy frosting.
- Offset Spatula or Icing Smoother: For applying and smoothing frosting.
- Cake Turntable (optional but recommended): Makes frosting much easier.
- Cake Stand: For assembly and presentation.
- Seashell Mold: Silicone molds are best for easy chocolate release. Available online or at craft stores.
- Wooden Dowel (optional): For extra support in a tall, double-barrel cake.
- Parchment Paper or Wax Paper: For lining baking trays and protecting surfaces.
- Spray Bottle (for color mist, if using): For even application on chocolate shells.
How to make easy beach cake from scratch? A Step-by-Step Tutorial
Creating this stunning beach cake is an enjoyable process. Follow these detailed steps for a perfect result:
- Bake Cakes: Begin by baking your chosen cake recipe (we recommend a sturdy one like our Orange Cake for this tall design). Ensure you bake enough layers – four 8×2 inch rounds are perfect for a striking double-barrel look. Once baked, allow your cakes to cool completely on a wire rack. This step is crucial; frosting warm cakes will lead to a melty, messy disaster. For best results, you can even chill the cooled cakes in the refrigerator for easier handling and trimming.
- Prepare and Color Icing: While your cake layers are cooling, prepare a generous batch of cream cheese frosting. Once it’s smooth and creamy, it’s time to transform it into the color of the ocean. Use blue gel food coloring, adding a small amount at a time until you achieve your desired shade of blue. Gel colors are highly concentrated and won’t thin out your frosting, which is essential for a stable, beautifully frosted cake.
- Assemble and Frost the Cake:
- Trim Layers: If your cake layers have domes, use a serrated knife or a cake leveler to gently trim them flat. This ensures a stable, even stack.
- Stacking: Place your first cake layer on your cake stand or serving plate. Spread an even layer of blue frosting on top. Repeat this process with the remaining cake layers, stacking them carefully. For a double-barrel effect, you’re building a tall cake.
- Crumb Coat: Once all layers are stacked, apply a very thin layer of frosting all over the entire cake. This “crumb coat” traps any loose crumbs, ensuring a smooth, clean finish for your final layer. Chill the cake in the refrigerator for about 15-20 minutes to set the crumb coat.
- Final Frosting: After chilling, apply a thicker, more even layer of blue frosting to the entire cake. Use an offset spatula or a cake scraper to achieve smooth sides and a relatively flat top.
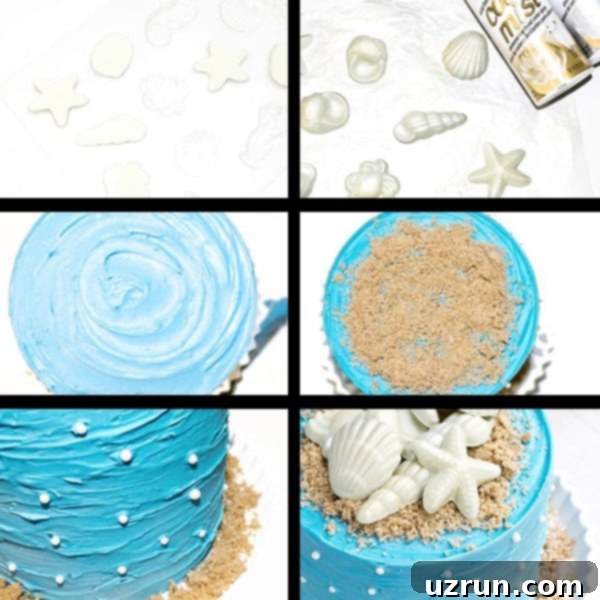
- Create a Spiral Pattern: With your final layer of frosting still soft, take a clean offset spatula or the back of a spoon. Starting from the outer edge, gently drag it inwards towards the center in a circular motion on top of the cake to create a beautiful spiral effect, mimicking ocean currents or ripples. You can also lightly drag it along the sides for a textured look.
- Add Edible Pearls: While the frosting is still tacky, gently press white edible pearls around the sides of the cake. Scatter them randomly to resemble sea foam or glistening water droplets. These small details add a touch of elegance and visual interest.
- Scatter Brown Sugar Sand: To create the “beach” effect, generously sprinkle brown sugar on the very top of the cake, creating a sandy shore. Extend some of the brown sugar down the sides slightly, creating a natural transition from the “ocean” to the “beach.” You can also sprinkle a small amount around the base of the cake stand to complete the scene.
- Make Chocolate Seashells: This is where the magic happens!
- Melt Chocolate: Melt white chocolate chips using a double boiler or microwave method (in 30-second intervals, stirring between each, until smooth).
- Fill Molds: Carefully pour the melted chocolate into the cavities of your seashell mold/tray. Tap the mold gently on the counter a few times to release any air bubbles.
- Chill: Place the mold in the freezer for about 15 minutes, or until the chocolate is completely hardened and opaque.
- Demold: Once firm, gently twist the silicone mold or carefully invert a hard mold onto a tray lined with wax paper. The chocolate seashells should pop out easily.
- Add Shine (Optional): For an extra touch of glamour, lightly spray the chocolate shells with gold and silver color mist. Hold the spray can about 6-8 inches away for an even coat. Allow the color to dry completely for 15-20 minutes at room temperature.
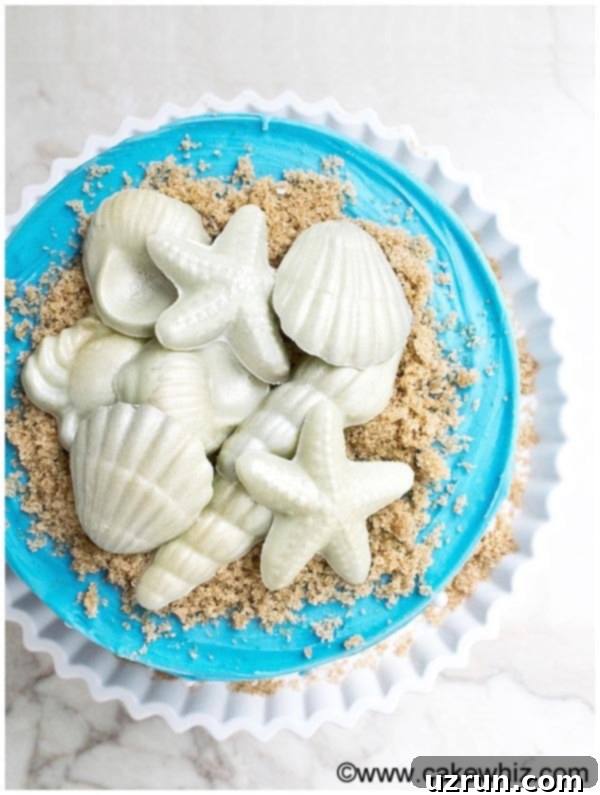
- Do Final Decorations: Arrange your beautiful chocolate seashells artistically on top of the brown sugar ‘sand’ layer of the cake. You can group them, scatter them, or create a specific design. Sprinkle a little more brown sugar around the shells for a truly natural look. And just like that, your breathtaking beach cake is complete and ready to impress! Enjoy the delightful reactions!

Variations for Your Beach Theme Cake (Ocean Theme Cake)
While the base recipe is fantastic, feel free to get creative with these variations to make your beach cake truly unique:
Make a larger tiered cake: This tutorial features a tall, double-barrel cake, which already creates an impressive presence. However, for grander occasions like beach-themed weddings, anniversaries, or large parties, consider adding a wider 10-inch tier at the bottom. This would transform it into a magnificent multi-tiered cake, requiring appropriate internal support like dowels and cake boards for stability. Such a design would surely be the star of any event!
Try other cake flavors: The base cake flavor is entirely up to you. While our recipe features orange cake, you could easily swap it for a refreshing Lemon Cake, a tropical Pineapple Cake, a classic vanilla, or even a rich coconut cake to enhance the beachy vibe. Choose a flavor that complements the light and fun summer theme.
Color cake batter blue: For an even more immersive ocean theme, consider adding a touch of blue gel food coloring directly into your cake batter before baking. This will give your cake layers a subtle blue hue, ensuring that even when sliced, the ocean theme is present throughout. It’s a fun surprise and adds an extra layer of visual consistency to your design.
Pair with other frosting flavors: The cream cheese frosting is delicious, but don’t limit yourself! A vibrant Mango Frosting or a zesty Lemon Frosting could offer a delightful tropical twist. You could even use a different flavor for each tier in a multi-tiered cake, offering a variety of tastes.
Add other edible decorations: Beyond chocolate seashells and pearls, consider edible glitter or shimmer dust for a sparkling water effect, rock candy for crystalline sea glass, or even small edible gummy sharks or fish for a playful touch. Mini umbrellas or tiny beach chairs could also be added to the ‘sand’ area for an adorable scene.
Create a “water” effect with gelatin: For an advanced touch, you can make a clear or light blue gelatin layer on top of a “sand” base to create a realistic shimmering water pool effect. This requires careful execution but yields a truly spectacular result.
Tips and Techniques for a Perfect Beach Birthday Cake
Achieving a professional-looking beach cake is easier with these expert tips and techniques:
Chocolate seashells are key: Homemade chocolate seashells are truly what elevate this cake. I crafted mine using specific chocolate molds, which offer intricate details and various shapes. While you might find pre-made chocolate seashells at specialty chocolate stores, they can be seasonal, limited in variety, and often quite expensive. Making your own is not only cost-effective but also allows for greater customization in terms of chocolate type and color.
Never frost or decorate warm cakes: This is a golden rule in baking. The warmth from the cake will cause your beautiful frosting to melt and slide off, creating a sticky, uneven mess. Similarly, chocolate decorations will soften and lose their shape. Always ensure your cake layers are completely cooled – ideally, even slightly chilled – before you begin any frosting or decorating. Patience here pays off immensely.
Fondant vs. chocolate for making seashells: When it comes to creating edible seashells, I strongly advocate for using chocolate over fondant. While fondant offers flexibility, it takes considerably longer to dry and harden, especially in humid conditions, which can be frustrating. Chocolate, on the other hand, sets quickly, especially when chilled, allowing you to produce firm, perfectly shaped shells in a fraction of the time. Plus, melted chocolate is generally easier for beginners to work with in molds.
Use gel colors for vibrant icing: For coloring your frosting, always opt for high-quality gel food coloring. Unlike liquid food colorings, gels are highly concentrated, meaning you need only a small amount to achieve vivid, deep colors like our ocean blue. More importantly, gel colors are thicker and won’t thin out or alter the consistency of your frosting, ensuring it remains stable and easy to work with for smooth application.
Where to find seashell molds? These essential tools are widely available. You can easily find a fantastic selection of silicone seashell molds online, particularly on Amazon, which offers various sizes and designs. Additionally, dedicated cake decorating aisles in craft stores like Hobby Lobby and Michaels typically stock a range of silicone molds suitable for chocolate or fondant work.
Spraying seashells with color mist is optional but recommended: While your chocolate seashells will look great on their own, a light dusting of edible color mist adds a subtle, beautiful shimmer that mimics the iridescence of real shells. It truly enhances their visual appeal, giving them a more realistic and enchanting finish. If you prefer a simpler look, you can certainly skip this step.
Where to find gold and silver color mist? If you decide to add that gorgeous shimmer, look for the Wilton brand color mist. It’s a popular and reliable choice for edible sprays. You can purchase it directly from Wilton’s official website or find it readily available at most major craft stores such as Hobby Lobby and Michaels, usually in their baking or cake decorating sections.
Ensure adequate cake support: For a tall cake like this double-barrel design, especially if you plan on adding more tiers or heavy decorations, internal support is crucial. Inserting a central wooden dowel through all the stacked cake layers and resting them on a sturdy cake board provides stability and prevents the cake from shifting or collapsing under its own weight.
Achieve smooth frosting first: Before attempting the spiral pattern, focus on getting your initial blue frosting layer as smooth and even as possible. This creates a clean canvas for your decorative touches. A rotating cake turntable and a long offset spatula or bench scraper can greatly assist in achieving a flawless finish.
Storage for Your Summer Cake
Proper storage ensures your beautiful beach cake remains fresh and delicious:
Refrigerate: Any leftover slices or the entire decorated cake should be stored in a sealed, airtight container. This prevents the cake from drying out and absorbing other fridge odors. It will stay fresh and delicious in the refrigerator for up to 3 days. Always remember to bring it to room temperature for about 30 minutes before serving for the best flavor and texture.
Freeze: If you’ve baked the cake layers in advance or have a large amount of leftover frosting, both can be frozen separately. Unfrosted cake layers should be tightly wrapped in plastic wrap and then in aluminum foil to prevent freezer burn. Frosting can be stored in an airtight container. Both can be kept in the freezer for up to 1 month. When you’re ready to assemble and decorate your dessert, simply let the frosting and cake layers thaw overnight in the refrigerator, then proceed with the decorating instructions.
Make ahead instructions: This beach cake is perfect for making ahead! You can bake and fully decorate this cake one day in advance of your event. Once decorated, store it in the refrigerator in a suitable cake box or sealed container. This allows you to reduce stress on the day of your gathering and ensures the cake is perfectly set and ready to serve when needed. Just remember to take it out about 30-60 minutes before serving to let it come to room temperature for optimal taste and texture.
Brown sugar substitute: Brown sugar is used in this recipe to create the illusion of soft, golden beach sand. It’s an excellent choice due to its color and slightly granular texture. If you don’t have brown sugar on hand, you can easily make your own brown sugar with granulated sugar and molasses. Alternatively, fine graham cracker crumbs are an excellent and popular substitute. They provide a similar color and texture, creating a convincing ‘sand’ effect on your cake.
More Cake Decorating Ideas
Looking for more creative cake inspiration? Explore these other fun and easy cake decorating tutorials:
- Butterfly Cake
- Tie Dye Shirt Cake
- Fondant Flower Cake
- Peacock Cake
- Crying Baby Cake
- Mini Sushi Cake
- Modern Abstract Cake
- How to Make Easy Fondant Roses (Ribbon Roses)
Recipe
Easy Beach Cake
Abeer Rizvi
Pin Recipe
Want to Save This Recipe?
Enter your email & I’ll send it to your inbox. Plus, get great new recipes from me every week!
By submitting this form, you consent to receive emails from CakeWhiz
Ingredients
- 4 Orange cake Double the recipe to make 4 round cakes, Dimensions: 8×2 each
- 6 cups Cream cheese frosting Double the recipe to make 6 cups of frosting, Colored blue
- 1 cup Brown sugar
- 2 tablespoons White edible pearls
- 4 cups White chocolate chips Melted
Instructions
-
Bake your chosen cake recipe to create four 8×2 inch round cakes, ensuring they are perfectly cooled to room temperature before proceeding. This prevents melting of the frosting.
-
While the cake layers cool, prepare the cream cheese frosting according to the recipe, then color it with blue gel food coloring until you achieve a vibrant ocean blue hue.
-
Using a serrated knife or cake leveler, carefully trim the domes off all the cake layers (if any) to ensure a flat, stable stacking surface.
-
Place one cake layer on your cake stand. Spread an even layer of blue frosting on top. Repeat this process, placing the second, third, and fourth cake layers on top, each with a layer of frosting in between. Once stacked, apply a thin crumb coat to the entire cake, chill for 15 minutes, then apply a final, smooth layer of frosting. Finish by using a spatula to create a gentle spiral design on the top and sides of the cake, mimicking ocean waves.
-
For additional stability, especially for a tall cake, you can gently push a wooden dowel through the top center of the cake, going through all layers (optional).
-
Generously sprinkle brown sugar on top of the cake to create a sandy beach effect, allowing some to cascade gently down the sides. You can also sprinkle some around the base of the cake stand.
-
Randomly stick white edible pearls around the sides of the cake while the frosting is still fresh, simulating sea foam or water droplets. Set the cake aside.
-
Prepare the chocolate seashells: Melt white chocolate chips until smooth. Pour the melted chocolate into the cavities of a seashell mold. Place the mold in the freezer for 15 minutes, or until the chocolate is firm. Gently demold the chocolate shells onto a tray lined with wax paper. Optionally, spray the chocolate shells with gold and silver color mist for a beautiful shimmer and let them dry for 15-20 minutes at room temperature.
-
Arrange the finished chocolate seashells artfully on top of the brown sugar ‘sand’ on your cake. Add a final light sprinkle of brown sugar if desired. Your stunning beach cake is now complete! Serve and enjoy this delightful summer treat.
Notes
- For the best results and to avoid common pitfalls, be sure to read all the detailed tips and techniques provided in the article above before you start.
- Leftover cake can be stored in a sealed, airtight container in the fridge for up to 3 days, maintaining its freshness and flavor.
- To enhance your ‘sand’ effect, you can also use fine graham cracker crumbs as an alternative or in addition to brown sugar.
Nutrition
An automated tool is used to calculate the nutritional information. As such, I cannot guarantee the accuracy of the nutritional information provided for any recipe on this site.
