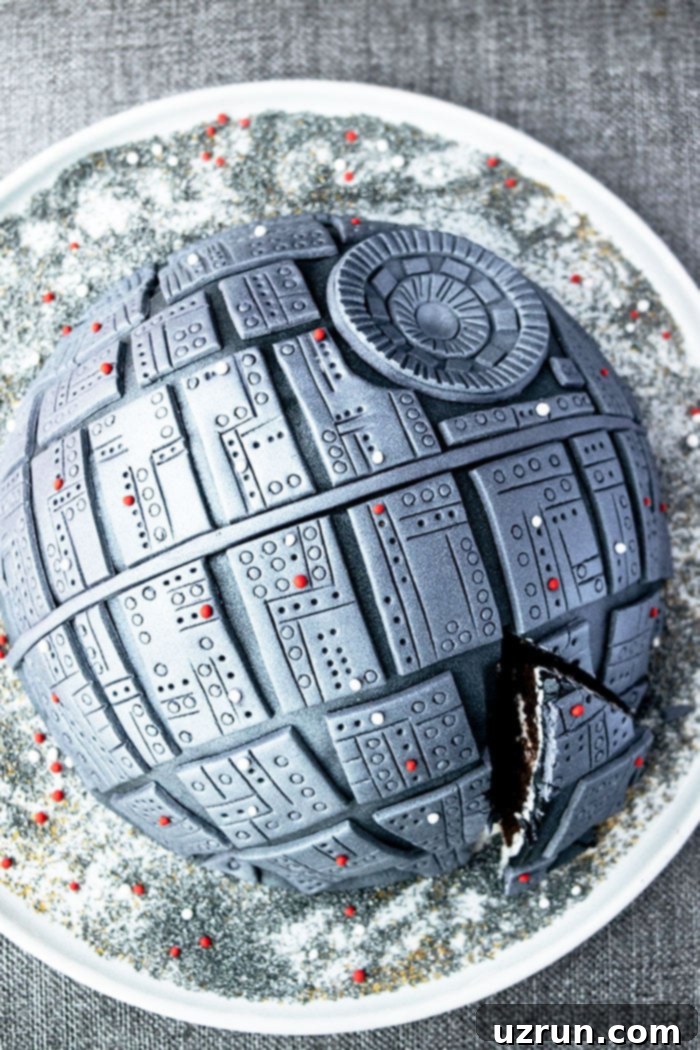
Craft the Ultimate Star Wars Death Star Cake: An Easy Homemade Tutorial
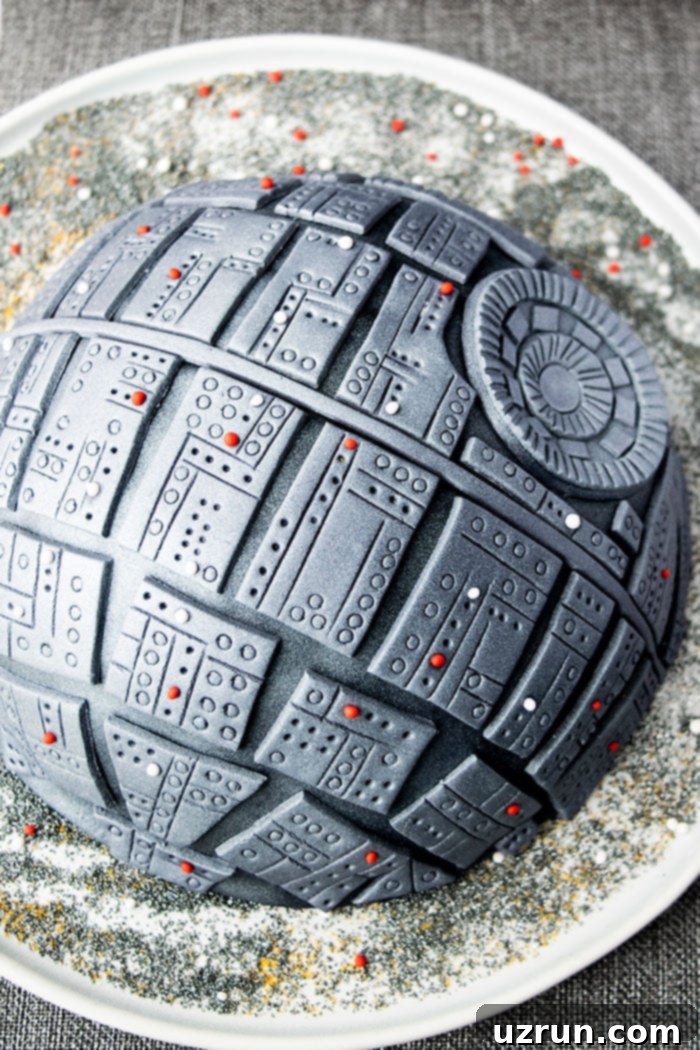
Prepare to journey to a galaxy far, far away, right from your kitchen! If you’re looking to create an unforgettable centerpiece for a Star Wars enthusiast, this easy homemade Death Star cake is your ultimate mission. Forget complicated designs that feel like navigating an asteroid field; this tutorial focuses on simplicity without sacrificing that iconic, impressive look. We’ll guide you through making a rich chocolate cake, frosting it with smooth vanilla buttercream, and transforming it into the ultimate battle station using marshmallow fondant.
While my family traditionally loves our classic birthday cake, my son’s passion for Star Wars demanded something truly epic. This “star cake” was a huge hit, and I’m thrilled to share how you can recreate it. This cake isn’t just for birthdays; it makes a fantastic groomsmen cake, a unique wedding cake for sci-fi fans, or the ultimate treat for any Star Wars celebration. Let’s make some galactic magic!
Why the Death Star? An Iconic Choice for Your Star Wars Cake
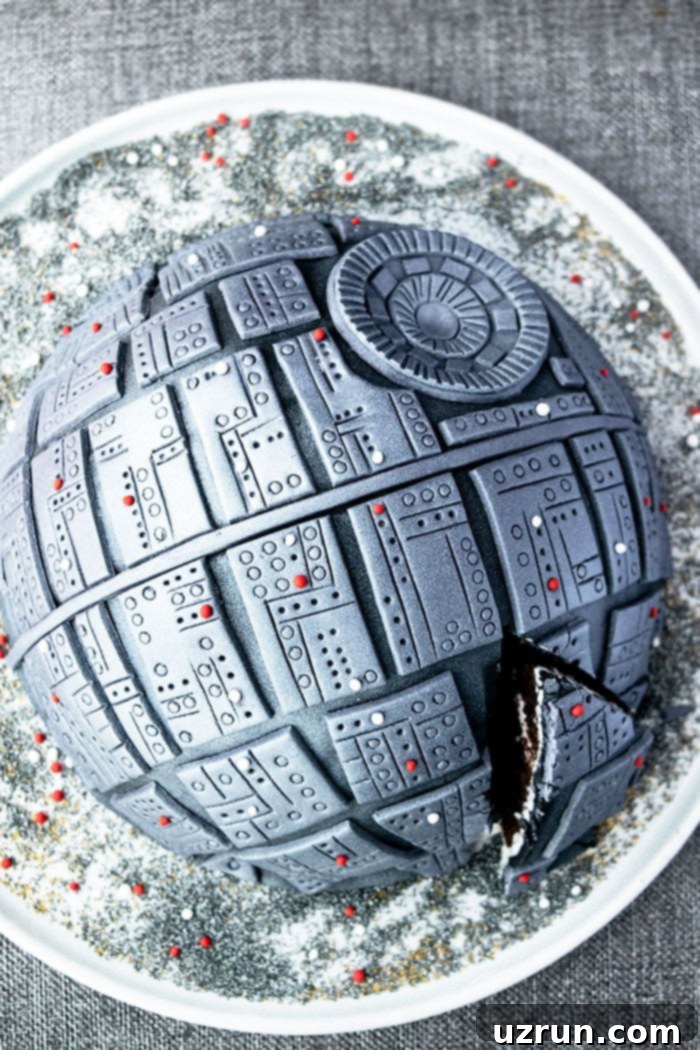
Among all the spacecraft, characters, and symbols in the vast Star Wars universe, the Death Star stands out as one of the most recognizable and visually striking. Its spherical shape, intricate panels, and menacing superlaser dish make it an ideal subject for a show-stopping cake. Unlike some character cakes that require advanced sculpting skills, the Death Star’s geometric design, while detailed, is surprisingly approachable for home bakers. With the right techniques, you can capture its essence and create a dessert that will have everyone exclaiming, “That’s no moon!”
Choosing the Death Star allows for a dramatic presentation and a chance to play with contrasting colors and textures. The dark facade adorned with metallic silver details and tiny red and white lights creates a captivating effect. It’s a conversation starter, a fan tribute, and, most importantly, a delicious treat that celebrates the epic saga. This tutorial streamlines the process, ensuring that even bakers with moderate experience can achieve a professional-looking result.
Getting Started: Ingredients and Essential Tools for Your Galactic Bake
Before you embark on your cake-building mission, gather your ingredients and tools. This recipe focuses on simple, accessible items to ensure your journey is as smooth as possible.
What You’ll Need (Ingredients)
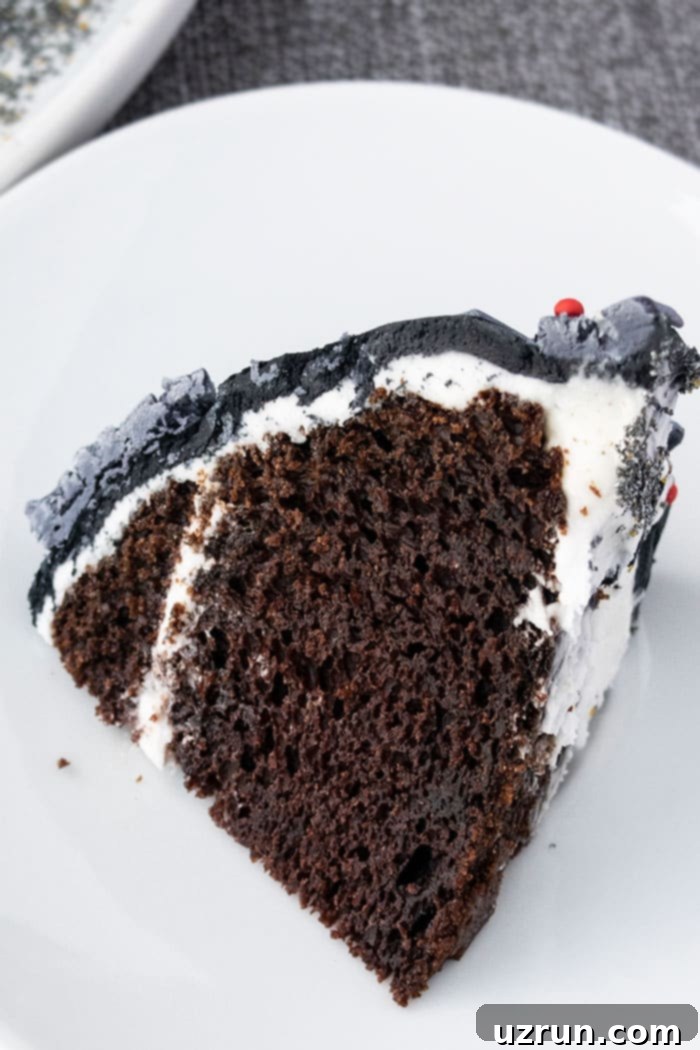
- Chocolate Cake: One batch of your favorite chocolate cake recipe, baked in a 9-inch dome pan. This forms the core of your Death Star. A rich, moist chocolate cake base provides a delightful contrast to the sweet frosting and fondant.
- American Buttercream Frosting: Approximately 2 cups of American buttercream frosting. This serves as both the filling and the smooth canvas for your fondant. Its creamy texture adds another layer of flavor and ensures the fondant adheres beautifully.
- Black Fondant: Essential for the primary outer shell of the Death Star. We highly recommend purchasing this pre-colored (more on that in our tips!).
- Gray Fondant: Used for all the intricate paneling, the superlaser dish, and other structural details. You can buy this pre-colored or dye white fondant gray.
- Red and White Fondant: Just a small amount for the tiny, sparkling “lights” on the Death Star’s surface, adding a touch of realism.
- Edible Silver Spray: The secret weapon for achieving that iconic metallic, battle-worn finish.
- Powdered Sugar or Cornstarch: For dusting your work surface to prevent fondant from sticking.
- Water: Used sparingly as an edible “glue” for attaching fondant pieces.
Essential Baking Equipment
- 9-inch Dome Cake Pan: This is a crucial tool for achieving the Death Star’s signature spherical shape without tedious carving. It saves time and minimizes crumbs.
- Offset Spatula: For evenly spreading buttercream.
- Rolling Pin: Specifically for rolling out fondant to an even thickness.
- Sharp Knife or Pizza Cutter: For cleanly trimming excess fondant and cutting out precise shapes.
- Small Round Decorating Tips (various sizes): To create uniform circular indentations and details on the gray fondant panels.
- Paintbrush: A small, clean brush for applying water as an adhesive for fondant.
- Steam Iron (optional, but highly recommended): Used to melt away powdered sugar residue and give fondant a smooth, professional sheen.
- Cutting Board or Non-Stick Mat: A clean surface for rolling and cutting fondant.
Step-by-Step Guide: How to Make Your Star Wars Death Star Cake
Now, let’s dive into the core of our mission: assembling and decorating your incredible Death Star cake. Follow these steps carefully for a smooth and successful execution.
- Bake Your Chocolate Cake: Start by baking your chosen chocolate cake recipe in a 9-inch dome pan. It’s absolutely crucial to let the cake cool completely before moving on. A warm cake will melt your frosting, leading to a sticky, crumbly mess. Patience is key here – a fully cooled cake ensures a stable structure for decoration.
- Prepare the Frosting: While your cake is cooling, whip up your American buttercream frosting. Ensure it’s smooth and spreadable. This will be used for both filling the cake and creating a smooth base for the fondant.
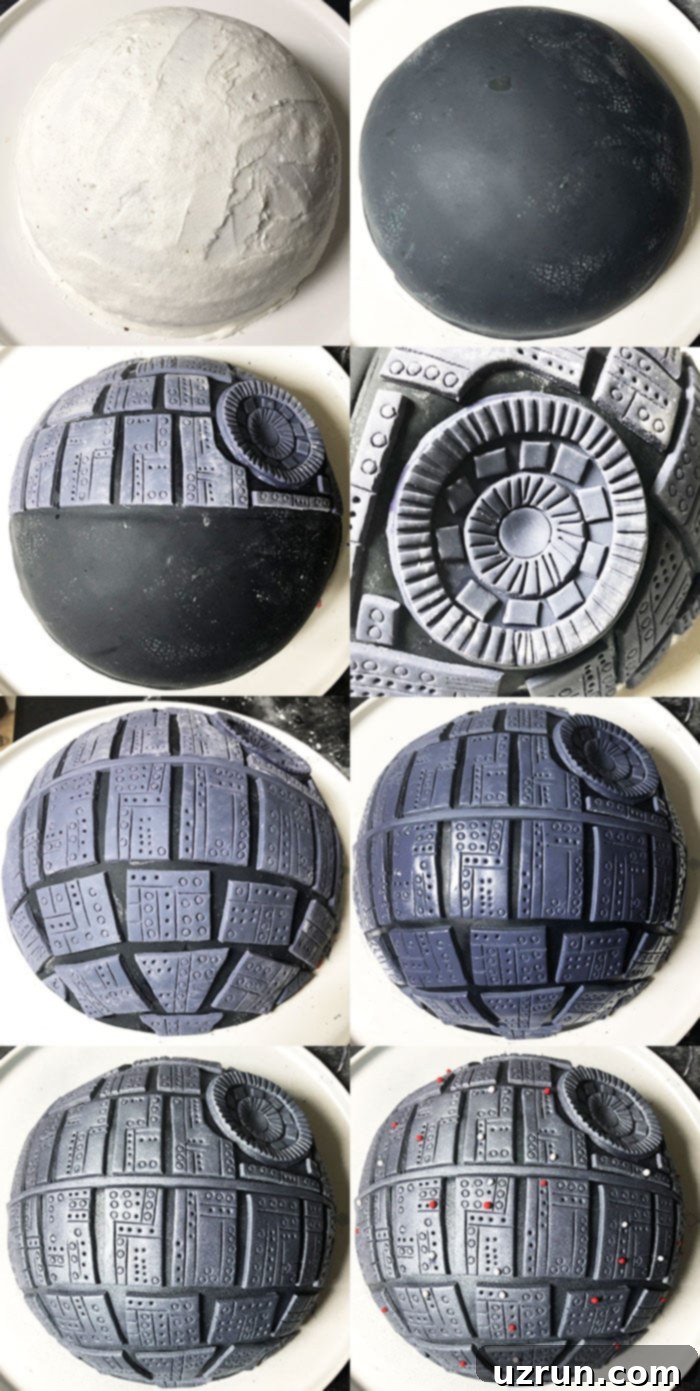
- Slice, Fill, and Crumb Coat: Once your dome cake is completely cool, carefully slice it horizontally into two or three layers. Fill each layer with a generous amount of buttercream. Then, apply a thin layer of frosting over the entire cake – this is called a “crumb coat.” The crumb coat traps any loose crumbs, creating a smooth surface. Chill the crumb-coated cake in the fridge for about 15-20 minutes until the frosting is firm. After chilling, apply a second, thicker, and as smooth as possible layer of frosting. This perfectly smooth surface is essential for fondant application.
- Apply Black Fondant: Lightly dust your work surface with powdered sugar. Roll out the black fondant to an even thickness, large enough to cover your entire dome cake. Carefully lift the fondant and drape it over the cake, smoothing it gently from the top downwards with your hands or a fondant smoother. Work quickly to prevent tearing. Trim off any excess fondant around the base with a sharp knife or pizza cutter for a neat finish.
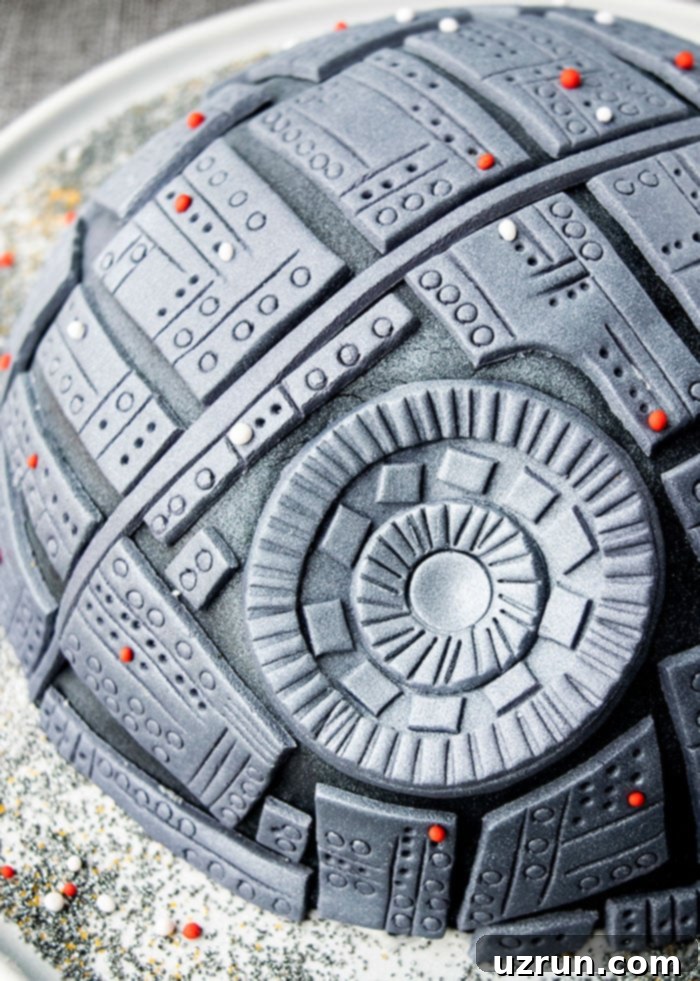
- Craft the Main “Superlaser” Dish: Roll out some gray fondant. Using a round cutter or a knife, cut out a perfect circle, approximately 3 inches in diameter. This will be the iconic superlaser dish. With a sharp knife, gently score lines and add small circular or square indentations to mimic the dish’s intricate details. Set this piece aside.
- Make an Indentation and Attach the Dish: On the upper side of your black-fondant-covered cake, use the back of a spoon or your fingers to gently press in and create a slight indentation. This provides a natural recess for the superlaser dish. Lightly brush the back of your gray fondant circle with a tiny bit of water using a paintbrush and carefully press it into the indentation on the cake. The water acts as a mild adhesive.
- Add Structural Panels: Roll out more gray fondant, aiming for an even thickness. Cut out various rectangle pieces of different lengths and widths. These will form the paneling of the Death Star.
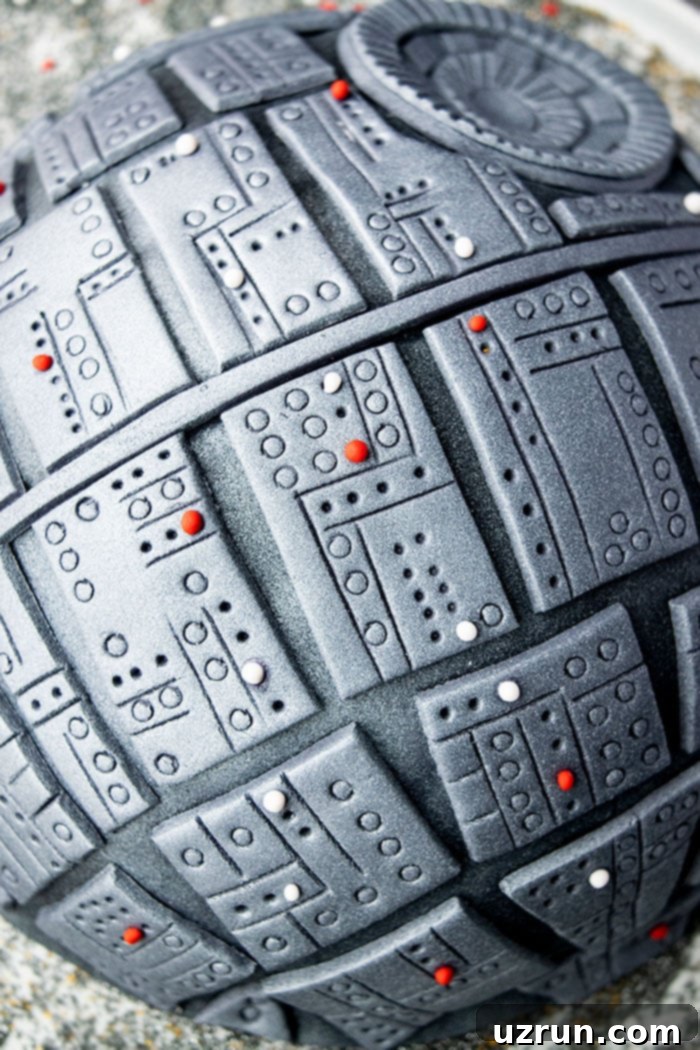
- Detail the Panels: Take each rectangle piece and use a sharp knife to create fine lines and various sizes of circular decorating tips (the opening end) to create small indentations. Reference images of the Death Star if needed for authenticity in your detailing. These small textures will bring the cake to life.
- Stick Panels to the Cake: Using your paintbrush, apply a very thin coating of water to the back of each detailed gray fondant panel. Carefully position and press them onto the black fondant, creating the Death Star’s recognizable grid-like structure. Work systematically, ensuring even spacing where possible. Remember, a little water goes a long way; too much will make the fondant gooey and sticky.
- Steam for Perfection: Once all your fondant pieces are securely in place, you’ll likely notice powdered sugar residue from rolling. To achieve a clean, professional, and shiny finish, use a steam iron. Hold the steam iron about 1 foot away from the cake and gently mist it with steam. This will dissolve the powdered sugar and help the fondant set beautifully. Let the cake dry for about 10 minutes after steaming.
- Spray the Cake: After the cake has thoroughly dried from steaming (this is crucial!), use your edible silver spray. Hold the can about 6-8 inches away and apply an even, light coat over the entire gray and black fondant surface. This will give your Death Star cake that authentic metallic, battle-station sheen. Avoid spraying too much at once to prevent drips.
- Add Little Lights: For the final touch, roll out tiny balls of red and white fondant. Randomly stick these small spheres onto the cake, using a tiny dab of water if needed, to represent the many lights and indicators on the Death Star’s surface. And just like that, you’re done! Your homemade Star Wars Death Star cake is complete and ready for its grand reveal.
Customizing Your Death Star Cake: Creative Variations
While the chocolate cake with vanilla buttercream and black/gray fondant is a classic choice, feel free to customize your Death Star to perfectly match your taste and style. Here are some fun variations to consider:
Alternative Cake Flavors
Don’t limit yourself to chocolate! The dome shape and fondant decoration will work beautifully with many cake bases. Consider these delicious options:
- Vanilla Cake: A timeless favorite that pairs well with almost any frosting.
- Ginger Cake: Offers a unique, spiced flavor profile for an unexpected twist.
- Banana Chocolate Chip Cake: A comforting and flavorful choice for a less traditional Death Star.
- Red Velvet Cake: The striking red interior would be a dramatic reveal, especially for a “destroyable” Death Star!
- Marble Cake: Swirl chocolate and vanilla for a visually interesting cross-section.
Different Frosting Options
The buttercream layer beneath the fondant can also be varied to suit your palate. Just ensure it’s a frosting that sets firmly enough to provide a smooth base for the fondant.
- Caramel Frosting: Adds a rich, buttery sweetness that complements chocolate perfectly.
- Mint Frosting: A refreshing choice that could add a cool, subtle flavor to your chocolate cake.
- Peanut Butter Frosting: A robust and popular flavor that pairs wonderfully with chocolate cake for a more indulgent treat.
- Cream Cheese Frosting: If you’re going with a red velvet cake, a classic cream cheese frosting is a must.
Add Character: Star Wars Toppers & Figurines
To truly elevate your Death Star cake, consider adding some external elements. You can purchase small Star Wars Lego toys or other action figures and strategically place them around the base of the cake or even on top to simulate a battle scene. Imagine X-wings approaching or Darth Vader surveying his creation. These toppers instantly enhance the theme and bring an extra layer of excitement for fans.
Storage & Make-Ahead Tips for Your Masterpiece
Proper storage ensures your Death Star cake remains as delicious and impressive as when you first created it. Fondant-covered cakes have specific needs, so pay close attention to these guidelines.
Room Temperature (Up to 24 Hours): For optimal taste and appearance, I highly recommend storing your finished cake at room temperature, away from direct sunlight, humidity, and excessive moisture. This is also ideal if you are making the cake a day in advance of serving. Fondant can “sweat” or become sticky if subjected to too much temperature fluctuation or humidity. Ensure it’s in a cool, dry place.
Fridge (Leftovers for up to 3 Days): If you have leftovers, they can be stored in a sealed airtight container in the fridge for up to 3 days. However, be aware that fondant does not react well to refrigeration. Over time, it will absorb moisture, becoming noticeably softer and stickier. It may also develop condensation as it comes back to room temperature, which can affect the metallic spray finish. While safe to eat, the texture and appearance of the fondant will deteriorate slightly.
Freezing (Not Recommended): Unfortunately, freezing is not suitable for fondant-decorated cakes. Fondant is very sensitive to moisture and will thaw poorly, often becoming very sticky, discolored, and losing its shape and smoothness. It’s best to enjoy this cake fresh or within a few days from the fridge.
Expert Tips & Techniques for a Flawless Finish
Achieving a professional-looking Death Star cake involves a few key techniques and considerations. These tips will help you navigate common challenges and ensure your galactic creation is a resounding success.
- Homemade Marshmallow Fondant vs. Store-Bought: You can use either, but I highly recommend my homemade marshmallow fondant recipe. While store-bought is convenient, homemade versions often taste significantly better and are more pliable, making them easier to work with, especially for intricate details.
- Why You Need Fondant, Not Just Frosting: While frosting is used to fill and ice the cake, it simply won’t provide the sharp edges, smooth finish, or structural integrity needed for the detailed panels and superlaser dish of the Death Star. Fondant is essential for achieving that iconic, professional look. Frosting would be too soft and prone to smudging.
- Do Not Skip the Edible Silver Spray: This is your secret weapon for authenticity! The edible silver spray is crucial for giving the Death Star its signature metallic, space-station appearance. Without it, the cake won’t have that realistic, battle-ready gleam.
- Always Ice a Completely Cooled Cake: This cannot be stressed enough. If you attempt to frost a warm cake, the buttercream will melt, creating a sticky, unstable, and crumb-laden mess. Always allow ample time for your cake to cool to room temperature, or even chill it slightly, before applying frosting.
- Dome Cake Pan is Your Best Friend: While carving a dome shape from a regular round cake is possible, using a dome pan (like a sports ball pan) is infinitely quicker and cleaner. It eliminates the mess of crumbs and the risk of uneven carving, giving you a perfect base effortlessly.
- Mastering the Steam Iron Technique: After applying all your fondant pieces, you’ll likely see powdered sugar residue. A steam iron, held about a foot away, will gently melt this residue, leaving your fondant shiny, smooth, and professionally finished. This step truly elevates the cake’s appearance. Just be sure not to hold it too close or steam for too long, as excess moisture can damage the fondant.
- Patience with the Silver Spray After Steaming: Your cake will be slightly damp for about 10 minutes after steaming. Resist the urge to spray immediately! If you apply the silver spray to a wet cake, it will create unattractive puddles and streaks. Wait until the cake is completely dry to the touch for an even, flawless metallic finish.
- Avoid Chilling the Prepared Fondant Cake: Once your fondant decorations are complete, avoid putting the cake in the fridge unless absolutely necessary for storage of leftovers. The cool temperature and humidity in the refrigerator can cause condensation and tiny water droplets to form on the fondant as it returns to room temperature, potentially ruining the smooth surface and metallic spray.
- Buy Black Fondant (Seriously): Coloring fondant black (or red) from scratch at home is incredibly difficult and often takes several days for the color to deepen sufficiently. Even then, it rarely achieves a true, rich black. Save yourself a lot of frustration and messy hands by purchasing pre-colored black fondant. For more tips on coloring fondant in general, refer to this guide: How to Color Fondant.
- Use Plenty of Powdered Sugar/Cornstarch: When rolling out fondant, generously dust your work surface, rolling pin, and even your hands with powdered sugar or cornstarch. This prevents the fondant from sticking, tearing, and becoming unmanageable. It’s a fundamental step for smooth fondant work.
- Less is More with Water as Adhesive: When sticking fondant pieces together, use a very small amount of water applied with a paintbrush. A thin, almost invisible coating is all you need. Too much water will dissolve the fondant, turning it into a sticky, gooey mess. Think of it as a light “kiss” of moisture.
More Epic Birthday Cake Ideas
If you loved creating this Star Wars masterpiece, you might enjoy these other creative and fun birthday cake tutorials:
- Easy Monster Cake
- Peacock Cake
- Butterfly Cake
- Galaxy Cake
- Tie Dye Shirt Cake
- Cake Ball Cake
- Crying Baby Cake
- Mini Sushi Cake
Star Wars Birthday Cake Recipe
Star Wars Birthday Cake
Abeer Rizvi
Easy Star Wars cake recipe and tutorial (Death Star cake)- Homemade with simple ingredients. It’s a chocolate cake with vanilla buttercream and decorated in marshmallow fondant.
Prep Time: 10 mins
Cook Time: 40 mins
Decorating Time: 2 hrs
Total Time: 2 hrs 50 mins
Course: Dessert
Cuisine: American
Servings: 12 Slices
Calories: 158 kcal
Ingredients
- 1 batch Chocolate cake (baked in a 9-inch dome pan)
- 2 cups American buttercream frosting
- Black fondant
- Gray fondant
- Small amounts of Red and White fondant (for lights)
- Edible silver spray
- Powdered sugar or cornstarch (for dusting)
- Water (for adhering)
Instructions
- Bake chocolate cake in a 9-inch dome pan and let it cool completely.
- While the cake is cooling, make the buttercream frosting.
- Once the cake has fully cooled down, slice it in half (or into 3 layers).
- Fill the cake layers with frosting.
- Then, crumb coat the entire cake with a thin layer of frosting, chill for 15-20 minutes, and apply a second, smooth layer of frosting.
- Roll out black fondant on a powdered sugar-dusted surface and spread it over the cake. Cut off excess along the sides with a knife or pizza cutter.
- Roll out gray fondant and cut out a circle piece (about 3 inches). Add details to it with a knife and some small circles/square pieces. Keep aside.
- Use the back of a spoon or your fingers to gently dig into the top side of the cake and make an indentation for the superlaser dish.
- Stick the detailed gray circle piece here with a tiny bit of water applied with a paintbrush.
- Roll out gray fondant again, this time cutting out rectangle pieces of various sizes.
- Add details to each rectangle piece with a sharp knife and various sizes of circle decorating tips to create indentations.
- Use a paintbrush and very little water to stick these detailed gray panels onto the black fondant-covered cake.
- Steam the cake (with a steam iron) from a 1-foot distance to dissolve powdered sugar residue and create a smooth finish. Let it dry for about 10 minutes.
- Once completely dry, use edible silver spray to create a metallic finish over the entire cake.
- Roll out tiny balls of red and white fondant and randomly stick them on the cake for lights. Enjoy your magnificent Death Star!
Notes
- Refer to all the detailed tips above for best results, especially regarding working with fondant and steaming techniques.
- Leftovers can be stored in a sealed container in the fridge for up to 3 days. Please note that the fondant may become slightly soft and sticky during this time, as it deteriorates in the fridge. Freezing is not recommended.
Nutrition
Calories: 158 kcal | Carbohydrates: 26g | Protein: 1g | Fat: 6g | Saturated Fat: 1g | Sodium: 70mg | Potassium: 13mg | Fiber: 1g | Sugar: 24g | Vitamin A: 1IU | Calcium: 1mg | Iron: 1mg
An automated tool is used to calculate the nutritional information. As such, I cannot guarantee the accuracy of the nutritional information provided for any recipe on this site.
