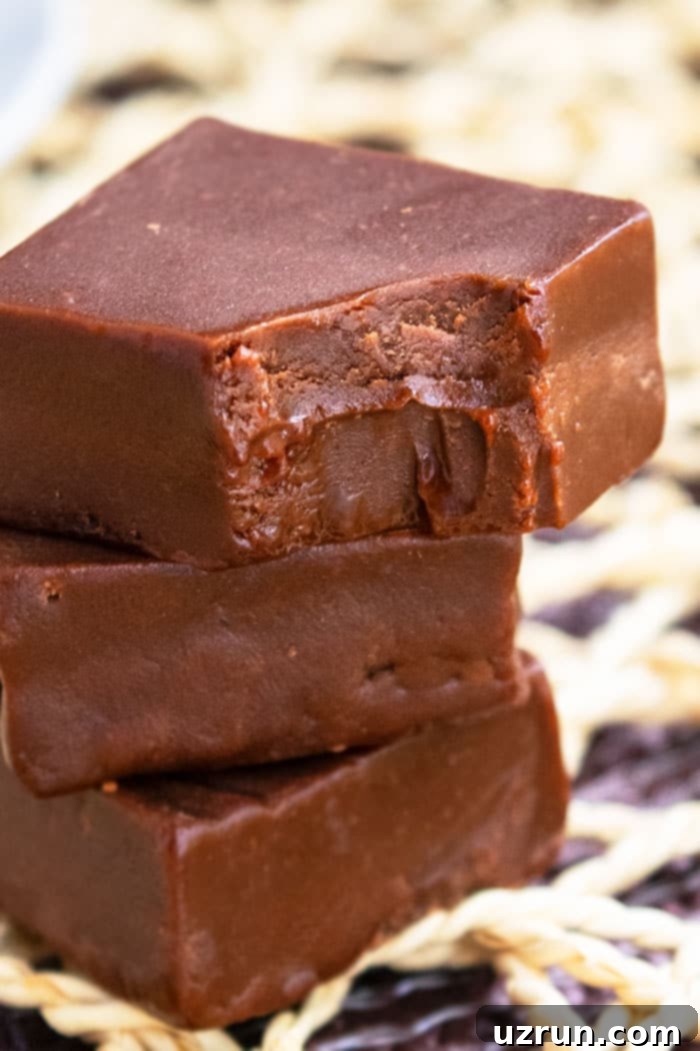
Effortless 3-Ingredient Microwave Chocolate Fudge: Your Quick & Creamy No-Bake Holiday Treat
Imagine a dessert that’s rich, intensely chocolatey, incredibly creamy, and unbelievably easy to make. This **3-ingredient microwave chocolate fudge recipe** delivers all that and more! Forget complicated techniques or special equipment like candy thermometers. This homemade, no-bake delight comes together in minutes and is guaranteed to be a showstopper, especially during the bustling Christmas holidays.
Fudge holds a special place in the hearts of many, particularly when the holiday season rolls around. It’s a cherished treat, perfect for gifting, sharing, or simply indulging. While traditional fudge can be a labor of love, our microwave method transforms it into a quick and stress-free project. The beauty of fudge lies in its versatility; the possibilities for flavors and mix-ins are endless. Beyond this classic chocolate version, we also adore this White Chocolate Fudge and the delightful Rocky Road Fudge, proving that there’s a fudge for every craving.
Whether you’re a seasoned home cook or a complete novice in the kitchen, this recipe is designed for success. It’s perfect for last-minute party contributions, thoughtful edible gifts, or just satisfying a sudden sweet tooth. Dive into the world of effortless homemade confections and discover how simple it is to create truly amazing chocolate fudge right in your kitchen.
What is Chocolate Fudge? The Ultimate Sweet Treat Explained
At its core, **chocolate fudge** is a rich, dense, and incredibly smooth confection, falling somewhere between a firm candy and a soft truffle. Traditionally, it’s a sugar candy prepared by cooking sugar, milk (or cream), butter, and cocoa powder (or chocolate) to a specific temperature, then beating it as it cools to achieve its signature creamy texture. This process, while rewarding, often requires careful attention and a candy thermometer to ensure perfect consistency and prevent crystallization.
However, this recipe offers a modern, **quick and easy method** that bypasses the need for stovetop cooking and specialized tools. Our microwave version simplifies the process dramatically, using just three common ingredients: chocolate chips, butter, and sweetened condensed milk. This approach yields a fudge that is just as luxurious and satisfying as its traditional counterpart, but with significantly less effort and time. It’s the ideal solution for anyone seeking homemade decadence without the culinary gymnastics.
Why Choose Our Easy Microwave Fudge Recipe?
In today’s fast-paced world, convenience is key, and this **microwave fudge recipe** truly delivers on both speed and flavor. Here’s why it stands out as the best option for your homemade sweet cravings:
- Effortless Preparation: With only three ingredients and the power of your microwave, you’ll spend less time in the kitchen and more time enjoying your delicious creation. There are no complex steps, no constant stirring over a hot stove, and minimal cleanup.
- No Candy Thermometer Needed: This is a game-changer for many home cooks. Achieving the precise “soft ball stage” with traditional fudge can be intimidating and requires specific equipment, but our recipe eliminates that guesswork entirely, making it accessible to everyone.
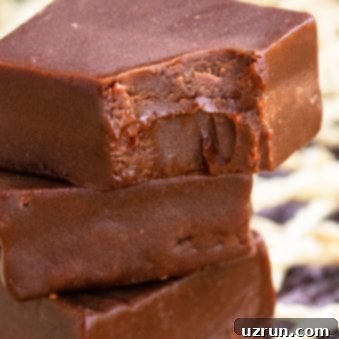
- Rich & Creamy Texture: Despite its simplicity, this fudge boasts an incredibly smooth, dense, and melt-in-your-mouth consistency that rivals any gourmet fudge. The combination of ingredients ensures a luxurious texture without the fuss.
- Quick Set Time: After a brief chilling period in the refrigerator, your fudge will be firm enough to slice and serve. This makes it perfect for spontaneous treats, unexpected guests, or last-minute holiday preparations.
- Incredible Versatility: This recipe serves as a fantastic base for endless variations. You can easily customize flavors and add-ins to suit any preference, dietary need, or celebratory occasion.
- Perfect for Gifting: Homemade fudge is a thoughtful and delightful gift, especially during the festive season. This easy recipe makes it feasible to whip up multiple batches for friends, family, neighbors, and colleagues without feeling overwhelmed.
Embrace the simplicity without sacrificing quality or taste. This recipe proves that homemade treats can be both incredibly delicious and wonderfully straightforward to prepare.
Step-by-Step Guide: How to Make Easy Chocolate Fudge in the Microwave
Making decadent homemade chocolate fudge has never been easier! Follow these simple steps to create a rich, creamy treat in no time, perfect for any occasion.
- Prepare Your Ingredients and Bowl: Start by gathering your three key ingredients: high-quality chocolate chips (semi-sweet is recommended for a balanced flavor, but milk or dark varieties work beautifully too!), a standard 14 oz. can of sweetened condensed milk, and ¼ cup of unsalted butter. In a sturdy, generously sized microwave-safe mixing bowl, combine the chocolate chips, the entire can of sweetened condensed milk, and the butter, cut into small, even pieces to ensure it melts more efficiently.
- Microwave and Stir Until Smooth: Place the bowl in the microwave and begin heating the ingredients in short, controlled bursts. Start with a 30-second interval, then remove the bowl and stir the mixture thoroughly with a spatula. Continue this process – heating for 30 seconds, then stirring vigorously – until the chocolate chips are fully melted, the butter is completely incorporated, and the mixture is entirely smooth, glossy, and free of any lumps. The key is gentle, gradual melting with frequent stirring to prevent scorching and ensure even consistency. Avoid the temptation to overcook.
- Pour into Prepared Pan: Once your fudge mixture has achieved that perfect, velvety smoothness, immediately pour it into an 8×8 inch square pan that has been thoughtfully lined with wax paper or parchment paper. Ensure there’s an adequate overhang of paper on the sides; these will serve as convenient “handles” later, making it incredibly easy to lift the set fudge out of the pan. Use your spatula to spread the mixture evenly into all corners, smoothing the top surface for a polished finish.
- Chill to Perfection: Transfer the pan containing the fudge mixture to the refrigerator. Allow the fudge to chill undisturbed for a minimum of 2-3 hours. For optimal results and a truly firm, impeccably sliceable consistency, extending the chilling time to 4 hours or even overnight is highly recommended. Resist the urge to cut it prematurely, as proper chilling is absolutely essential for the fudge to set correctly and maintain its shape.
- Slice, Serve, and Savor: Once the fudge is completely firm to the touch, use the wax paper overhang to carefully lift the entire block of fudge out of the pan and transfer it to a clean cutting board. Employing a very sharp knife, cut the fudge into your desired size and shape – small squares or neat rectangles are typical and perfect for sharing. For the cleanest, most precise edges, wipe your knife clean with a damp cloth between cuts. Now, it’s time to indulge and enjoy your homemade, melt-in-your-mouth chocolate fudge!
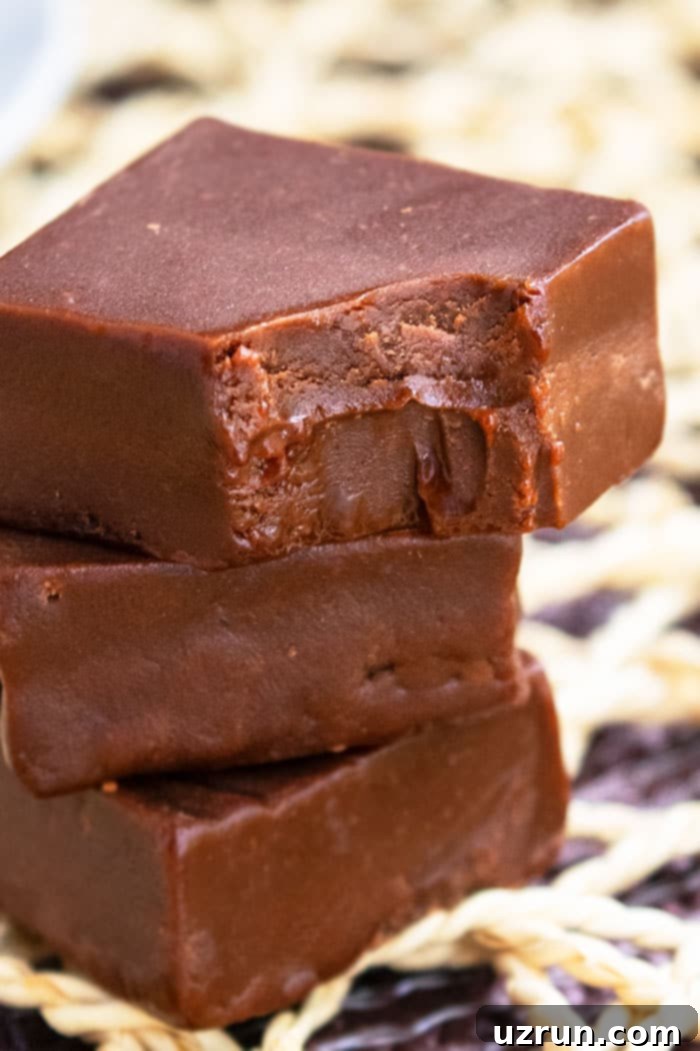
Chocolate vs. Fudge: Understanding the Key Distinctions
While both chocolate and fudge are beloved sweet treats, they are distinct in their composition, texture, and preparation. Understanding these differences can enhance your appreciation for both confections and guide your culinary choices:
- Core Ingredients and Origin: True chocolate, in its purest form, is primarily derived from cacao beans, which are roasted, ground, and then processed into cocoa solids and cocoa butter. Other ingredients like sugar, milk solids, and flavorings are added to create various types of chocolate bars (dark, milk, white). Fudge, on the other hand, is fundamentally a type of sugar confection. While it very often features chocolate as a key flavoring (especially in **chocolate fudge**), its base relies on a cooked mixture of sugar, milk (or condensed milk), and butter, which is then beaten to achieve a specific crystalline structure.
- Texture and Consistency: This is perhaps the most noticeable and defining difference. Chocolate bars, particularly dark varieties, are typically firm and brittle, designed to snap cleanly when broken. They possess a smooth, quick-melting quality in the mouth due to their high cocoa butter content. Fudge, by contrast, is known for its softer, denser, and more malleable texture. It’s creamy, slightly chewy, and melts slowly, offering a rich, lingering mouthfeel rather than a clean snap.
- Preparation Method: Chocolate making involves precise tempering processes to achieve its characteristic sheen, snap, and stable crystal structure. Fudge, even in its traditional stovetop form, involves cooking ingredients to a “soft ball stage” (a specific temperature) and then beating it as it cools. This beating process encourages the formation of tiny sugar crystals, which gives fudge its distinctive smooth texture. Our **microwave fudge recipe** simplifies this, relying on the unique combination of melted chocolate chips, butter, and sweetened condensed milk to create the desired consistency without complex temperature control.
- Versatility in Add-ins and Forms: While chocolate can certainly have inclusions like nuts, dried fruits, or caramel, fudge is arguably even more famous for its vast array of mix-ins and flavor variations. From a wide range of nuts and dried fruits to candies, extracts, and swirls, fudge is a versatile canvas for culinary creativity, making it a highly customizable and endlessly adaptable treat.
In essence, think of chocolate as the fundamental ingredient or a standalone finished product (like a chocolate bar), whereas fudge is a specific type of creamy, soft candy or confection that frequently incorporates chocolate, but is ultimately defined by its unique texture and preparation method.
Troubleshooting Microwave Fudge: Achieving Perfect Consistency Every Time
While this **easy chocolate fudge recipe** is incredibly straightforward, sometimes things don’t go exactly as planned. Don’t worry! Here’s a comprehensive guide to common consistency issues and how to troubleshoot them, ensuring your **homemade fudge** is always perfect and delicious:
Why is My Fudge Too Soft, Gooey, or Won’t Set Properly?
A soft, unset, or overly gooey fudge can be disappointing, but it’s usually easily remedied or prevented in future batches. Several factors can contribute to this frustrating issue:
- Insufficient Heating: This is the most common culprit. The mixture needs to be heated sufficiently for the chocolate chips and butter to fully melt and thoroughly combine with the sweetened condensed milk. This melting and mixing process allows the ingredients to properly emulsify and will help the fudge set firmly. Make sure you’re stirring frequently during each 30-second microwave interval to ensure even heat distribution and complete melting.
- Inaccurate Measurements: Even with a simple recipe, precision matters. Adding too much sweetened condensed milk, for example, will result in a higher liquid content that prevents the fudge from firming up properly, leading to a softer, stickier consistency. Always use standard measuring cups and spoons and adhere strictly to the recipe’s quantities.
- Not Chilled Long Enough: Patience is a virtue, especially when making fudge! The cooling and setting process in the refrigerator is absolutely crucial. If you attempt to cut the fudge before it’s thoroughly chilled (typically 2-3 hours, but longer for a truly firm fudge), it will be too soft and sticky. For the best, most sliceable results, allow it to chill for at least 4 hours, or ideally, overnight.
- Using the Wrong Type of Milk: This is a critical point that cannot be stressed enough. This recipe *requires* sweetened condensed milk, which is distinctively thick and contains a high amount of sugar crucial for the fudge’s structure. Using evaporated milk, regular milk, or any other dairy will not work, as they lack the necessary sugar content and thickness for the fudge to set correctly.
- Humidity: High humidity in your environment can sometimes affect how well sugar-based confections set. While less common for microwave fudge, it can be a minor contributing factor.
Why is My Fudge Grainy, Crumbly, or Greasy?
A perfectly smooth and creamy fudge is the ultimate goal. If your fudge turns out grainy, crumbly, or appears greasy, here’s what might have happened:
- Overheating/Burning: The microwave is powerful! If the chocolate mixture is overheated for too long or at too high a power setting, especially without constant stirring between intervals, the sugar can crystallize, and the chocolate can scorch. This often leads to a grainy, gritty, or even burnt texture. Always heat in short bursts and stir thoroughly and gently.
- Over-mixing: While adequate stirring is necessary to melt and combine ingredients, excessive or aggressive mixing *after* the ingredients are already melted and smooth can sometimes cause the mixture to separate or encourage undesirable sugar crystal formation, resulting in a grainy or crumbly texture. Mix just until the mixture is homogenous and smooth, then stop.
- Fudge is Too Old/Dry: Like many confections, fudge can dry out over time, especially if not stored properly in an airtight environment. If your fudge is past its prime, it might become crumbly and lose its desirable moistness. Proper storage helps maintain its texture.
- Separation/Oiliness: If your fudge appears greasy or the chocolate seems to have separated from the other ingredients, it could be a sign of overheating or that the fat (from butter or cocoa butter) has rendered out due to excessive heat. Again, slow and steady melting with frequent stirring is the preventative measure.
- Temperature Fluctuations: If the fudge is repeatedly brought to room temperature and then re-chilled, or stored in an inconsistent environment, it can sometimes affect its crystalline structure, potentially leading to a less smooth consistency over time.
By understanding these potential pitfalls and applying the recommended solutions, you’ll be well on your way to crafting consistently perfect batches of homemade **microwave chocolate fudge** that everyone will rave about!
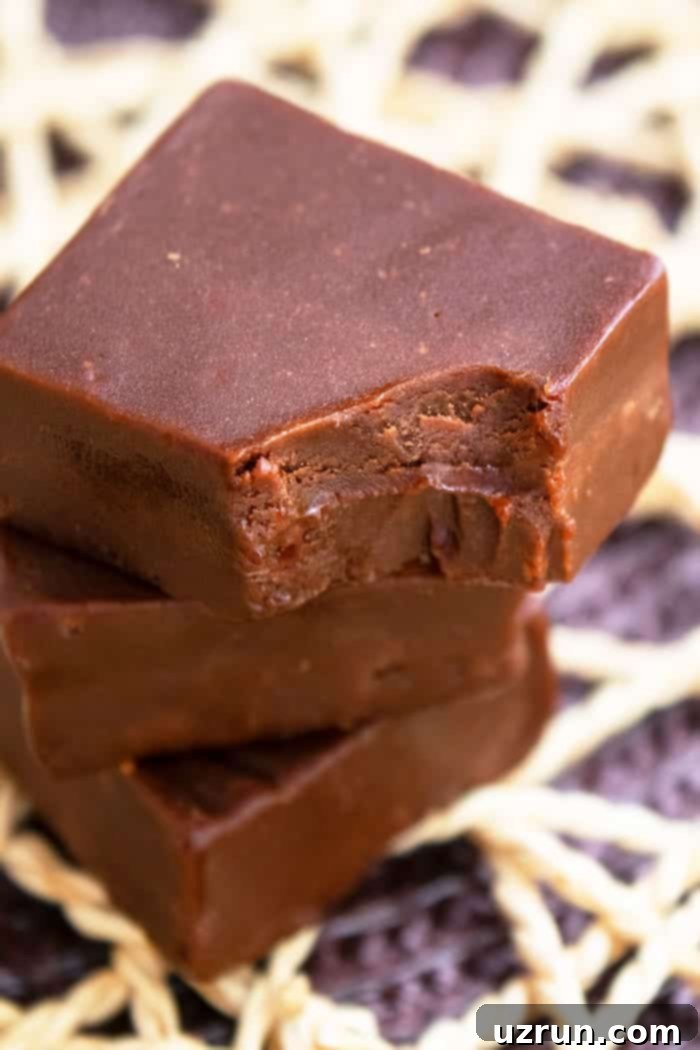
Endless Possibilities: Delicious Variations for Your Chocolate Fudge
One of the most exciting and enjoyable aspects of making **homemade chocolate fudge** is the ability to customize it with a plethora of delicious add-ins and flavor enhancements. This basic **3-ingredient fudge recipe** is an incredibly versatile canvas for your culinary creativity. Here are some popular and delightful variations to inspire you to make your fudge uniquely yours:
- Nutty Delights: Introduce a delightful crunch and earthy flavor by stirring in your favorite chopped nuts. Almonds, walnuts, pecans, or even roasted peanuts work wonderfully and provide a satisfying textural contrast to the creamy fudge. For an enhanced flavor, lightly toast the nuts before adding them.
- Fruity Accents: For a burst of fruity sweetness and a chewy texture, fold in dried fruits. Tart dried cherries, sweet apricots, tangy cranberries, or classic golden raisins are all excellent choices. Their natural acidity can beautifully balance the richness of the chocolate, creating a more complex flavor profile.
- Colorful Sprinkles: Perfect for birthdays, holidays, or any festive occasion, sprinkles add a fun pop of color and a subtle textural difference. After pouring the melted fudge mixture into the pan, generously scatter colorful sprinkles on top. Gently press them down with your palm or a spatula to ensure they adhere securely to the fudge as it cools and sets.
- Cookie Crumble Inclusion: Transform your fudge into a cookies-and-cream dream! Roughly crush Oreos, Biscoff cookies, graham crackers, or any favorite crunchy cookies and gently fold them into the chocolate mixture just before pouring it into the pan. This adds both a pleasant texture and a familiar, comforting flavor that’s universally loved.
- Flavorful Extracts: A small amount of a high-quality extract can completely change the flavor profile of your fudge. Start with 1 teaspoon and adjust to taste, as a little goes a long way. Mint extract creates a classic “mint chocolate chip” experience, while almond, vanilla bean, orange, or even a touch of rum extract can add sophisticated and aromatic notes.
- Bright Citrus Zests: For a refreshing and fragrant twist, incorporate fresh citrus zests. Lemon, lime, or orange zest can cut through the richness of the chocolate, offering a vibrant and zesty counterpoint. Remember to only zest the colored part of the peel, avoiding the bitter white pith.
- Gooey Marshmallow Swirl: For a softer, chewier, and wonderfully whimsical fudge, press mini marshmallows into the warm mixture immediately after pouring it into the prepared pan. The marshmallows will slightly melt into the warm fudge, creating pockets of gooey goodness that are incredibly appealing.
- Decadent Chocolate Peanut Butter Fudge: This is a timeless and incredibly popular flavor combination! For a beautiful swirled effect, you can create a separate batch of Peanut Butter Fudge and gently swirl it into the chocolate fudge. Alternatively, you can mix a generous amount of creamy peanut butter directly into your chocolate fudge mixture (you might need to slightly adjust the amount of butter or chocolate chips to maintain consistency). Adding roughly chopped salted peanuts can elevate this variation even further, providing both crunch and a salty contrast.
- Adjusting Chocolate Base: Milk or Dark Chocolate Fudge: While semi-sweet chocolate chips offer a balanced and universally appealing flavor profile, you can easily alter the intensity of your fudge by using different types of chocolate chips. Opt for **milk chocolate chips** for a sweeter, milder, and creamier fudge, or choose **dark chocolate chips** for a more intense, bittersweet, and sophisticated chocolate experience. Ensure the chocolate chips are good quality for optimal melting and flavor.
Don’t be afraid to experiment with your favorite candies, toasted coconut flakes, a sprinkle of sea salt, or even a swirl of dulce de leche. Your kitchen is your laboratory, and your unique creation could be the next great **homemade fudge** innovation. Let your imagination run wild and create a fudge that’s uniquely yours!
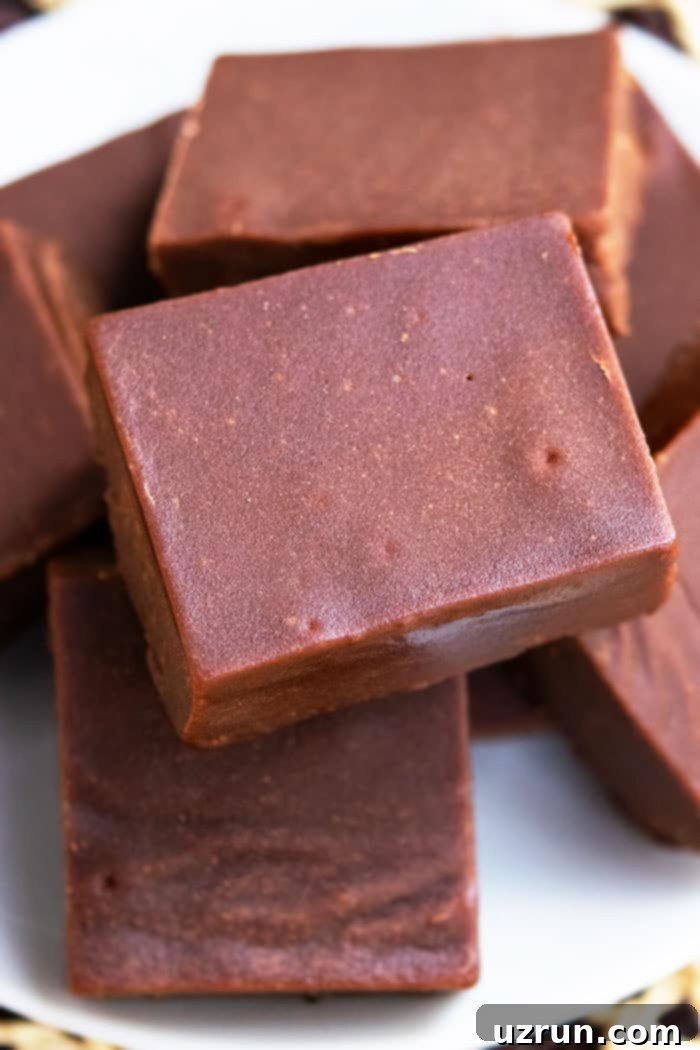
Expert Tips and Techniques for Perfect Microwave Fudge Every Time
Even with a recipe as simple as this **3-ingredient microwave chocolate fudge**, a few expert tips and techniques can elevate your homemade creation from good to absolutely perfect. Pay close attention to these details for the best possible results, ensuring your fudge is always creamy, well-set, and delicious:
- The Crucial Difference: Sweetened Condensed Milk vs. Evaporated Milk: This is arguably the most important tip for this recipe. You *must* use **sweetened condensed milk**. Do not, under any circumstances, substitute it with evaporated milk or regular milk. Sweetened condensed milk is thick, highly concentrated, and contains a significant amount of sugar, which is essential for the fudge to set properly and achieve its characteristic creamy texture. Evaporated milk is unsweetened and much thinner, leading to a fudge that will simply not firm up.
- Opt for Unsalted Butter: While a pinch of salt can indeed enhance flavors in many recipes, for this **chocolate fudge**, unsalted butter is highly preferred. Using unsalted butter gives you complete control over the sweetness profile and prevents your delicious treat from tasting unexpectedly salty. If you only have salted butter on hand, you can still use it, but be aware it might subtly alter the final flavor.
- Invest in Quality Chocolate Chips: The overall flavor of your fudge is largely dependent on the quality of the chocolate you use. While reliable everyday brands like Nestle Toll House work perfectly well and are budget-friendly, opting for premium chocolate chips from brands like Godiva, Ghirardelli, Lindt, or Scharffen Berger will undoubtedly result in an incredibly rich, luxurious, and intensely flavored fudge. Experiment with different brands and percentages of cacao to find your personal favorite.
- Proper Pan Preparation is Key: Always line your square pan (an 8×8 inch pan is ideal) generously with wax paper or parchment paper. Ensure there’s enough overhang on the sides to create convenient “handles.” This simple yet crucial step is vital for easy, mess-free removal of the set fudge, preventing it from sticking to the pan and making clean, effortless slicing possible.
- Use a Sharp Knife for Clean Cuts: Once your fudge is perfectly set and thoroughly firm, use a very sharp knife to cut it into neat squares or rectangles. A clean, sharp blade will glide through the fudge, giving you beautiful, defined edges without crumbling. For extra pristine slices, you can lightly oil the knife or run it under hot hot water and wipe it dry between each cut.
- Serving Temperature Matters for Optimal Texture: Fudge is best enjoyed when it’s allowed to come to slightly above refrigerator temperature. Remove your **homemade fudge** from the fridge about 15-20 minutes before you plan on serving it. This brief time at room temperature allows it to soften just slightly, enhancing its creamy, melt-in-your-mouth texture and bringing out its full, rich flavor.
Storage and Gifting Your Homemade Fudge
- How to Store Fudge: To keep your **easy chocolate fudge** fresh and delicious, store it in an airtight container. Place the container in the refrigerator, where it will maintain its quality for up to 1 week. Remember to always allow it to come to room temperature briefly before serving for optimal texture and flavor.
- Can You Freeze Fudge? Absolutely, yes! Fudge freezes exceptionally well, making it an excellent make-ahead treat for future indulgence or gifting. To prevent freezer burn and maintain peak freshness, double-wrap the fudge (either as a whole block or individual pieces) tightly in plastic wrap, then place it in an airtight freezer-safe container or a heavy-duty freezer bag. It can be stored in the freezer for up to 3 months. When ready to enjoy, thaw it in the refrigerator overnight or at room temperature for a few hours.
- Thoughtful Fudge Packaging for Gifts: **Homemade fudge** is a perennial favorite for edible gifts, especially during the holidays. For individual wrapping, plastic bags or wax paper work best to prevent sticking and maintain freshness, making each piece easily accessible. Once individually wrapped, arrange your fudge pieces in decorative tins, festive gift boxes, or clear cellophane bags tied with a beautiful ribbon. For more creative and practical solutions for presenting your delicious edible gifts, explore these Food and Cookie Packaging Ideas (Easy).
By diligently following these comprehensive tips, your **3-ingredient microwave chocolate fudge** will not only be foolproof but also incredibly impressive, making you the star of any gathering!
More Delicious Candy Recipes to Explore
If you’ve enjoyed making this easy chocolate fudge, you might be inspired to try your hand at other delightful homemade candies. Here are some fantastic recipes to expand your confectionery repertoire:
- Chocolate Bark
- Chocolate Mint Truffles
- Nougat Candy
- Microwave Peanut Brittle
- Candied Orange Peel and Slices
- Coffee Fudge
- Homemade Gourmet Chocolate
Frequently Asked Questions About Chocolate Fudge
Here are answers to some common questions about making and enjoying homemade chocolate fudge:
- Q: Can I use different types of chocolate chips?
A: Absolutely! While semi-sweet chocolate chips provide a balanced flavor, you can easily use milk chocolate chips for a sweeter, milder fudge, or dark chocolate chips for a more intense, bittersweet experience. Just ensure they are good quality melting chocolates for the best results. - Q: Do I need a special pan for this recipe?
A: An 8×8 inch square pan is ideal for the proportions in this recipe, yielding a good thickness. However, any similar-sized baking dish or a slightly larger one (which will result in thinner fudge) will work. The most important thing is to line it well with wax paper or parchment paper for easy removal. - Q: What if my fudge is still sticky or too soft after chilling?
A: This usually indicates it needs more chilling time. Ensure it’s placed in the coldest part of your refrigerator for at least 3-4 hours, or even better, overnight. The fudge should feel very firm to the touch before you attempt to cut it. Inaccurate ingredient measurements (e.g., too much condensed milk) can also contribute to this issue. - Q: Can I add alcohol to my fudge for an adult twist?
A: Yes, a small amount of your favorite liqueur can add a wonderful adult flavor. Consider adding a tablespoon or two of Kahlua, Baileys Irish Cream, rum, or Grand Marnier (for an orange kick) in the last stage of melting, after the chocolate is smooth, and mix it in thoroughly. Start with a small amount and adjust to your taste preferences. - Q: Is this fudge recipe gluten-free?
A: Generally, yes, as the core three ingredients (chocolate chips, sweetened condensed milk, and unsalted butter) are typically gluten-free. However, it is always crucial to check the labels of your specific brands to confirm, especially if you plan to add any mix-ins like cookies, which often contain gluten. - Q: How can I make my fudge shine?
A: The natural gloss of the chocolate and proper melting technique usually give the fudge a nice shine. Ensure you’re melting slowly and stirring well to keep the chocolate tempered and smooth. A perfectly smooth top surface before chilling also contributes to a glossy finish.
Recipe
Homemade Chocolate Fudge
Abeer Rizvi
Pin Recipe
Want to Save This Recipe?
Enter your email & I’ll send it to your inbox. Plus, get great new recipes from me every week!
By submitting this form, you consent to receive emails from CakeWhiz
Ingredients
- 3 cups Chocolate chips Semisweet
- 1 can Sweetened condensed milk 14 oz. can
- ¼ cup Butter Unsalted, Cut into small pieces
Instructions
-
In a microwave-safe bowl, add chocolate chips, condensed milk, butter.
-
Heat in the microwave for 30 seconds at a time, making sure to mix often until everything is fully melted and mixture is smooth and creamy.
-
Pour this mixture in a square pan (Dimensions: 8×8), lined with wax paper.
-
Chill in the fridge for 2-3 hours or until the fudge sets completely.
-
Use a sharp knife to cut slices. Enjoy!
Video
Notes
- Read all my tips above for detailed guidance on achieving perfect fudge consistency and troubleshooting common issues.
- Leftovers can be stored in a sealed airtight container in the fridge for up to 1 week. For longer storage, refer to the freezing instructions in the “Tips and Techniques” section.
Nutrition
An automated tool is used to calculate the nutritional information. As such, I cannot guarantee the accuracy of the nutritional information provided for any recipe on this site.
The Sweet Simplicity of Homemade Chocolate Fudge
This **3-ingredient microwave chocolate fudge recipe** truly redefines ease in the kitchen. It’s a testament to how simple ingredients, combined with a quick and straightforward method, can produce a truly exceptional dessert. Perfect for busy holidays, impromptu gatherings, or simply a cozy night in, this **no-bake fudge** is a delightful indulgence that everyone will love and appreciate for its rich flavor and incredibly creamy texture.
From its luscious, creamy texture to its endless customization possibilities, **homemade chocolate fudge** offers a unique blend of cherished tradition and modern convenience. So, gather your minimal ingredients, follow these easy, step-by-step instructions, and get ready to impress with a decadent treat that tastes like it came directly from a gourmet candy shop, but was made with love right in your own microwave. Enjoy the sweet, satisfying rewards of effortless baking!
