Easy Homemade Lord of the Rings Sauron Eye Cake: A Buttercream Masterpiece for Beginners
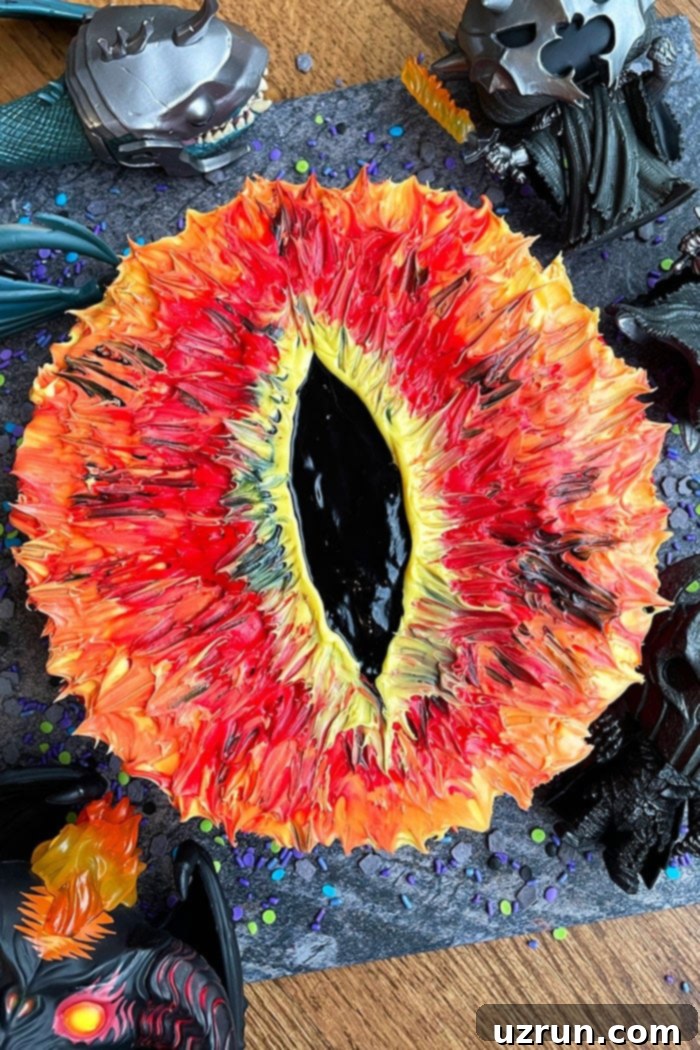
Embark on a culinary quest to Middle-earth with this incredibly easy Lord of the Rings cake, affectionately known as the Sauron Eye Cake! This homemade chocolate-flavored delight is adorned entirely with vibrant, colored buttercream frosting, proving that you don’t need elaborate techniques or expensive fondant to create a show-stopping dessert. Whether you’re celebrating a birthday, a movie marathon, or simply expressing your love for Tolkien’s epic saga, this cake is designed for success, even for absolute beginners.
When delving into the vast world of LOTR movies and books, many cake designs gravitate towards iconic elements like the One Ring or the charming hobbit holes of the Shire. While these are wonderful inspirations, I wanted to craft something distinctly different and undeniably impactful. Thus, the terrifying and iconic Eye of Sauron became my muse. The beauty of this design lies in its simplicity: it’s decorated purely with buttercream icing, completely eliminating the need for fondant. You won’t even require any fancy tools – a simple paintbrush is all you need to achieve the fiery, watchful gaze of Mordor. If you’ve never decorated a cake before, fear not! This guide will walk you through every step, making it an achievable and fun baking project. For even more creative ideas, be sure to explore this extensive collection of Birthday Cake Ideas.
Crafting the Eye of Sauron: A Step-by-Step Guide to Your LOTR Cake
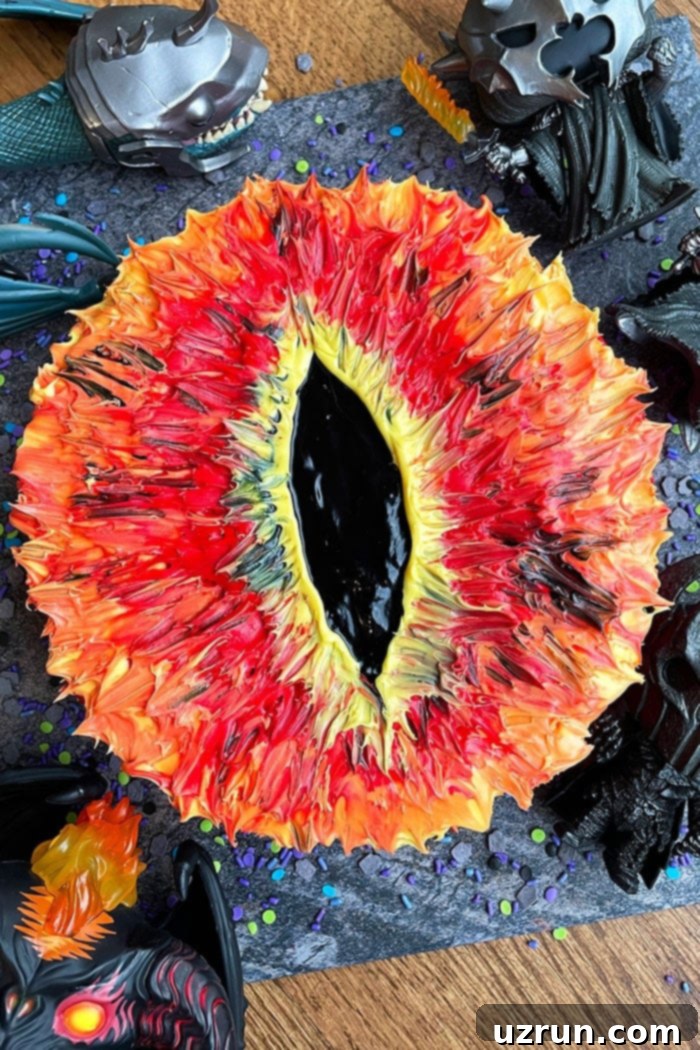
Creating this captivating Lord of the Rings cake is a straightforward process, broken down into simple, manageable steps. Here’s a detailed look at how to bring the Eye of Sauron to life using only buttercream.
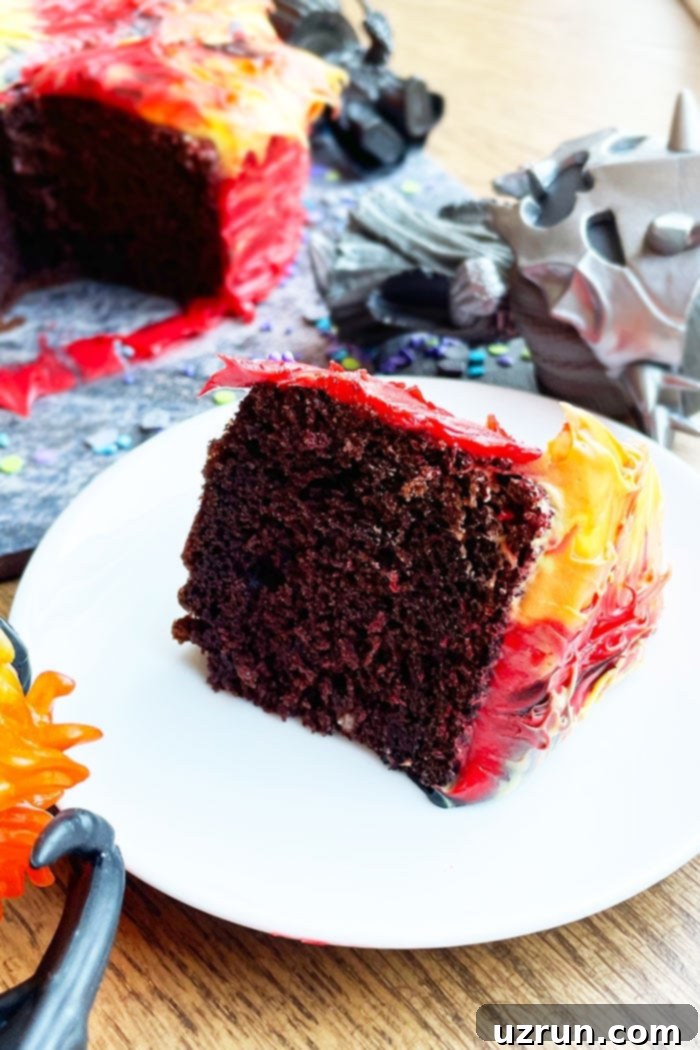
- Bake the Cake: Begin by baking your favorite chocolate cake. A dense, moist cake recipe works best for decorating as it holds its shape well. Ensure the cake cools completely on a wire rack before you attempt any frosting. A warm cake will melt your beautifully prepared buttercream, leading to a frustrating mess. Patience here is key!
- Prepare Buttercream Frosting: While your cake cools, prepare a generous batch of delicious buttercream frosting. Divide it into several bowls and color it with gel food coloring. You’ll need vibrant red, fiery orange, bright yellow, and deep black to truly capture Sauron’s gaze. Gel colors are highly recommended as they provide intense hues without altering the frosting’s consistency.
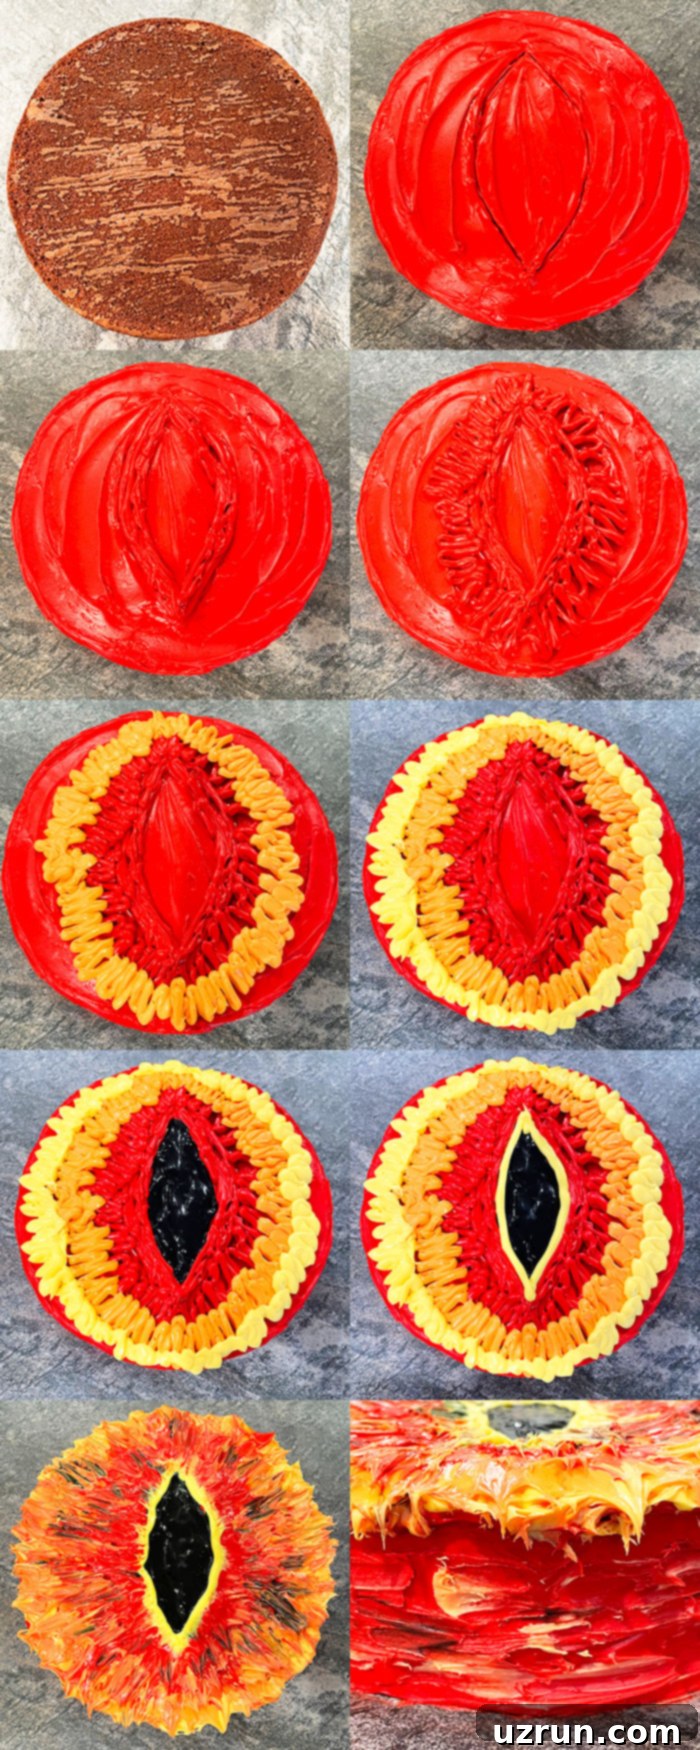
- Apply the Crumb Coat and Base Layer: Once the cake is fully cooled and leveled (if necessary), apply a thin “crumb coat” of red frosting all over. This seals in any loose crumbs and provides a smooth base. Chill for 15-20 minutes, then apply a thicker, even layer of red frosting to completely cover the cake. This will be the fiery base of your Eye of Sauron.
- Outline the Center Eyeball: With the cake smoothly iced in red, use a toothpick to carefully etch a large oval or almond shape in the center, which will serve as the pupil/iris of the eye. Don’t press too hard, just enough to leave a visible guide.
- Pipe Frosting Around the Outline: Now for the artistic part! Prepare separate piping bags with red, orange, and yellow buttercream, each with a small tip or a small snip off the corner. Start by piping concentric rings of red frosting around the toothpick outline, using a zig-zag or flame-like motion to create an uneven, fiery effect. Follow this with a layer of orange frosting, piping roughly around the red, and then a final layer of yellow frosting, creating a gradient of intense heat radiating from the center.
- Fill the Center: Switch to your piping bag filled with black frosting. Carefully fill the entire outlined center area with black buttercream. This creates the menacing pupil of Sauron’s eye. Try to make this as smooth and even as possible.
- Paint and Blend Buttercream: This is where the magic happens and your simple paintbrush comes into play! Using a clean, small food-safe paintbrush, gently blend the red, orange, and yellow frostings together. Use short, upward, and outward strokes to mimic the look of flickering flames and molten lava, ensuring the colors transition smoothly. Be careful not to blend the black center – keep it sharp and distinct. For an added touch of darkness and shadow, you can lightly brush some black icing randomly over the fiery red parts of the cake.

Creative Variations for Your Sauron Eye Cake
While the classic Sauron Eye design is fantastic, don’t hesitate to personalize your Lord of the Rings cake. Here are some inspiring variations to consider:
- Make Mini Cakes: For individual servings or a themed party spread, bake smaller cakes using cupcake tins or mini cake pans. Decorate each mini cake according to the instructions above, creating an army of watchful Eyes of Sauron. These are perfect for grab-and-go treats and look incredibly charming.
- Add Delicious Fillings: I opted for a simple, unfurnished cake this time, but adding a filling can elevate the flavor and texture significantly. After baking, slice your cooled cake horizontally into two or three layers. Between the layers, you can spread delightful fillings like raspberry jam, strawberry preserves, fresh berries, rich caramel sauce, decadent chocolate ganache, or even a contrasting cream cheese frosting.
- Experiment with Fondant: If you’re comfortable with fondant, you can use it to create a super smooth base. Cover the entire cake in red fondant, then use edible paints (a mixture of gel colors and clear extract like vodka or lemon extract) to paint the orange, yellow, and black details on top. This offers a different aesthetic and can provide sharper lines.
- Bake a Larger Cake: This recipe primarily used an 8-inch cake, but you can easily scale it up for more servings. Adjust the ingredient quantities to make a 9-inch or even a 10-inch cake, perfect for larger gatherings or when you want more leftovers! Remember to adjust baking times accordingly.
- Try Different Cake Flavors: While chocolate is a classic choice, don’t limit yourself! This design would also pair wonderfully with other cake bases such as a rich Chocolate Pound Cake, a moist Banana Chocolate Chip Cake, or even a red velvet cake to enhance the fiery theme.
- Consider an Alternative Frosting: American buttercream is fantastic for piping and painting, but other frostings can also work. For a richer, tangier flavor, try a Chocolate Cream Cheese Frosting. If you prefer a smoother, more elegant finish, a Chocolate Ganache Frosting could be an excellent choice, though it might require slight adjustments to the painting technique.
- Add Edible Glitter or Gold Dust: For an extra touch of menacing magic, consider dusting the finished red, orange, and yellow flames with edible gold or red glitter. This can give the “fire” a shimmering, ethereal quality, making Sauron’s gaze even more captivating.
Essential Tips and Techniques for Your LOTR Birthday Cake Success
Achieving a perfectly decorated Lord of the Rings cake is easier with these helpful tips and techniques:
- Never Decorate a Warm Cake: This cannot be stressed enough! The heat from a warm cake will cause your buttercream frosting to melt, slide off, and create an absolute mess. Always ensure your cake is completely cooled to room temperature, or even slightly chilled, before you start frosting.
- Homemade vs. Store-bought Frosting: Both options are viable. Homemade buttercream often tastes superior and allows for precise control over consistency, which is crucial for piping and blending. However, store-bought frosting is an excellent time-saver, especially if you’re short on time or new to baking. Just ensure it’s whipped to the right consistency before coloring.
- Invest in Pre-made Black and Red Icing: While you can color white frosting black or red at home, these colors are notoriously difficult to achieve with true depth and vibrancy. You often need a lot of food coloring, which can affect the taste and consistency of your frosting. I highly recommend buying pre-made black and red icing for the best results, as their colors are typically much deeper and more saturated.
- Use Gel Colors for Tinting Icing: When coloring your buttercream (especially for the yellow and orange, or if you insist on making your own red/black), always opt for gel food coloring over liquid dyes. Gel colors are much more concentrated and thicker, meaning you need less product to achieve vibrant colors, and they won’t thin out or alter the consistency of your frosting as liquid colors can.
- Level Your Cake: For a professional-looking finish, ensure your cake layers are perfectly level before frosting. You can use a serrated knife or a cake leveler for this. An even surface makes decorating much easier and ensures your Eye of Sauron sits perfectly flat.
- Practice Piping and Blending: If you’re new to piping or the paintbrush technique, practice on a piece of parchment paper first. You can scoop the frosting back into your bag or bowl afterward. This helps build confidence and refine your technique before working on the actual cake.
- Clean Your Paintbrush: When blending colors, ensure your paintbrush is clean. You might even want to have a separate brush for the black section to prevent accidental smudging of dark color into your bright flames.
- Work in a Cool Environment: Buttercream can become soft and difficult to work with in a warm kitchen. If your frosting starts to get too soft, pop the cake (or just the bowl of frosting) into the fridge for 10-15 minutes to firm it up.
Storage Guidelines for Your Sauron Eye Cake
Proper storage ensures your magnificent Lord of the Rings cake remains fresh and delicious for as long as possible:
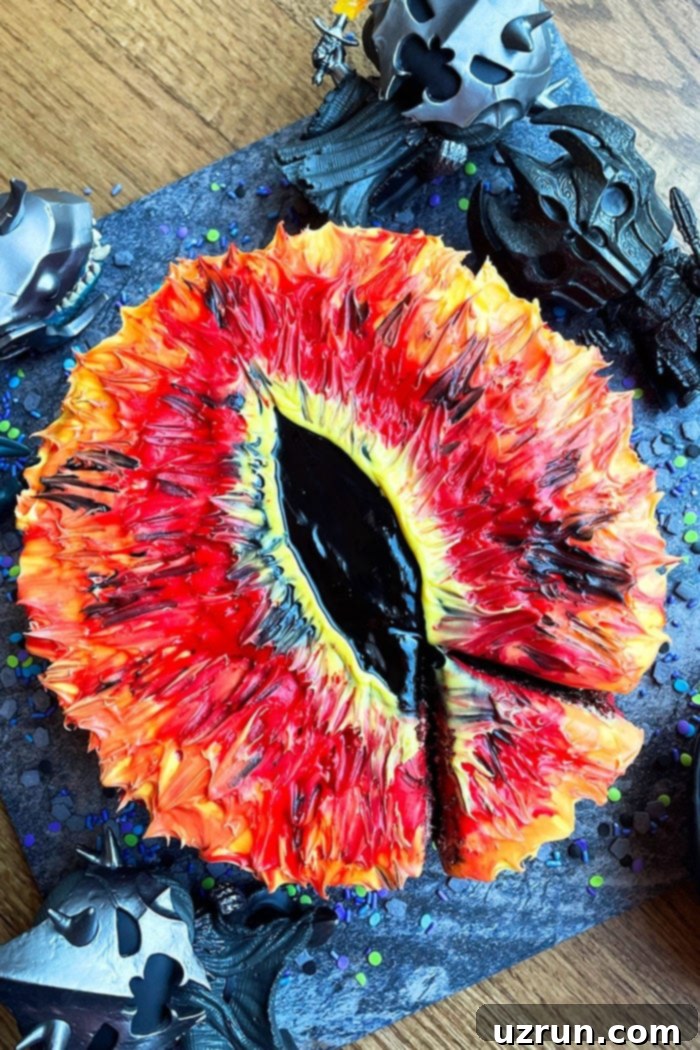
- Room Temperature: If your cake doesn’t contain any perishable fillings (like fresh cream or fruit), it can be stored at room temperature, loosely covered or in a cake dome, for up to 24 hours. This is also ideal if you’re making the cake a day ahead for an event. Keep it away from direct sunlight or heat sources.
- Refrigerate: For longer storage or if your cake has perishable fillings, a decorated cake can be stored in an airtight cake box or covered tightly with plastic wrap in the refrigerator for up to 2-3 days. Bring it to room temperature for about 30-60 minutes before serving to ensure the buttercream is soft and flavorful.
- Freeze: Unfrosted cake layers and prepared buttercream frosting can be stored separately in sealed, airtight containers for up to 1 month in the freezer. Wrap cake layers tightly in plastic wrap and then foil to prevent freezer burn. When you’re ready to assemble and decorate, thaw the cake and frosting overnight in the refrigerator. Once thawed, allow them to come to room temperature (and re-whip the buttercream if necessary) before proceeding with decoration as per the instructions above.
The Lore Behind the Eye of Sauron
For true Lord of the Rings fans, understanding the symbolism behind this cake makes it even more special. The Eye of Sauron, often referred to as the Great Eye or the Lidless Eye, is a central and terrifying symbol in J.R.R. Tolkien’s epic. It represents Sauron’s pervasive will, his all-seeing watchfulness, and his dark power. It’s not a literal eye in a physical sense for much of the story, but rather a manifestation of his spirit and oppressive gaze that terrorizes Middle-earth. By creating this cake, you’re not just baking a dessert; you’re bringing a piece of this rich mythology to life in an edible, celebratory form. It’s a fantastic conversation starter and a tribute to one of fantasy literature’s most iconic villains.
More Whimsical & Decorated Cakes (Birthday Cakes)
If you enjoyed this creative cake project, you might love exploring these other fun and uniquely decorated cake ideas:
- Easy Emoji Cake (Poop Cake)
- Erupting Volcano Cake (With Dry Ice Smoke)
- Galaxy Cake
- Tie Dye Cake
- Easy Shoe Cake (Sneaker Cake)
Recipe
Easy Lord of the Rings Cake (Sauron Eye Cake)
Abeer Rizvi
Pin Recipe
Want to Save This Recipe?
Enter your email & I’ll send it to your inbox. Plus, get great new recipes from me every week!
By submitting this form, you consent to receive emails from CakeWhiz
Ingredients
- 1 Chocolate cake Round, 8×3 inches, baked and completely cooled
- 4-6 cups American buttercream frosting Divided and colored red, yellow, orange, and black with gel food coloring
Instructions
-
Bake your chocolate cake according to your recipe and allow it to cool completely on a wire rack. This is crucial for successful frosting.
-
While the cake is cooling, prepare your buttercream frosting. Ensure it’s whipped to a smooth, pipeable consistency.
-
Divide the buttercream into separate bowls and tint generous portions red, yellow, orange, and black, using high-quality gel food colors for best vibrancy.
-
Once completely cool, place the cake on your desired serving dish or cake stand.
-
Apply a thin crumb coat of red frosting all over the cake, then chill for 15 minutes. Follow with a thicker, even layer of red frosting to completely ice the cake.
-
Using a toothpick, gently make an oval-shaped eyeball outline in the center of the cake top.
-
Fill a piping bag (fitted with a small round tip or with a small snip made by scissors) with red icing.
-
Pipe red frosting in a zig-zag or flame-like motion around the toothpick outline, creating the innermost fiery layer.
-
Fill another piping bag with orange icing and pipe roughly around the red icing, extending the flame effect.
-
Fill a third piping bag with yellow icing and pipe roughly around the orange icing, completing the vibrant flame gradient.
-
Fill a piping bag with black icing and carefully fill the entire outlined center of the eyeball.
-
Use a small, clean paintbrush to gently blend all the red, orange, and yellow colors together with short, outward strokes, creating a seamless, fiery look. Be careful not to blend the black center – keep it distinct.
-
For added depth, lightly brush some black icing randomly over the blended red, orange, and yellow flames on top of the cake.
-
For the sides of the cake, you can randomly brush red, yellow, orange, and black icing to extend the fiery, smoky effect. Your Eye of Sauron cake is complete! Enjoy your delicious journey to Mordor!
Notes
- For best results, carefully read all the detailed tips and techniques provided in the article above before you start decorating.
- Leftovers of the decorated cake can be stored in a sealed, airtight container in the fridge for up to 3 days. Ensure the cake is covered well to prevent it from drying out.
Nutrition
An automated tool is used to calculate the nutritional information. As such, I cannot guarantee the accuracy of the nutritional information provided for any recipe on this site.
