The Ultimate Guide to Easy Homemade Chocolate Covered Cherries
Indulge in the simple luxury of homemade chocolate covered cherries! Forget store-bought imitations or the syrupy cordial versions; this recipe focuses on real, fresh cherries enrobed in your favorite chocolate, offering a delightful crunch and burst of natural fruit flavor. Whether you’re looking for a quick, elegant dessert, a thoughtful edible gift, or just a satisfying snack, these gourmet-style treats are surprisingly easy to make with just a few simple ingredients.
There’s something truly magical about combining the natural sweetness and slight tartness of fresh cherries with rich, velvety chocolate. It’s the best of both worlds – a treat that feels decadent yet satisfyingly fresh. While the sugar content adds to the indulgence, the fact that you’re enjoying a wholesome fruit at its core makes it feel like a healthier choice. If you’re a fan of this delightful duo, you’ll also adore Chocolate Covered Blueberries and Homemade Chocolate Covered Strawberries – definite wins in our book!

Table of Contents
- How to Make Easy Homemade Chocolate Covered Cherries from Scratch
- Key Ingredients for Perfect Chocolate Dipped Cherries
- Cherry Cordials vs. Chocolate Covered Cherries: The Key Difference
- How to Melt Chocolate for Dipping: Two Popular Methods
- Creative Variations for Your Chocolate Covered Cherries
- Expert Tips and Techniques for Flawless Results
- Storage of Homemade Dipped Cherries
- More Delicious Chocolate Covered Desserts
How to Make Easy Homemade Chocolate Covered Cherries from Scratch
Crafting these delectable treats at home is incredibly simple and much more rewarding than buying them. The process is straightforward, ensuring you get that perfect balance of crisp cherry and smooth chocolate every time.
- Prepare Cherries: Begin by thoroughly washing your fresh cherries under cool water. This step is crucial for hygiene. Afterward, use paper towels to gently but completely pat each cherry dry. Any residual moisture will prevent the chocolate from adhering properly, leading to a less appealing finish.
- Melt Chocolate: In a microwave-safe bowl, melt your chosen chocolate (white, milk, or dark) in short intervals. Start with 30 seconds, then stir. Continue heating in 15-second bursts, stirring well after each, until the chocolate is smooth and fully melted. Be careful not to overheat it, as this can cause it to seize or burn.
- Dip Cherries: Holding each cherry by its stem, dip it into the melted chocolate, twirling gently to coat it evenly. Allow any excess chocolate to drip off back into the bowl. A clean, even coat is key to a beautiful finish.
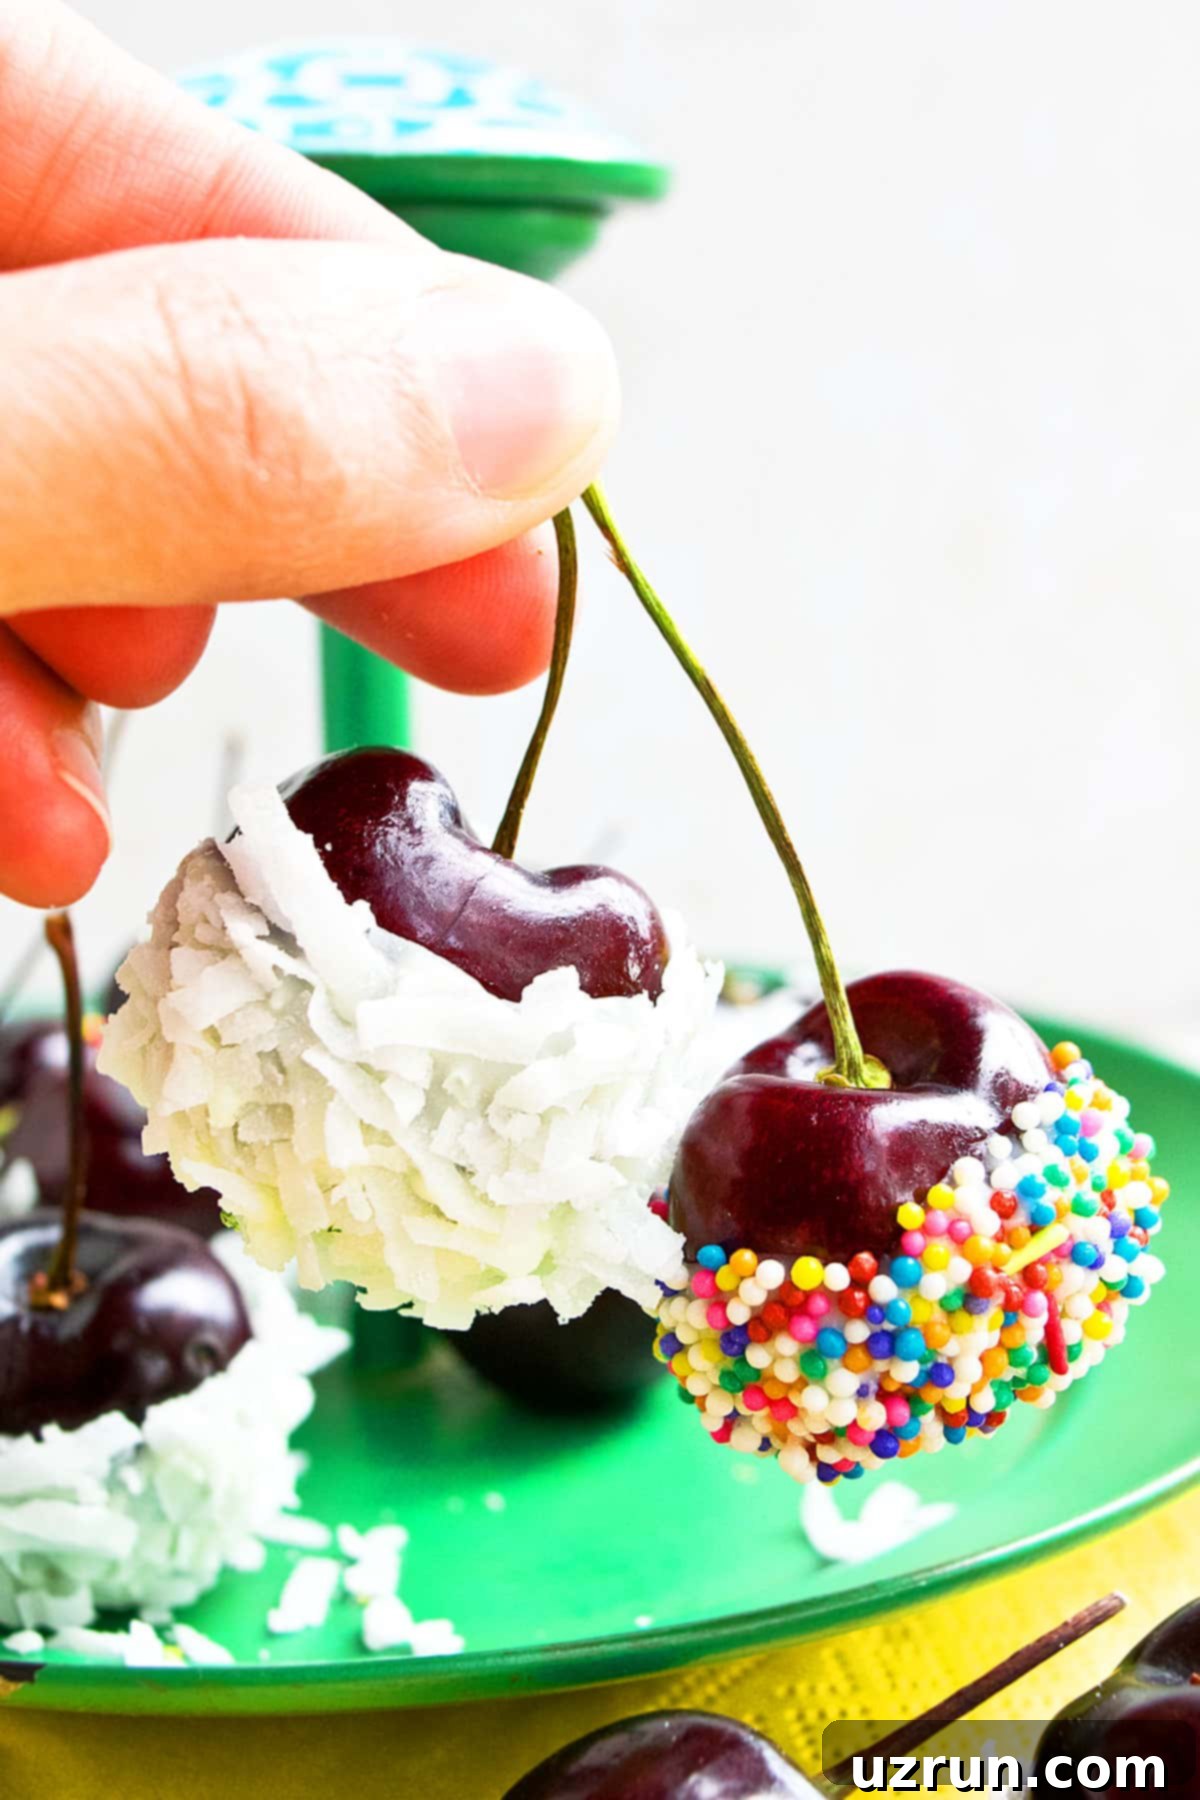
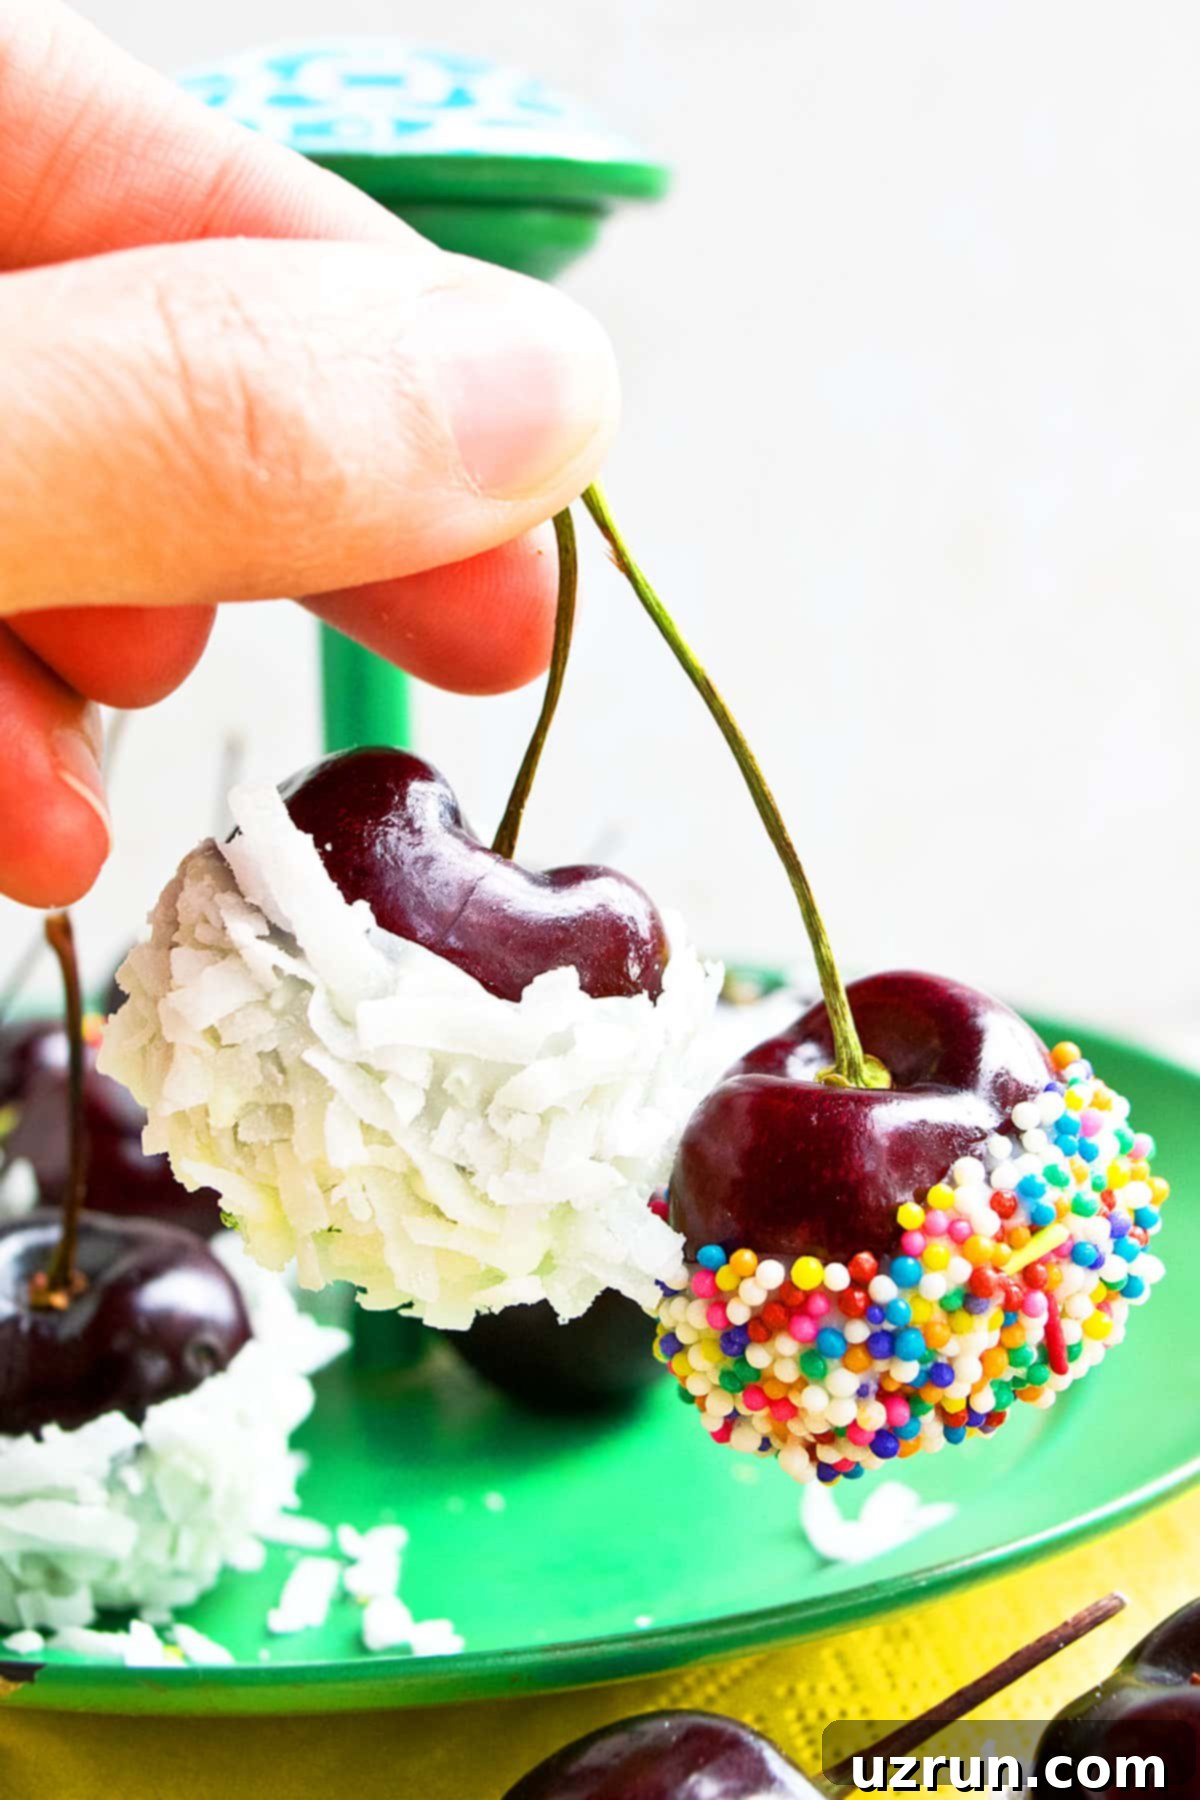
- Add Toppings (Optional): If desired, immediately roll the chocolate-covered cherry in your chosen topping – be it finely shredded coconut, chopped nuts, or vibrant sprinkles. Ensure the topping adheres while the chocolate is still wet.
- Set and Enjoy: Place the coated cherries on a sheet of wax paper or parchment paper. This prevents sticking and makes for easy removal once the chocolate hardens. Let them sit at room temperature or chill them in the refrigerator for about 10-15 minutes until the chocolate is firm. Enjoy your homemade gourmet delight!
Key Ingredients for Perfect Chocolate Dipped Cherries
While the steps are simple, the quality of your ingredients makes all the difference in achieving truly outstanding chocolate-covered cherries.
- Cherries: The star of the show! Always opt for fresh, ripe, and firm cherries. Rainier cherries offer a sweeter, milder flavor with a beautiful yellow-red hue, while Bing or Chelan cherries provide a classic deep red color and a slightly tarter taste that pairs wonderfully with chocolate. Ensure they are thoroughly washed and, most importantly, completely patted dry before dipping. This is a non-negotiable step for optimal chocolate adhesion.
- Melted Chocolate: Your choice of chocolate can dramatically alter the flavor profile.
- White Chocolate: Offers a creamy, sweet coating that complements the fruit without overpowering it.
- Semisweet/Milk Chocolate: A classic choice, providing a balanced sweetness and familiar chocolate flavor.
- Dark Chocolate: For those who love a rich, slightly bitter contrast to the cherry’s sweetness. Choose a percentage you enjoy, typically 60-75% cacao works well.
Always use high-quality chocolate chips or baking bars for the best melting consistency and flavor. Brands like Ghirardelli, Lindt, or Guittard are excellent choices.
- Toppings (Optional but Recommended!): These add texture, visual appeal, and an extra layer of flavor.
- Shredded Coconut: Toasted or untoasted, it adds a tropical, chewy element.
- Finely Chopped Nuts: Almonds, walnuts, pistachios, or pecans offer a delightful crunch and nutty flavor.
- Rainbow Sprinkles: Perfect for a festive and fun touch, especially for parties or gifts.
- Mini Chocolate Curls: For an extra touch of chocolate elegance.
- Sea Salt Flakes: A tiny sprinkle can enhance the chocolate and cherry flavors, creating a gourmet experience.
Cherry Cordials vs. Chocolate Covered Cherries: The Key Difference
It’s important to clarify the distinction between these two popular cherry-chocolate confections, as they offer vastly different experiences. Cherry cordials typically feature maraschino cherries – a specific type of cherry that is brined, bleached, and then dyed red, resulting in a softer texture and an artificially sweet flavor. These cherries are then enveloped in a sweet, often boozy, red syrup before being encased in a layer of chocolate. The hallmark of a cordial is that liquid, sugary center.
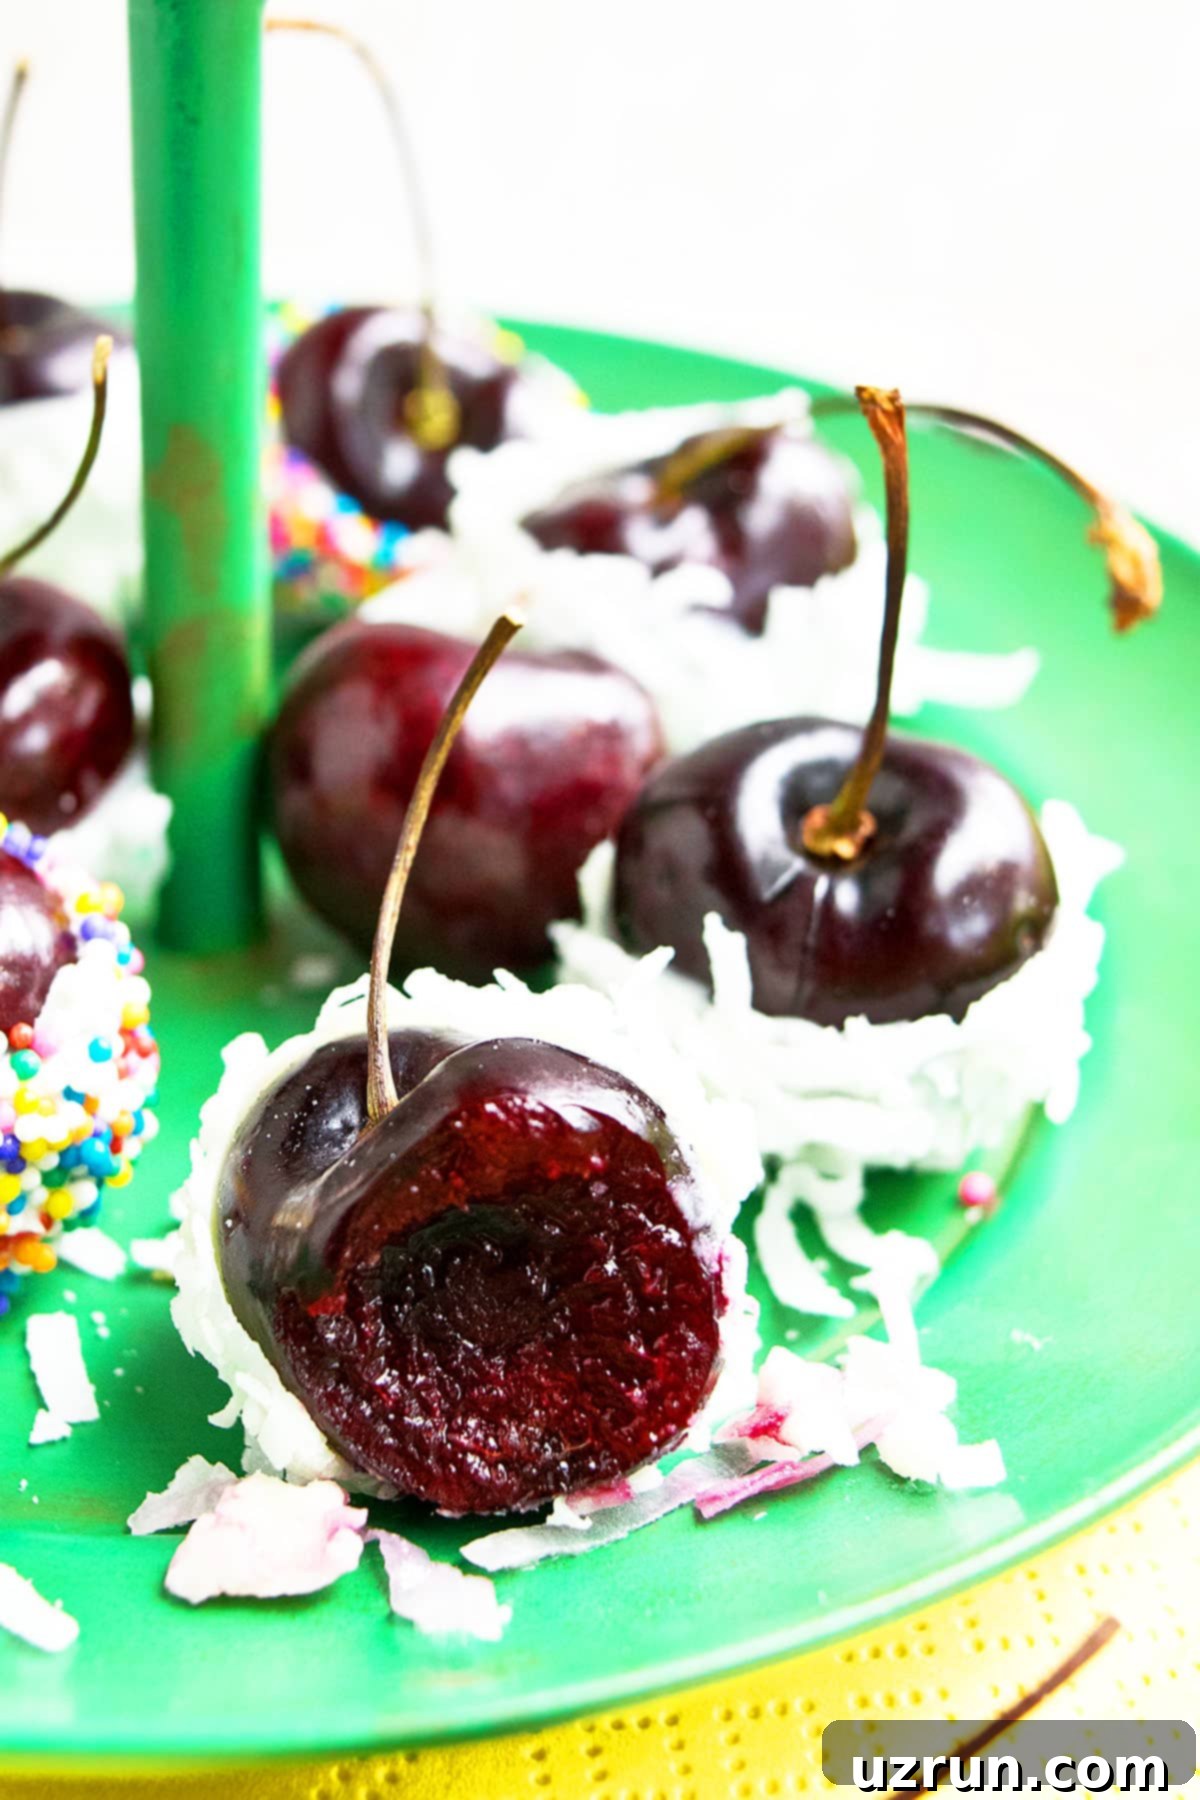
Our recipe, however, champions the natural beauty and crispness of fresh cherries. We use darker, ripe cherries that retain their firm, juicy texture. There’s no gooey syrup inside; just the pure, unadulterated taste of the fruit, complemented by a generous coating of your favorite rich chocolate. This contrast provides a satisfying crunch and a more authentic cherry flavor, making it a distinctly different and, many would argue, superior treat to the traditional cordial.
How to Melt Chocolate for Dipping: Two Popular Methods
Properly melting chocolate is crucial for a smooth, even coating. Overheating can lead to seized, grainy, or burned chocolate, while underheating can leave it clumpy. Here are two reliable methods:
Double Boiler Method
This method offers gentle, indirect heat, making it less likely to burn the chocolate. It’s often preferred for achieving a consistently smooth and glossy finish.
- Prepare Water: Fill a medium-sized pot with about an inch or two of water. Bring the water to a gentle simmer over medium heat.
- Set Up: Place your chocolate chips or chopped baking chocolate in a heat-safe bowl that fits snugly over the pot without touching the simmering water. The steam from the simmering water will gently heat the bowl.
- Melt and Stir: As the chocolate begins to melt from the indirect heat, stir it gently and continuously with a spatula. Continue stirring until the chocolate is completely smooth and free of lumps. This usually takes a bit longer than the microwave, but the controlled heat reduces the risk of overheating.
- Remove: Once melted, carefully remove the bowl from the heat.
Microwave Method (My Preferred, Faster Way)
The microwave method is quicker and convenient, but requires close attention to prevent burning.
- Place in Bowl: Put your chocolate chips or chopped chocolate into a microwave-safe bowl.
- First Heat: Microwave on high for 30 seconds.
- Stir and Check: Remove the bowl and stir the chocolate well with a spoon or spatula. Even if it doesn’t look melted, stir it. The residual heat will continue to melt the chocolate. Check the consistency.
- Continue Heating: If not fully melted, return to the microwave and heat for an additional 15 seconds. Stir again thoroughly. Repeat this process – 15-second intervals followed by stirring – until the chocolate is completely smooth. The key is to melt the chocolate gradually and rely on stirring to finish the melting process, avoiding direct, prolonged exposure to high heat.

Creative Variations for Your Chocolate Covered Cherries
While classic chocolate-covered cherries are delicious on their own, there are countless ways to customize them and add your personal touch. Get creative with different chocolate types and a variety of toppings!
- Explore Chocolate Types: Don’t limit yourself to just white chocolate.
- Semisweet or Milk Chocolate: These are popular choices for a reason, offering a rich, comforting flavor that complements the tartness of cherries beautifully.
- Dark Chocolate: For a more sophisticated and less sweet treat, opt for dark chocolate (60% cacao or higher). Its slight bitterness creates an elegant contrast with the sweet fruit.
- Swirls: For a visually stunning effect, dip cherries in one type of chocolate (e.g., dark) and then drizzle another (e.g., white) over them before setting.
- Endless Topping Options: The possibilities for external coatings are truly endless and can add wonderful texture and flavor dimensions.
- Finely Chopped Nuts: Almonds, walnuts, pistachios, pecans, or even hazelnuts add a satisfying crunch and earthy flavor. Toast them lightly for an enhanced aroma.
- Toasted Shredded Coconut: Provides a delightful chewiness and tropical note.
- Various Sprinkles: From classic rainbow sprinkles to festive holiday-themed ones, these add color and a playful touch.
- Mini Chocolate Curls or Shavings: Elevate the elegance of your treats.
- Edible Glitter or Gold Dust: For truly gourmet, show-stopping cherries.
- Crushed Freeze-Dried Raspberries or Strawberries: Adds a tart, fruity powder that contrasts beautifully with chocolate.
- Spices: A tiny pinch of cinnamon, chili powder (for a Mexican hot chocolate vibe), or cardamom mixed into the chocolate can create an exotic twist.
- Cherry Choices:
- Maraschino Cherries: If fresh cherries are out of season or you prefer a sweeter, softer texture, maraschino cherries can be used. However, they are packed in syrup, so you must pat them extremely dry with multiple layers of paper towels to ensure the chocolate adheres properly and doesn’t become watery.
- Pitted Cherries: For an easier-to-eat and more child-friendly treat, consider pitting your fresh cherries before dipping. A cherry pitter makes this quick work, and it eliminates the surprise of biting into a pit!
Expert Tips and Techniques for Flawless Results
Achieving perfectly coated, gourmet-looking chocolate cherries is easier than you think with these expert tips:
- Absolutely Dry Cherries: This cannot be stressed enough. After washing, gently pat each cherry thoroughly dry with paper towels. Any moisture on the surface will cause the chocolate to seize, create lumps, or simply slide off instead of adhering smoothly. A dry surface is crucial for a professional, beautiful coating.
- Don’t Overcook or Overheat Chocolate: This is the most common mistake when melting chocolate. Overheated chocolate will become thick, grainy, dull, and unusable for dipping – a state known as “seizing.” There’s no way to salvage seized chocolate, so you’ll have to start over. Melt slowly and gently, especially in the microwave, using short bursts and constant stirring.
- Use High-Quality Chocolate: The flavor of your finished cherries will only be as good as the chocolate you use. Invest in good quality chocolate chips or baking bars from reputable brands like Lindt, Ghirardelli, Guittard, or even a good quality store-brand chocolate. It melts smoother and tastes far superior.
- Ripe and Firm Cherries are Best: Select cherries that are ripe for maximum sweetness but still firm. Overly soft or mushy cherries will not hold their shape well and can release too much moisture. They should have a pleasant bite.
- Fresh Cherries Only: Do not use frozen cherries for this recipe. As frozen cherries thaw, they release a significant amount of water, becoming soft, soggy, and mushy. This moisture will prevent the chocolate from sticking and ruin the texture of the final product.
- Timing is Key for Toppings: If you’re adding toppings like coconut, nuts, or sprinkles, you must apply them immediately after dipping the cherry, while the chocolate is still wet and unset. Once the chocolate hardens, nothing will stick to it.
- Work in Batches: If you’re making a large quantity, it’s often better to melt chocolate and dip cherries in smaller batches. This ensures your chocolate stays at the right temperature and doesn’t harden or cool too much before you’ve finished dipping.
- Use the Right Tools: While simply holding the stem works, a candy dipping tool or even a fork can help achieve a more even coating and allow excess chocolate to drip off cleanly.
- Consider Tempering Chocolate (Advanced): For a truly professional, shiny, and snap-able chocolate coating that resists melting at room temperature, consider tempering your chocolate. This is a more advanced technique involving precise temperature control, but it yields superior results for gourmet confections. For a simpler home version, quick chilling after dipping will suffice.
- Gift Presentation: These homemade chocolate-covered cherries make exquisite gifts. Package them in a nice decorative box with small paper liners, just like those fancy gourmet chocolates you’d buy from a specialty shop. This elevates their appeal and makes them feel extra special. For more inspiration, check out our Food and Cookie Packaging Ideas post.

Storage of Homemade Dipped Cherries
Proper storage ensures your delicious chocolate-covered cherries remain fresh and appealing for as long as possible.
- Refrigerate: For optimal freshness and to keep the chocolate firm, store your homemade chocolate-covered cherries in an airtight container in the refrigerator for up to 2-3 days. The cold temperature helps maintain the chocolate’s snap and prevents the cherries from softening too quickly. Be aware that over time, even in the fridge, the cherries may start to release some moisture, which can affect the chocolate.
- Room Temperature: If consumed within 1-2 days, they can be stored in a sealed container at a cool room temperature (ideally below 70°F or 21°C), away from direct sunlight or heat. However, refrigeration is generally preferred for longer storage and to prevent the chocolate from softening, especially in warmer climates.
- Freeze (Not Recommended): I highly advise against freezing chocolate-covered cherries. As they thaw, the cherries release a significant amount of water, making them soggy, mushy, and watery. This excess moisture also causes the chocolate coating to ‘bloom’ (develop white streaks) and likely fall apart, ruining the texture and appearance. These treats are best enjoyed fresh!
More Delicious Chocolate Covered Desserts
If you’ve enjoyed making these delightful cherry treats, you’ll love exploring other simple chocolate-covered delights:
- Chocolate Covered Graham Crackers
- Chocolate Covered Oreos (Dipped Oreos)
- Frozen Chocolate Covered Bananas
- Chocolate Covered Raspberries
- Chocolate Covered Pretzels
Recipe

Chocolate Covered Cherries
Abeer Rizvi
Pin Recipe
Want to Save This Recipe?
Enter your email & I’ll send it to your inbox. Plus, get great new recipes from me every week!
By submitting this form, you consent to receive emails from CakeWhiz
Ingredients
- 2 cups Cherries Washed and patted dry
- 1 cup White chocolate Melted
- 2 cups Coconut
- 2 cups Rainbow sprinkles
Instructions
-
Wash the cherries and pat them dry with a paper towel.
-
Melt white chocolate in the microwave.
-
Dip each cherry in melted chocolate.
-
Then, roll the cherry in a bowl of coconut or sprinkles until it’s fully coated.
-
Place the cherries on wax paper and let the chocolate harden. Enjoy!
Notes
- Read all my tips above.
- Leftovers can be stored in a sealed container in the fridge for up to 2 days.
Nutrition
An automated tool is used to calculate the nutritional information. As such, I cannot guarantee the accuracy of the nutritional information provided for any recipe on this site.
