Homemade Classic Vanilla Pudding Recipe: Silky Smooth & Easy From Scratch
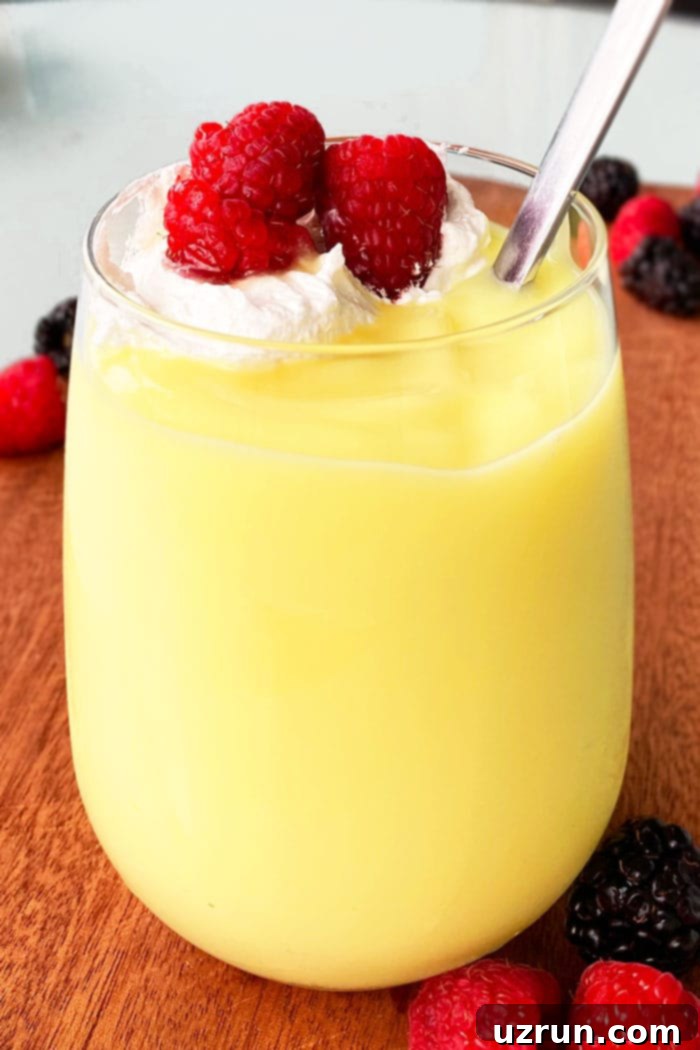
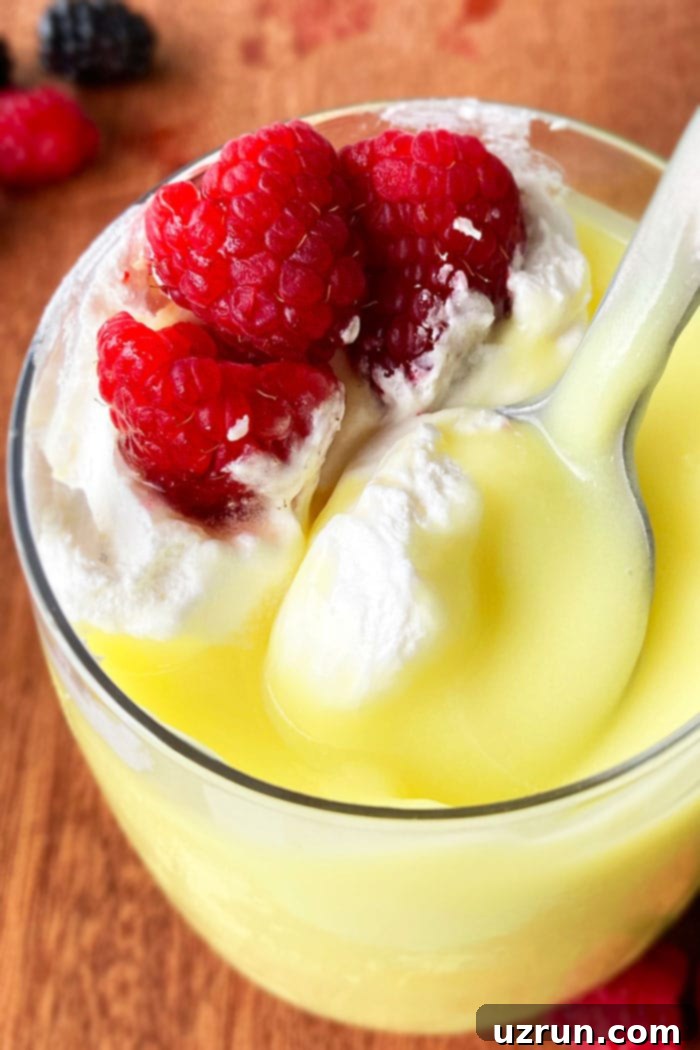
Prepare to rediscover a beloved classic with this incredible **homemade vanilla pudding recipe**. Forget those childhood Snack Packs; this recipe brings the rich, silky smooth, and intensely creamy goodness of vanilla pudding right to your kitchen, made entirely from scratch with just a handful of simple ingredients. Often affectionately known as “yellow pudding,” this dessert is a testament to timeless flavor and delightful texture.

As a kid, the excitement of finding those creamy Snack Packs in school lunches was unmatched. Now, you can recreate that cherished childhood favorite at home, elevating it with fresh, quality ingredients for an unparalleled taste and texture. This **easy vanilla pudding recipe** is just as comforting and delicious as a bowl of Easy Rice Pudding or a healthy Chia Seed Pudding (4 Ingredients). Plus, it’s a fantastic no-bake dessert option and a smart way to utilize leftover egg yolks, ensuring nothing goes to waste in your kitchen.
Making **vanilla pudding from scratch** might seem daunting, but it’s surprisingly simple and incredibly rewarding. The result is a dessert far superior to any store-bought version, boasting a depth of flavor and a velvety consistency that will impress everyone. Whether you’re making it for a special occasion, a family treat, or simply to satisfy a craving, this **classic vanilla pudding** is guaranteed to become a household favorite.
Why Homemade Vanilla Pudding is the Best
There are countless reasons to ditch the instant mixes and embrace the joy of making **homemade vanilla pudding**. For starters, you have complete control over the ingredients, allowing you to choose high-quality milk, cream, and pure vanilla extract for the best possible flavor. The texture achieved through slow cooking is unmatched – a truly **silky smooth and creamy** consistency that melts in your mouth.
- Superior Flavor: Fresh ingredients and real vanilla create a profound, authentic vanilla taste.
- Perfect Texture: Achieving that ideal balance of richness and smoothness is a hallmark of homemade pudding.
- No Artificial Additives: Free from preservatives, artificial colors, and flavors often found in packaged puddings.
- Customizable: Easily adapt the sweetness, thickness, and even add extra flavors.
- Rewarding Experience: The process of cooking from scratch is incredibly satisfying.
Key Ingredients for the Best Vanilla Pudding
The beauty of this **easy vanilla pudding recipe** lies in its simplicity. You’ll only need a few pantry staples to create this delicious dessert:
- Granulated Sugar: Provides the perfect sweetness.
- Cornstarch: The primary thickening agent, ensuring a smooth and stable pudding.
- Half and Half & Whole Milk: A combination of these creates a rich, creamy base without being overly heavy. Full-fat dairy is key for the best texture and flavor.
- Egg Yolks: These add incredible richness, a beautiful “yellow pudding” color, and contribute to the creamy texture. They also act as a secondary thickener.
- Unsalted Butter: Stirred in at the end for extra silkiness and a luxurious mouthfeel.
- Vanilla Extract: The star flavor! Use high-quality pure vanilla extract for the best results. Vanilla bean paste or fresh vanilla bean can also be used for an even more intense flavor.
[feast_advanced_jump_to]
How to Make Classic Vanilla Pudding from Scratch: A Step-by-Step Guide
Making **classic vanilla pudding from scratch** is a straightforward process that yields incredibly delicious results. Follow these steps carefully for a perfectly smooth and creamy dessert every time:
- Combine Dry Ingredients: In a medium-sized, nonstick saucepan, whisk together the granulated sugar and cornstarch. This prevents the cornstarch from clumping when the liquids are added.
- Whisk in Dairy: Gradually add the half and half and whole milk to the sugar and cornstarch mixture. Whisk continuously until the dry ingredients are fully dissolved and no lumps remain.
- Heat Milk Mixture: Place the saucepan over medium heat. Cook, whisking frequently (almost constantly), until the mixture comes to a gentle boil and visibly thickens. It should coat the back of a spoon. Whisking is crucial to prevent scorching and lumps.
- Temper Egg Yolks: Remove the thickened milk mixture from the heat. In a separate bowl, lightly beat the egg yolks. Spoon about 1 cup of the hot milk mixture into the beaten egg yolks, whisking vigorously the entire time. This process, known as tempering, slowly raises the temperature of the egg yolks, preventing them from scrambling when added to the hot pudding.
- Return to Heat & Cook: Pour the tempered egg yolk mixture back into the saucepan with the remaining milk mixture. Return the saucepan to low heat and cook for another 1-2 minutes, whisking constantly. Do not let it boil excessively; you just want to ensure the eggs are fully incorporated and contribute to the thickening without scrambling.
- Stir in Flavor & Fat: Remove from heat immediately. Stir in the unsalted butter until it’s fully melted and incorporated, making the pudding extra smooth and glossy. Finally, add the vanilla extract and mix until well combined.
- Achieve Ultimate Smoothness (Optional): If you notice any small lumps, you can pass the pudding through a fine-mesh sieve using a spoon to push it through. For an even smoother consistency, a hand-held immersion blender works wonders. If your pudding is already perfectly smooth, you can skip this step.
- Chill Properly: Pour the warm pudding into individual serving cups or a large bowl. To prevent a skin from forming on top, cover the surface of the pudding directly with plastic wrap (ensure the plastic touches the pudding). Allow it to cool to room temperature on the counter before refrigerating.
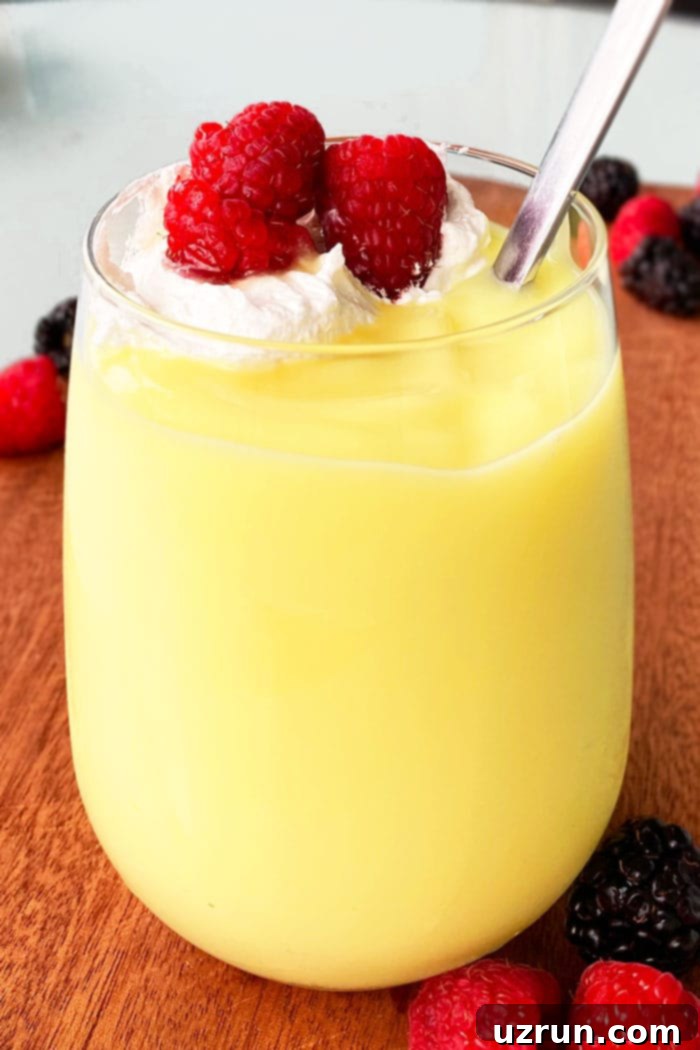
- Refrigerate & Serve: Chill the pudding in the refrigerator for at least 6 hours, or preferably overnight. The pudding will continue to thicken as it cools. Serve your delicious **creamy vanilla pudding** with your favorite toppings like fresh fruits and whipped cream.
Are Vanilla Pudding and Custard the Same? Understanding the Differences
While often confused, **vanilla pudding** and custard are not exactly the same, though they share many similarities. The primary differences lie in their thickening agents, cooking methods, and resulting textures.
Custards primarily rely on egg yolks for thickening, often without the addition of cornstarch or flour. This gives them a richer, denser, and sometimes firmer texture. Many custards are baked, often in a water bath (bain-marie), which provides gentle, even heat, resulting in a smooth, delicate set (think crème brûlée or flan). The egg proteins coagulate to create the structure.
Puddings, especially this **homemade vanilla pudding**, typically use a combination of egg yolks and a starch, like cornstarch, for thickening. The cornstarch helps achieve a lighter, silkier texture and provides more stability, making it less prone to separating. Puddings are usually cooked on the stovetop and then chilled to set. This combination of thickeners gives pudding its characteristic smooth, spoonable consistency.
So, while both are rich, dairy-based desserts featuring eggs, the inclusion of cornstarch and the stovetop cooking method are what primarily distinguish **vanilla pudding** from a classic custard.
Delicious Vanilla Pudding Variations & Creative Topping Options
This **classic vanilla pudding** is wonderfully versatile, serving as a perfect base for countless variations and flavor additions. Get creative with these ideas!
Flavor Variations:
- Chocolate Pudding: For a decadent twist, simply whisk in 2-3 tablespoons of unsweetened cocoa powder along with the sugar and cornstarch. Adjust to your desired chocolate intensity.
- Coffee Pudding: Add 1-2 teaspoons of instant espresso powder or strong brewed coffee concentrate with the milk mixture for a delightful coffee-flavored pudding.
- Nutty Pudding: Stir in a tablespoon of almond or hazelnut extract, or a few tablespoons of finely ground nuts at the end.
- Caramel or Butterscotch Pudding: Replace a portion of the granulated sugar with brown sugar or add a few tablespoons of caramel sauce or butterscotch extract for a richer, more complex flavor profile.
- Citrus Zest: For a bright and refreshing touch, add 1-2 teaspoons of finely grated orange, lemon, or lime zest to the milk mixture while it’s heating. Remove before chilling for a subtle hint, or leave it in for more intense flavor.
- Spiced Pudding: Incorporate a pinch of cinnamon, nutmeg, or cardamom for a warm, comforting flavor, especially during colder months.
Topping Options:
The right topping can elevate your **homemade vanilla pudding** from great to absolutely extraordinary. Here are some fantastic ideas:
- Fresh Fruits: A vibrant and healthy choice. Think sliced strawberries, raspberries, blueberries, blackberries, banana slices, or even diced mango or kiwi.
- Homemade Whipped Cream: Light, airy, and a perfect complement to the rich pudding. Consider flavored whipped cream for an extra touch!
- Crushed Cookies & Wafers: Vanilla wafers, graham cracker crumbs, Oreo crumbles, or shortbread cookies add a delightful textural contrast.
- Chocolatey Goodness: Chocolate chips, chocolate shavings, a drizzle of chocolate syrup, or even a sprinkle of cocoa powder.
- Chopped Nuts: Toasted almonds, pecans, walnuts, or pistachios provide crunch and a nutty flavor.
- Shredded Coconut: Toasted or untoasted, it adds a tropical touch.
- Rainbow Sprinkles: A fun and colorful option, especially for kids (or adults who are kids at heart!).
- Mint Leaves: A fresh garnish that adds a touch of sophistication.
- Caramel or Butterscotch Sauce: A sweet, gooey drizzle that pairs perfectly with vanilla.
Beyond the Bowl: Creative Uses for Vanilla Pudding:
- Vanilla Pudding Pops: Pour the cooled pudding mixture into popsicle molds and freeze for a refreshing frozen summer treat.
- Cake or Cupcake Filling: This **creamy vanilla pudding** makes a fantastic filling for cakes, cupcakes, or even éclairs and cream puffs.
- Pudding Parfaits: Layer the pudding with crushed cookies, fruit, and whipped cream in a tall glass for an impressive dessert.
- Pie Filling: Use it as a base for a delicious no-bake vanilla cream pie, topped with meringue or whipped cream.
- Poke Cakes or Pudding Cakes: Drizzle or spread the pudding into holes in a baked cake for added moisture and flavor.

Expert Tips and Techniques for Perfect Vanilla Pudding Every Time
Achieving perfectly **silky smooth and creamy vanilla pudding** is easy with these expert tips and tricks:
- Whisk, Whisk, Whisk: Constant whisking, especially during the cooking phases, is paramount. This prevents lumps from forming, ensures even cooking, and stops the eggs from scrambling or the milk from scorching on the bottom of the pan.
- Temper Your Egg Yolks: Do not skip the tempering step! Adding hot milk gradually to the egg yolks while whisking prevents them from cooking too quickly and creating scrambled egg bits in your pudding. This ensures a smooth consistency.
- Use Full-Fat Dairy: For the richest, creamiest, and most luxurious texture, use full-fat whole milk and half-and-half (or heavy cream). Low-fat alternatives will result in a thinner, less satisfying pudding.
- Medium to Low Heat is Key: High heat can cause the milk to scorch and the egg yolks to scramble. Cook over medium heat initially, then reduce to low heat once the egg yolks are added. Patience here will pay off.
- Preventing a Skin: To avoid a rubbery skin from forming on top of your pudding as it cools, press plastic wrap directly onto the surface of the warm pudding. This creates a barrier against the air.
- How to Thicken Pudding: This recipe uses both cornstarch and egg yolks as thickeners. The pudding will also continue to thicken considerably as it cools and chills. If your pudding isn’t thick enough, ensure you cooked it long enough for it to bubble and coat a spoon. Adding extra cornstarch might make it “chalky,” so it’s generally not recommended as a fix after cooking.
- How to Make Pudding Thinner: If your pudding becomes too thick after chilling, you can gently whisk in a tablespoon or two of milk or half-and-half until it reaches your desired consistency.
- Fixing Lumpy Pudding: Don’t despair if you end up with lumps! For small lumps, simply pour the warm pudding through a fine-mesh sieve, using a spoon to push it through. For a truly smooth fix, an immersion blender (hand-held stick blender) works wonders and is the easiest method to achieve ultimate silkiness.
- Cornstarch Substitutes: Arrowroot powder is an excellent 1:1 substitute for cornstarch and yields similar results. Some recipes use flour, but it can impart a slightly “floury” taste, which isn’t ideal for a pure vanilla flavor.
- Egg Yolks Only: This recipe specifically calls for only egg yolks to achieve maximum richness and a beautiful yellow color. Using whole eggs would result in a thinner, more soup-like consistency.
- Vanilla Bean vs. Vanilla Extract: Both can be used. High-quality pure vanilla extract offers excellent flavor. For an even more intense, gourmet vanilla flavor and visible specks (from the seeds), use a vanilla bean. Split the bean, scrape the seeds into the milk, and simmer the pod with the milk, then remove the pod before chilling.
- Make-Ahead Instructions: This **homemade vanilla pudding** is perfect for making ahead! Prepare it 2-3 days before your event. Store it covered with plastic wrap (touching the surface) in the refrigerator. Add any toppings just before serving.
- What to Do with Leftover Egg Whites: Don’t let those egg whites go to waste! They are perfect for making light and airy desserts like these Easy Meringue Cookies, macarons, or an egg white omelet.
Storage & Freezing Recommendations
Proper storage ensures your **homemade vanilla pudding** remains fresh and delicious:
- Refrigerate: Store leftover vanilla pudding in an airtight container in the refrigerator for up to 3 days. Remember to press plastic wrap directly onto the surface of the pudding to prevent a skin from forming and to keep it fresh.
- Freeze: I generally do not recommend freezing pudding that relies heavily on milk and egg yolks for its creamy texture. Dairy-based desserts, especially those thickened with starch and eggs, tend to separate, become grainy, and lose their smooth consistency upon thawing. If you want a frozen treat, consider making the pudding pops variation instead.
More Delightful Pudding Recipes to Explore
If you loved this **classic vanilla pudding**, you might enjoy trying these other delicious pudding recipes:
- Chocolate Pudding Pots: A fun and edible dessert idea.
- Coconut Rice Pudding: A creamy, tropical twist on a classic comfort food.
- Halloween Pudding Cups: Themed fun for a spooky celebration.
- Vegan Chocolate Pudding: A dairy-free option that’s just as rich and satisfying.
Recipe Card: Homemade Vanilla Pudding

Homemade Vanilla Pudding
Abeer Rizvi
Pin Recipe
Want to Save This Recipe?
Enter your email & I’ll send it to your inbox. Plus, get great new recipes from me every week!
By submitting this form, you consent to receive emails from CakeWhiz
Ingredients
- ¾ cups Granulated sugar
- 2 tablespoon Cornstarch
- 1.5 cups Half and Half
- 1.5 cups Whole milk
- 4 Egg yolks From large eggs, Lightly beaten
- 1 tablespoon Butter Unsalted
- 2 teaspoon Vanilla extract
Instructions
-
Add sugar and cornstarch in a medium sized nonstick saucepan and mix until combined.
-
Add half and half and milk.
-
Cook over medium heat, whisking often, until mixture is bubbling and thickened.
-
Remove from heat and add 1 cup of this milk mixture to the egg yolks. Whisk it together until combined.
-
Pour this egg yolk mixture back into the saucepan and cook on Low heat for about 2 minutes.
-
Remove from heat and mix in butter and vanilla extract.
-
If there are any lumps, you can pour this mixture through a fine mesh sieve. You can also use a hand-held immersion blender to make it super smooth. If your pudding is already smooth, skip this step.
-
Pour mixture in 6 small serving bowls.
-
Cover the top with plastic wrap so that it is touching the surface of the pudding.
-
Let it cool to room temperature.
-
Then, refrigerate overnight or for at least 6 hours. It will thicken more, as it chills.
-
Enjoy with a topping of fresh fruits and whipped cream.
Notes
- Read all my tips above for the best results.
- Leftovers can be stored in a sealed container in the fridge for up to 3 days, with plastic wrap pressed directly on the surface.
Nutrition
Carbohydrates: 34g
Protein: 6g
Fat: 14g
Saturated Fat: 8g
Cholesterol: 164mg
Sodium: 74mg
Potassium: 172mg
Sugar: 28g
Vitamin A: 545IU
Vitamin C: 1mg
Calcium: 148mg
Iron: 1mg
An automated tool is used to calculate the nutritional information. As such, I cannot guarantee the accuracy of the nutritional information provided for any recipe on this site.
