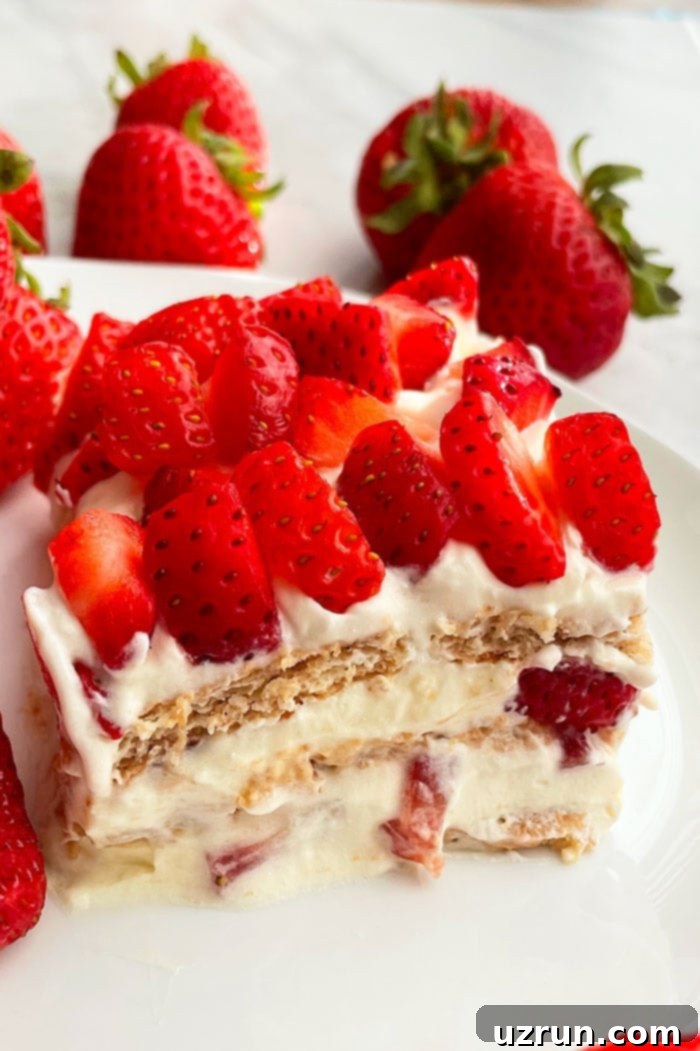
Easy Old-Fashioned No-Bake Icebox Cake with Strawberries: Your Perfect Summer Dessert
Step back in time with a beloved classic: the Easy Old-Fashioned No-Bake Icebox Cake. This delightful dessert, also fondly known as a refrigerator cake, is a testament to simple pleasures. Crafted with layers of crisp graham crackers, a luscious vanilla or cheesecake pudding and Cool Whip filling, and bursting with fresh strawberries, it’s a homemade treat that brings smiles with minimal effort. Forget the oven – this cake is all about cool, creamy indulgence, making it the ultimate warm-weather delight that’s incredibly simple to prepare but utterly impossible to resist.
There’s something inherently satisfying about a dessert that combines the freshness of berries with a rich, creamy filling. This icebox cake perfectly captures that essence, offering a light yet decadent experience that’s ideal for picnics, barbecues, or simply a sweet ending to a family meal. If you’re a fan of fuss-free, delicious no-bake creations, you’ll also love exploring other options like our Cookies and Cream Cake (Oreo Cake) or these charming Strawberry Cheesecake Cupcakes (No Bake). Each offers a unique spin on the convenience and deliciousness of a dessert that doesn’t require an oven.
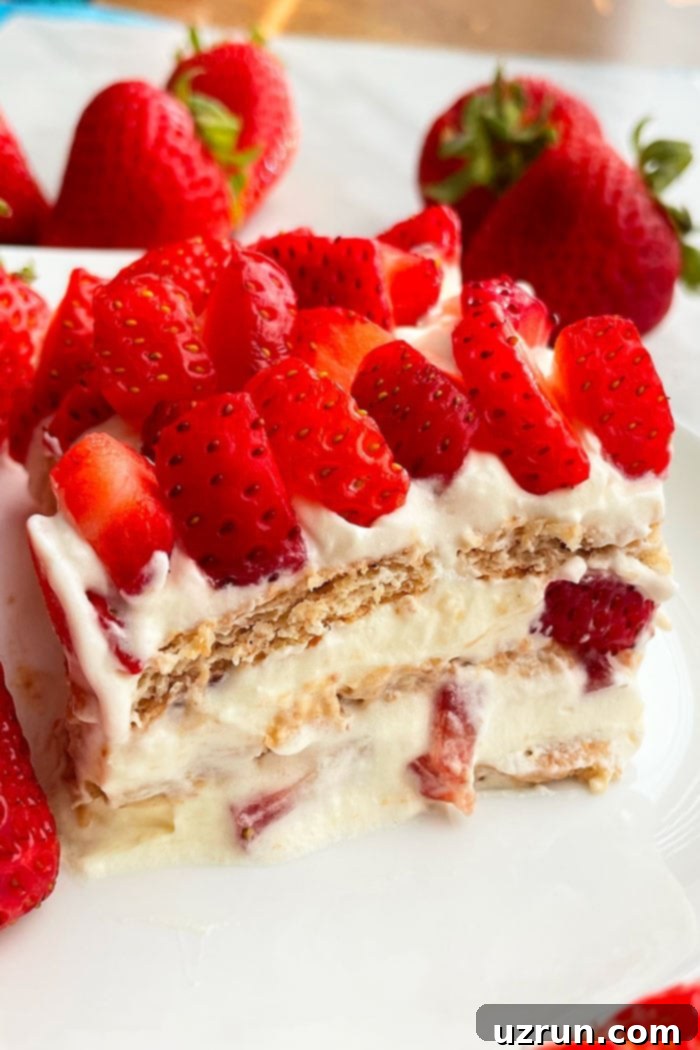
Making Your Strawberry Icebox Cake: A Simple Guide
Crafting this delightful no-bake dessert is incredibly straightforward, perfect for beginners and seasoned bakers alike. The magic lies in its simplicity and the essential chilling time that transforms humble ingredients into a cohesive, flavorful cake.
Step-by-Step Instructions for a Perfect Refrigerator Cake:
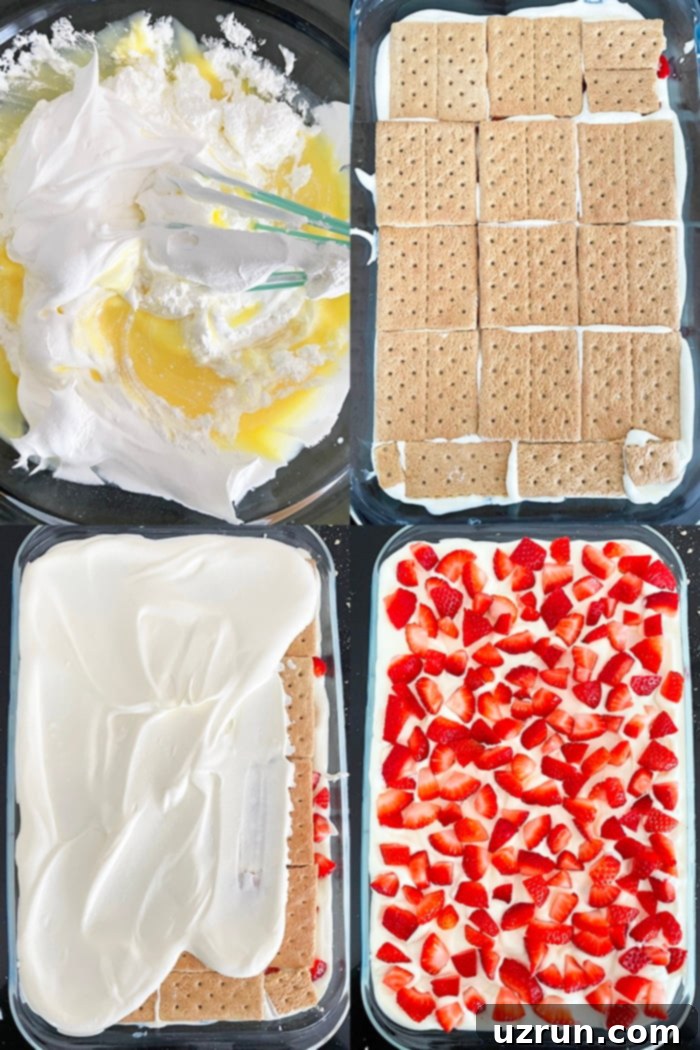
- Prepare the Creamy Filling: In a large mixing bowl, combine the instant pudding mix (cheesecake or vanilla works wonderfully) with cold milk. Whisk thoroughly until the mixture becomes smooth, thick, and well-incorporated. Once the pudding has started to set slightly, gently fold in the Cool Whip. The key here is to mix until just combined, maintaining the airy texture of the Cool Whip. This creamy mixture forms the heart of your icebox cake.
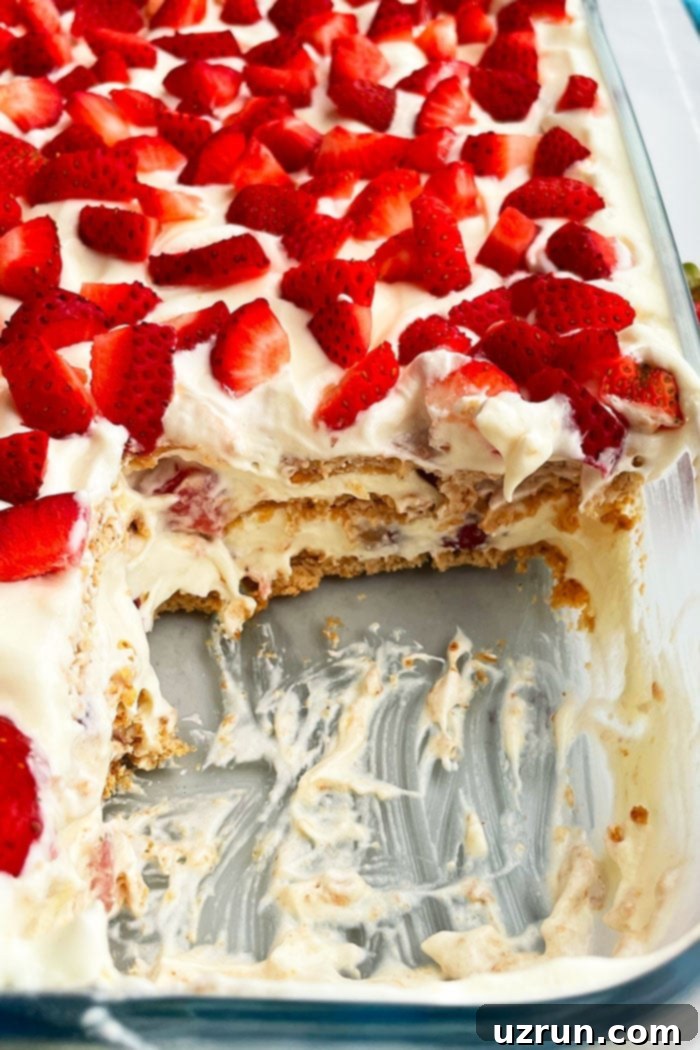
- Layer and Assemble: Choose a 9×13 inch rectangular pan, which is ideal for serving multiple slices. Begin by creating the first layer: arrange graham crackers neatly at the bottom of the pan, covering the entire surface. Don’t worry if you need to break some crackers to fill in gaps; perfect coverage is key for a stable base. Next, spoon approximately one-third of your creamy pudding and Cool Whip filling over the graham crackers and spread it evenly with a spatula. Follow this with a generous layer of fresh, diced strawberries. Repeat this layering process twice more, creating three distinct layers of graham crackers, creamy filling, and vibrant strawberries.
- Chill to Perfection: Once assembled, cover the pan tightly with plastic wrap. This is crucial to prevent the cake from drying out and absorbing other fridge odors. Place the cake in the refrigerator for a minimum of 6-8 hours, or ideally, overnight. This extended chilling period allows the graham crackers to soften and absorb the moisture and flavor from the creamy filling, transforming them into a cake-like texture. It also ensures the filling sets completely, giving you clean, beautiful slices.
Can You Freeze No-Bake Icebox Cakes for a Frozen Treat?
Absolutely! Turning your no-bake icebox cake into a refreshing frozen dessert is a fantastic option, especially during hot summer months. The freezing process gives the cake a delightful, firmer texture, akin to an ice cream cake, while still retaining its creamy interior.
To freeze your icebox cake, follow these simple steps:
- Prepare for Freezing: Once your cake is fully assembled in its pan, wrap it meticulously. Start by covering the pan tightly with plastic saran wrap. Ensure it’s sealed well to prevent freezer burn and ice crystal formation.
- Double Protection: After the plastic wrap, add another layer of protection by wrapping the pan in aluminum foil. This dual layer offers superior defense against freezer odors and moisture loss.
- Freeze Overnight: Store the well-wrapped cake in the freezer overnight, or for a minimum of 3-4 hours, to allow it to firm up completely.
- Thawing and Serving: When you’re ready to enjoy this delectable frozen delight, remove it from the freezer and let it thaw at room temperature for approximately 30-40 minutes. This brief thawing period will soften it just enough for easy slicing, but it will still be wonderfully cold and refreshing. Then, simply slice and serve! It’s a perfect make-ahead dessert for entertaining.
How Long Does an Icebox Cake Need to Be Refrigerated or Frozen?
Proper chilling is key to the success of any no-bake icebox cake, as it allows the ingredients to meld and the crackers to soften into a tender, cake-like consistency. The time required varies slightly depending on whether you’re refrigerating or freezing:
- Refrigeration Time: For a perfectly set, sliceable icebox cake with a soft, moist texture, it typically needs to chill in the refrigerator for about 6-8 hours, or ideally, overnight. This duration ensures the graham crackers fully absorb the creamy filling, preventing a soggy texture and allowing all the flavors to harmonize beautifully.
- Freezer Time: If you opt for a firmer, frozen dessert, the cake usually takes approximately 3-4 hours to set in the freezer. However, for best results and complete solidification, I recommend freezing it overnight. This guarantees a truly robust, scoopable texture similar to ice cream cake.
The Fascinating Origin: Why Is It Called Icebox Cake?
The term “icebox cake” might sound a bit archaic in our modern world, and for good reason! The name harks back to an earlier era, specifically the 1930s. An “icebox” was the precursor to what we now know as the refrigerator – a non-mechanical, insulated cabinet used to keep food cold with large blocks of ice.
During the Great Depression, when new household appliances were becoming more accessible, this cake served a clever dual purpose. It became a popular recipe often promoted by appliance manufacturers to showcase the convenience and benefits of their new “iceboxes” (refrigerators) to housewives. The cake’s simplicity, requiring no baking and only a cold environment to set, perfectly demonstrated the “ease of preparation” that these newfangled appliances offered. It was a delicious way to entice families to purchase a refrigerator, promising a simpler life in the kitchen. So, while the technology has evolved, the charming name and the delightful dessert endure, connecting us to a sweet piece of culinary history.

Delicious Variations for Your Refrigerator Cake
While the classic strawberry icebox cake is undeniably delicious, one of its greatest strengths is its versatility. You can easily customize this recipe to suit your taste preferences or to celebrate seasonal ingredients. Here are some fantastic ideas to get your creative juices flowing:
- Switch Up the Fruit: Don’t limit yourself to strawberries! Explore a spectrum of flavors by incorporating other fresh fruits. Try sweet raspberries, juicy peaches, creamy sliced bananas, tropical mango or pineapple, or vibrant blueberries. Mix and match for unique flavor combinations, always ensuring your fruit is fresh and patted dry.
- Change the Filling: The pudding and Cool Whip filling is a blank canvas.
- Different Pudding Flavors: Experiment with chocolate, banana, lemon, or even pistachio pudding for distinct profiles.
- Alternative Creamy Layers: For a richer taste, swap Cool Whip for homemade whipped cream (ensure it’s stabilized to prevent weeping). You could also use flavored yogurts for a tangier, lighter option, or even layers of softened ice cream for a truly decadent frozen treat.
- Sprinkle and Drizzle: Elevate your cake with exciting toppings beyond just berries.
- Crunchy Additions: Add sprinkles for a festive touch, various chopped nuts (like pecans, walnuts, or almonds) for texture, or mini marshmallows.
- Chocolate Lovers: Chocolate chips, chocolate shavings, or a drizzle of chocolate ganache will satisfy any chocoholic.
- Caramel Indulgence: A generous swirl of homemade Caramel Sauce is always a winner.
- Try Other Cookies: Graham crackers provide a traditional base, but other cookies can create entirely new flavor experiences. Consider using Oreo cookies for a chocolatey crunch, Nutter Butters for a peanut butter twist, or Biscoff cookies for a spiced, caramelized note.
- S’mores Version: Recreate the campfire classic. Use graham crackers for the base, marshmallow cream or fluff for the creamy filling, and top with chocolate chips or a drizzle of melted chocolate. For an extra touch, lightly toast the marshmallow topping with a kitchen torch just before serving.
- Loaded Chocolate Version: For the ultimate chocolate indulgence, go all out! Use chocolate pudding for the filling, crushed Oreo crackers for the layers, and top with a medley of chocolate chips, chopped candy bars, and a rich chocolate ganache.
- Chocolate Peanut Butter Version: A beloved flavor combination! Replace strawberries with chopped Reese’s peanut butter cups and a sprinkle of peanut butter chips. You can even mix a tablespoon or two of cocoa powder or melted peanut butter into the pudding filling for an intensified flavor.
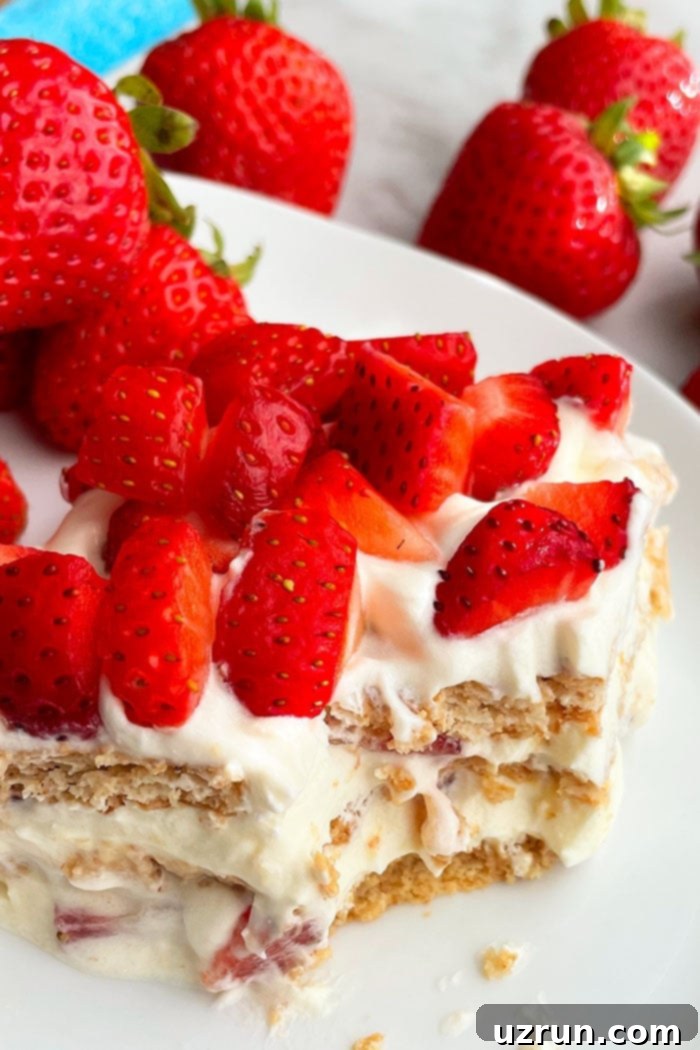
Expert Tips and Techniques for Icebox Cake Perfection
Achieving the perfect no-bake icebox cake is simple, but a few key tips and techniques can elevate your dessert from good to absolutely phenomenal. Pay attention to these details for the best possible results:
- Always Use Fresh Fruit: This is paramount for texture and flavor. Resist the temptation to use frozen strawberries or any other frozen fruit. Frozen fruits contain a lot of water, which, upon thawing, will leach into your cake, making it watery, soggy, and prone to falling apart. Fresh fruit ensures a vibrant flavor and firm texture.
- Pat Fruit Dry: Even fresh fruit can carry excess moisture. After washing and dicing your strawberries (or any other fruit), spread them on a paper towel and gently pat them dry. This crucial step prevents any additional liquid from seeping into your creamy layers, which could lead to a soggy cake.
- Opt for Full-Fat Ingredients: For the richest flavor and most desirable texture, full-fat ingredients are highly recommended. Full-fat milk and Cool Whip contribute to a creamier, more luxurious filling that holds its structure better. The higher fat content also enhances the overall taste, making your cake incredibly indulgent and satisfying.
- Homemade Pudding vs. Pudding Mix: You have flexibility here! While homemade pudding offers a gourmet touch, store-bought instant pudding mixes are incredibly convenient and work perfectly for this recipe. I often opt for the boxed mix myself for its ease and consistent results, especially when time is a factor.
- Plan Ahead for Chilling: This dessert is not an instant gratification kind of treat. It absolutely must chill in the refrigerator (or freezer) for the graham crackers to soften and absorb the creamy filling. This process is what transforms the crackers into a cake-like layer and allows all the flavors to truly meld. For the best outcome, I highly recommend making this cake at least one day in advance.
- Use Cold Milk: When mixing your instant pudding, ensure your milk is very cold. Cold milk helps the pudding set faster and achieve a thicker, more stable consistency, which is essential for a firm filling that won’t make your cake runny.
- Adjust Pan Size for Servings: If you’re looking to serve a larger crowd, you can easily double the recipe. Just make sure to use a larger pan (e.g., a full sheet pan if you can find one suitable for depth) or divide the ingredients between two standard 9×13 inch pans.
- Even Spreading is Key: When layering the filling, take a moment to spread it evenly across the graham crackers. This ensures that every bite has a balanced ratio of cracker, cream, and fruit, and that the crackers soften uniformly.
Storage Solutions for Your Icebox Cake
Proper storage is essential to keep your no-bake icebox cake fresh and delicious for as long as possible, whether you plan to enjoy it over a few days or save it for a special occasion.
- Refrigerator Storage: Leftovers of your refrigerated icebox cake should be stored in an airtight container. This prevents it from drying out and absorbing other odors from the fridge. When stored correctly, the cake will remain fresh and delightful for up to 3 days. The texture might become slightly softer over time, but the flavors will continue to meld beautifully.
- Freezer Storage: For longer-term storage, the freezer is your best friend. To freeze the cake:
- First, wrap the entire pan tightly with plastic saran wrap. Ensure a snug fit to minimize air exposure.
- Next, add a layer of heavy-duty aluminum foil over the plastic wrap. This double-layer protection is crucial for preventing freezer burn and maintaining the cake’s quality.
- Store the well-wrapped cake in the freezer for up to 1 month.
- When you’re ready to indulge, simply remove the cake from the freezer and let it thaw at room temperature for 30-40 minutes. This allows it to soften just enough for easy slicing while remaining delightfully cold and firm. Then, slice and enjoy your perfectly preserved treat!
More Irresistible Strawberry Desserts
If you love the fresh, sweet taste of strawberries in your desserts, you’re in for a treat! Here are some more fantastic strawberry-centric recipes to explore:
- Strawberry Rhubarb Crisp (Crumble)
- Strawberry Crumble (Strawberry Crisp)
- Strawberry Shortcake Cake
- Easy Strawberry Shortcake (With Bisquick Mix)
- Strawberry Cupcakes
Recipe: Easy Icebox Cake
Easy Icebox Cake
Author: Abeer Rizvi
An easy, old-fashioned no-bake icebox cake recipe (refrigerator cake), homemade with simple ingredients with layers of graham crackers, vanilla or cheesecake pudding/Cool Whip filling and fresh strawberries.
Prep Time: 10 mins
Chill Time: 6 hrs
Total Time: 6 hrs 10 mins
Course: Dessert
Cuisine: American
Servings: 15 Slices
Calories: 250 kcal
Ingredients
- 3 boxes Instant cheesecake pudding (Dry powder, 3.4 oz each, Can also be replaced with vanilla pudding, Full fat)
- 4 cups Whole milk (Cold)
- 2 cups Cool whip (Full fat)
- 1 box Graham crackers (14.4 oz. box)
- 3-4 cups Strawberries (Fresh, Washed, Diced, Patted dry)
Instructions
- In a large mixing bowl, add pudding mix, cold milk and whisk until combined. It should become smooth and slightly thick.
- Gently fold in the Cool Whip until combined. Keep aside.
- In a rectangle pan (Dimensions: 9×13), line graham crackers on the bottom to cover the whole pan.
- Spoon a third of the pudding/Cool Whip mixture on top of the crackers and spread gently and evenly with a spatula.
- Toss some strawberries on top.
- Arrange another layer of graham crackers on top of the strawberries, spread more pudding/Cool Whip mixture on top, followed by more strawberries.
- Arrange a final layer of graham crackers, spread remaining pudding/Cool Whip mixture on top, followed by remaining strawberries.
- Cover and chill in fridge 6-8 hours or overnight to let the filling set.
- If you like, you can turn this into a frozen dessert. Wrap the pan in plastic saran wrap first, followed by aluminum foil and then, store it in the freezer overnight. Let it thaw for 30-40 minutes at room temperature and then, slice and enjoy.
Notes
- Remember to read all the tips provided above for the best results.
- Leftovers can be stored in a sealed container in the fridge for up to 3 days.
Nutrition
Calories: 250kcal | Carbohydrates: 46g | Protein: 4g | Fat: 5g | Saturated Fat: 2g | Polyunsaturated Fat: 1g | Monounsaturated Fat: 2g | Cholesterol: 8mg | Sodium: 481mg | Potassium: 174mg | Fiber: 1g | Sugar: 27g | Vitamin A: 125IU | Vitamin C: 11mg | Calcium: 109mg | Iron: 1mg
An automated tool is used to calculate the nutritional information. As such, I cannot guarantee the accuracy of the nutritional information provided for any recipe on this site.
Tried this recipe? Leave a comment below or rate and tag @cakewhiz on social!
