Master the Art of Naked Cake Decorating: A Step-by-Step Guide for Beautiful, Rustic Cakes
Welcome to the ultimate guide for creating exquisite naked cakes! Whether you call them semi-naked cakes, unfrosted wedding cakes, bare cakes, or half-dressed cakes, these stunning desserts have captured hearts worldwide with their rustic charm and natural elegance. Far from being unfinished, a naked cake celebrates the beauty of its layers, fillings, and natural texture, offering a sophisticated yet approachable alternative to heavily frosted confections. This step-by-step tutorial will teach you how to craft a gorgeous naked cake adorned with luscious frosting, vibrant fruits, and delicate flowers, perfect for weddings, birthday parties, or any special celebration.
What Exactly is a Naked Cake?
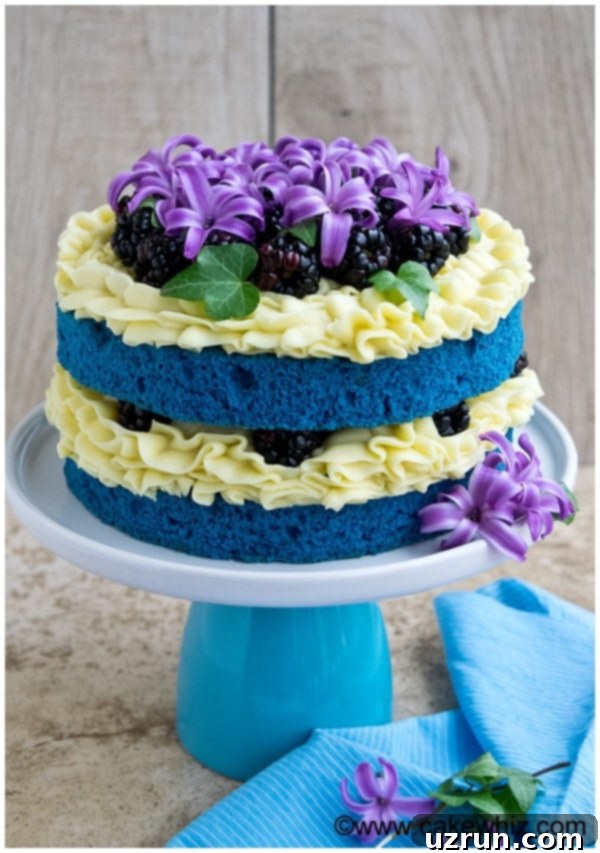
The term “naked cake” refers to a cake where the sides are either completely or partially unfrosted, revealing the beautiful cake layers and fillings underneath. This minimalist approach offers a distinct aesthetic that highlights the cake’s internal structure and ingredients. There are two main styles:
- Semi-Naked or Half-Dressed Cakes: These cakes feature a very thin layer of frosting lightly scraped around the sides, creating a translucent effect. It’s often likened to a “crumb coat” but intended as the final finish, allowing hints of the cake color to peek through. This style provides a delicate balance between a fully frosted and a completely bare look.
- Pure Naked Cakes: In this style, the sides of the cake have absolutely no frosting, leaving the cake layers and fillings fully exposed. This bold and honest presentation is what you see predominantly featured in this tutorial, showcasing every detail of the cake’s construction.
Why Choose a Naked Cake for Your Celebration?
Beyond their visual appeal, naked cakes offer several compelling advantages that make them a popular choice for various occasions:
- Effortless Elegance: They exude a natural, rustic charm that is both sophisticated and inviting. Perfect for those who prefer a less formal, more organic look than traditional fondant-covered cakes.
- Easier to Make: Compared to intricate fondant decorations or perfectly smooth buttercream finishes, naked cakes are significantly less demanding. They require fewer advanced techniques, making them ideal for home bakers or those new to cake decorating.
- Highlight Flavors: With less frosting on the exterior, the focus shifts to the delicious cake flavors and luscious fillings. This allows the quality of your cake and fillings to truly shine.
- Customizable Decorations: Naked cakes serve as a beautiful canvas for natural decorations like fresh flowers, seasonal fruits, and herbs, making them incredibly versatile for any theme or color palette.
- Perfect for Any Event: While popular for weddings due to their understated elegance, their versatility also makes them fantastic for birthday parties, anniversaries, baby showers, or any gathering where you want a beautiful, homemade touch.
Essential Components of a Stunning Naked Cake
The Cake Base: Firmness is Key
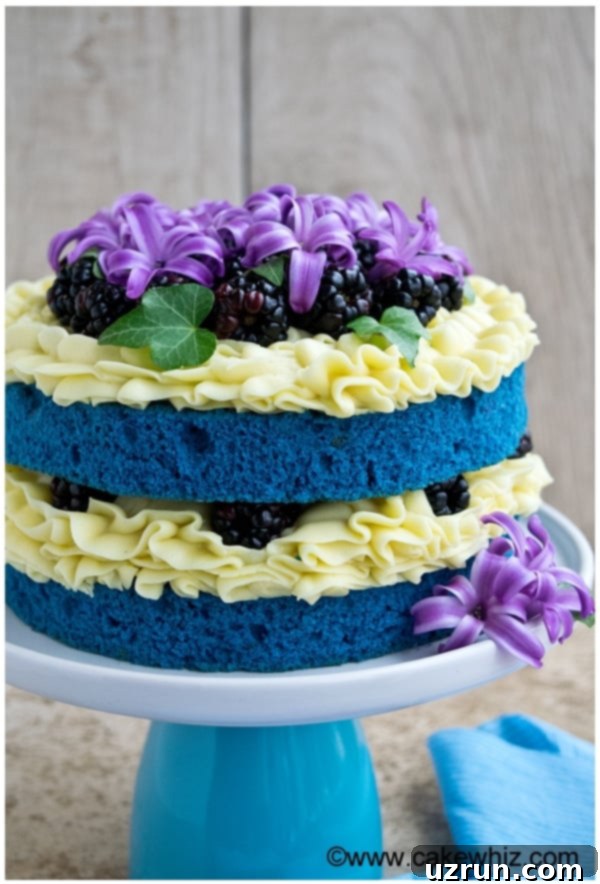
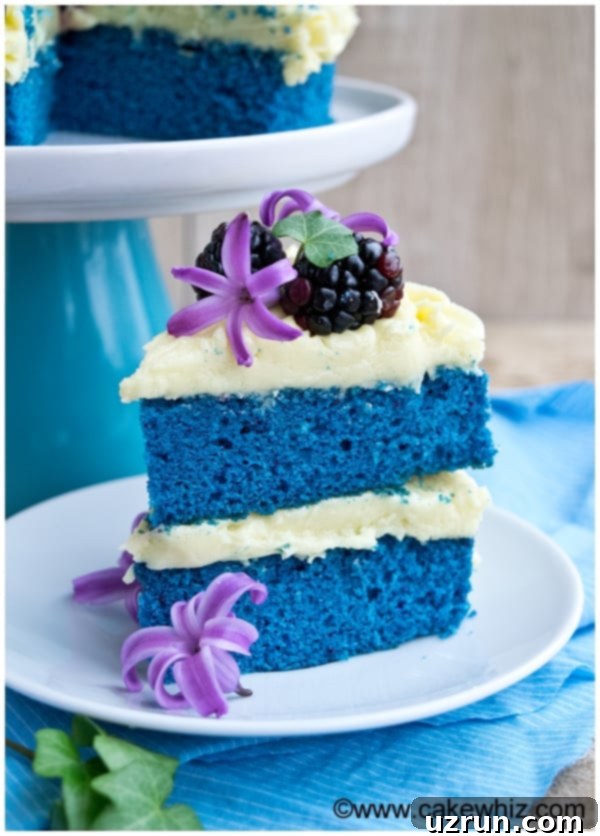
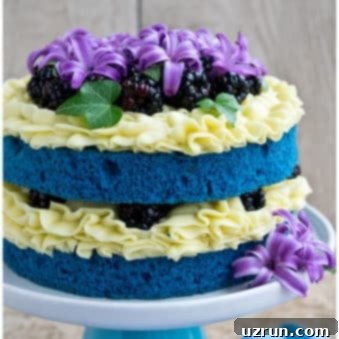
The foundation of any great naked cake is a stable and delicious cake recipe. Since the sides will be exposed, you need a cake that is firm enough to hold its shape without crumbling. While a classic vanilla sponge cake is a popular choice, don’t limit yourself! Any dense, sturdy cake batter will work beautifully. For instance, a rich red velvet, a moist chocolate fudge, or a sturdy carrot cake are excellent alternatives. In this particular example, I crafted a beautiful two-layer blue velvet cake, filled with vibrant yellow buttercream and fresh blackberries.
The Perfect Frosting: Stability is Non-Negotiable
When it comes to naked cakes, your frosting selection is crucial. You need a frosting that is thick and stable, capable of holding its structure between layers and providing a clean, defined look. Thin, runny frostings like whipped cream are generally unsuitable as they will simply drip down the sides of your exposed cake, creating a messy rather than a minimalist effect. American buttercream is an excellent choice due to its stability and ease of piping. Other great options include cream cheese frosting, ganache (especially a firm chocolate ganache), or even a sturdy Swiss or Italian meringue buttercream. For this cake, I used a delightful yellow buttercream icing, perfectly complementing the blue velvet layers.
Step-by-Step: How to Make and Assemble Your Naked Cake
Creating a beautiful naked cake is a rewarding process. Follow these detailed steps to ensure a flawless finish:
Baking and Preparing Your Cake Layers
- Bake Your Cake Layers: Begin by baking 2-3 round cakes according to your chosen recipe. Ensure your cake pans are well-greased and floured to prevent sticking, and consider lining the bottoms with parchment paper for extra insurance. This helps the cakes release cleanly, which is vital for naked cakes where imperfections are more visible.
- Cool Completely: Allow your cakes to cool down completely in their pans on a wire rack before attempting to remove them. Warm cakes are delicate and prone to breaking. Once cooled, you can wrap them in plastic wrap and even freeze them for a short period (about 20-30 minutes) to make them easier to handle and slice.
- Level Your Cakes: Using a sharp, serrated knife or a cake leveling tool, carefully cut off the top domed portion of each cake layer. This ensures that each layer is perfectly flat, allowing for a stable and even stack. Discard the trimmed domes or save them for cake pops!
- Trim Edges (Optional but Recommended): For a truly pristine look, you can use a smaller cake pan or cake board as a guide to trim the outer edges of your cake layers. This removes any slightly browned or uneven crust, revealing the soft, uniform crumb underneath.
Layering and Filling Your Naked Cake
Now for the fun part – assembling your masterpiece! This process involves careful layering and applying your stable frosting.
- First Layer Placement: Place your first leveled cake layer onto your chosen cake stand, serving plate, or cake board. A dab of frosting underneath can help secure it in place.
- Prepare Your Frosting: Fill a piping bag with your stable frosting (e.g., buttercream) and attach a decorating tip with a wide opening, such as Tip 1M, 4B, or 1A. These tips create beautiful, consistent swirls or smooth lines.
- Pipe a Dam (Optional, for runny fillings): If you plan to use a runny filling like jam or fruit curd, pipe a sturdy “dam” of frosting around the outer edge of the first cake layer. This creates a barrier that will prevent your filling from seeping out the sides.
- Apply Filling: If using a dam, fill the center with your chosen jam, fruit compote, or extra buttercream. For this tutorial, we used a generous layer of yellow buttercream and strategically placed fresh blackberries.
- Add Second Cake Layer: Carefully place your second leveled cake layer directly on top of the filling and frosting. Gently press down to ensure it adheres. If making a multi-tiered cake, repeat the filling process for subsequent layers.
- Top Frosting: Pipe a thick, even layer of frosting on top of the final cake layer. You can pipe concentric circles, swirls, or spread it smoothly, depending on your desired look.
- Decorate! Now is the time to unleash your creativity. Arrange fresh flowers, berries, candies, or sprinkles on top of the cake. This is where the “naked” aspect truly shines, allowing your chosen decorations to take center stage. For my blue velvet cake, I added more fresh blackberries and beautiful purple flowers and leaves.
Decorating Your Naked Cake: Simple & Elegant Ideas
The beauty of a naked cake lies in its versatility for decoration. With the cake layers and fillings as the focal point, you can choose decorations that complement your theme and personal taste. Here are some popular and easy ideas:
- Fresh Flowers: Edible flowers like roses, peonies, dahlias, or even herbs like rosemary can add a touch of natural elegance. Always ensure flowers are food-safe and pesticide-free.
- Fresh Fruit: Berries (strawberries, raspberries, blueberries, blackberries), sliced figs, kiwi, or citrus segments add color, texture, and a burst of freshness.
- Candies & Chocolates: For a more playful or decadent touch, adorn your cake with gourmet chocolates, macarons, chocolate shavings, or even small, colorful candies.
- Sprinkles: A scattering of sprinkles can add fun and festivity, especially for birthday cakes.
- Cookies & Biscuits: Crushed cookies, mini cookies, or even elegant biscotti can provide interesting texture and flavor.
- Minimalist Frosting Details: Beyond the layered frosting, consider adding small piped dots, swirls, or a rustic “smear” of frosting on the exposed sides for a semi-naked effect.
Pro Tips for Naked Cake Success
To ensure your naked cake is not only beautiful but also delicious and holds up well, keep these expert tips in mind:
- Use Edible Flowers and Leaves: Always verify that any flowers or leaves you use for decoration are non-toxic and safe for consumption. If you’re unsure, consult your florist or a reliable guide for edible botanicals.
- Proper Pan Preparation is Crucial: Always grease and flour your cake pans thoroughly, and consider adding a round sheet of wax paper or parchment paper at the base. This step prevents the cake from sticking and breaking when you remove it, which is especially important for exposed cake layers.
- Opt for Thick, Stable Frosting: As mentioned, stability is key. Use a frosting that is firm and holds its shape, such as buttercream, cream cheese frosting, or ganache. Avoid thin or runny frostings like whipped cream, which will sag and drip.
- Create a Dam for Runny Fillings: If your chosen filling (like jam or fruit puree) is on the thinner side, pipe a sturdy buttercream dam around the perimeter of each cake layer before filling the center. This prevents the filling from escaping.
- Prevent Cake from Drying Out: Naked cakes are more susceptible to drying because their sides are exposed to air. To combat this, assemble the cake only a few hours before serving. For longer storage or if you’re particularly worried, place slices of regular bread around the base of the cake. The bread will absorb moisture from the air, keeping your cake fresh and moist.
- Achieve Even Cake Layers: Especially when making a tiered naked cake, uniform thickness in your cake layers is vital. Even layers contribute to a balanced structure and a more aesthetically pleasing final product. Utilize a cake leveling tool for best results.
- Provide Proper Support for Tiered Cakes: If you’re venturing into multi-tiered naked cakes, don’t skip the support dowels or bubble tea straws. Inserting these into the bottom tiers provides crucial structural integrity, preventing the upper layers from sagging or collapsing.
- Chill Your Cakes: Chilling your cake layers before slicing them makes them firmer and easier to handle, reducing crumbling and mess. Once your naked cake is fully assembled, refrigerate it for at least 30 minutes. This allows the frosting to firm up, ensuring the cake holds its shape and remains stable.
- Experiment with Multiple Layers and Tiers: While my featured cake has one tier, feel free to stack as many layers or tiers as you desire to create a grander statement. Remember to adjust your support system accordingly for taller cakes.
- Craft a Rustic Wedding Cake: To achieve a truly rustic naked wedding cake, use this tutorial as a foundation but scale it up. Incorporate more layers, additional tiers, and decorate with natural elements like fresh greenery, wildflowers, or even twine.
- Try a Fun Rainbow Variation: For a vibrant naked rainbow cake, follow the same assembly steps but use different colored cake layers and frostings. Decorate with an abundance of sprinkles and candies for a festive and playful naked birthday cake, especially for children.
More Naked Cake Ideas and Flavors to Explore
The beauty of the naked cake style is that it can be applied to almost any cake recipe. Here are a few more delicious ideas to inspire your next baking adventure:
- Naked Chocolate Oreo Cake
- Naked Red Velvet Cake
- Apple Pie Naked Cake
- Applesauce Naked Cake
- Chai Tea Spice Naked Cake
- Ginger Ale Naked Cake
- Naked Mango Cherry Cake
Recipe: How to Make Naked Cake
By Abeer Rizvi
This step-by-step recipe guides you through creating a beautiful naked cake with moist blue velvet layers, luscious yellow buttercream icing, and a charming decoration of fresh fruits and flowers. It’s an ideal choice for weddings, birthday parties, or any special occasion!
Prep Time: 10 mins
Cook Time: 40 mins
Decorating Time: 30 mins
Total Time: 1 hr 20 mins
Course: Cake, Dessert
Cuisine: American
Servings: 9 Slices
Calories: 3673 kcal
Ingredients
- 2¼ cups All-purpose flour
- 1¼ cups Granulated sugar
- 1½ cup Soy milk (Or almond milk)
- ¾ cup Oil
- 1 tablespoon Vanilla extract
- ¾ teaspoon Baking soda
- ⅛ teaspoon Salt
- 3 tablespoon Lemon juice
- Blue gel coloring
Decoration
- 4 cups American Buttercream Frosting (Yellow color)
- 1 cup Blueberries (Fresh, washed and patted dry)
- Fresh purple flowers and leaves
Instructions
Bake The Cake:
- Add milk, oil, vanilla extract, and lemon juice into a mixing bowl. Mix until you have a pale and fluffy mixture.
- In a separate bowl, whisk together all the dry ingredients. Dump this dry mixture into the wet mixture.
- Add blue gel coloring and mix until just combined. Be careful not to over-mix!
- Pour the batter into two 8×2 inch greased and floured round cake pans.
- Bake at 350 degrees Fahrenheit (175 degrees Celsius) for 40-45 minutes, or until an inserted toothpick comes out clean.
- Allow the cakes to cool completely in their pans, then cover them in plastic wrap and freeze them for a short period to make handling easier.
Assemble the Cake:
- When ready to assemble, remove your cakes from the freezer and let them sit at room temperature for about 20 minutes. Then, peel off any wax paper or parchment from the bottom.
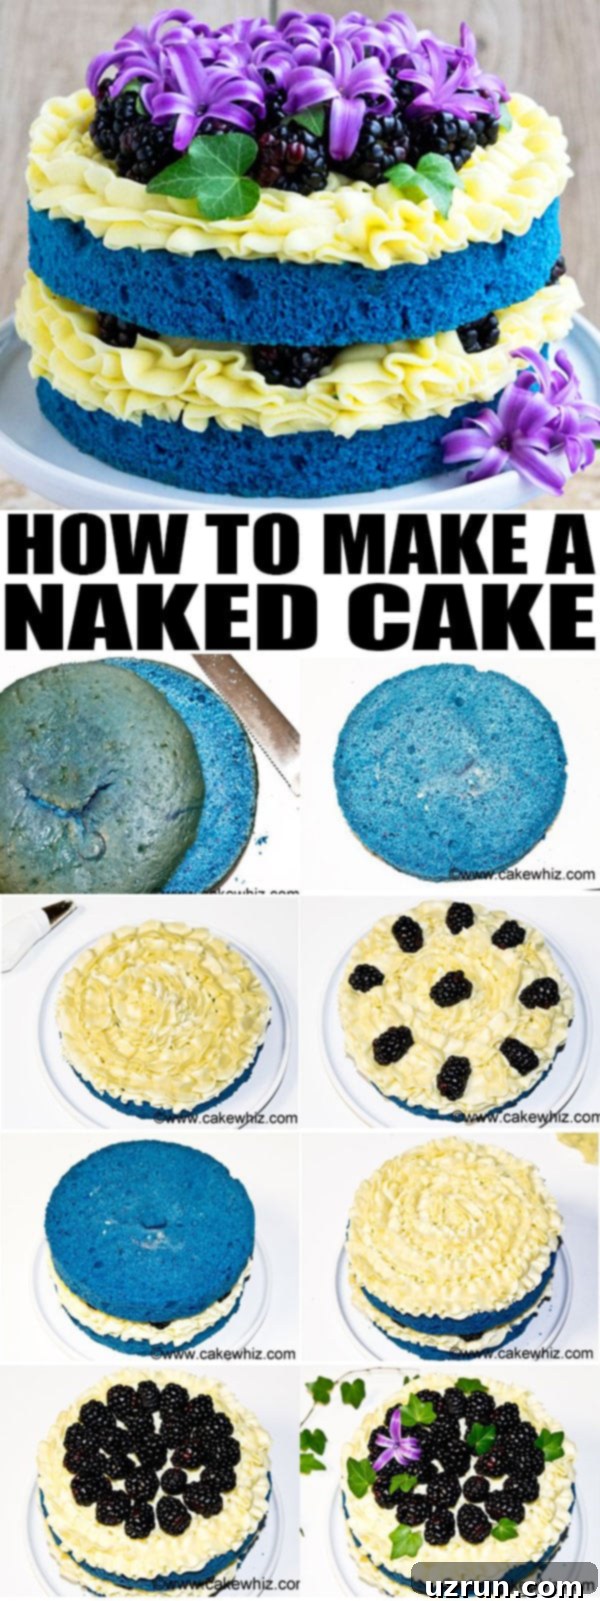
- Use a serrated knife to evenly slice off the top dome portion of each cake layer.
- To further refine the shape, place a smaller cake pan (about 7 inches wide) or a smaller cake board on top of your cake. Use a serrated knife to cut around the cake, removing any discolored or uneven outer edges.
- Repeat the slicing and trimming steps for your second blue velvet cake layer.
- Place one cake layer on your chosen cake stand or serving plate.
- Fill a piping bag with your yellow buttercream frosting and attach Tip 1M (or a similar wide-opening tip).
- Pipe a sturdy dam of frosting around the top edge of the first cake layer. You can then fill the center of this dam with jam, fruit, or more buttercream.
- Evenly arrange a few fresh blackberries on top of the buttercream filling within the dam.
- Carefully place the second blue velvet cake layer on top of this filled layer.
- Gently press the top of your cake to help the layers adhere slightly. Avoid pressing too hard, as this can cause the icing and berries to shift.
- Pipe frosting around the top edge of the upper cake layer, creating decorative ruffles or swirls as desired.
- Place more fresh blackberries on top of the cake, leaving some space between them for additional decorations.
- Finally, fill the spaces between the berries by carefully inserting fresh flowers and leaves.
- Keep the assembled naked cake refrigerated until it’s ready to be served. Enjoy your beautiful creation!
Notes
- Refer to all the detailed tips provided in the main article for best results.
- Leftovers can be stored in a sealed container in the fridge for up to 3 days.
- Use any cake scraps or leftover portions to make delicious blue velvet cake balls or cake pops.
Nutrition
Calories: 3673 kcal | Carbohydrates: 481g | Protein: 39g | Fat: 176g | Saturated Fat: 13g | Sodium: 1423mg | Potassium: 797mg | Fiber: 9g | Sugar: 262g | Vitamin A: 755IU | Vitamin C: 17.4mg | Calcium: 492mg | Iron: 14.7mg
An automated tool is used to calculate the nutritional information. As such, I cannot guarantee the accuracy of the nutritional information provided for any recipe on this site.
We hope this comprehensive guide inspires you to create your own beautiful naked cakes. With a little practice and these detailed instructions, you’ll be crafting stunning, elegant desserts in no time.
Until next time, happy baking and decorating!
