Effortlessly Easy Christmas Tree Cake: A Simple Guide to Festive Holiday Baking
Get ready to impress with this incredibly simple yet stunning Christmas Tree Cake recipe! This homemade delight starts with a humble sheet cake and transforms into a festive masterpiece adorned with vibrant green buttercream icing roses, cheerful sprinkles, and an assortment of candies. The best part? You won’t need any specialized cake pans, complex molds, or professional tools to bring this holiday vision to life. It’s the perfect solution for anyone seeking a show-stopping dessert without spending endless hours in the kitchen during the busy holiday season.
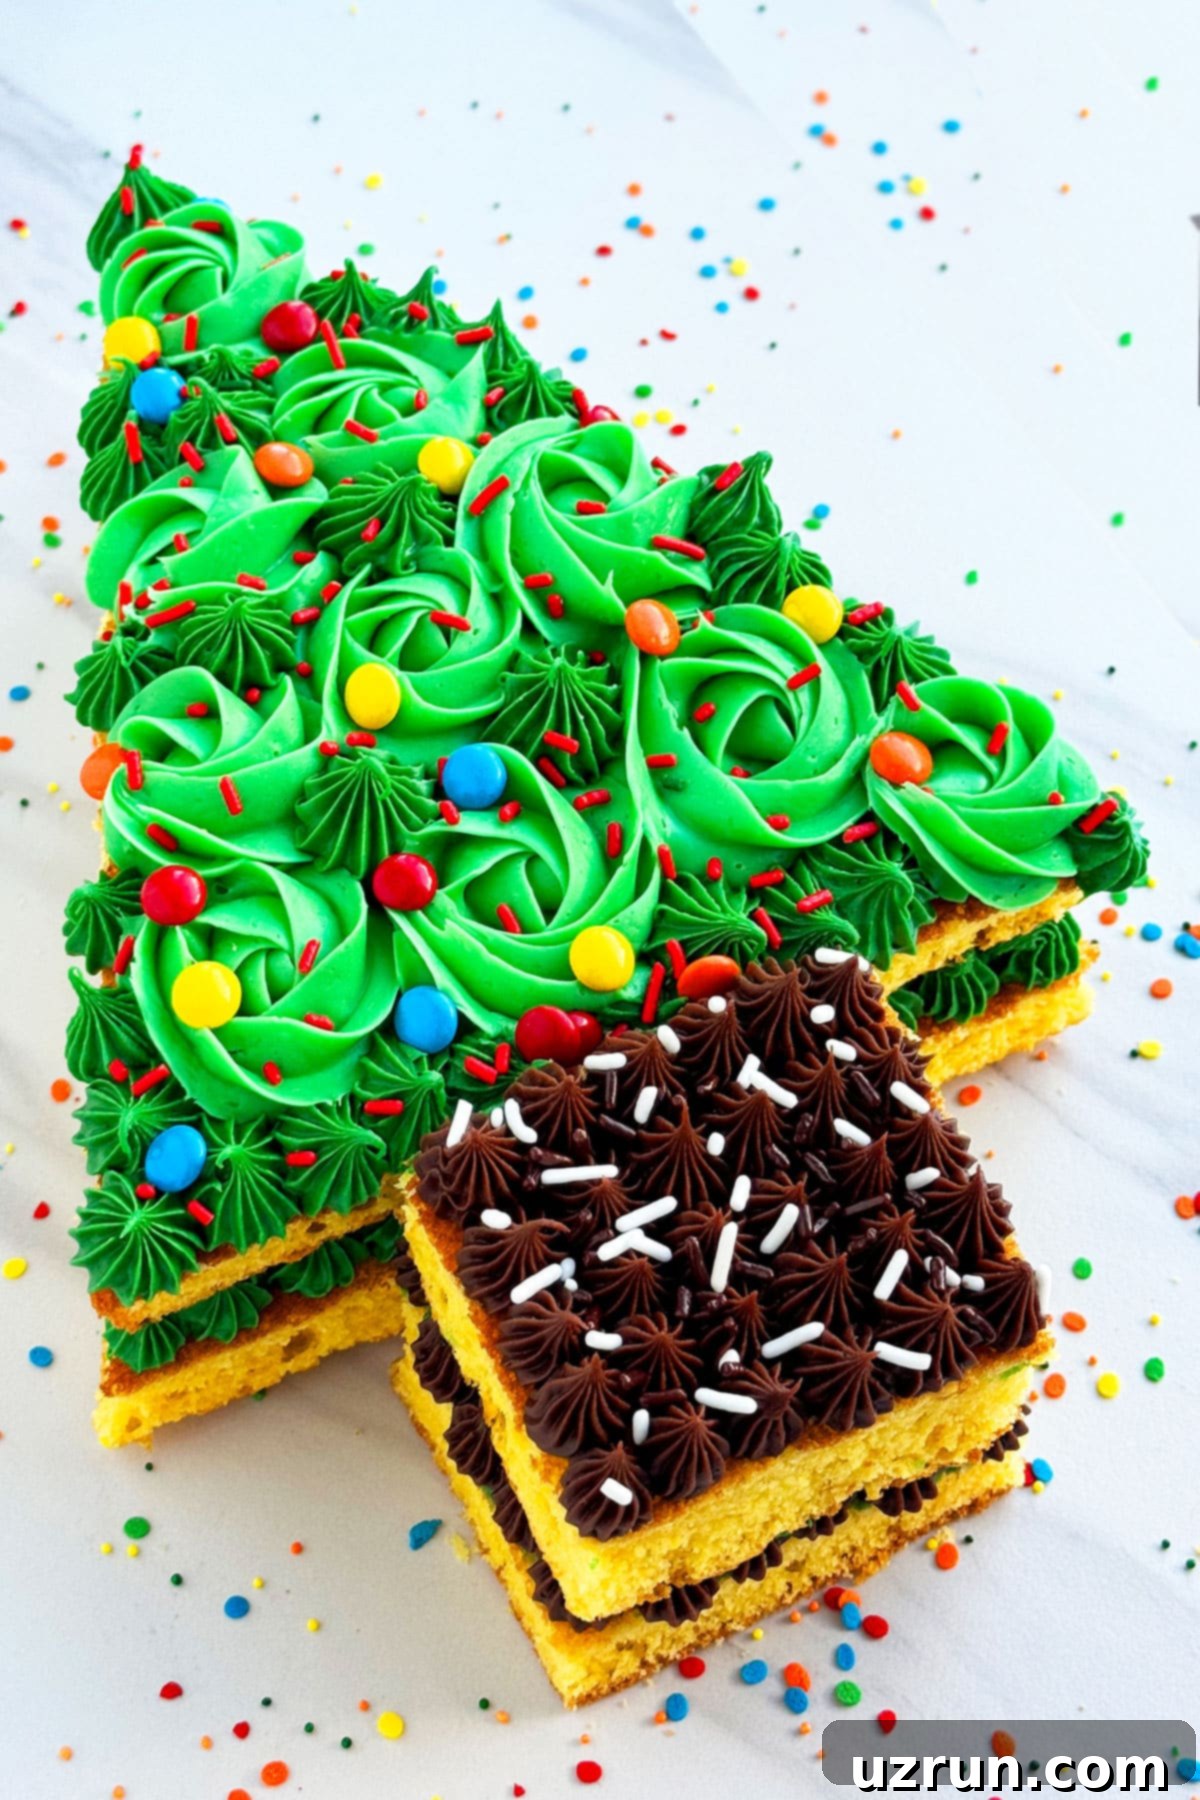
Creating edible trees is one of my favorite holiday traditions, as evidenced by popular recipes like Christmas Tree Brownies, festive Christmas Tree Cookies, and charming Easy Christmas Tree Cupcakes. My Chocolate Tree Cake is also a perennial favorite. This detailed recipe and step-by-step tutorial will empower you to create one of the easiest, yet most impressive, holiday cakes you’ve ever made. The holidays should be about joy and connection, not stress in the kitchen. This recipe offers clever shortcuts, making your life easier while still delivering a major “WOW” factor that will delight all your guests.
Table of contents
- Key Ingredients
- How to Make an Easy Christmas Tree Cake from Scratch
- Variations to Spark Your Creativity
- Expert Tips and Techniques for Success
- Storage and Make-Ahead Options
- Recipe FAQs
- More Christmas Desserts to Explore
Key Ingredients for Your Festive Tree Cake
Crafting this adorable Christmas tree cake requires just a handful of accessible ingredients. The beauty of this recipe lies in its simplicity, allowing you to focus on the fun of decorating.
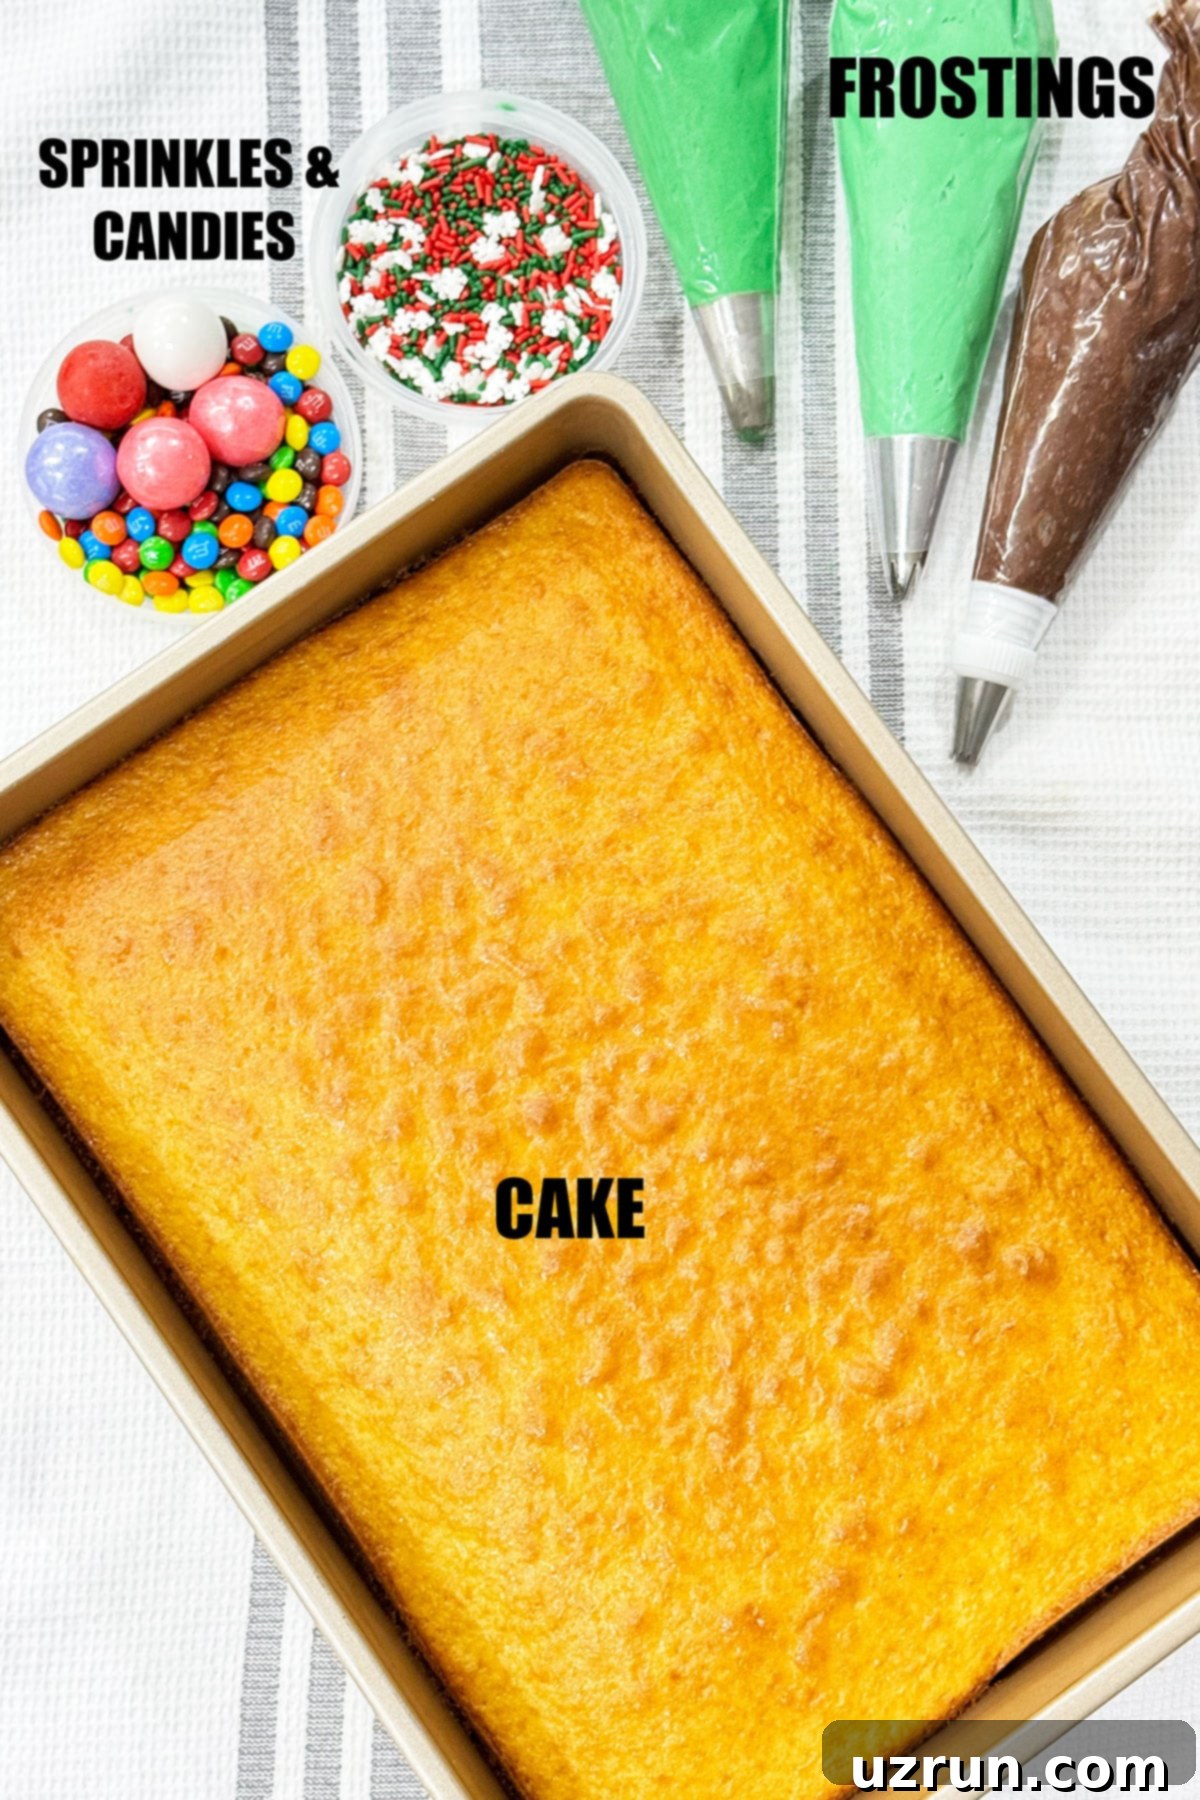
- Yellow Sheet Cake: This forms the foundational “tree” structure. You can bake a classic homemade yellow sheet cake for that authentic touch or opt for a convenient box mix from the store to save time. The 9×13 inch size is ideal for the tree shape.
- Buttercream Icing: The go-to frosting for easy and elegant cake decorating. Its stable consistency is perfect for piping intricate designs like roses and stars, making it a dream to work with for both beginners and experienced bakers.
- Green Food Coloring: This is essential for transforming your buttercream into lush foliage. Using varying amounts allows you to create two distinct shades – a lighter green and a darker green – adding depth and realism to your tree.
- Chocolate Frosting: Approximately one cup of chocolate frosting will be needed to create the tree’s trunk. Its rich color and flavor provide a lovely contrast to the green tree top.
- Sprinkles: Festive red, green, and white sprinkles are crucial for decorating your Christmas tree. They instantly add a joyful, celebratory sparkle.
- Candies: Mini M&M candies are a fantastic choice for “ornaments” on your tree. Feel free to get creative and use a variety of small, colorful candies to mimic traditional holiday decorations.
How to Make an Easy Christmas Tree Cake from Scratch
Creating this festive Christmas tree cake is a surprisingly straightforward process. Follow these steps for perfect results, starting with the sheet cake and moving to the creative decoration.
Assembling the Top of the Cake (The Tree Foliage)
- Bake and Cool: Begin by baking your yellow sheet cake in a 9×13 inch pan according to your chosen recipe or box mix instructions. This is a crucial step – ensure the cake cools *completely* before you attempt any cutting or decorating. A warm cake will melt your frosting and create a sticky mess.
- Prepare Frostings: While your cake is cooling, prepare your buttercream icing. Divide it, coloring half a light green shade and the other half a darker green. Also, have your chocolate frosting ready for the trunk.
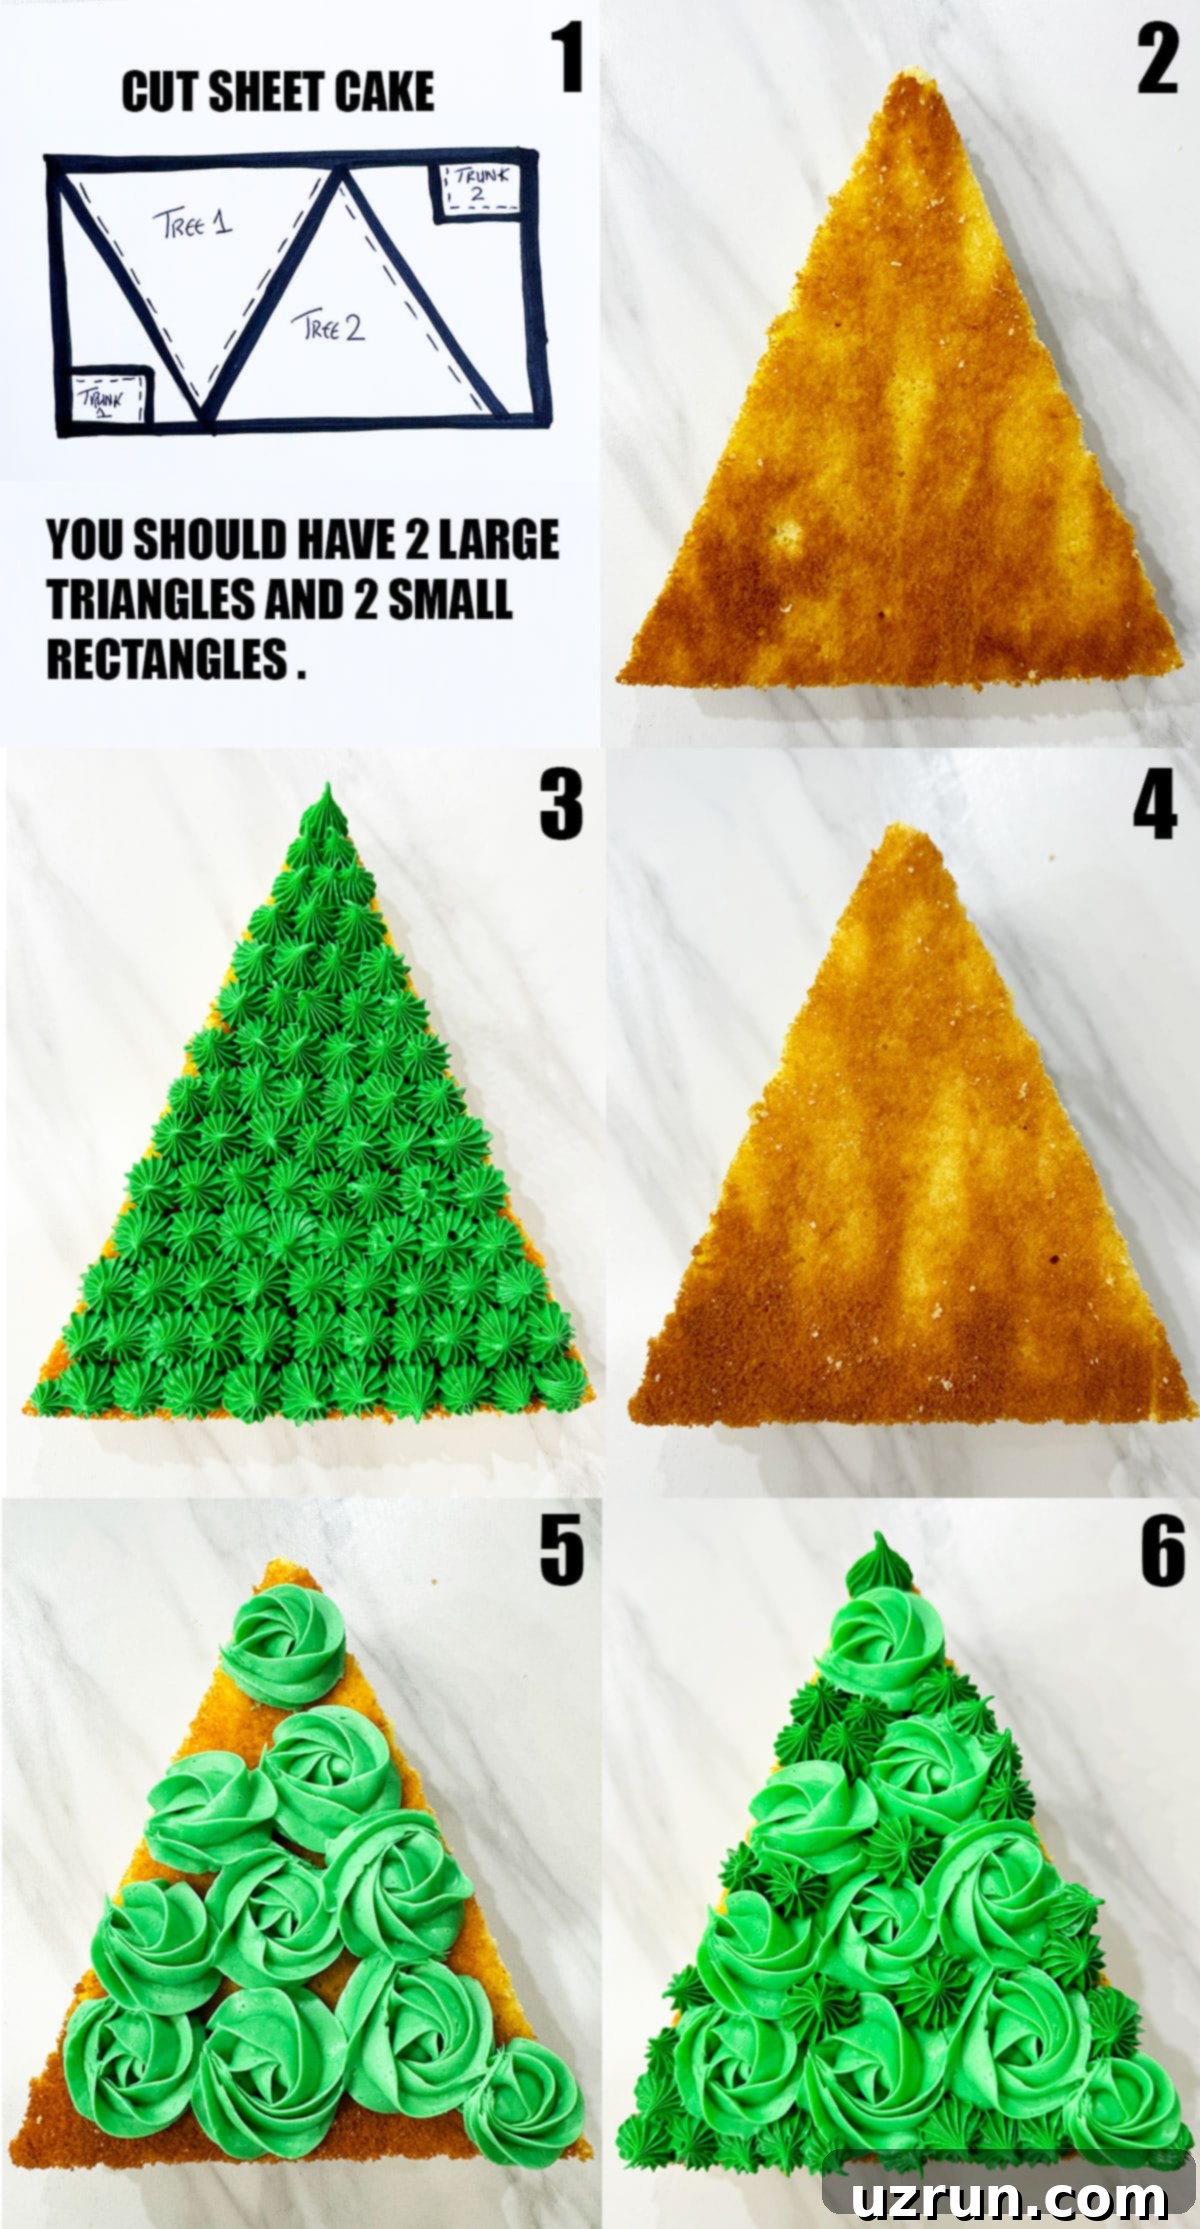
- Cut Sheet Cake into Shapes: This is where the magic happens! Carefully cut your cooled sheet cake to form the tree and trunk pieces. You’ll need two large triangles for the tree’s foliage and two small rectangles for the trunk. A useful tip: lightly mark your desired cuts with a toothpick first to ensure symmetry before making the final cuts with a sharp knife (Image 1).
- Place First Triangle: Gently place one of the large triangle cake pieces onto your chosen cake board or serving platter. This will be the base layer of your tree top (Image 2).
- Pipe Dark Green Stars: Fill a piping bag fitted with a French tip (like Wilton Tip 4B) with your darker green buttercream icing. Pipe small, neat stars evenly across the entire surface of the first triangle cake layer until it is fully covered. These stars will serve as the inner layer of your tree’s “leaves” (Image 3).
- Position Second Triangle: Carefully place the second triangle cake piece directly on top of the piped dark green icing. Press down gently to ensure it adheres properly, but avoid pressing too hard, which could squeeze out the frosting (Image 4).
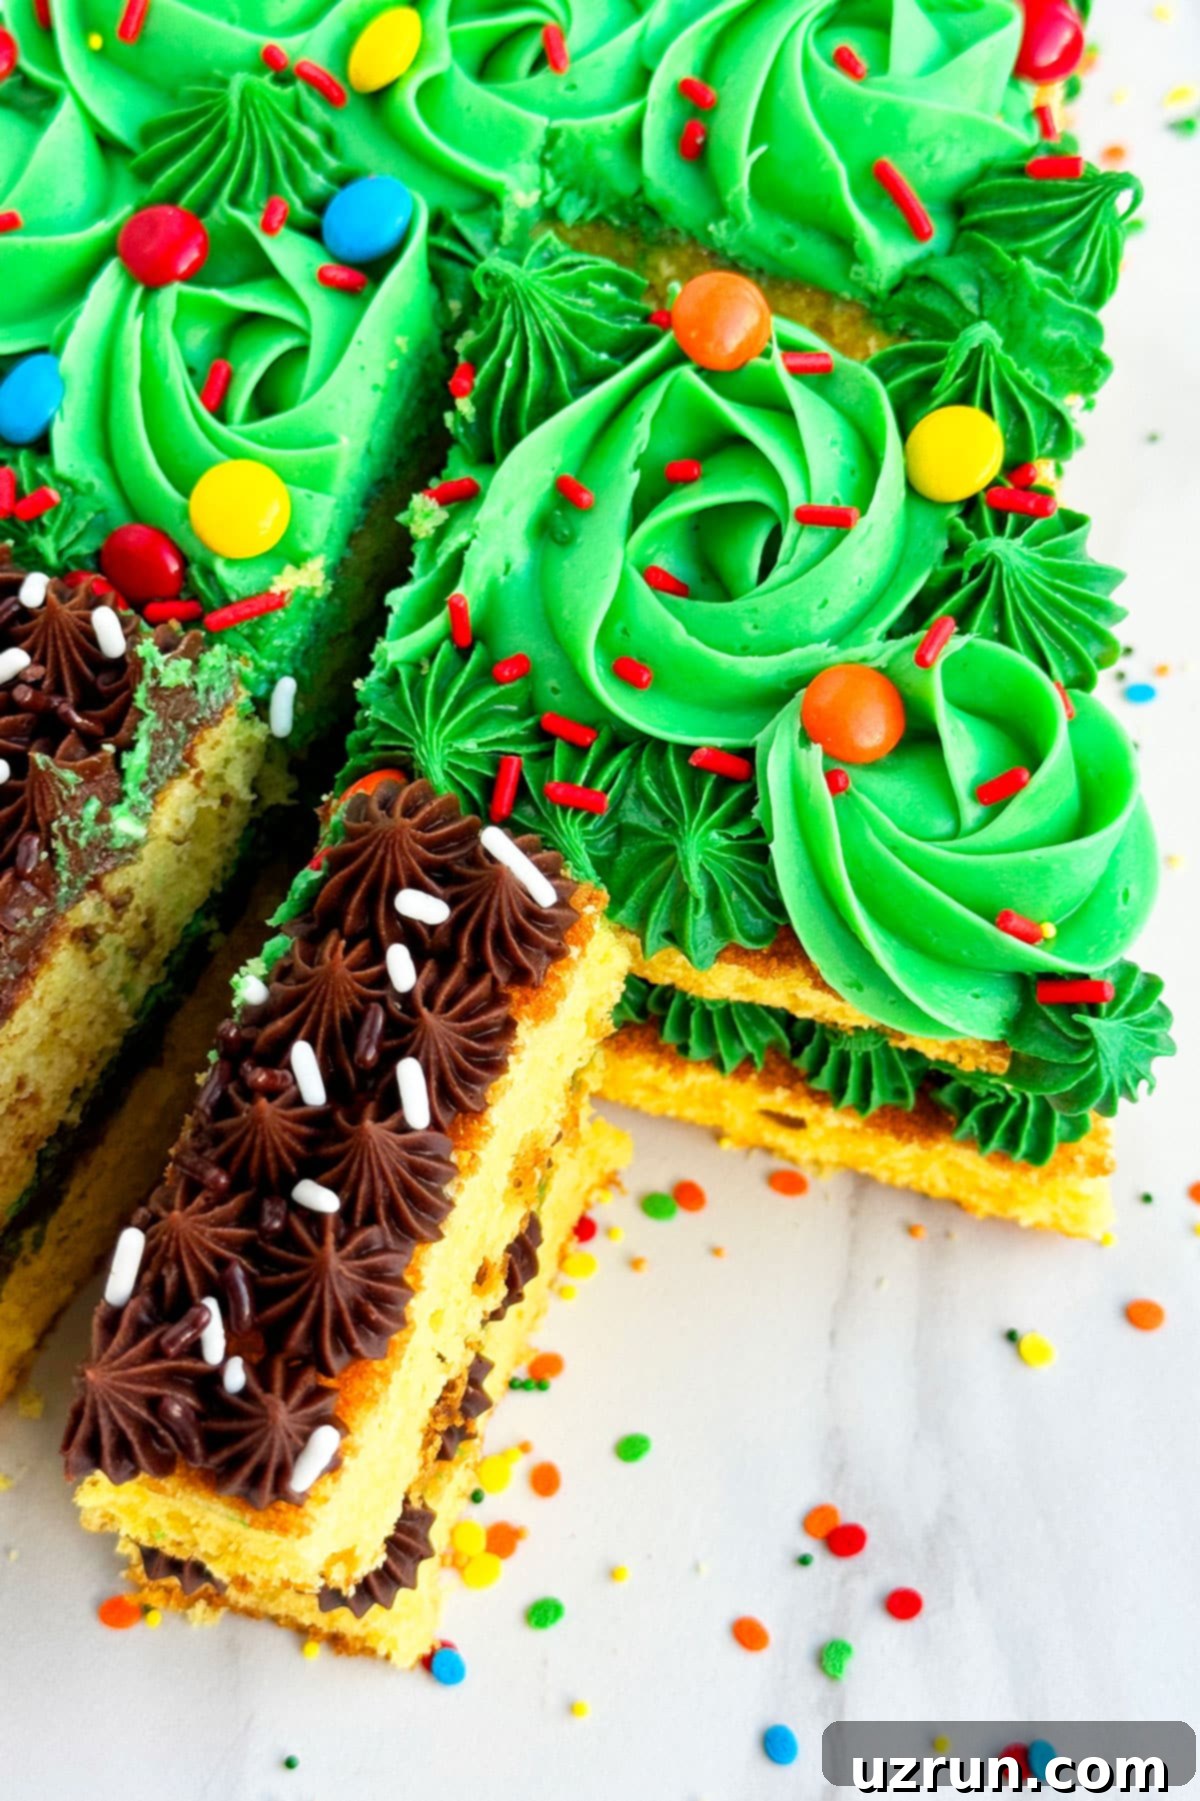
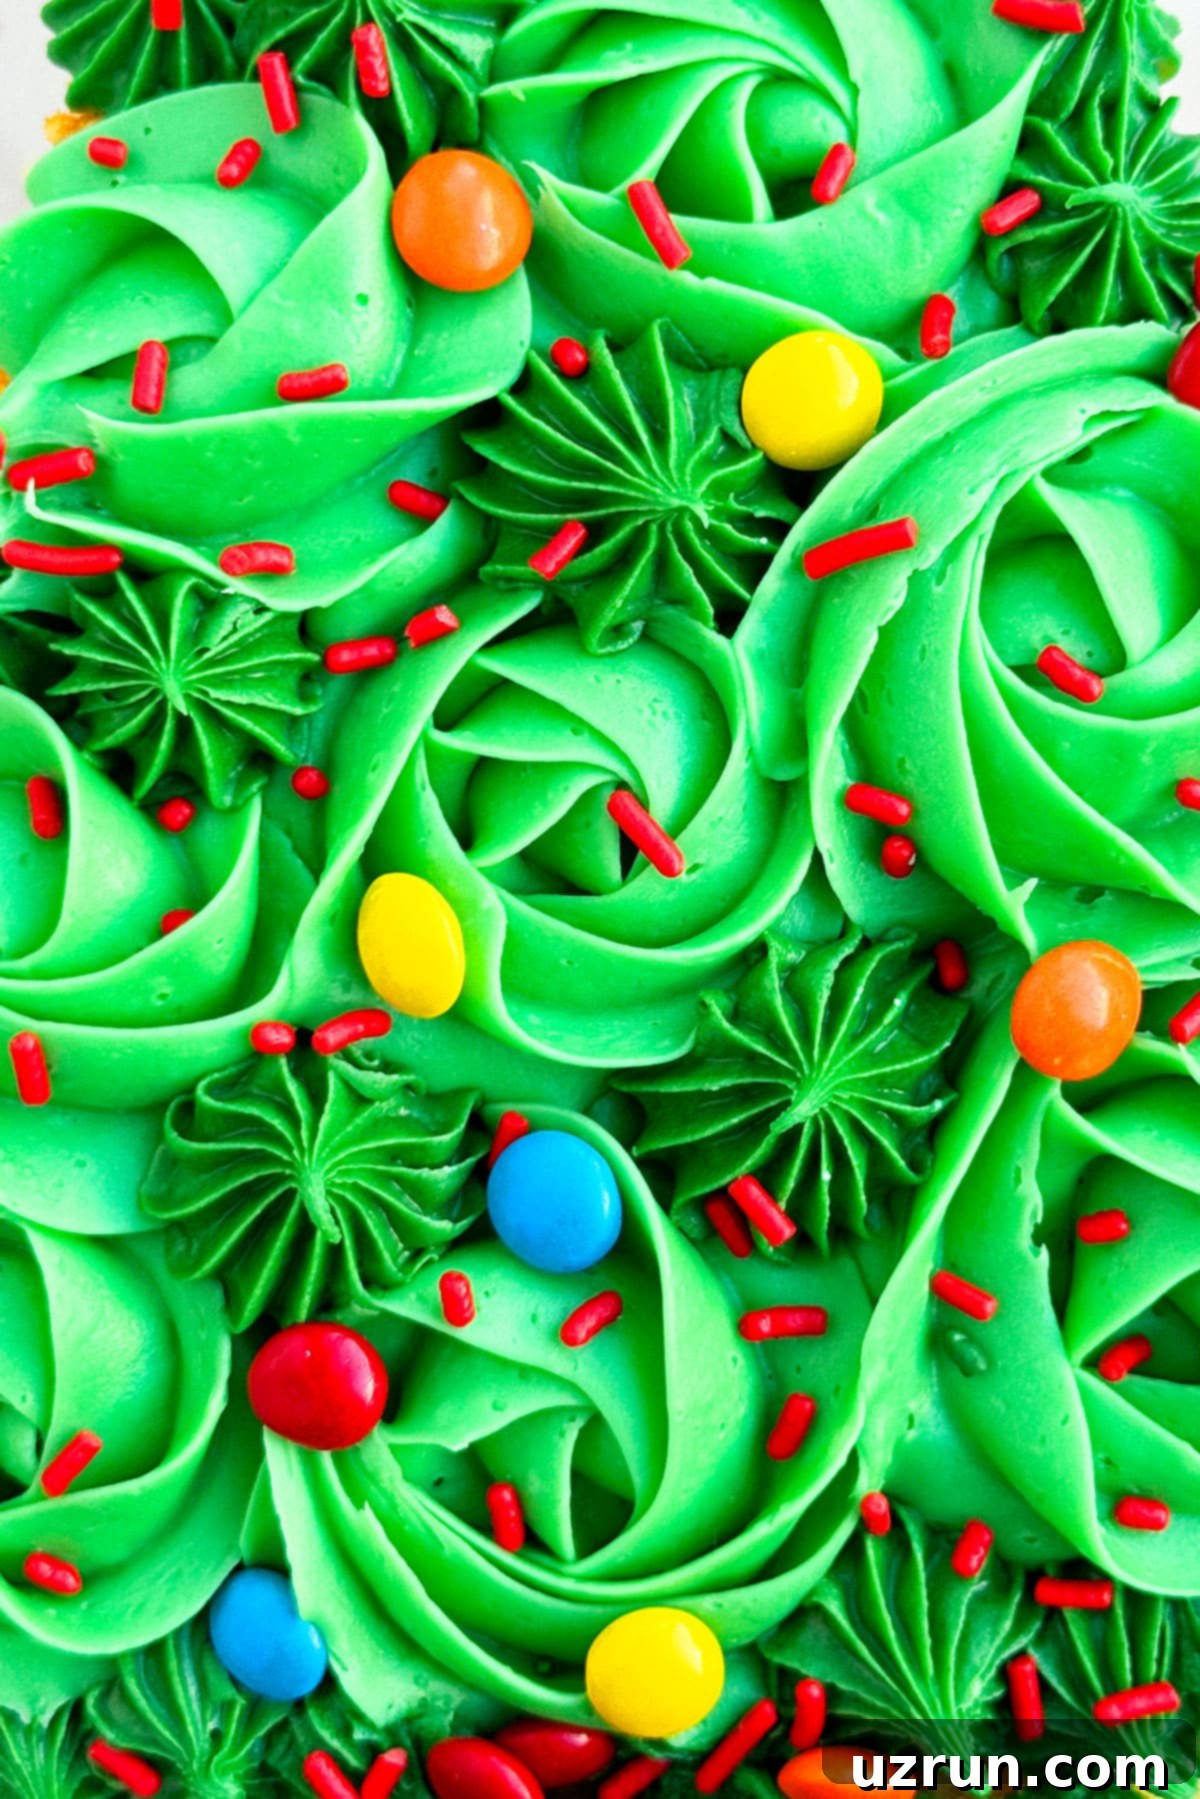
- Pipe Light Green Roses: Now, switch to your lighter green buttercream, using a piping bag fitted with a large star tip (such as Wilton Tip 1M). Pipe large, beautiful roses randomly across the top surface of the second triangle cake. Don’t worry about filling every tiny space just yet; leave small gaps between each rose (Image 5).
- Fill the Gaps: Go back to your darker green icing and French tip. Use it to pipe smaller stars into all the empty gaps between the light green roses. This technique adds depth, texture, and creates a fuller, more realistic tree appearance (Image 6).
Assembling the Bottom of the Cake (The Tree Trunk) and Decorating
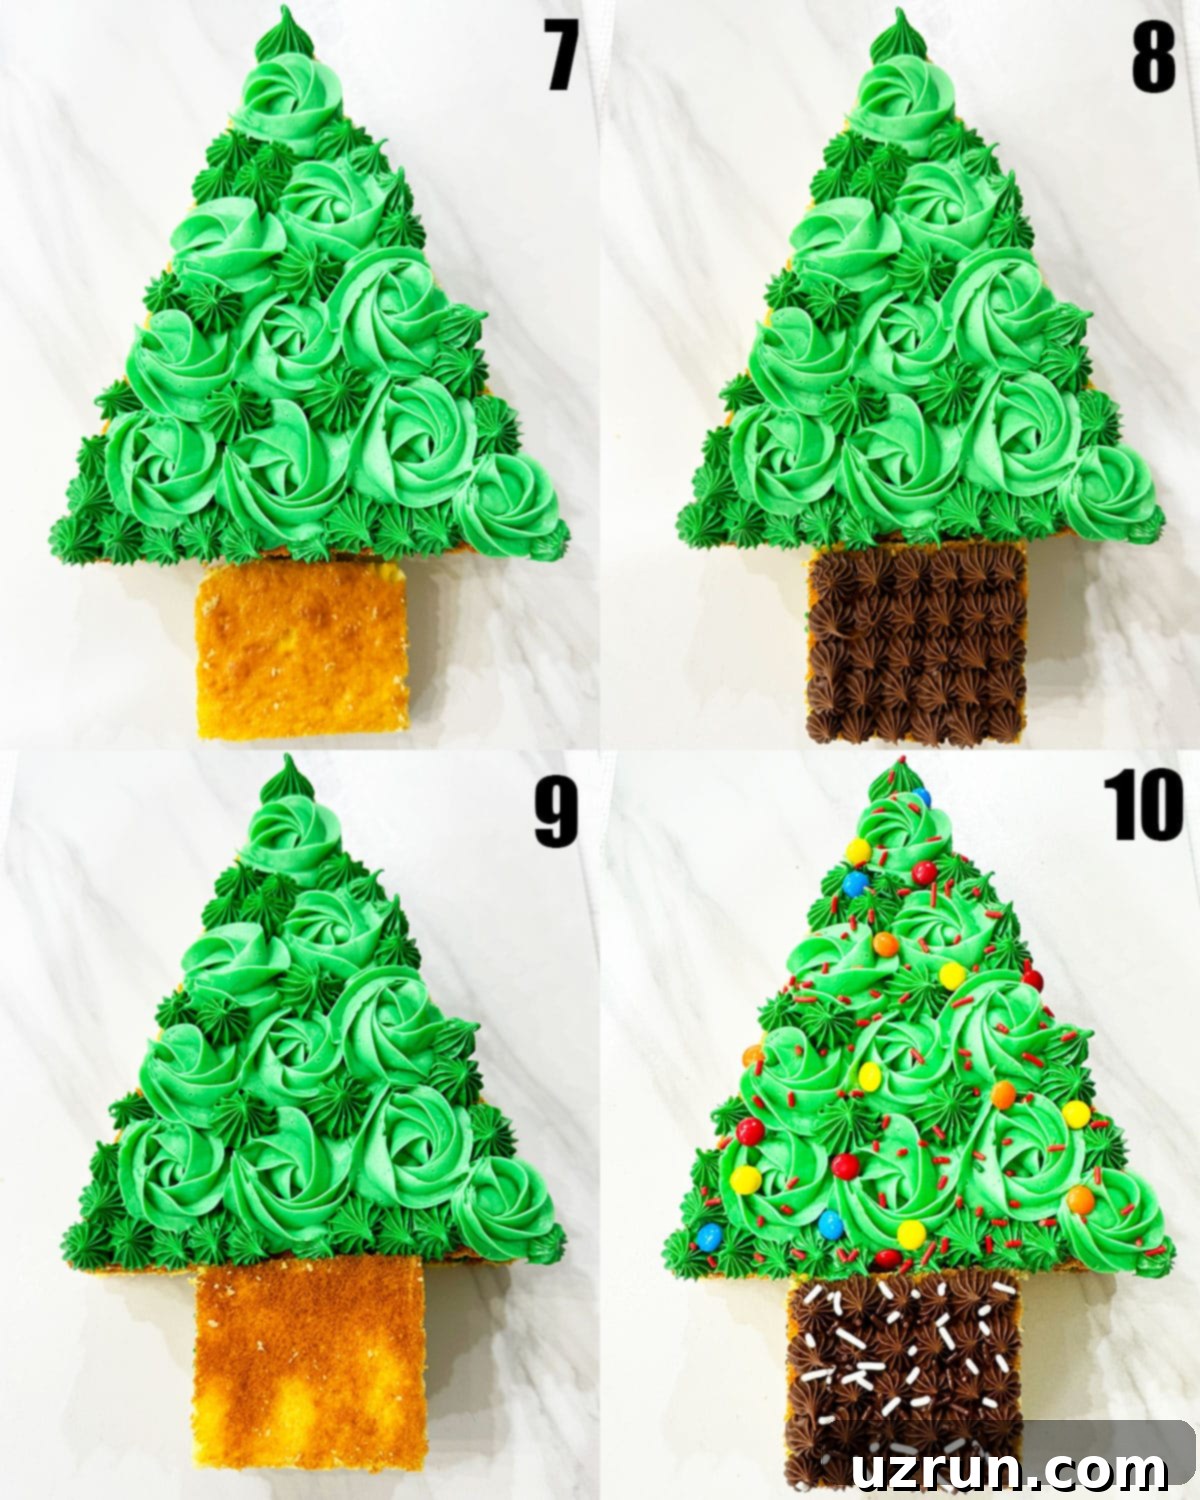
- Place First Rectangle: Beneath your now-completed tree foliage, position one of the small rectangle cake pieces. This will form the base of your tree’s trunk (Image 7).
- Pipe Chocolate Stars: Using a piping bag filled with chocolate frosting and a French tip (Wilton Tip 4B), pipe small stars over the entire surface of this first rectangle cake layer until it’s completely covered. This creates a rustic, bark-like texture (Image 8).
- Position Second Rectangle: Carefully place the remaining rectangle cake piece on top of the piped chocolate icing, pressing gently to secure it (Image 9).
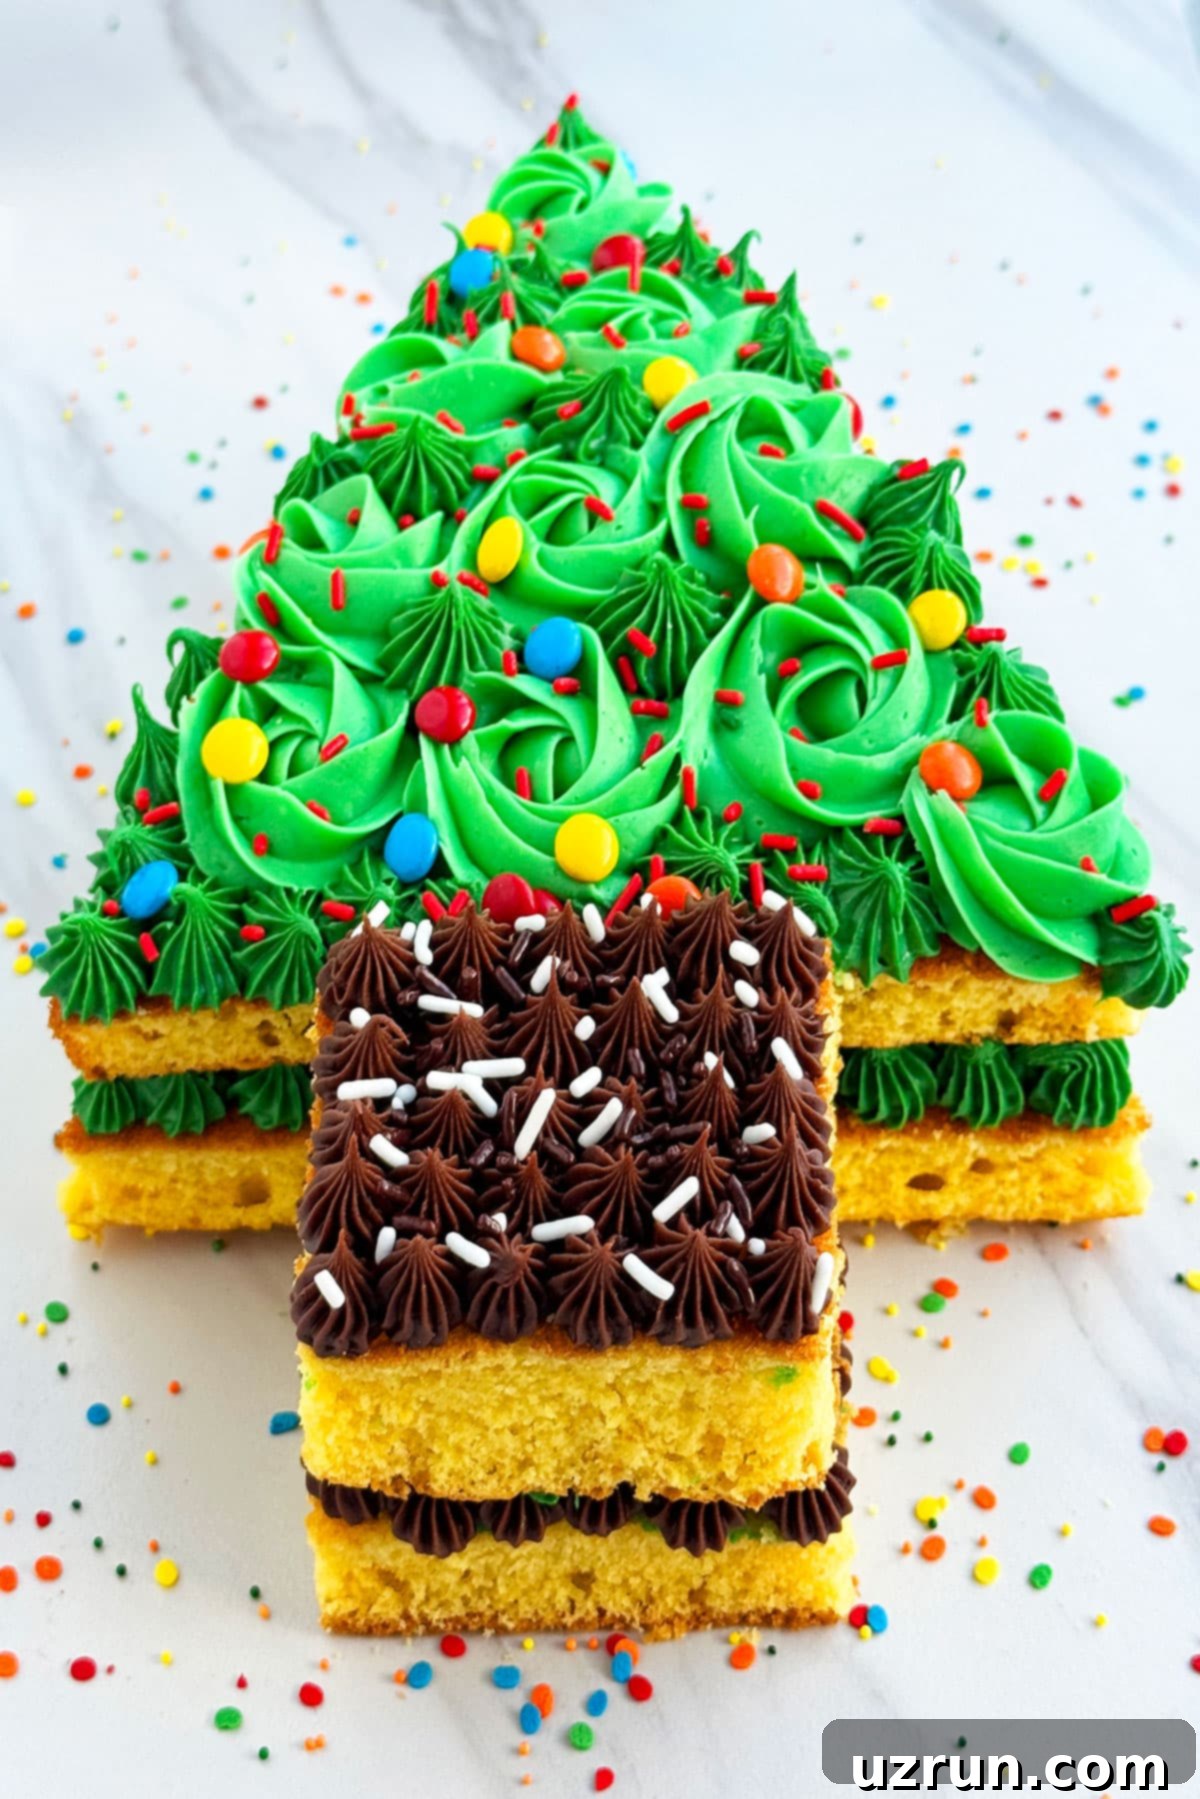
- Pipe and Decorate: Continue piping chocolate stars over the top of the second rectangle until the entire trunk is covered. Now for the fun part: decorating! Liberally toss red sprinkles and colorful candies (like mini M&Ms) over the green tree portion, making them look like festive ornaments. For the trunk, sprinkle white sprinkles to evoke a snowy ground effect or simply add a touch of contrast (Image 10). Your stunning Christmas Tree Cake is now complete!
Variations to Spark Your Creativity
While the classic green Christmas Tree Cake is a showstopper, don’t hesitate to experiment with these fun variations to customize your holiday treat:
Add a Delicious Filling: Instead of a simple buttercream layer in the middle, elevate your cake with a flavorful filling. Consider a creamy Vanilla Custard, rich Chocolate Ganache, tart Cherry Pie Filling, or even a light and airy homemade Whipped Cream for an extra layer of taste and texture.
Alternate Trunk Frosting: If chocolate isn’t your preference for the tree trunk, try Chocolate Whipped Cream for a lighter, airier alternative, or even a simple vanilla buttercream colored brown with food gel.
Design a White, Snow-Covered Tree: For a more elegant or wintry look, create a “flocked” or snow-covered tree. Use only white frosting (without any food coloring) and decorate with sparkling sugar, white edible pearls, or shredded coconut. You could also use alternative white frostings like fluffy Marshmallow Frosting or decadent White Chocolate Buttercream Frosting.
Make a Bigger Cake: Need to feed a larger crowd? I used a standard 9×13 sheet pan, but you can easily scale up the recipe by using a larger sheet pan (like a half-sheet pan) and adjusting ingredient quantities accordingly to create a bigger, more impressive centerpiece.
Rainbow Version: Unleash your inner artist by making a vibrant rainbow tree! Use red, orange, yellow, green, blue, and purple icing colors to pipe stripes or sections, creating a whimsical and unique holiday cake.
Add a Star Topper: No Christmas tree is complete without a star! You can easily add a yellow star to the very top of your cake. Cut out a star shape from a piece of yellow fondant using a cookie cutter. My Marshmallow Fondant recipe works wonderfully, or simply use store-bought fondant for convenience.
Experiment with Piping Tips: While the French tip and large star tip create beautiful results, don’t be limited! Consider using a small star tip for more delicate details, a grass tip for a fuzzy texture, a petal tip for a different floral look, or even a simple round tip for classic dots and swirls. Each tip offers a unique buttercream design.
Mini Cakes: Adapt the same concept to create individual-sized mini Christmas tree cakes. You can cut smaller triangles from your sheet cake or bake individual mini sheet cakes. These are perfect for party favors or personal servings.
Pull-Apart Cupcake Cake: For an even easier approach, arrange cupcakes in a triangle shape on a large platter. Then, frost and decorate them with green icing and candies to resemble a pull-apart Christmas tree cake. Try using delightful bases like my Red Velvet Cupcakes or fragrant Gingerbread Cupcakes.
Frost the Sides: For a more traditional, fully covered cake appearance, you can choose to frost the sides of both the tree and trunk layers. However, leaving the sides exposed can showcase the cake layers, adding a cool, modern, and rustic charm.
Expert Tips and Techniques for Success
Achieving a beautiful and delicious Christmas Tree Cake is easy with a few key tips and techniques:
Mastering Buttercream Roses and Rosettes: If you’re new to piping these classic designs, practice makes perfect! Check out my detailed tutorials on how to pipe them in these Red Rose Cupcakes and this elegant Rosette Cake. The techniques are quite similar and transfer beautifully to this tree design.
Icing Consistency is Key: For successful piping, your buttercream icing should have a medium-firm consistency. If your kitchen is warm or the heat from your hands is softening the icing too much, making it runny and difficult to pipe, simply pop your piping bag into the refrigerator for 10-15 minutes. This will help it stiffen up. If it’s still too soft, you may need to mix in a bit more powdered sugar to reach the ideal texture. Conversely, if it’s too stiff, add a tiny bit of milk or cream, a teaspoon at a time.
Precision with Tweezers: For perfectly placed sprinkles and candies, especially for smaller details or a neat pattern, I highly recommend using clean kitchen-only tweezers. This allows for precise placement, ensuring your “ornaments” are exactly where you want them.
Two Shades of Green Make a Difference: To avoid a flat, monotoned appearance, always use two distinct shades of green icing for the tree portion. The contrast between the light and dark green adds depth, dimension, and visual interest, making your Christmas tree look much more dynamic and lifelike.
Cool Cake Completely: This cannot be stressed enough! Always ensure your cake is fully cooled to room temperature before you begin any decorating. Attempting to frost a warm cake will cause the buttercream to melt and slide, resulting in a gooey, unmanageable mess and a ruined design.
Gentle Pressure for Assembly: When placing the top cake layers onto the piped frosting, press very gently. You want to secure the layers without squishing the buttercream in the middle or forcing it to squeeze out the sides. A light, even press is all that’s needed.
Evenly Distribute Decorations: For a beautifully balanced and festive appearance, distribute your candies and sprinkles evenly across the tree. Imagine hanging ornaments on a real tree – you want them spaced out for maximum visual impact, not clumped together.
Fill All Gaps (Mostly!): On the top surface of the tree, aim to fill all visible gaps with frosting and decorations so that no plain cake shows through. This creates a lush, full “foliage” effect. However, for a more modern and chic style, you can deliberately leave the sides of the cake unfrosted to showcase the lovely layers. This adds a unique touch!
Storage and Make-Ahead Options
Planning ahead for holiday baking is key, and this Christmas Tree Cake offers great flexibility:
- Make Ahead: Both the unfrosted cake and the buttercream frosting can be prepared in advance. Store the cooled cake, tightly wrapped, and the frosting in separate airtight containers in the refrigerator for 2-3 days. When you’re ready to decorate, bring the frosting to room temperature and whip it slightly if needed, then proceed with the assembly instructions.
- Room Temperature: Once decorated, the cake should not be left at room temperature for more than 2-3 hours, especially if your kitchen is warm, due to the buttercream.
- Refrigerate Leftovers: Any leftover slices or the entire decorated cake should be stored in a sealed, airtight container in the refrigerator. It will stay fresh and delicious for up to 3 days.
- Freeze: For longer storage, you can freeze the unfrosted cake layers and the buttercream separately in airtight containers for up to 1 month. Thaw both components in the refrigerator overnight before decorating according to the instructions. This is a fantastic option for preparing far in advance!
Recipe FAQs
Runny frosting is a common issue often caused by a kitchen that’s too warm, leading the butter in your buttercream to soften and melt. To remedy this, place your frosting (either in the bowl or piping bag) in the refrigerator for 10-15 minutes to help it firm up. Another reason could be an imbalance in your recipe – if there isn’t enough powdered sugar relative to the butter and liquid, the frosting will be too thin and won’t hold its shape. You might need to gradually add more powdered sugar until the desired medium-firm consistency is reached.
It’s simpler than you think! Start with a rectangular sheet cake (a 9×13 inch pan works perfectly). To create the tree, you’ll strategically cut the cake. First, mark the center point of one of the longer sides. From this point, make two diagonal cuts to the opposite corners of the cake, forming two large triangles. These will be the top layers of your tree. The remaining strip of cake in the middle can then be cut into two smaller rectangles to form the tree’s trunk. For best results, lightly score your cutting lines with a toothpick first before committing with a sharp knife, ensuring straight and even cuts.
Absolutely! While a yellow sheet cake provides a classic base, you can easily adapt this recipe with other flavors. Chocolate, vanilla, red velvet, or even a gingerbread cake would all work wonderfully and complement the festive theme. Just ensure your chosen cake bakes well in a sheet pan and cools completely before cutting and decorating.
Piping bags and tips (like a French tip and large star tip) are recommended for achieving the detailed rose and star designs shown. However, if you don’t have them, you can still create a beautiful cake! For the stars, you can snip a corner off a sturdy freezer bag to create a makeshift piping bag. For roses, you can simply spread the frosting evenly with an offset spatula, or use a butter knife to create textured swirls and peaks, giving your tree a charming, rustic look. The key is to have fun with it!
This easy Christmas Tree Cake is not just a dessert; it’s a centerpiece that embodies the festive spirit with minimal fuss. It’s designed for busy holiday hosts who want to create something truly special without feeling overwhelmed. Gather your ingredients, follow these simple steps, and prepare to bring a smile to everyone’s face with your edible holiday masterpiece. Happy baking!
More Christmas Desserts to Explore
- Easy Grinch Cake (With Buttercream Icing)
- Sugared Cranberries (Candied Cranberries)
- Easy Cake Mix Gingerbread Cookies
- Easy Poinsettia Cupcakes
- Easy Reindeer Cupcakes (Rudolph)
- Santa Hat Brownies
Recipe
Easy Christmas Cake (Tree)
Abeer Rizvi
Pin Recipe
Want to Save This Recipe?
Enter your email & I’ll send it to your inbox. Plus, get great new recipes from me every week!
By submitting this form, you consent to receive emails from CakeWhiz
Ingredients
- 1 Yellow sheet cake (9×13 inch)
- 3 cups Buttercream icing Colored half light green and half dark green
- 1 cup Chocolate frosting
- ½ cup Assorted Sprinkles and Candies Red & white sprinkles, mini M&M candies recommended
Instructions
-
Bake your yellow sheet cake in a 9×13 inch cake pan according to recipe/package directions and allow it to cool completely on a wire rack. This is crucial for clean cuts and frosting application.
-
While the cake is baking and cooling, prepare your buttercream frosting. Divide it into two portions and color one half a light green shade and the other a darker green shade using food gel. Ensure your chocolate frosting is also ready.
-
Carefully cut the cooled sheet cake to create the tree shape. You will cut it to yield two large triangles (for the tree top) and two small rectangles (for the tree trunk). For precision, it’s helpful to lightly mark your cutting lines with a toothpick before using a sharp knife for the final cuts.
-
Place one of the large triangle cake pieces onto your desired cake board or serving platter. This forms the base layer of your tree’s foliage.
-
Fill a piping bag with your dark green icing and attach a French tip (such as Wilton Tip 4B).
-
Pipe small stars over the entire top surface of the first triangle cake layer until it is fully covered with the dark green icing.
-
Carefully position the second triangle cake piece directly on top of the piped dark green icing layer. Press down gently to secure it without squishing the frosting.
-
Fill a clean piping bag with your light green icing and attach a large star tip (like Wilton Tip 1M). Pipe large buttercream roses randomly across the top of the cake, leaving small gaps between each flower.
-
Go back to your dark green icing and French tip. Fill in all the small gaps between the light green roses by piping little stars, creating a full and textured tree canopy.
-
Now, prepare the tree trunk. Place one of the small rectangle cake pieces directly below the assembled triangle tree layers.
-
Fill a piping bag with chocolate frosting and attach a French tip (Wilton Tip 4B).
-
Pipe small chocolate stars over the entire top surface of the first rectangle cake piece until it’s fully covered, creating a bark-like texture.
-
Carefully place the remaining rectangle cake piece on top of the chocolate icing layer, pressing gently to secure.
-
Pipe chocolate stars on top of this second rectangle layer again until it is fully covered.
-
Time to decorate! Generously toss red sprinkles and mini M&M candies onto the green, top portion of the tree cake, mimicking festive ornaments.
-
Finish by scattering some white sprinkles over the brown, bottom portion of the cake (the trunk), to suggest a snowy ground or simply add a delightful contrast. Your gorgeous Christmas Tree Cake is now ready to be admired and enjoyed!
Notes
- The cake must cool fully before you start decorating to prevent the frosting from melting.
- The consistency of your icing should be medium-firm for piping. If it’s too soft (due to kitchen heat or hand warmth), chill it in the refrigerator for 10-15 minutes to firm up. If it’s still too runny, gradually mix in more powdered sugar.
- For varied buttercream designs, consider using alternative piping tips such as a small star tip, a grass tip, a petal tip, or a simple round tip.
- Refer to the “Tips and Techniques” and “Variations” sections above for additional guidance and creative ideas.
- Leftovers can be stored in an airtight container in the fridge for up to 3 days.
Nutrition
An automated tool is used to calculate the nutritional information. As such, I cannot guarantee the accuracy of the nutritional information provided for any recipe on this site.
