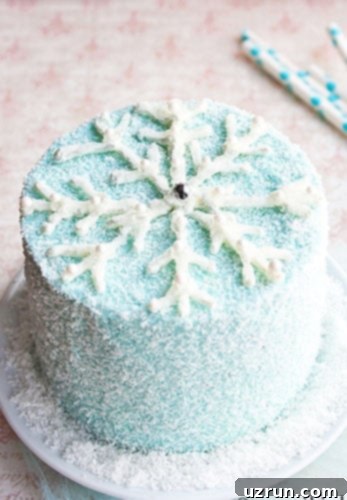
Easy Snowflake Cake: Your Guide to a Magical White Chocolate Winter Wonderland Dessert
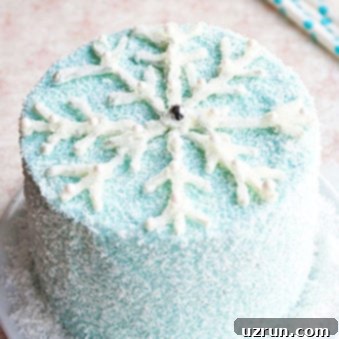
Embrace the enchanting spirit of winter with a homemade Easy Snowflake Cake! This stunning yet simple dessert, adorned with delicate white chocolate snowflakes, sparkling sugar, and a dreamy blue buttercream, is perfect for any festive gathering, from Christmas parties to New Year’s celebrations, or just a cozy winter evening. Forget expensive, specialized pans – this guide will show you how to create a show-stopping cake with minimal fuss, making it accessible even for beginner bakers.
As the weather turns chilly and the world outside transforms into a frosty wonderland, there’s nothing quite like the warmth and joy of baking. Inspired by the season’s magic, we’ve crafted this quick and easy cake recipe, designed to bring a touch of snowy elegance to your table without requiring hours in the kitchen. We’ve explored countless winter cake designs and ideas, and deliberately chosen a straightforward approach that yields impressive results. While snowflake-shaped pans are an option, they can be costly and aren’t always a practical investment for occasional use. Our method avoids this by focusing on simple techniques that deliver maximum visual impact. If you’re as smitten with the winter theme as we are and wish to expand your festive offerings, consider pairing this cake with our delightful Snowflake Cupcakes and charming Snowflake Cookies for a truly cohesive and memorable winter party menu.
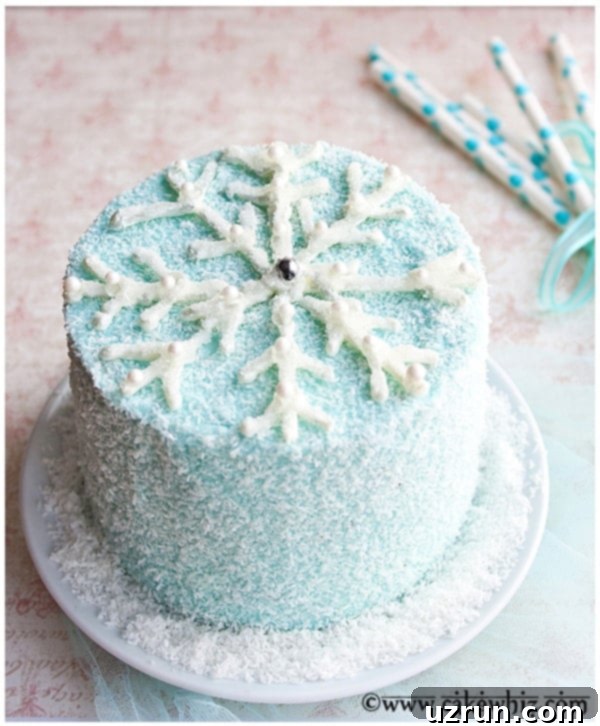
Table of contents
- How to Make an Easy White Chocolate Snowflake Cake
- Creative Variations for Your Winter Cake
- Expert Tips and Techniques for a Flawless Winter Wonderland Cake
- Storage Solutions for Your Homemade Decorated Cake
- More Enchanting Winter Desserts to Explore
How to Make an Easy White Chocolate Snowflake Cake
Creating this beautiful snowflake cake is a straightforward process that anyone can master. Follow these simple steps to bring your winter cake vision to life:
- Bake and Cool Your Cakes: Start with your favorite cake recipe or a good quality boxed mix. Ensure the cakes are completely cooled before attempting to frost them. This is a crucial step to prevent your buttercream from melting and sliding off, ensuring a smooth, stable base for your decoration.
- Assemble and Frost: Once cooled, stack your cake layers with a thin, even layer of your chosen buttercream icing in between. Then, cover the entire cake smoothly with the remaining buttercream. The light blue frosting provides that classic icy, winter sky effect.
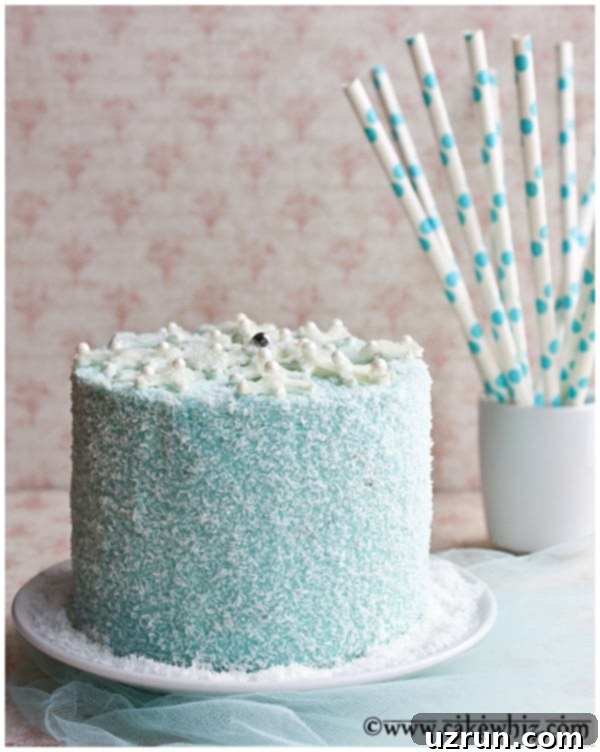
- Add a Snowy Texture: Gently press shredded or desiccated coconut over the entire frosted cake. This creates a wonderful texture reminiscent of freshly fallen snow, adding an extra layer of winter charm and visual interest.
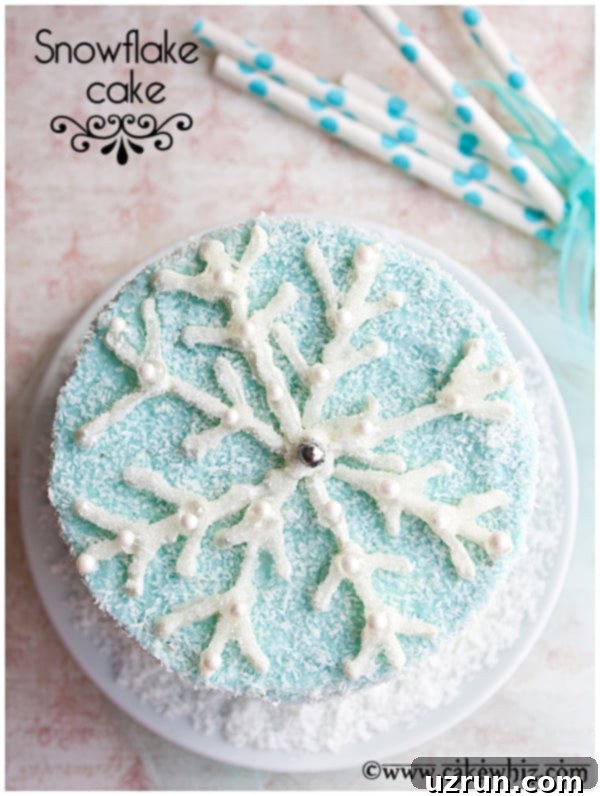
- Craft Your White Chocolate Snowflake: This is where the magic happens! Using a pre-made or hand-drawn snowflake pattern as a guide, pipe melted white chocolate onto wax paper. The key here is to make your lines thick enough to ensure the snowflake is sturdy and doesn’t break easily.
- Let the Chocolate Set: Allow the intricate white chocolate snowflake to cool and fully harden. For a quicker and more secure set, you can pop it into the freezer for a few minutes.
- Gently Apply to Cake: Once fully set, carefully peel the chocolate snowflake from the wax paper. This step requires a gentle touch! Position it delicately on top of your coconut-covered cake to complete your winter masterpiece.
Creative Variations for Your Winter Cake
While the classic blue and white snowflake cake is enchanting, feel free to customize your creation to match any occasion or preference. Here are some inspiring variations:
- Embrace Pink Elegance: For a soft, whimsical touch, perfect for girls’ birthday parties or a baby shower, try using pastel pink frosting and melted pink chocolate for your snowflake. This transforms the winter theme into something sweet and charming.
- Frozen Birthday Cake: Transform your snowflake cake into an enchanting Frozen-themed dessert! Use a vibrant blue frosting and add edible glitter for an extra icy sparkle. Incorporate popular Frozen characters as edible toppers or standees, and place a single white candle in the center to mimic Elsa’s magic.
- Serve a Crowd with a Sheet Cake: Planning a larger gathering? Opt for a rectangular sheet cake instead of a round one. You can create multiple chocolate snowflakes in various sizes and arrange them artfully across the iced surface. This method makes serving a crowd at parties incredibly easy and efficient.
- Mini Chocolate Snowflakes for Delights: Don’t limit your beautiful chocolate snowflakes to just cakes! Make smaller versions to decorate individual treats like Cake Pops and Cake Balls, cupcakes, or even hot cocoa mugs for an extra festive touch.
- Alternative Snowy Coatings: Beyond desiccated coconut, explore other delightful options for covering your cake to achieve different snowy effects. Consider fine sanding sugar for a glistening sparkle, elegant white sprinkles, pristine white edible pearls, or even delicate shredded white chocolate curls for a rich, textured finish. Each option offers a unique visual and textural experience.
- Pure White Winter Wonderland: For a truly elegant and sophisticated look, swap the light blue buttercream for a pure white frosting. This creates a classic, pristine winter wonderland effect that is both striking and timeless.
- Royal Icing Snowflakes: Instead of melted white chocolate, try crafting your snowflake design with thick Royal Icing. Royal icing offers a crisp, intricate finish and dries to a hard, matte texture that contrasts beautifully with a smooth buttercream.
- Explore Different Cake Flavors: The beauty of this design is its versatility. Feel free to use any cake base you desire. Popular choices include a rich Moist Triple Chocolate Cake for a decadent treat, a classic Best Vanilla Cake for universal appeal, or a festive Best Red Velvet Cake for a touch of vibrant color beneath the winter facade.
- Vary Your Frosting Flavors: The frosting provides both flavor and a canvas for your design. Experiment with White Chocolate Buttercream Frosting for added richness, Best Cream Cheese Frosting for a tangy counterpoint, or even a bright Lemon Buttercream for a refreshing twist.
- Introduce Delightful Fillings: Elevate your cake’s flavor profile by adding a delicious filling between the layers. Consider a sweet and tart Cherry Pie Filling, a classic Homemade Strawberry Jam, or a vibrant Raspberry Pie Filling. You can also get creative with luscious nut butters, various fruit preserves, or layers of fresh, seasonal fruits for a lighter touch.
Expert Tips and Techniques for a Flawless Winter Wonderland Cake
Achieving a professional-looking snowflake cake is all about attention to detail. Here are some essential tips and techniques to ensure your winter wonderland cake turns out perfectly:
- Cool Cakes Completely Before Icing: This cannot be stressed enough! Warm cakes will melt your frosting, leading to a runny mess and an unstable cake structure. Always allow your cake layers to cool fully, ideally in the refrigerator for 15-30 minutes after reaching room temperature, before applying any frosting.
- Freeze the Snowflake for 5 Minutes: For the easiest removal of your delicate chocolate snowflake from the wax paper, place it in the freezer for about 5 minutes after it has initially set. The quick chill makes the chocolate firm and less likely to break when handled.
- Draw an Outline of Your Round Cake Pan: Before piping your chocolate snowflake, place your round cake pan on a piece of parchment paper and trace its outline with a pencil. This simple trick ensures that your chocolate decoration will be perfectly sized for the top of your cake when you go to assemble it, preventing any awkward overhangs or undersized designs.
- How to Make a Snowflake Template: You have a couple of options here. After drawing your cake’s outline, use a pencil to sketch a snowflake design directly inside that circle. This will serve as your personal snowflake template. Alternatively, you can easily find and print various snowflake pictures online to use as a template. Just ensure it’s roughly the same size as your cake top.
- How to Make the Snowflake Design with Chocolate: Place a sheet of wax paper directly over your chosen snowflake template. Secure the wax paper in place with a few pieces of tape so it doesn’t shift. Fill a piping bag (or a ziploc bag with a corner snipped off) with your melted white chocolate. Carefully trace the snowflake design, ensuring your piped lines are thick and continuous. Thicker lines are crucial for making the chocolate snowflake strong and firm, significantly reducing the likelihood of it breaking as you gently remove it from the wax paper.
- Decorate the Snowflake Quickly: Once you’ve piped your chocolate snowflake, sprinkle any desired decorations, such as sparkling sugar or edible pearls, immediately while the chocolate is still wet. This ensures the decorations adhere properly before the chocolate has a chance to set and harden.
- Make Extra Chocolate Decorations: Chocolate snowflakes can be quite fragile, especially during the removal process from wax paper. It’s always a good idea to pipe a couple of extra snowflakes or smaller decorative elements than you think you’ll need. This provides a safety net in case one breaks, saving you time and stress.
- Achieve a Smooth Crumb Coat: Before your final layer of blue buttercream, apply a thin “crumb coat” of frosting to your cake. This seals in any loose crumbs, ensuring your final layer of frosting is smooth and free of imperfections, contributing to that pristine winter look.
- Use High-Quality Ingredients: The flavor of your cake will only be as good as its ingredients. Opt for good quality butter, chocolate, and extracts for the best taste. Fresh ingredients always make a difference.
- Level Your Cake Layers: For a perfectly even and professional-looking cake, make sure your cake layers are level before stacking. A serrated knife or a cake leveler can help achieve this, ensuring your cake stands tall and straight.
Storage Solutions for Your Homemade Decorated Cake
Proper storage is essential to keep your beautiful snowflake cake fresh and delicious for as long as possible:
- Refrigerate Leftovers: Any leftover cake should be stored in an airtight container to prevent it from drying out or absorbing refrigerator odors. It will remain fresh and enjoyable for up to 3 days in the refrigerator.
- Freezing for Longer Freshness: For longer storage, you can freeze both unfrosted cake layers and buttercream separately. Wrap unfrosted cake layers tightly in plastic wrap, then aluminum foil, and store in an airtight container for up to 1 month. Buttercream can be stored in an airtight container in the freezer for a similar duration. When you’re ready to enjoy this delightful dessert, thaw the components to room temperature before assembling and decorating according to the instructions. This method allows you to prepare ahead for future events!
More Enchanting Winter Desserts to Explore
If you’re looking to further expand your repertoire of delightful winter treats, consider these other festive and fun recipes:
- Snowman Cupcakes (With Donut Toppers)
- Easy Snowman Cake (Frosting and Fondant)
- Poinsettia Cupcakes (With Buttercream)
- Snowman Cookies (Snowman Oreos)
- Snow Ice Cream
- Penguin Cookies (With Nutter Butter)
- Penguin Cake
Recipe
White Snowflake Cake (Winter Cake)
Abeer Rizvi
Pin Recipe
Want to Save This Recipe?
Enter your email & I’ll send it to your inbox. Plus, get great new recipes from me every week!
By submitting this form, you consent to receive emails from CakeWhiz
Ingredients
- 2 Funfetti cake Dimensions: 6×2 each
- 4 cups Buttercream icing Colored light blue
- 2 cups Desiccated coconut
- 1 cup Melted white chocolate
- ¼ cup Sparkling sugar
Instructions
-
Bake cakes and allow them to cool completely.
-
While cakes are baking and cooling, prepare the frosting.
-
Place one cake on a serving dish.
-
Spread a thin layer of frosting on top.
-
Place the second cake on top of the frosting and press gently to secure into place.
-
Ice the entire cake smoothly in buttercream.
-
Cover the entire cake in desiccated coconut. Keep aside.
-
Make the chocolate snowflake now. Draw an outline of your round cake pan on a sheet of paper. This will ensure that your chocolate snowflake is the same size as your cake.
-
Use a pencil to draw a snowflake design inside the circle. This will be your snowflake template.
-
Place a sheet of wax paper on top of this paper template. Secure it in place with tape.
-
Fill a piping bag with melted white chocolate and outline this snowflake design. Make sure your piping is thick, which makes the chocolate snowflake strong and firm. This reduces the likelihood of it breaking when you remove it from the wax paper.
-
Sprinkle white sparkling sugar all over the snowflake before the chocolate hardens.
-
Place an edible silver pearl in the center.
-
Stick some white pearls randomly all over the snowflake.
-
Allow the chocolate to completely set. Then, remove the tapes and gently peel the snowflake away from the wax paper.
Tip: If you place this snowflake in the freezer for 5 minutes, removing it from the wax paper becomes even easier.
-
Gently, place this chocolate snowflake topper on top of your frosted cake. Enjoy!
Notes
- Read all my tips above.
- Leftovers can be stored in a sealed container in the fridge for up to 3 days.
Nutrition
An automated tool is used to calculate the nutritional information. As such, I cannot guarantee the accuracy of the nutritional information provided for any recipe on this site.
