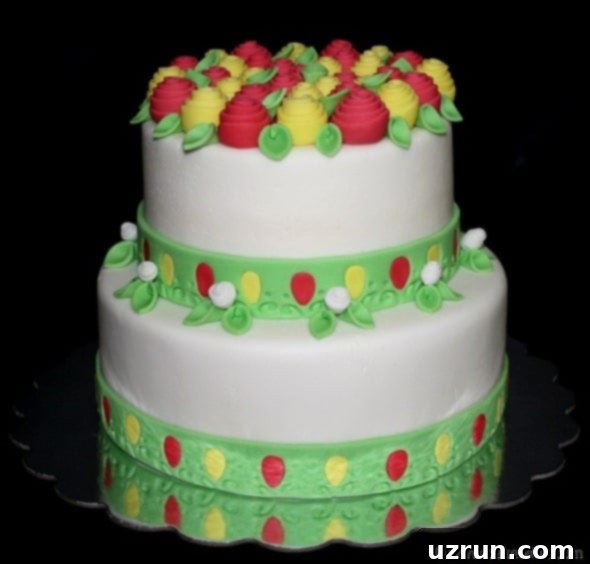
Master Easy Fondant Roses (Ribbon Roses) for Stunning Cakes & Cupcakes – No Special Tools Needed!
Transform your homemade cakes and cupcakes into works of art with these incredibly easy-to-make fondant roses! Often called “ribbon roses” due to their simple construction from rolled strips of fondant, these edible decorations require absolutely no specialized cutters or fancy tools. This step-by-step tutorial will guide you through creating beautiful, lifelike roses that are perfect for any occasion, from birthday parties to elegant gatherings. Whether you’re a beginner baker or an experienced decorator looking for a simplified method, you’ll love how quickly and effortlessly these stunning fondant flowers come together using just a few basic kitchen items and simple ingredients.
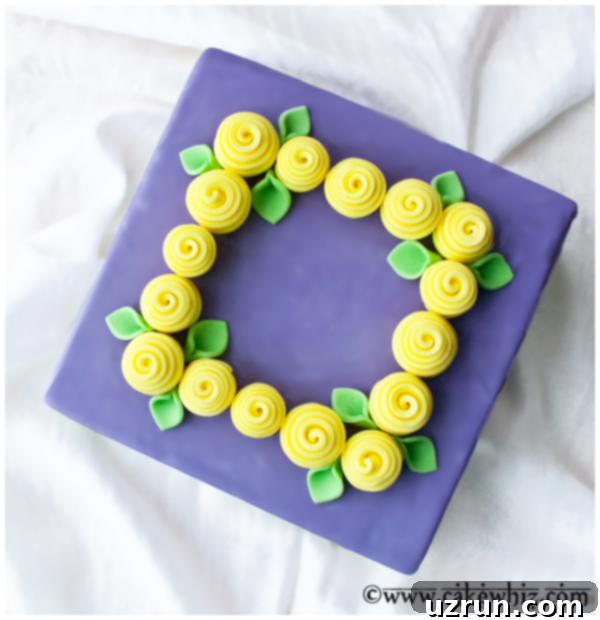
One of my favorite aspects of cake decorating is finding creative ways to use what I already have on hand, embracing simplicity over complexity. I’m not a fan of accumulating countless fancy cutters or specialized tools, preferring straightforward techniques that yield beautiful results. This philosophy is exactly how I approached crafting this gorgeous Fondant Flower Cake and these charming Fondant Daisies. If you enjoyed those simple and effective methods, then you are absolutely going to adore today’s tutorial for mastering elegant fondant roses without any fuss.
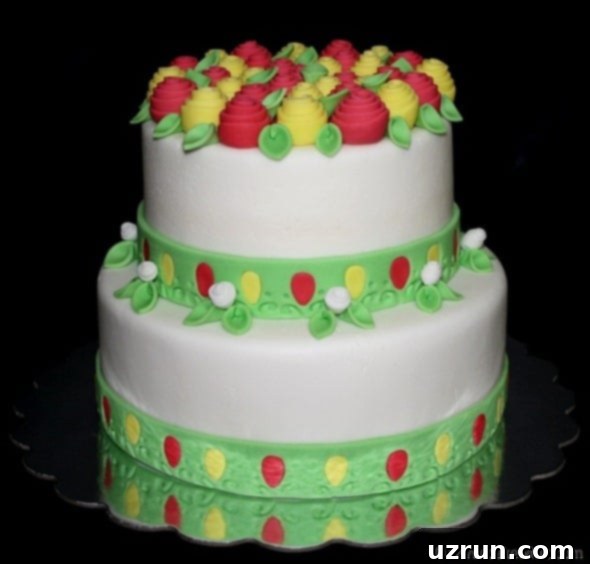
Table of contents
- How to Make Easy Fondant Roses? (Ribbon Roses)
- Materials You’ll Need
- Variations
- Pro Tips and Techniques for Flawless Fondant Roses
- Storage
- More Cake Decorating Tutorials
How to Make Easy Fondant Roses? (Ribbon Roses)
Creating these beautiful fondant roses is incredibly straightforward. With just a few simple steps, you’ll be able to make impressive edible flowers to adorn your desserts. The key is to work with your fondant efficiently and confidently.
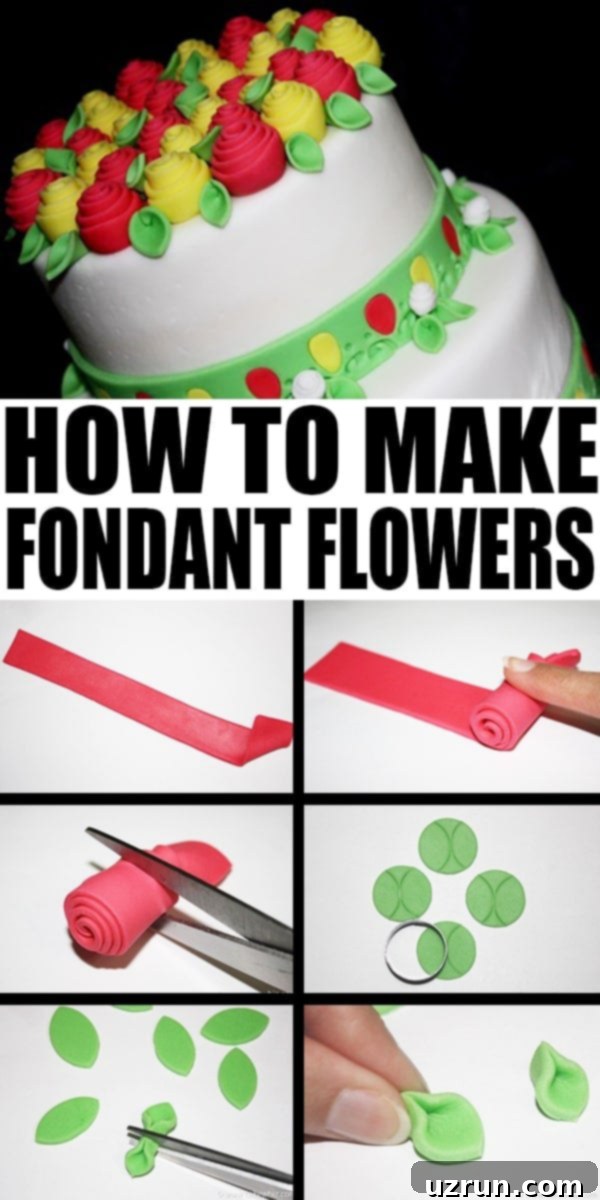
- Prepare your workspace and fondant: Start by lightly dusting your clean work surface with a small amount of powdered sugar or cornstarch to prevent sticking. Take a piece of your desired colored fondant and knead it until it’s pliable and smooth. This ensures it’s easy to roll and won’t crack.
- Roll fondant thin: Using a rolling pin, roll out the fondant evenly. The thickness of your fondant will impact how delicate or robust your rose petals look. Aim for about 1/16 to 1/8 inch thickness for a good balance. Ensure it’s rolled into a relatively long and wide shape to allow for cutting strips.
- Cut thin strips: With a pizza cutter, a sharp knife, or a specialized fondant cutter (if you have one, though not necessary), cut thin strips of fondant. For a standard rose, aim for strips about 1 inch wide and 8-10 inches long. For smaller roses, like cupcake toppers, you’ll want thinner and shorter strips (e.g., ½ inch wide and 4-6 inches long). Consistency in strip width will help create uniform petals.
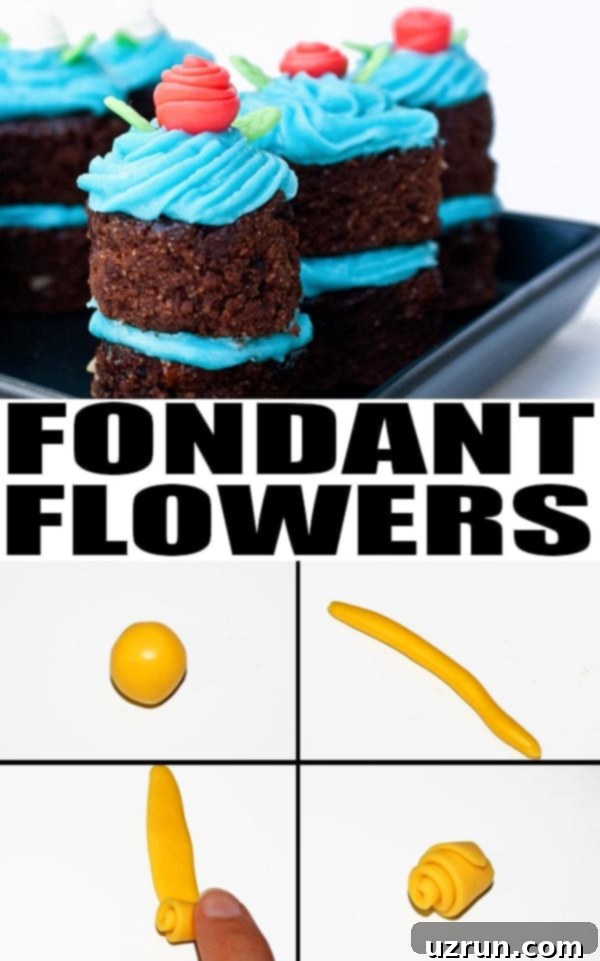
- Begin rolling the rose: Take one end of a strip and fold a small corner diagonally, creating a slight angle. This will form the tight center bud of your rose. Begin to tightly roll this folded corner, keeping the bottom edge straight. As you roll, gently angle the strip slightly outwards with your thumb and forefinger, creating the natural curve of petals. Don’t roll too tightly, or your rose will look too stiff.
- Continue shaping: Keep rolling the strip, progressively loosening your grip slightly to allow the ‘petals’ to open up and overlap naturally. You can gently stretch the top edge of the fondant strip outwards as you roll to give the petals a more delicate and realistic ruffled appearance. Work your way to the end of the strip, ensuring the base remains flat.
- Final touches: Once you’ve rolled the entire strip, use sharp scissors to trim the excess fondant from the base of the rose, creating a flat bottom that will sit flush on your cake. Gently smooth out the cut bottom with your fingers to neaten it up and ensure stability. You can also carefully pull back or adjust individual petals to achieve your desired open or closed rose effect.
- Dry overnight: Place your finished fondant roses on a piece of parchment paper or a drying rack. Allow them to dry overnight or for at least 24 hours, or until they harden completely. This process is essential for them to hold their shape and remain stable when placed on your desserts.
Materials You’ll Need
The beauty of these easy fondant roses is that they require minimal equipment. Here’s what you’ll need to get started:
- Fondant: The star of the show! Whether you choose homemade marshmallow fondant (which tastes amazing!) or good quality store-bought fondant, make sure it’s fresh and pliable.
- Rolling Pin: For rolling out your fondant to an even thickness.
- Pizza Cutter or Sharp Knife: Essential for cutting straight, uniform strips of fondant. A ruler can help ensure precision.
- Scissors: For neatly trimming the base of your roses.
- Powdered Sugar or Cornstarch: For dusting your work surface and rolling pin to prevent sticking.
- Parchment Paper or Drying Rack: To allow your finished roses to dry without sticking.
- Small Paintbrush (optional): For applying edible glue or water if you need to secure any petals.
- Gel Food Coloring (optional): If you plan to color plain white fondant.
Variations
The versatility of these ribbon roses means you can adapt them for almost any dessert and theme. Don’t be afraid to experiment with these ideas:
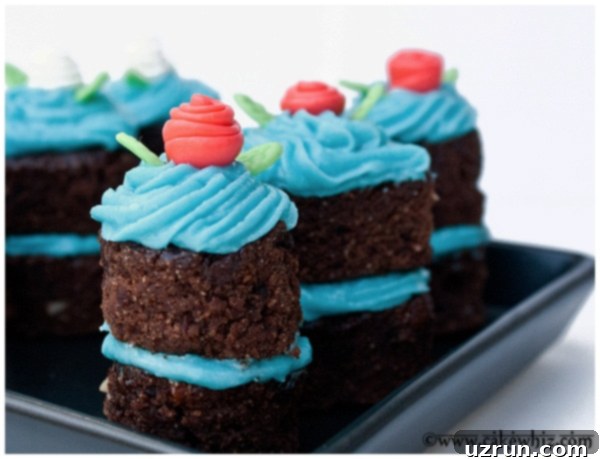
Decorate cupcakes: While a full-sized cake adorned with these roses is stunning, they also make exquisite cupcake toppers. Simply create smaller flowers by cutting thinner and shorter strips of fondant. These miniature roses add an elegant touch to individual cupcakes, perfect for parties or gifts. They can also be used on individual-sized mini cakes, petit fours, or even at the corner of decorated cookies for an extra flourish.
Make different sizes of flowers: The technique remains the same, but by adjusting the width and length of your fondant strips, you can create a diverse range of rose sizes. Wider and longer strips will yield larger, more dramatic roses, while narrower and shorter strips will result in delicate, tiny blossoms. Play around to find the perfect size for your project.
Try other colors: I’ve showcased charming pink, yellow, and green combinations, but the color palette is entirely up to your imagination! Choose colors that match your party theme, seasonal celebrations, or personal preference. Vibrant reds for Valentine’s Day, pastel shades for a baby shower, or deep jewel tones for a sophisticated event – the possibilities are endless. Remember to use gel colors for the best results when coloring fondant.
Try other cake flavors: These beautiful fondant roses are a universal decoration that complements virtually any cake flavor. Imagine them atop a refreshing Easy Key Lime Cake for a zesty contrast, or gracing a tropical Pineapple Cake (With Cake Mix). They pair wonderfully with classic vanilla, rich chocolate, or even spiced cakes. The visual appeal of the roses enhances the deliciousness of the cake below.
Try other frosting flavors: The fondant roses sit beautifully on a variety of frostings. A fluffy Marshmallow Frosting provides a soft, sweet base, while a refreshing Mint Frosting could offer an unexpected but delightful flavor pairing. Traditional American buttercream, cream cheese frosting, or even a smooth ganache can all serve as a perfect canvas for your edible floral creations.
Pro Tips and Techniques for Flawless Fondant Roses
Achieving perfectly beautiful fondant roses is easier with a few insider tricks. These tips will help you navigate common challenges and ensure your edible flowers are nothing short of stunning.
For faster drying: Use a 50/50 mixture. If you’re short on time or working in a humid environment, a quick solution is to knead together equal parts fondant and gum paste. This 50/50 mixture provides the pliability of fondant with the superior drying properties of gum paste, allowing your roses to harden significantly faster and hold their shape more firmly. It’s especially useful for delicate designs or if you plan to stack your roses.
Homemade fondant vs. Store-bought fondant: Both types of fondant can be used successfully for these roses. My homemade marshmallow fondant is incredibly pliable, delicious, and often more cost-effective. However, high-quality store-bought fondant offers convenience and consistent texture. Choose the option that best suits your time, budget, and taste preferences.
Can you use marzipan instead of fondant? Absolutely, you can! Marzipan is another excellent medium for edible decorations, offering a unique almond flavor and a slightly different texture than fondant. While it can be molded similarly, be aware that its distinct taste might influence the overall flavor profile of your dessert. Marzipan can also be a bit softer to work with, so allow for adequate drying time.
Use pre-colored fondant: To save precious time, especially if you need many roses or specific color matches, opt for pre-colored fondant. This eliminates the need for kneading in gel colors, which can sometimes be messy and time-consuming. It’s a fantastic shortcut for busy bakers.
Use gel colors for vibrant results: If you are coloring plain white fondant, always choose gel food colors over liquid food coloring. Gel colors are highly concentrated, delivering much more vibrant and intense hues without significantly altering the fondant’s consistency. Liquid colors, on the other hand, can make your fondant sticky and difficult to work with due to the added moisture.
How long does it take for fondant flowers to dry? Typically, fondant roses take approximately 24 hours to dry completely and harden, but this can vary significantly. Several factors influence drying time: the thickness of your rolled fondant (thinner layers dry faster, thicker layers take longer), the ambient humidity (dry climates speed up drying, while high humidity slows it down), and whether you’re using pure fondant or a 50/50 gum paste mixture (the latter dries faster). Always allow ample time for drying to ensure your decorations are firm and stable.
Don’t decorate a warm cake: This is a crucial rule for all cake decorating. Always ensure your cake is completely cooled before applying any fondant decorations. If the cake is warm, the heat can cause your fondant roses to soften, become sticky, or even melt, leading to a messy and disappointing result. Patience is key here!
Creating Fondant Leaves: To complement your beautiful roses, fondant leaves add a touch of realism. Roll out green fondant thinly. Use a small round cutter to cut out circles. Then, using the same cutter, cut off two halves of each circle, creating a leaf shape. For more realistic leaves, pinch the center of each leaf and use a knife or tool to create a central vein. Allow these to dry completely alongside your roses.
Attaching Fondant Roses: Once your roses are dry and firm, you can attach them to your cake or cupcakes. For cakes covered in buttercream, you can usually gently press the dry roses directly onto the frosting. For fondant-covered cakes, use a tiny dab of edible glue or a bit of royal icing to secure the roses in place. A small amount goes a long way!
Storage
Proper storage is essential to keep your delicate fondant roses beautiful and ready for decoration. Knowing how to store them correctly ensures they maintain their shape, color, and texture until you’re ready to use them.
Room temperature: Once your fondant roses are completely dry and hard, store them in a cardboard box or an airtight container at room temperature. It’s crucial to keep them away from direct sunlight, which can fade their colors, and moisture, which can make them sticky. Stored correctly in a cool, dry place, these decorations can last for up to 1 month, and often even longer. I’ve personally had some last for 3 months and still be perfectly fine to use!
Do not freeze: Fondant decorations, including these roses, cannot be frozen. The main reason is that when they thaw, the rapid temperature change and the resulting condensation will cause the flowers to become sticky, soft, and potentially lose their shape. This will ruin their appearance and texture.
Do not refrigerate: Similarly, fondant roses should not be refrigerated. The moisture and humidity present in a refrigerator can cause the fondant to absorb water, leading to stickiness, softening, and a loss of structural integrity. It’s best to keep them dry and at a consistent room temperature.
More Cake Decorating Tutorials
If you’ve enjoyed making these beautiful fondant roses and are looking to expand your cake decorating skills, explore these other fantastic tutorials for creating impressive edible accents:
- How to Make Easy Fondant Bows
- How to Make Easy Fondant Buttons
- How to Make Fondant Baby Shoes
- How to Make Fondant Basket
- How to Make Fondant Pansies
- How to Make Fondant Flowers
Recipe
Easy Fondant Roses (Ribbon Roses)
Abeer Rizvi
Pin Recipe
1 hour
1 day
1 day 1 hour
Dessert
American
15 Flowers
16 kcal
Want to Save This Recipe?
Enter your email & I’ll send it to your inbox. Plus, get great new recipes from me every week!
By submitting this form, you consent to receive emails from CakeWhiz
Ingredients
- 1 cup Marshmallow fondant Pink, Yellow, and Green (or colors of your choice)
- Vanilla cake Two 6-inch round cakes, Two 8-inch round cakes (for a tiered cake)
- 4-6 cups American buttercream icing
- 4 cups White fondant
Instructions
-
Lightly dust your work surface with powdered sugar or cornstarch. Use a rolling pin to roll out a ball of desired colored fondant (e.g., pink) to an even thickness of about 1/16 to 1/8 inch.
-
Using a pizza cutter or a sharp knife, cut ribbons approximately 1 inch wide and 8-10 inches long. For smaller roses, cut strips that are thinner and shorter (e.g., ½ inch wide and 4-6 inches long).
-
Take one end of a fondant strip and fold over one corner diagonally to create the center bud.
-
Start rolling the folded corner tightly, keeping the bottom edge straight. As you roll, gradually loosen your grip and gently angle the strip outwards to form natural-looking petals. Continue rolling all the way to the end of the strip.
-
Once the entire strip is rolled, use scissors to cut off the excess fondant from the base of your rose, creating a flat bottom. Discard the trimmed end.
-
Smooth out the bottom of your rose using your fingers to neaten it and ensure stability. Gently adjust any petals if needed for a more open or closed look.
-
Place the finished roses on parchment paper or a drying rack and let them dry overnight, or until they are completely hardened.
-
To make leaves, roll out green fondant thinly on a lightly dusted surface.
-
Use a small circular cutter to cut out fondant circles.
-
Using the same cutter, cut out two halves from each circle. This will give you two leaf shapes per circle. Let them dry overnight or until they harden.
-
For more realistic leaves: Pinch the center of each leaf until the ends stick together. Cut the pinched center with scissors to create two distinct leaf halves. Smooth out the ends with your fingers.
-
While the fondant decorations are drying, bake your cakes (two 8-inch and two 6-inch rounds) and allow them to cool completely on wire racks.
-
Prepare your American buttercream icing according to your recipe.
-
Assemble the first tier: Place one 8-inch cake on a cake board. Spread a layer of buttercream on top. Place the second 8-inch cake on top and press gently to secure.
-
Ice the entire 8-inch cake tier smoothly with buttercream.
-
Cover the 8-inch iced cake smoothly with white fondant and set it aside.
-
Assemble the second tier: Place one 6-inch cake on another cake board. Spread buttercream on top. Place the second 6-inch cake on top and press gently to secure.
-
Ice the entire 6-inch cake tier smoothly with buttercream.
-
Cover the 6-inch iced cake smoothly with white fondant and set it aside.
-
To assemble the tiered cake: Place the covered 8-inch cake tier on a cake stand. Insert dowels for support into the 8-inch tier. Carefully place the covered 6-inch cake tier on top of the dowels.
-
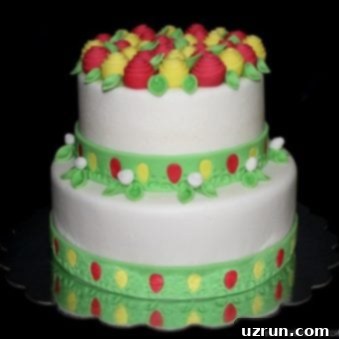
Decorate the cake with your dried fondant roses and leaves, arranging them as desired. You can also add a simple fondant ribbon around the base of each tier for a clean finish. Enjoy your beautifully decorated cake!
Notes
- For best results, read all the detailed tips and techniques provided above in the article to ensure flawless fondant roses.
- These beautiful roses can also be made using gum paste alone, or a 50/50 mixture of half fondant and half gum paste. Using gum paste or the 50/50 mixture will significantly reduce the drying time, allowing your decorations to harden much faster than pure fondant.
- Ensure your fondant is kneaded until smooth and pliable before rolling to prevent cracks and tears.
- Working in a cool, dry environment is ideal for preventing stickiness and aiding in faster drying.
Nutrition
Calories:
16
kcal
Carbohydrates:
4
g
Protein:
1
g
Fat:
1
g
Saturated Fat:
1
g
Sodium:
4
mg
Potassium:
1
mg
Fiber:
1
g
Sugar:
3
g
Calcium:
1
mg
Iron:
1
mg
An automated tool is used to calculate the nutritional information. As such, I cannot guarantee the accuracy of the nutritional information provided for any recipe on this site.
Tried this recipe?
Leave a comment below or rate and tag @cakewhiz on social
