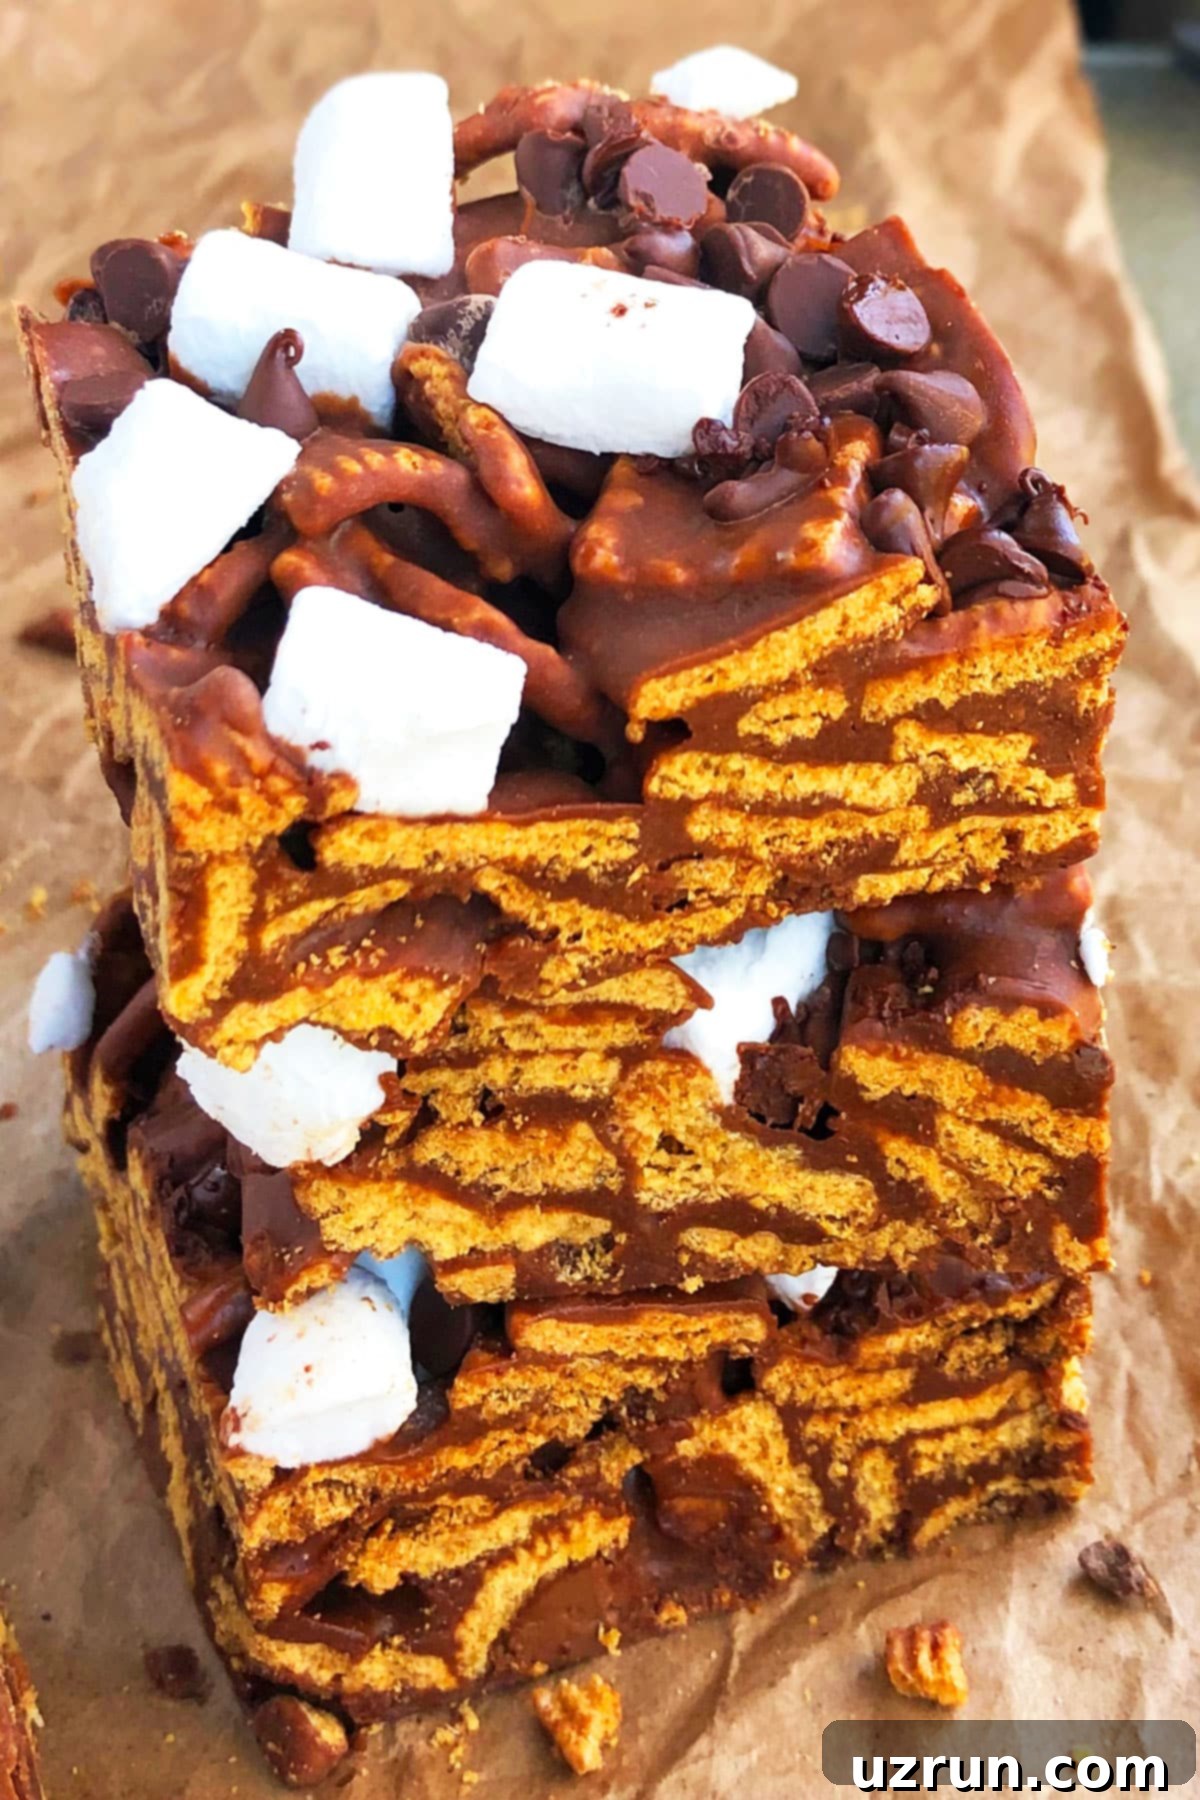
The Best Easy No-Bake S’mores Bars: Gooey, Crunchy, & Simple Homemade Perfection
Get ready for a classic campfire treat without the campfire mess! These incredible No-Bake S’mores Bars are the epitome of quick, easy, and utterly delicious. Imagine layers of ooey-gooey melted marshmallows and rich chocolate chips, perfectly binding together crunchy Golden Grahams cereal. This homemade recipe uses simple ingredients to create a dessert that captures all the nostalgic flavors of traditional s’mores in a convenient, handheld bar form. Often referred to as “cereal bars” due to their crispy foundation, these treats are incredibly versatile and perfect for any occasion.
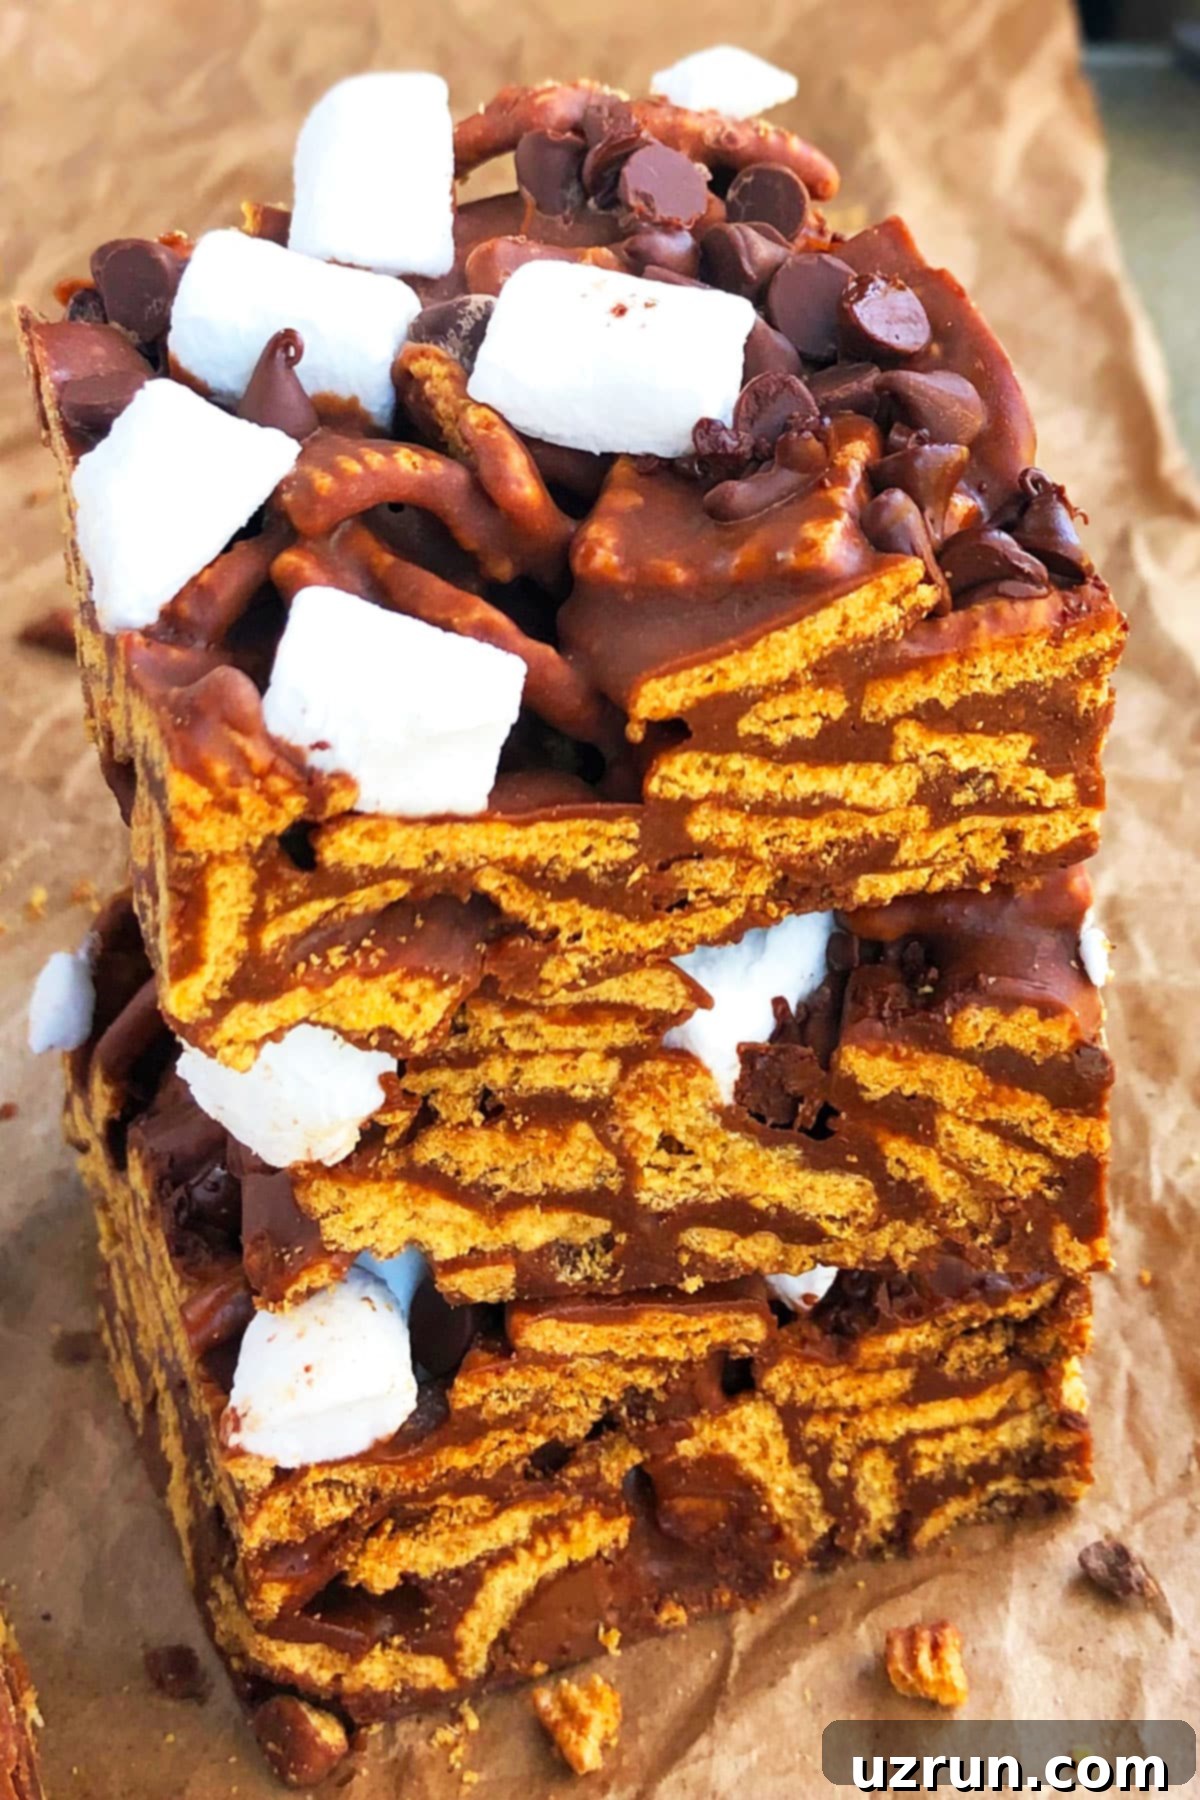
As warmer weather approaches, these easy no-bake s’mores bars become an absolute must-have dessert. They are perfectly suited for a wide range of activities, from casual backyard picnics to more adventurous camping trips. What makes them truly special is their incredible simplicity, making them an ideal baking project to tackle with kids. You’ll adore how these bars encapsulate the authentic taste of classic s’mores—that delightful combination of toasted marshmallow, melted chocolate, and crisp graham cracker—all neatly contained in a less messy, easy-to-handle bar form. They offer the same irresistible charm as my popular S’mores Cookies and are just as fun and simple to make as my Rainbow Cereal Bars (3 Ingredients).
Forget the sticky fingers and campfire smoke; these s’mores bars deliver pure bliss with minimal effort. They are the ultimate solution for satisfying that s’mores craving any time of year, without needing an oven or a fire pit. Just mix, press, chill, and enjoy a truly unforgettable treat!
Why You’ll Love These No-Bake S’mores Bars
- Effortlessly Easy: No oven required, making them perfect for hot days or when you need a quick dessert that won’t heat up your kitchen.
- Kid-Friendly: A fantastic recipe to involve young chefs, with simple, safe steps and no sharp tools or intense heat (beyond the gentle melting process).
- Classic S’mores Flavor: Experience all the nostalgic taste of traditional s’mores—the sweet marshmallow, rich chocolate, and crispy graham notes—packed into a convenient, delightful bar.
- Less Messy: Enjoy the s’mores experience without the sticky marshmallow drips and crumbling graham crackers often associated with the campfire version. These are perfect for clean, on-the-go enjoyment.
- Quick to Prepare: With only about 10 minutes of active prep and cook time, you’ll have these delicious bars mixed and ready to chill in practically no time.
- Incredibly Versatile: Easily customizable with different cereals, chocolates, and various mix-ins to suit any preference or dietary need.
- Perfect for Any Occasion: Ideal for summer parties, potlucks, school lunchboxes, camping trips, or simply as a comforting weeknight dessert.
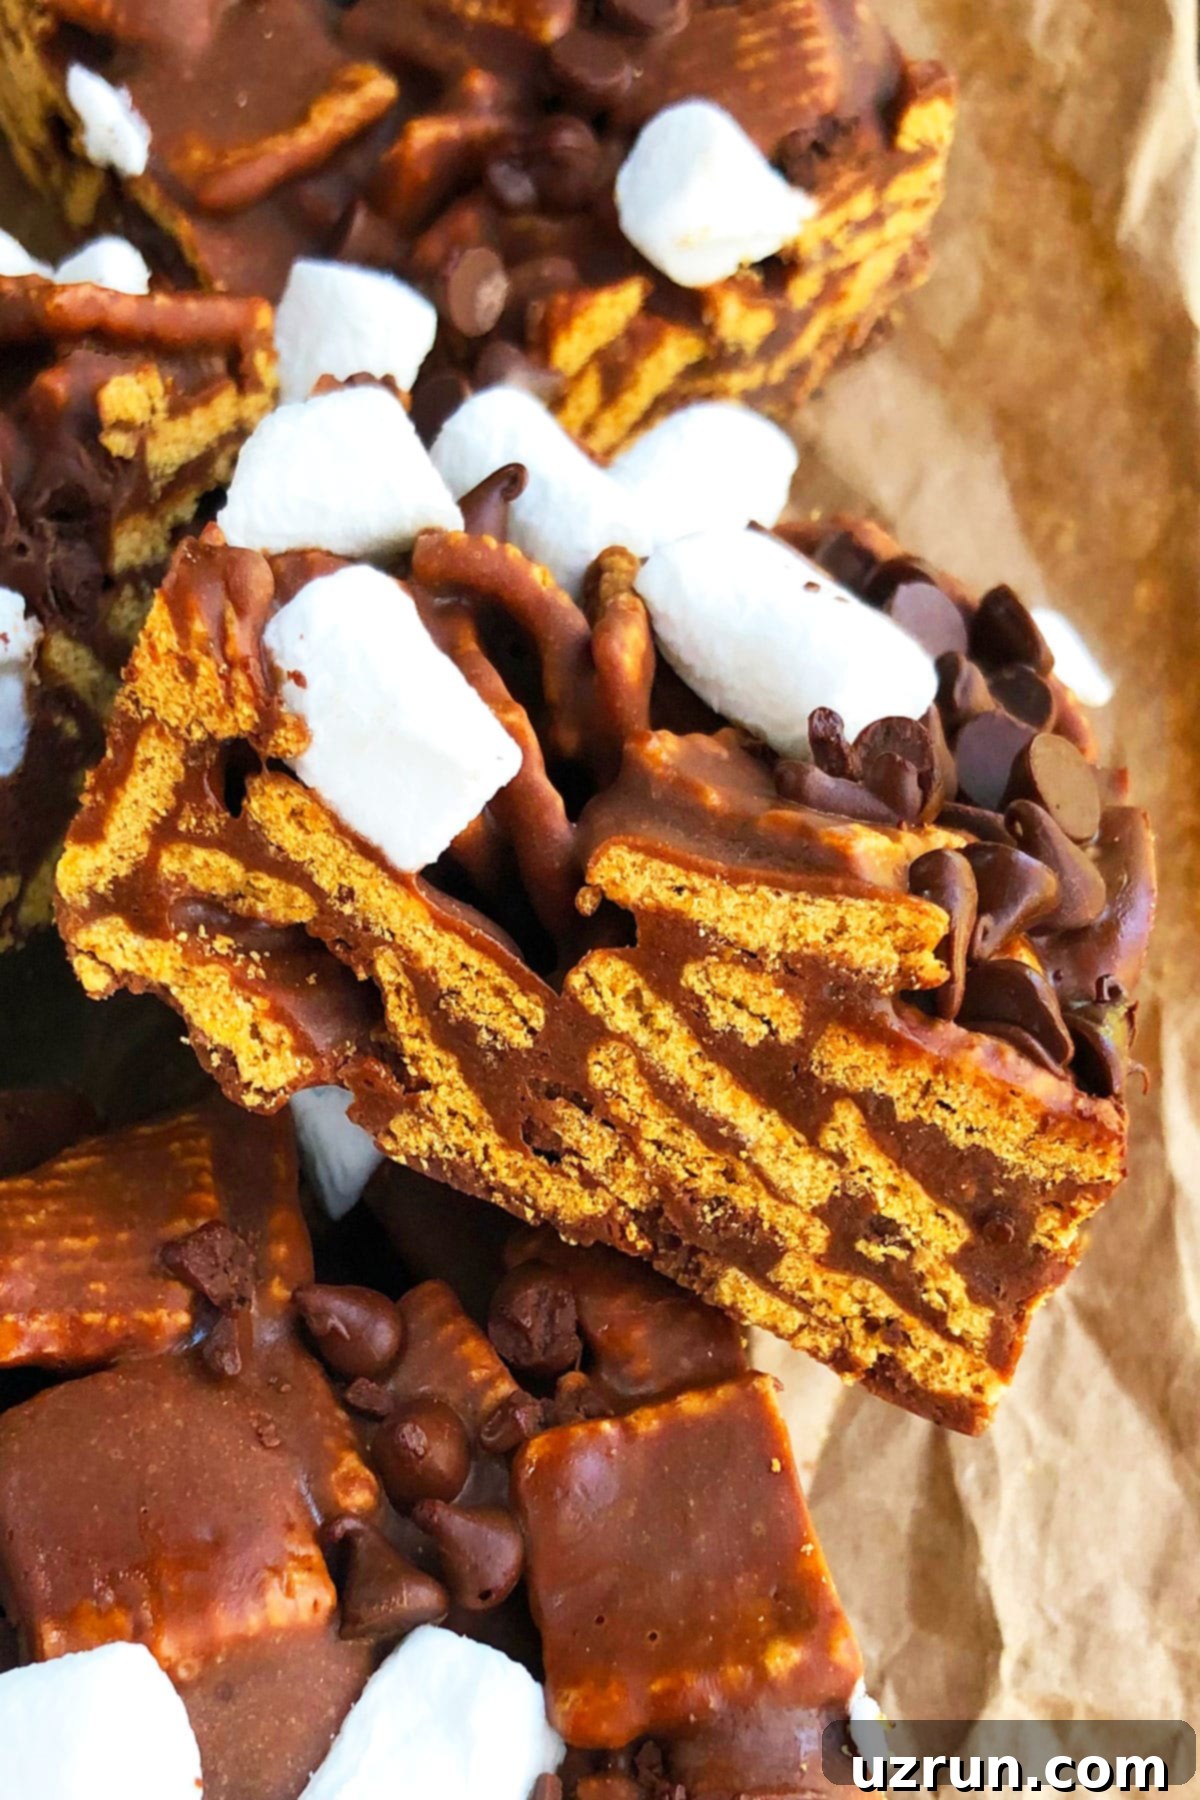
Essential Ingredients for Perfect S’mores Bars
Crafting these delectable no-bake s’mores bars requires just a handful of simple, readily available ingredients. Each component plays a crucial role in achieving that signature s’mores flavor and irresistible gooey, crunchy texture:
- Unsalted Butter: Using unsalted butter is absolutely key to controlling the overall saltiness of your bars. This allows the balanced sweetness of the marshmallows and chocolate to shine through without any overpowering savory notes. If you only have salted butter on hand, you can use it, but be sure to reduce or omit any other added salt in the recipe to maintain a harmonious flavor profile.
- Mini Marshmallows: These are the undeniable star of the show, providing that signature gooey chewiness and binding power. Mini marshmallows are preferred because they melt more quickly and evenly than larger ones, ensuring a smooth, cohesive binder for your cereal. While classic vanilla is always a winner, don’t hesitate to experiment with other fun, flavored marshmallows (like strawberry, chocolate, or even peppermint during holidays) if you want to add a unique twist. Remember to reserve some extra mini marshmallows for pressing on top, as they add a beautiful visual appeal and extra pockets of melt-in-your-mouth goodness.
- Chocolate Chips: My personal first choice for these bars is always semisweet chocolate chips. They offer a balanced sweetness that perfectly complements the rich flavors of the other ingredients without being overly sugary. However, feel free to cater to your family’s preferences! Milk chocolate chips will yield a sweeter, creamier bar, while dark chocolate chips will add a more intense, slightly bitter contrast that many dark chocolate enthusiasts adore. You can even use a mix of different types for a complex and satisfying chocolate experience.
- Golden Grahams Cereal: This cereal is hands-down the best choice for achieving an authentic s’mores experience, as its flavor and wonderfully crisp texture remarkably mimic traditional graham crackers. The sturdy squares hold up exceptionally well in the sticky marshmallow mixture, providing a satisfying and consistent crunch in every single bite. Always ensure your cereal is fresh to maintain maximum crispness, which is vital for the bar’s texture.
These four core ingredients form the delicious foundation of our amazing no-bake s’mores bars. Gather them up, and you’re well on your way to creating a truly delightful and unforgettable treat!
Creative Variations for Your S’mores Cereal Bars
While the classic Golden Grahams version of these no-bake s’mores bars is undeniably delicious, this recipe is incredibly adaptable, allowing for endless customization. Feel free to get creative and tailor them with these exciting variations to perfectly suit your taste, mood, or occasion:
- Chocolate Golden Grahams Cereal: For the ultimate chocolate lover, consider swapping the regular Golden Grahams for the chocolate-flavored variety. This simple change instantly boosts the chocolate intensity of your bars while still retaining that characteristic graham cracker-like taste and subtle cinnamon notes. It’s a fantastic and easy way to add a deeper cocoa flavor to your already delightful treats.
- Marshmallow Fluff/Spread: No mini marshmallows on hand? No problem at all! You can easily substitute an equal amount of marshmallow fluff or a marshmallow spread. Just be aware that the texture might be slightly different—a bit softer and less chunky—but it will still deliver that essential sweet, gooey marshmallow flavor that defines s’mores. Adjust quantities as needed to achieve the right consistency for binding.
- Experiment with Other Cereals: The world of cereal offers an exciting array of possibilities to change up the flavor and texture of your bars!
- Cinnamon Toast Crunch: A personal favorite, this cereal adds an extra layer of warm cinnamon spice that pairs absolutely beautifully with the sweet chocolate and gooey marshmallow.
- Cheerios (Honey Nut or Regular): For a slightly healthier or less intensely sweet option, Cheerios provide a good, wholesome crunch. Honey Nut Cheerios will impart a pleasant, subtle honey sweetness.
- Honeycomb: Its unique shape and slightly malty flavor make for an interesting textural experience and a distinct taste profile.
- Cornflakes: A classic choice for crispy treats, cornflakes offer a relatively neutral base that allows the s’mores flavors to truly pop and shine.
- Cocoa Puffs: For another rich chocolatey twist, Cocoa Puffs bring a delicious, milk-chocolate flavor to the cereal base.
- Fruity Pebbles/Loops: If you’re feeling particularly adventurous and want a vibrant burst of fruity flavor and color, these cereals can make for a fun, playful bar, though it will naturally move away from the traditional s’mores profile.
- Use Crushed Cookies or Crackers: Expand beyond cereal entirely for a different base that offers unique flavors and textures:
- Graham Crackers: Roughly chopped graham crackers are an obvious and perfect choice, further reinforcing the s’mores theme with their authentic flavor and texture.
- Oreos: Crushed Oreos (cream and all) create an incredibly decadent “cookies and cream” s’mores bar that is utterly irresistible.
- Chocolate Chip Cookies: Roughly chopped chocolate chip cookies add a wonderful homemade bakery feel and extra chewiness to your bars.
- Biscoff Cookies: Crushed Biscoff cookies would introduce a delightful spiced caramel note, elevating the flavor profile significantly.
- Add Peanut Butter Chips: The classic combination of chocolate and peanut butter is an undeniable winner. Stir in about a cup of peanut butter chips along with your chocolate chips for a rich, nutty depth of flavor that complements the s’mores perfectly and is utterly irresistible.
- Swirl in Peanut Butter or Nutella Spread: For an extra layer of indulgent flavor and creaminess, gently swirl a few tablespoons of creamy peanut butter or hazelnut Nutella spread into the melted marshmallow mixture just before you add the cereal. This creates beautiful streaks of nutty deliciousness throughout your bars.
- Incorporate Nuts and Dried Fruits: Boost both the texture and, dare I say, the nutritional value by stirring in your favorite chopped nuts like almonds, peanuts, walnuts, or pecans into the cereal mixture. Toasted nuts will offer an even deeper, more complex flavor. For a touch of fruitiness and chew, consider adding dried cranberries, raisins, or finely chopped dried apricots.
- Sprinkle with Joy: Make these bars festive and fun for any celebration! Simply toss some colorful sprinkles (like vibrant rainbow jimmies or nonpareils) on top of the cereal mixture right after you’ve pressed it into the pan. This adds a delightful visual appeal, making them absolutely perfect for birthday parties, school events, or even just a cheerful everyday treat. They can easily double as fantastic birthday party favors or a vibrant, eye-catching addition to any dessert table.
- Elegant Wedding Party Favors: Transform these simple bars into sophisticated and memorable wedding favors. Use white chocolate chips in place of or in addition to semisweet chocolate, and top them with delicate edible white pearls, shimmering silver dragees, or subtle pastel sprinkles. Once set, cut them into neat squares or elegant rectangles and package them beautifully in small cellophane bags tied with a charming ribbon. They look absolutely charming and are a delightful, personalized touch for a wedding or bridal shower.
With such a wide array of creative variations, your batches of homemade s’mores bars can be a new and exciting adventure every single time you make them!
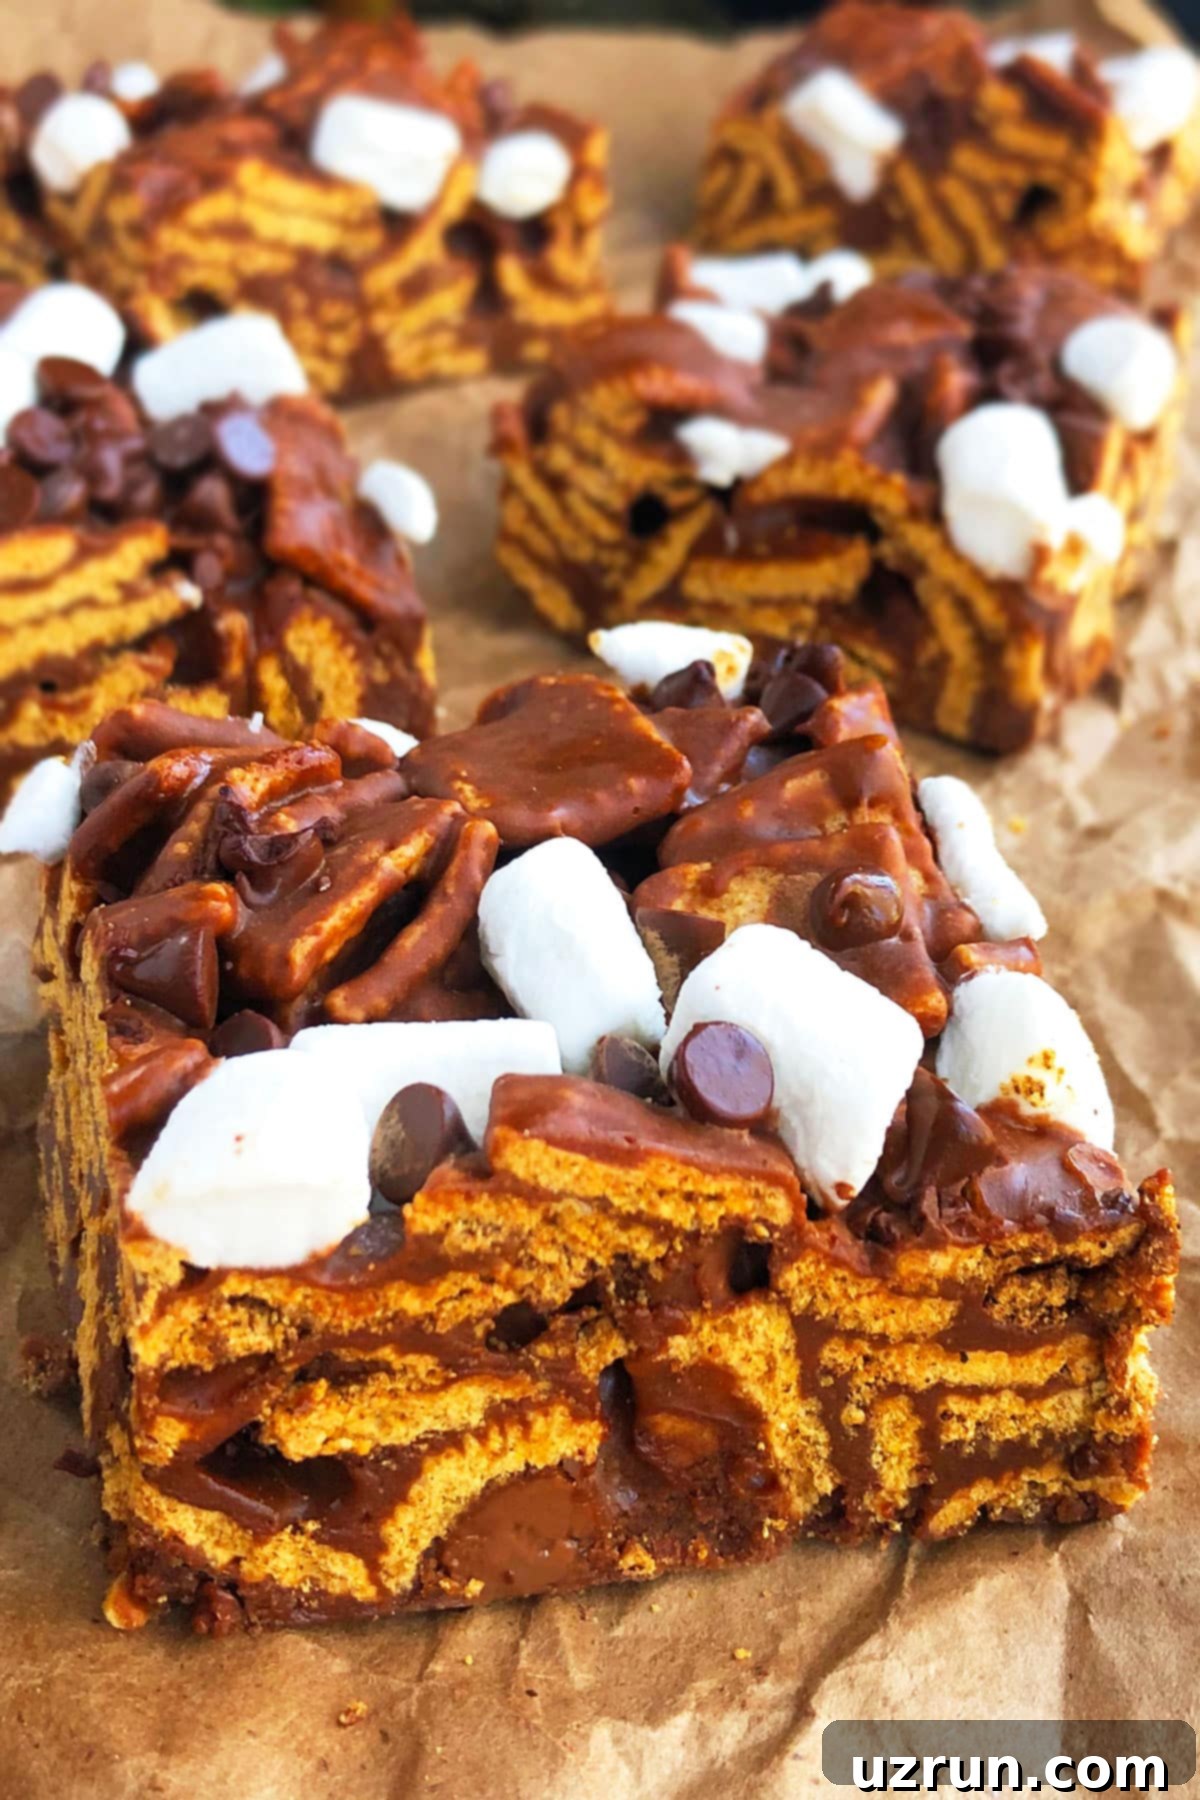
Crafting the Perfect Easy No-Bake S’mores Bars: A Step-by-Step Guide
Making these delightful no-bake s’mores bars from scratch is incredibly straightforward and fun. Just follow these simple steps, and you’ll have a batch of gooey, crunchy goodness ready in practically no time:
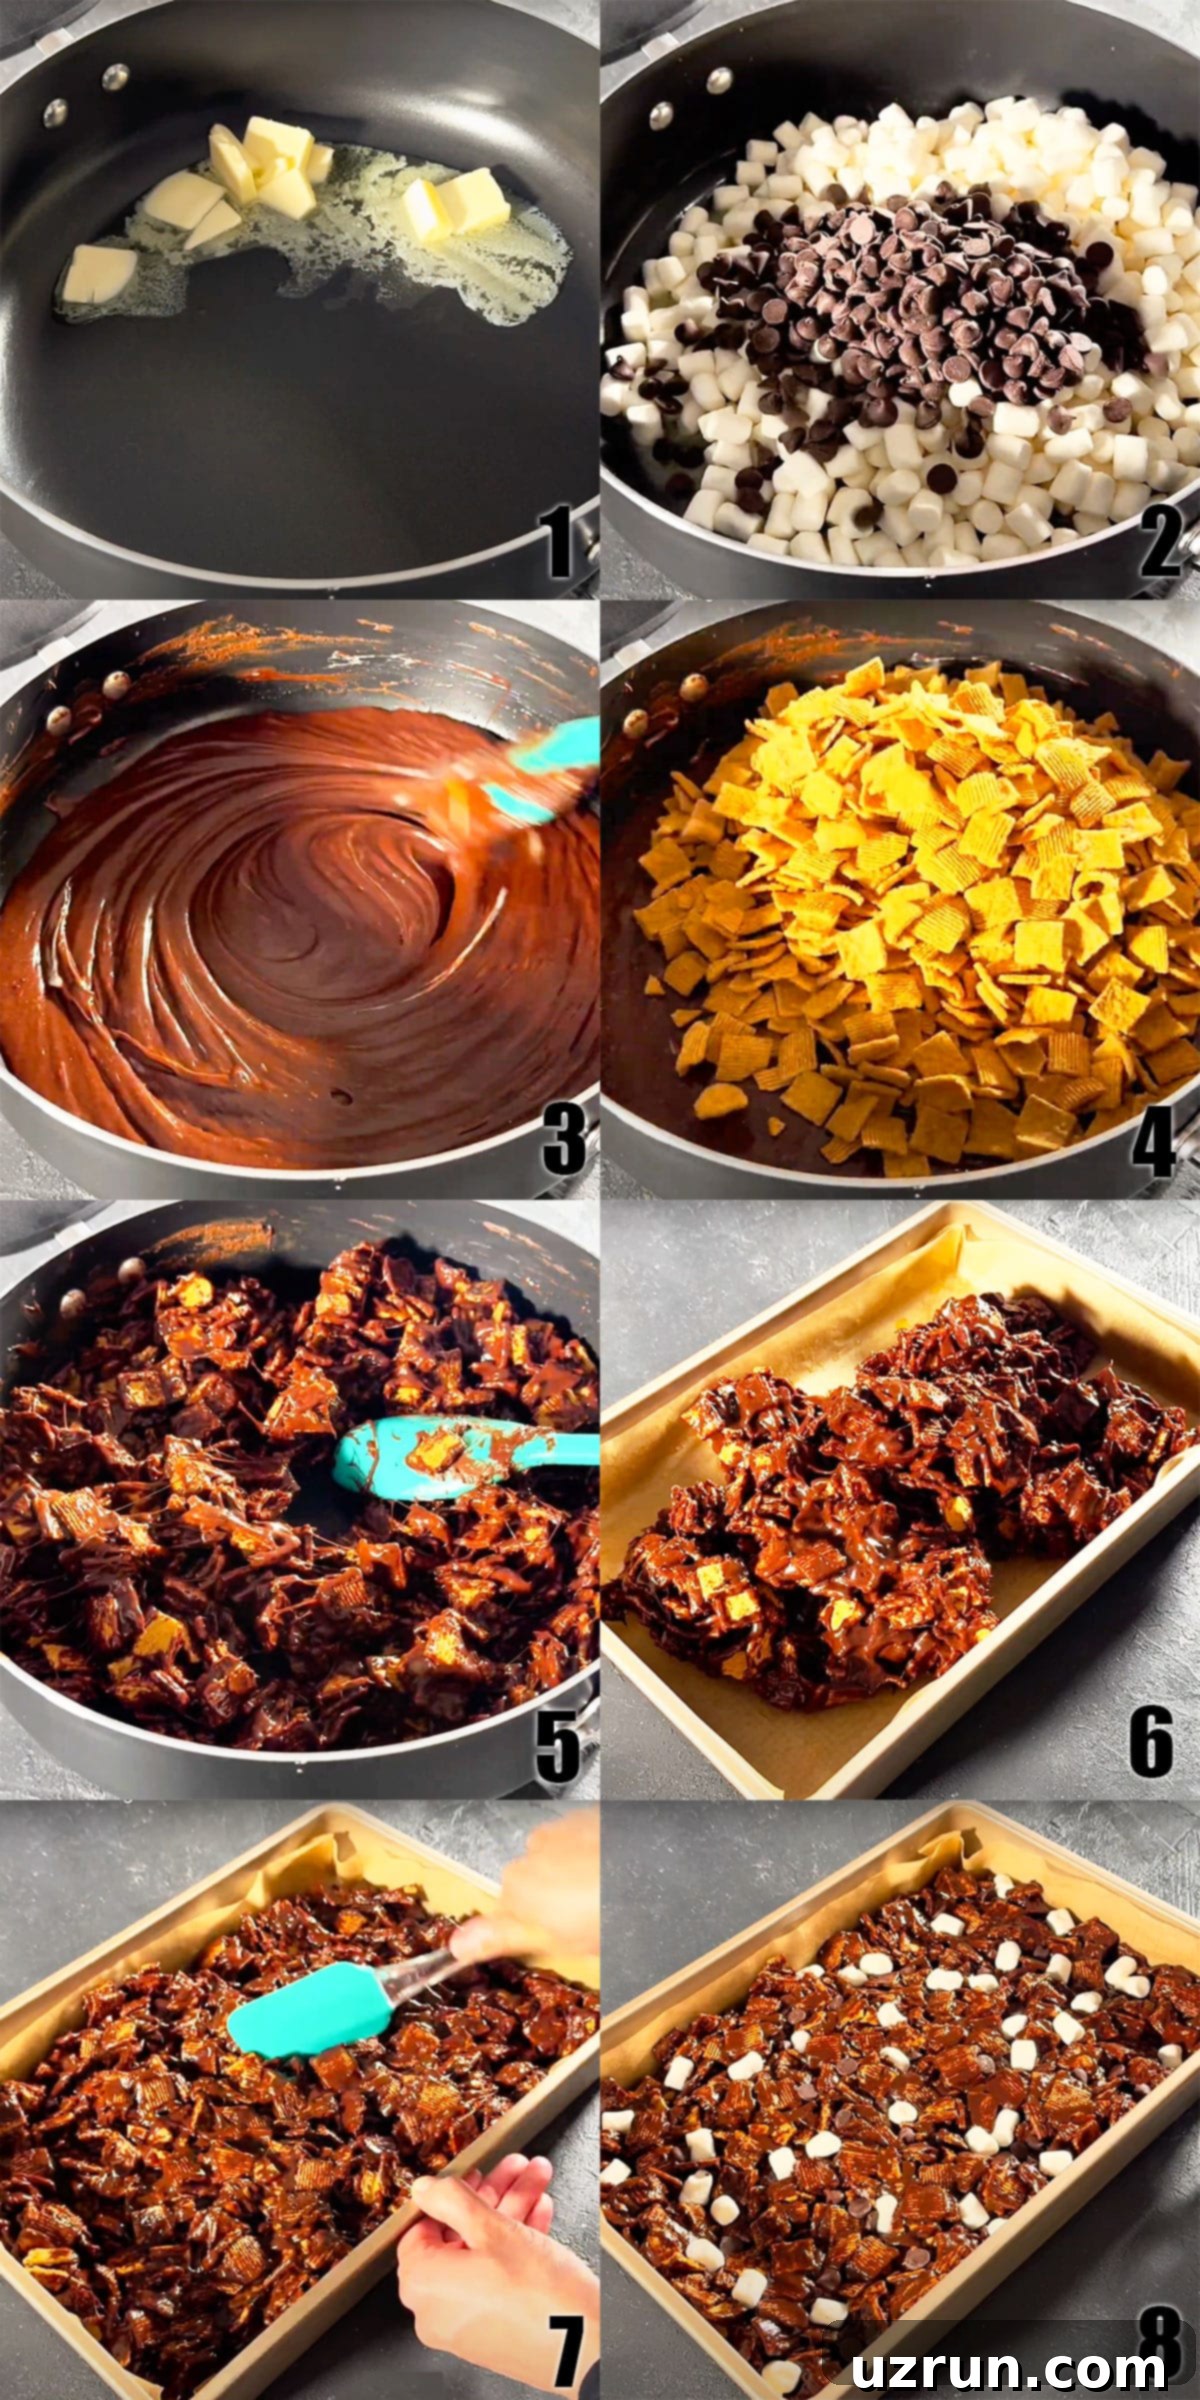
- Melt the Butter: Begin by heating the unsalted butter in a large, nonstick pot over medium-low heat. Stir occasionally until the butter is completely melted and forms a clear, golden liquid. This forms the essential base of our sticky marshmallow mixture (refer to Image 1 in the step-by-step collage for visual guidance).
- Combine Marshmallows and Chocolate: Once the butter is fully melted, reduce the heat to low. Add the majority of your mini marshmallows (reserving about half a cup for topping later) and most of your chocolate chips (reserving half a cup for topping) to the pot. Gently mix and cook this mixture, stirring continuously with a heat-resistant spatula, until both the marshmallows and chocolate chips have mostly melted into a smooth, gooey consistency. It’s perfectly fine if there are a few tiny lumps of marshmallow remaining; they add to the homemade charm and delightful texture (see Images 2 and 3 for the melting process).
- Incorporate the Cereal: Remove the pot from the heat immediately. Pour the Golden Grahams cereal into the warm, melted marshmallow and chocolate mixture. Using a sturdy spatula or large spoon, quickly and thoroughly mix until all the cereal pieces are fully coated with the sticky, gooey mixture. It’s important to work efficiently at this stage, as the mixture will start to set as it cools (Images 4 and 5 illustrate this thorough coating process).
- Press into Pan: Prepare a 9×13 inch rectangular baking pan by lining it completely with wax paper or parchment paper, ensuring there’s a generous overhang on all sides. Lightly spray the wax paper itself with non-stick cooking oil. Transfer the s’mores cereal mixture into the prepared pan. Lightly grease the back of a clean spatula or a piece of wax paper with a little oil, and use it to firmly and evenly press the mixture down into the pan. This compression is crucial for ensuring your bars hold together well and have a uniform thickness (Images 6 and 7 show how to accurately spread and press).
- Add Finishing Touches: Immediately after pressing the base layer, evenly sprinkle the remaining ½ cup of mini marshmallows and ½ cup of chocolate chips over the top of the warm mixture. Gently press these additional toppings into the warm mixture with your greased spatula or fingertips to ensure they adhere firmly and become embedded (Image 8 demonstrates this final topping step).
- Chill to Firm: Place the entire pan in the refrigerator for at least 1 hour, or until the bars are completely firm and set. This chilling time is absolutely essential for easy cutting and to achieve that perfect chewy-crispy texture that everyone loves.
- Slice and Serve: Once the bars are thoroughly firm, use the wax paper overhang to carefully lift the entire slab of s’mores bars out of the pan. Place it on a clean cutting board. Using a sharp, lightly oiled knife (this helps prevent sticking), cut the slab into individual bars of your desired size. Serve immediately and enjoy the delightful taste of homemade no-bake s’mores bars!
Each step is thoughtfully designed for ease and efficiency, ensuring you get perfect homemade s’mores bars every single time. Don’t forget to glance at the provided image collage for clear visual guidance throughout the entire preparation process!
Expert Tips and Techniques for Flawless S’mores Bars
Even though these no-bake s’mores bars are wonderfully simple to make, a few key tips and techniques can significantly enhance your success, ensure a perfect texture, and make the entire process even smoother and more enjoyable:
- Work Quickly and Efficiently: This is arguably the most crucial tip. The marshmallow and chocolate mixture begins to set very rapidly as it cools. Once you’ve added the cereal, you need to work quickly and decisively to transfer and firmly press the mixture into the prepared pan before it becomes too stiff and difficult to manage. Have all your ingredients measured, your tools ready, and your pan perfectly prepared before you even start melting the butter.
- Always Use Unsalted Butter: This recommendation is fundamental for achieving the ideal flavor balance in your s’mores bars. Unsalted butter gives you complete control over the salt content in your dessert, preventing the bars from becoming overly salty and allowing the natural sweet, rich s’mores flavors to truly shine and be enjoyed.
- Grease Your Spatula (and Hands!): The melted marshmallow mixture is inherently incredibly sticky. To prevent it from clinging relentlessly to your spatula (and potentially your hands!) as you press it into the pan, lightly spray or generously butter the back of your spatula. For an even easier time, you can also lightly grease your hands for the initial pressing if you prefer, ensuring you get a smooth, even layer without a frustrating sticky mess.
- Line the Pan with Wax Paper (or Parchment Paper): This step is absolutely non-negotiable for effortless cleanup and seamless removal of your finished bars. Always line your 9×13 inch baking pan completely with wax paper or parchment paper, ensuring there’s a generous overhang on all sides. This handy overhang will allow you to easily lift the entire firm slab out of the pan once chilled, making cutting a breeze and minimizing any sticky residue left behind in the pan. For extra insurance, don’t forget to lightly spray the paper itself with non-stick cooking spray or grease it with a thin layer of butter.
- Opt for Fresh Marshmallows: The freshness of your marshmallows directly and significantly impacts the final texture of your bars. Fresh marshmallows melt much more smoothly and contribute to a softer, gooier, and more pliable bar that holds together perfectly. Stale marshmallows, on the other hand, tend to make harder, stiffer bars and may not bind the ingredients as effectively, leading to a crumbly texture. Always check the expiration date and ensure your marshmallows are soft and pliable before use.
- Gentle Heat is Key: When melting the butter, marshmallows, and chocolate, always keep the heat setting on medium-low. Using high heat can quickly cause the marshmallows to burn or become too stiff and sugary, and the chocolate can seize or scorch, leading to a gritty texture rather than a smooth, perfectly gooey one. Patience here will undoubtedly pay off with beautifully melted ingredients and superior results.
- Don’t Over-Mix the Cereal: While you certainly want the cereal fully coated in the marshmallow mixture, avoid excessive or vigorous mixing once it’s added. Over-mixing can easily crush the delicate cereal pieces, diminishing their desirable crunch, which is a key characteristic of these bars. Mix just until all pieces are evenly combined.
By diligently following these simple yet effective guidelines, you’ll be well on your way to creating irresistible, perfectly textured, and consistently delicious easy no-bake s’mores bars every single time you make them!
Common Questions About No-Bake S’mores Bars
There are a few common reasons why your bars might not be setting firm enough. The most frequent culprits are not using enough marshmallows or chocolate, as these are the primary binding agents that create the sticky, cohesive matrix holding everything together. Ensure you’re following the recipe’s exact measurements for both marshmallows and chocolate. Additionally, inadequate chilling time can prevent them from firming up. Make sure to chill them for the recommended 1 hour (or even longer if your kitchen is particularly warm or humid) in the refrigerator until they are completely firm to the touch throughout.
If your bars are excessively sticky, it usually indicates either too many marshmallows were added without a proportional increase in butter and cereal, or perhaps not enough butter to properly emulsify and bind the marshmallow mixture. Conversely, if your bars turned out too hard and brittle, it could be due to using stale marshmallows (which don’t melt as smoothly and create a stiffer bond), or overcooking the marshmallow mixture, causing it to become overly caramelized and hard. Always strive to use fresh marshmallows and ensure you meticulously follow the precise measurements provided in the recipe card for the best, most balanced texture. Also, remember to work quickly after combining the cereal, as the mixture starts to set, and overworking it can sometimes lead to a tougher bar.
Absolutely! While semisweet chocolate chips are generally recommended for a balanced flavor that doesn’t overpower, you can certainly experiment with other varieties. Milk chocolate chips will make the bars noticeably sweeter and creamier, offering a milder chocolate flavor. Dark chocolate chips, on the other hand, will add a richer, more intense cocoa flavor with a slight hint of bitterness, appealing to those who prefer less sweetness. You can even use a mix of different chocolates to achieve your preferred taste profile. Just ensure they are good quality chocolate chips that are designed to melt smoothly.
Lining your pan is the absolute most crucial step to prevent any sticking. Always use wax paper or parchment paper that extends generously over the sides of the pan (creating an overhang). Additionally, it’s vital to lightly spray the wax paper itself with non-stick cooking spray or grease it thoroughly with a thin layer of butter. This double layer of protection ensures your no-bake s’mores bars can be easily lifted out of the pan in one piece and cut without any frustrating hassle or mess.
Proper Storage for Your S’mores Bars
To keep your delicious no-bake s’mores bars fresh, perfectly textured, and ready to enjoy for as long as possible, proper storage is absolutely essential. Here’s how to best store them:
- Refrigerate: For optimal freshness, to maintain their firm yet chewy structure, and especially in warmer climates, store the bars in a sealed airtight container in the refrigerator for up to 1 week. If you need to stack the bars, place a piece of wax paper or parchment paper between each layer to prevent them from sticking together. This also helps preserve their individual integrity.
- Room Temperature: If your environment is not too warm (ideally below 75°F or 24°C) and not too humid, these bars can be stored at room temperature in a sealed airtight container for up to 3 days. Similar to refrigeration, always separate layers with wax paper if stacking. Beyond 3 days, or in any warmer or humid conditions, refrigeration is highly recommended to prevent them from becoming too soft, overly sticky, or potentially spoiling.
- Freezing: Freezing these particular bars is generally not recommended. The primary reason is that the moisture released during the thawing process can cause the cereal to become soggy and lose its delightful crispy texture, which is a key and beloved component of a good s’mores bar. While they would technically be safe to eat after freezing and thawing, the quality and desired texture will be significantly altered and diminished. It’s best to enjoy them fresh or simply refrigerate.
Regardless of your chosen storage method, always ensure they are placed in a truly airtight container. This protection from air exposure is critical as it helps prevent them from drying out, becoming stale, or absorbing unwanted odors from other foods.
More Marshmallow Desserts You’ll Love
- Chocolate Marshmallow Cake
- Easy Rice Krispie Treats
- Marshmallow Frosting
- Easy Marshmallow Pops
- Jello Marshmallow Candy
Recipe
No Bake S’mores Bars
Abeer RizviWant to Save This Recipe?
Enter your email & I’ll send it to your inbox. Plus, get great new recipes from me every week!
By submitting this form, you consent to receive emails from CakeWhiz
Ingredients
- ½ cup Butter Unsalted
- 6 cups Mini marshmallows Divided
- 2 cups Chocolate chips Semisweet, Divided
- 6-7 cups Golden grahams cereal Adjust according to your preference for gooiness vs. crunch
Instructions
- Heat unsalted butter in a large nonstick pot over medium-low heat until fully melted.
- Add 5.5 cups of mini marshmallows and 1.5 cups of chocolate chips.
- Mix and cook gently until marshmallows and chocolate are mostly melted and gooey. It’s okay if there are a few small lumps remaining.
- Remove from heat, add 6-7 cups of Golden Grahams cereal (adjust for desired coverage), and mix until fully coated. Work quickly!
- Spoon the mixture evenly into a 9×13 inch rectangle pan that’s lined with wax paper (leaving an overhang) and lightly sprayed with oil.
- Lightly spray the back of a spatula with oil and use it to press the mixture down firmly and evenly in the pan.
- Immediately press the remaining ½ cup marshmallows and ½ cup chocolate chips on top of the warm mixture.
- Chill in the refrigerator for at least 1 hour until the bars become firm and set.
- Remove from pan using the wax paper overhang, then use a sharp, lightly oiled knife to cut slices. Enjoy your perfectly gooey and crunchy S’mores Bars!
Video
Notes
- Feel free to try other cereal flavors instead of Golden Grahams for a different and exciting flavor profile.
- For a more traditional s’mores base, you can use roughly chopped graham crackers instead of cereal.
- Add a little bit of creamy peanut butter or hazelnut Nutella for an additional layer of rich, nutty flavor.
- Remember to work quickly when you are spreading the mixture in the pan because the marshmallow and chocolate will start to set very rapidly.
- You absolutely must line the pan with wax paper or parchment paper and spray it generously with oil to prevent the bars from sticking to the pan and ensure easy removal.
- For more detailed insights and creative variations, please read the additional tips and techniques section and variations section above.
- Leftovers of your delicious no-bake s’mores bars can be stored at room temperature for up to 3 days in a sealed airtight container, ideally separated by wax paper, or refrigerated for up to 1 week.
Nutrition
An automated tool is used to calculate the nutritional information. As such, I cannot guarantee the accuracy of the nutritional information provided for any recipe on this site.
Once you’ve tried these easy no-bake s’mores bars, you’ll understand why they’re a fan favorite. Share your creations and enjoy the ultimate s’mores experience, no campfire required!
