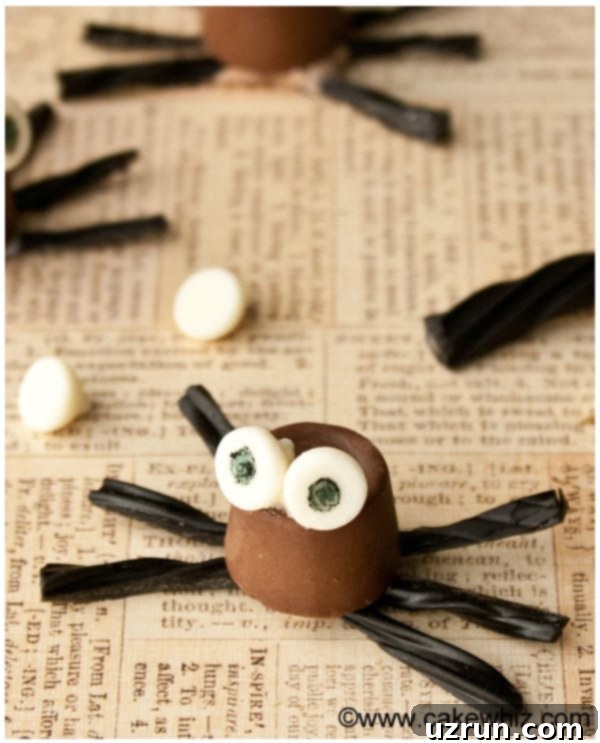
Spooktacularly Simple: Easy Edible Chocolate Spiders for Your Halloween Party
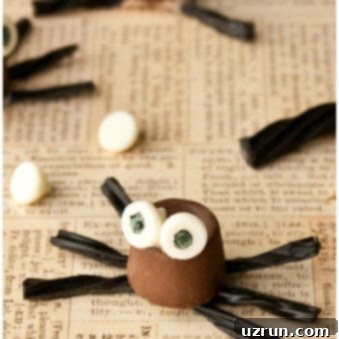
Get ready to add a touch of playful spookiness to your Halloween celebrations with these incredibly quick and easy edible chocolate spiders! Crafted with everyday candies like Rolo and Twizzlers, these homemade delights are not only simple to make but also incredibly fun, making them the perfect activity and treat for any kids’ Halloween party or a last-minute creative burst.
The anticipation for Halloween is always electrifying, and this year, I couldn’t wait to share these charmingly creepy creatures with all of you. In my preparations, I found myself surrounded by bags of candy – some destined for trick-or-treaters, and some, admittedly, for “quality control” (ahem, sampling!). It was during one of these delightful tasting sessions, combined with the excitement of my little one’s adorable teddy bear costume, that the idea for these cute chocolate spiders was born. They’re an absolute lifesaver if you need a speedy, impressive treat for a Halloween gathering, and your kids will love helping you assemble them. If you’re enchanted by the spider theme, don’t miss out on these fantastic Oreo Spider Cookies {No Bake} and our super fun Easy Spider Web Cupcakes for even more spooky inspiration.
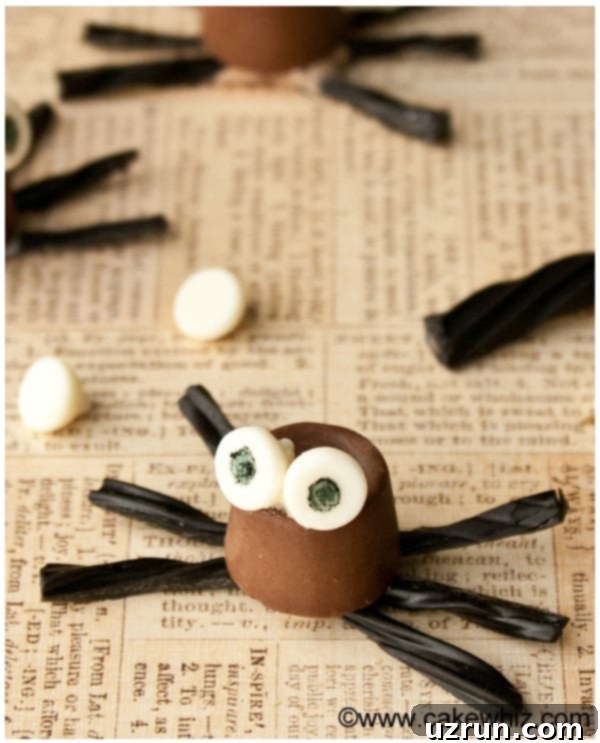
How to Craft Your Easy Chocolate Spiders (Step-by-Step)
Making these adorable, no-bake chocolate spiders is simpler than you might imagine, and you don’t even need a mold! Follow these straightforward steps to bring your creepy-crawly treats to life:
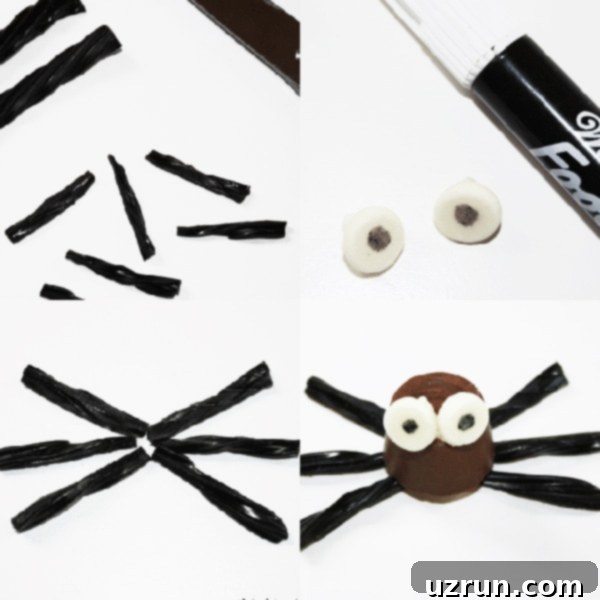
- Prepare the Spider Legs: Start by carefully cutting your Black Twizzler strips into small, uniform pieces. Aim for about six short segments per spider. Consistency in size will ensure your spiders look perfectly balanced and delightfully spooky, rather than a disoriented chocolate blob!
- Design the Eyes: This step adds personality! Take your white chocolate chips and, using a fine-tipped black edible marker, draw two small black circles on the flat side of each chip. These will be your spider’s eyes. Have them ready, as melted chocolate sets quickly.
- Assemble Your Spiders: On a piece of wax paper or parchment paper, arrange six of your pre-cut Twizzler legs in a radial pattern, resembling a spider’s legs splayed out. Next, squeeze a small dollop of melted chocolate in the center where the legs meet. This will act as the adhesive and the base for the body.
- Add the Body and Eyes: Promptly place an unwrapped Rolo candy on top of the melted chocolate dollop, pressing gently to secure it to the legs. While the chocolate is still wet, carefully attach two of your prepared white chocolate chip eyes to the Rolo candy, using a tiny dab of additional melted chocolate if needed.
- Allow to Set and Enjoy: Once assembled, let the chocolate spiders sit at room temperature or in the refrigerator for a few minutes until the melted chocolate has fully set and hardened. This ensures they hold their shape perfectly. Then, it’s time to enjoy your delightful, edible arachnids!
Creative Variations for Your Edible Halloween Spiders
While the classic Rolo and Twizzler combination is a winner, don’t hesitate to get creative with these edible Halloween spiders! Here are some fun variations to explore:
- Alternative Spider Legs: Instead of Twizzlers, try using mini pretzels for a salty-sweet crunch! Their irregular shapes can give your spiders an even more rustic, “hairy leg” look. You could also use mini licorice strips, or for a truly custom touch, pipe thin chocolate strips onto parchment paper and let them set before assembling.
- Different Spider Bodies: If Rolos aren’t your preference, consider using luxurious Lindt candy balls for a gourmet twist, or even homemade chocolate truffle balls like these Healthy Chocolate Truffles. The choice of body candy can significantly alter the flavor and texture profile of your spiders.
- Ready-Made Eyeballs: Short on time or looking for extra “pop”? Use store-bought eyeball candies instead of drawing on white chocolate chips. They come in various sizes and often have intricate designs, adding instant character to your spooky treats.
- Spiders as Cupcake Toppers: These edible spiders make fantastic, eye-catching cupcake toppers! Simply place them atop festive and spooky cupcakes such as these Easy Orange Cupcakes {With Whipped Cream} or our rich Best Red Velvet Cupcakes {With Cream Cheese Frosting} for an instant Halloween transformation.
- Cake Decoration Extravaganza: Imagine a whole spooky cake crawling with these chocolate spiders! Arrange a cluster of them on top of a delicious Moist Triple Chocolate Cake or our Best Vanilla Cake Recipe to create an unforgettable Halloween centerpiece.
- Personalized Rolo Designs: Add an extra layer of detail by drawing designs on the top of the Rolo candies. Use red, yellow, or white melted chocolate in a piping bag to create intricate patterns like black widow hourglass shapes or other eerie markings.
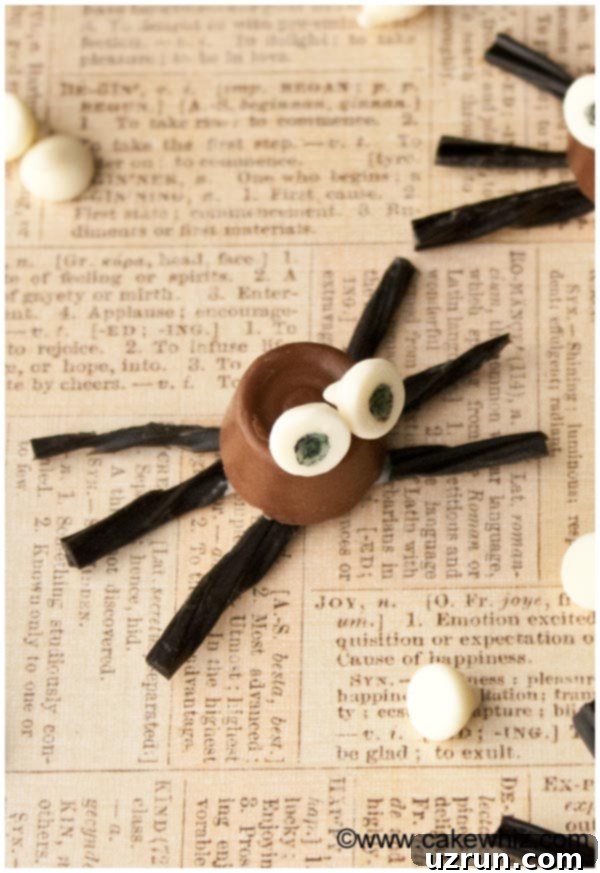
Essential Tips and Techniques for Perfect Chocolate Spiders
Even though these chocolate spiders are incredibly simple, a few expert tips can ensure your treats turn out perfectly spooky and delicious every time:
- Wear Plastic Gloves When Handling Rolos: Rolo candies, with their chocolate coating, can easily melt from the warmth of your hands. Wearing thin plastic gloves will protect the chocolate from fingerprints and premature melting, keeping your spider bodies pristine.
- Prioritize Eye Preparation: As melted chocolate cools and sets quite rapidly, it’s crucial to have your spider eyes completely ready before you begin the assembly process. This way, you won’t be scrambling to draw eyes while your chocolate base hardens.
- Achieve Uniform Leg Size: For a convincing spider silhouette, try to make all the Twizzler legs roughly the same length and thickness. Uneven legs can make your spider look less like a creepy crawler and more like a lopsided, melted chocolate abstract art piece – definitely not the spooky aesthetic we’re aiming for!
- Choosing Your Chocolate: I typically use semi-sweet chocolate for a balanced flavor, but feel free to experiment with milk chocolate for a sweeter treat or dark chocolate for a richer, more intense flavor. You can use chocolate chips melted in the microwave (stirring every 30 seconds) or candy melts, which are often easier to work with for decorative purposes as they set quickly and don’t require tempering.
- Working Surface: Always assemble your spiders on wax paper or parchment paper. This prevents them from sticking and makes for easy removal once the chocolate has set.
- Cooling Time: If you’re in a hurry, you can pop the assembled spiders into the refrigerator for 5-10 minutes to speed up the setting process. Just be sure not to leave them in too long, as extreme cold can sometimes cause chocolate to bloom (develop a white, powdery film).
Storage Solutions for Your Chocolate Spiders
Once your spooky spiders are complete and have fully set, proper storage will keep them fresh and delicious for your Halloween festivities:
- Room Temperature Storage: Store your chocolate spiders in a covered airtight container or box. Keep them in a cool, dry place away from direct sunlight or any heat sources, as chocolate is prone to melting. They will remain fresh and firm for up to 3 days. Avoid refrigerating for extended periods, as this can cause condensation and affect the chocolate’s texture.
- Preparing Ahead: These spiders are perfect for making a day or two in advance of your party, alleviating last-minute stress. Just ensure they are stored correctly, and they’ll be ready to impress!
More Enchanting Halloween Desserts
Looking for more spooktacular treats to complete your Halloween spread? Explore these other delightful and easy recipes:
- Halloween Treat Bags
- Halloween Donuts (Spider and Monster)
- Easy Ghost Cookies (No Bake)
- Easy Monster Cookies {Candy Corn Cookies}
- Easy Mummy Cake {Halloween Cake}
Recipe
Easy Chocolate Spiders
Abeer Rizvi
Pin Recipe
20 minutes
20 minutes
Dessert
American
10 Spiders
123 kcal
Want to Save This Recipe?
Enter your email & I’ll send it to your inbox. Plus, get great new recipes from me every week!
By submitting this form, you consent to receive emails from CakeWhiz
Ingredients
- 3 strips Black Twizzlers
- ⅓ cup White chocolate chips
- 1 cup Melted chocolate Semisweet or milk
- 10 Rolo candies Unwrapped
Instructions
-
Using scissors, cut the black Twizzlers into small, evenly sized pieces to create your spider legs. Consistency is key for a neat look.
-
Prepare the eyes by drawing small black circles on the flat side of two white chocolate chips for each spider using an edible marker. Set these aside.
-
On a sheet of wax paper, arrange six Twizzler leg pieces in a radial pattern (as depicted in the step-by-step collage image above).
-
Squeeze a dollop of melted chocolate onto the center of the arranged Twizzler legs. This will form the base of the spider’s body.
-
Carefully place an unwrapped Rolo candy on top of the melted chocolate dollop, gently pressing it down to secure it to the legs.
-
Finally, attach the two prepared white chocolate chip eyes to the Rolo candy, using a small amount of melted chocolate as an adhesive if needed.
-
Allow the chocolate to fully set and harden at room temperature or briefly in the refrigerator before serving. Then, enjoy your delightfully spooky creations!
Notes
- For best results, read all the detailed tips provided in the sections above the recipe card.
- Leftover chocolate spiders can be stored in a covered box at room temperature, away from heat and direct sunlight, for up to 3 days.
Nutrition
Carbohydrates: 14g
Protein: 1g
Fat: 8g
Saturated Fat: 5g
Polyunsaturated Fat: 1g
Monounsaturated Fat: 3g
Cholesterol: 1mg
Sodium: 9mg
Potassium: 68mg
Fiber: 1g
Sugar: 13g
Vitamin A: 2IU
Vitamin C: 1mg
Calcium: 16mg
Iron: 1mg
An automated tool is used to calculate the nutritional information. As such, I cannot guarantee the accuracy of the nutritional information provided for any recipe on this site.
Tried this recipe?Leave a comment below or rate and tag @cakewhiz on social
