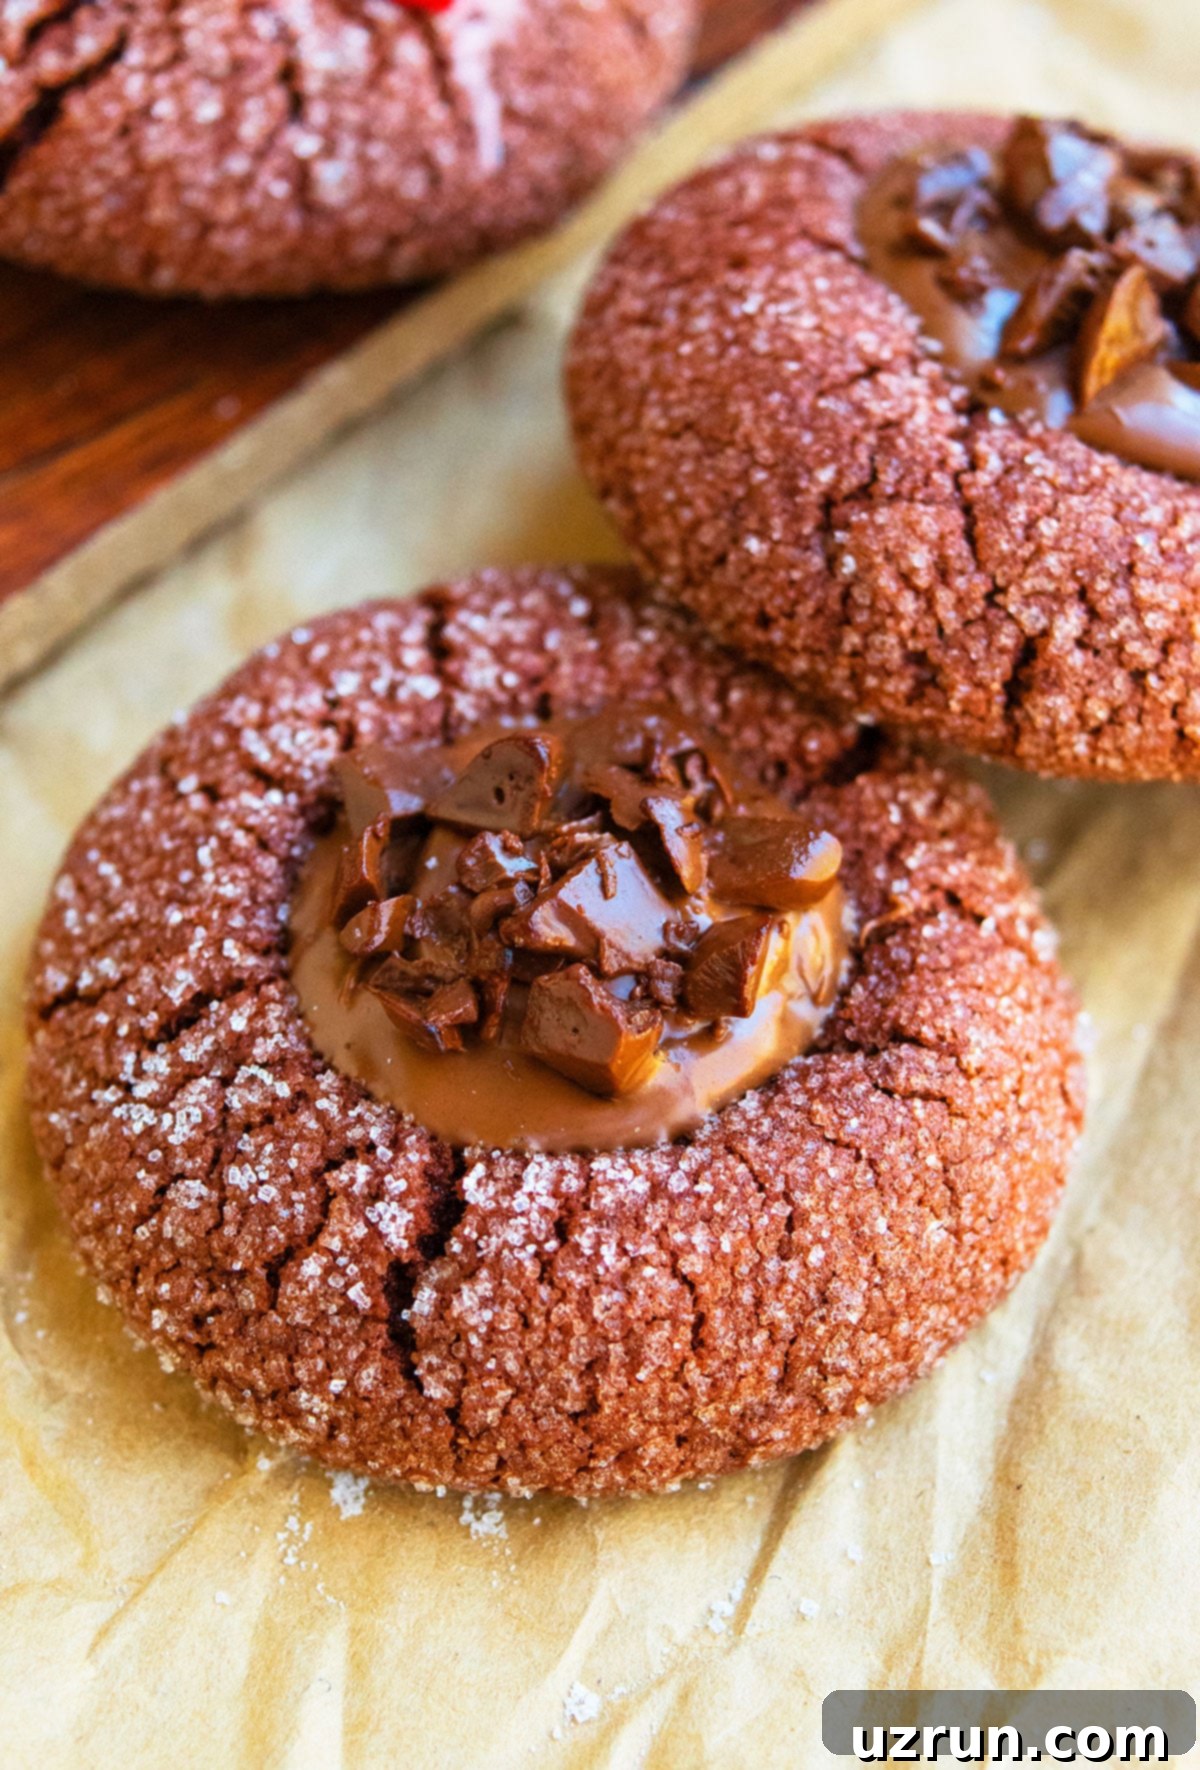
Easy Decadent Chocolate Thumbprint Cookies with Rich Ganache: Your New Favorite No-Chill Recipe
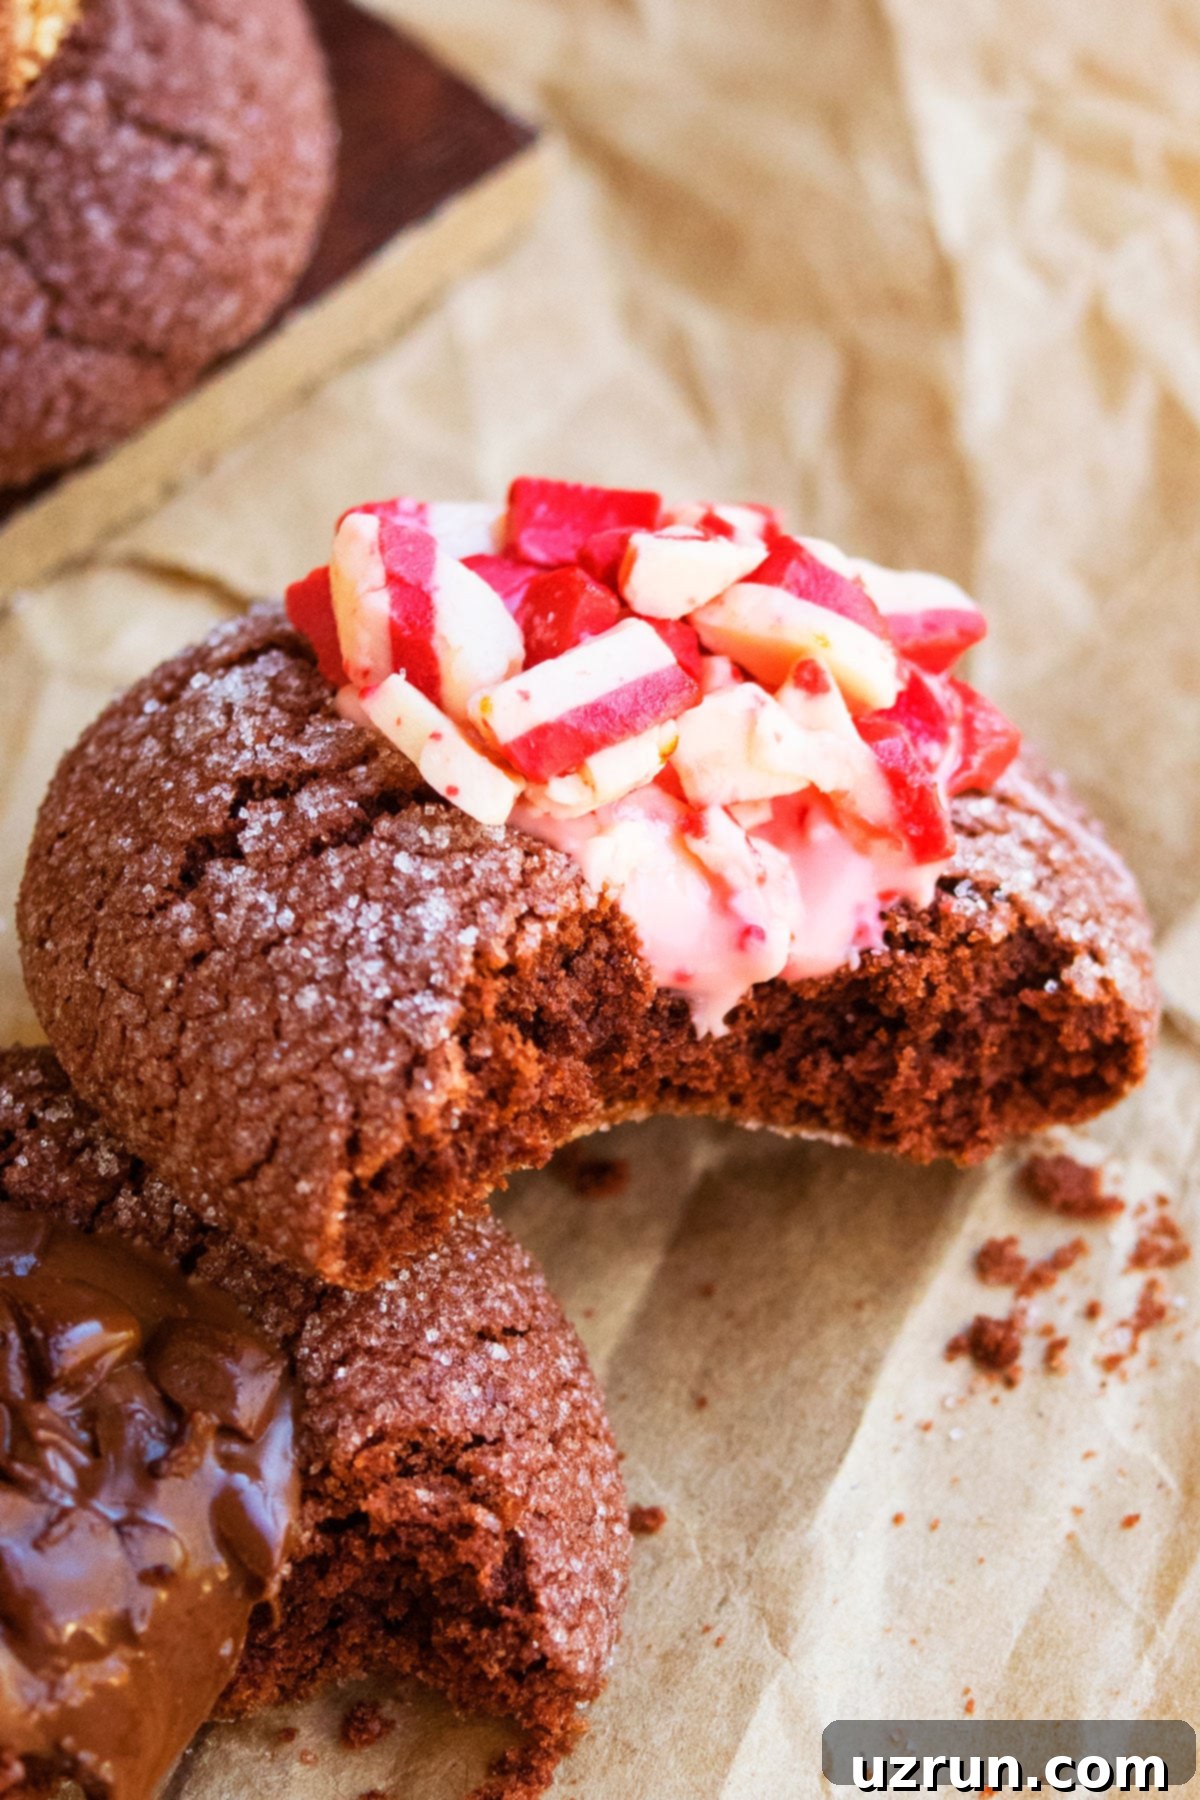
Prepare to fall in love with these incredibly quick and easy chocolate thumbprint cookies, featuring a luscious homemade ganache filling. Crafted from scratch, these delightful treats boast a perfectly crispy exterior that gives way to a wonderfully soft and tender interior. Whether you’re seeking a simple dessert for a weeknight craving or a festive addition to your holiday spread, these cookies are exceptionally versatile. For a special seasonal touch, consider filling them with crushed peppermint pieces or a delightful candy cane mixture. The best part? This recipe requires absolutely no chilling, meaning you can enjoy fresh-baked goodness in record time!
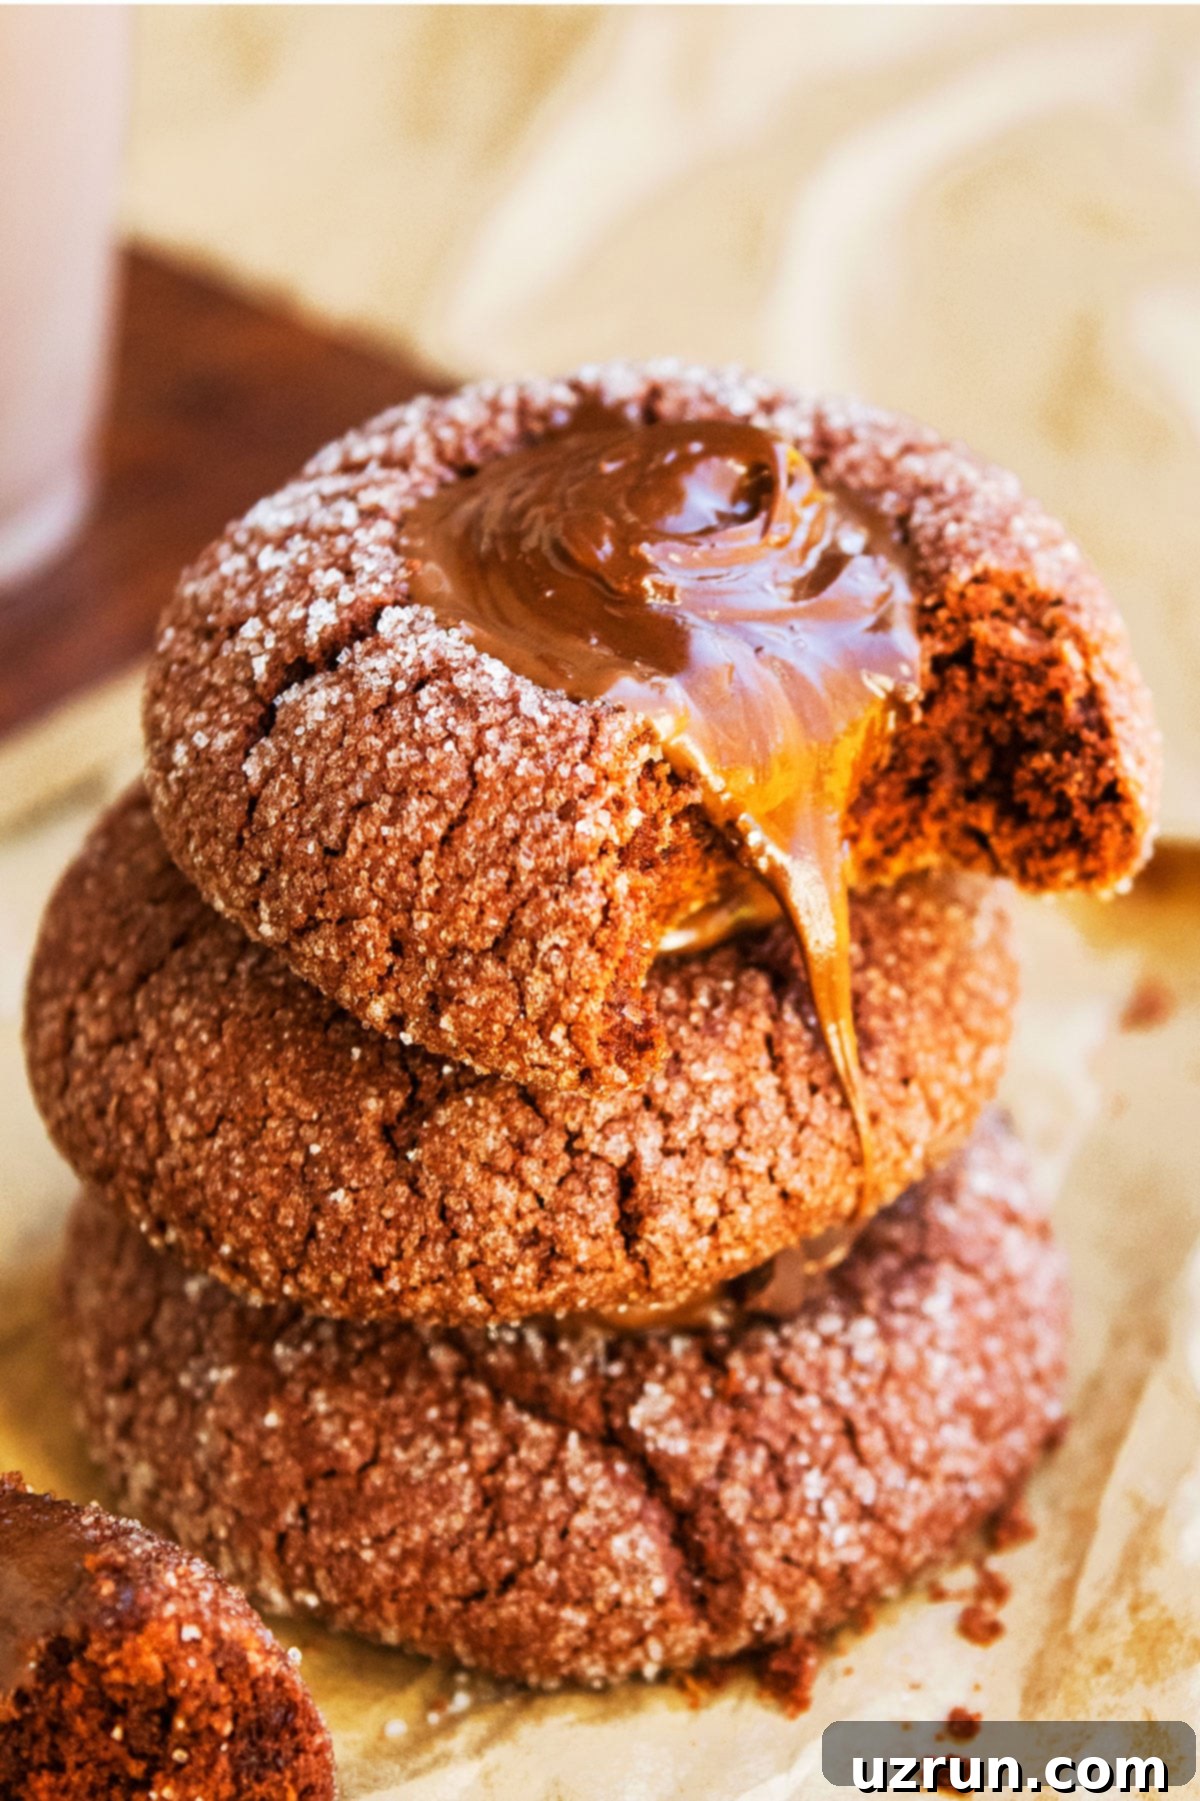
These truly are cookies loaded with irresistible chocolate! The deep, rich flavor starts with cocoa powder generously incorporated into the cookie dough itself. But the chocolate adventure doesn’t stop there. Once baked to perfection, each thumbprint is filled with a luxurious, velvety chocolate ganache, creating a double-chocolate experience that’s absolutely divine. For those who adore the classic combination of chocolate and peanut butter, these cookies offer a delightful twist, easily adaptable to your cravings. I personally find that rolling the cookie dough in granulated sugar before baking adds a fantastic texture, contributing to that desired crispy outside while maintaining a soft and chewy interior. This simple step truly elevates them to the best chocolate thumbprint cookies you’ll ever make.
This classic chocolate thumbprint cookie recipe is a must-have in every baker’s collection. It’s a favorite in my home, especially during the joyous Christmas holiday season, where they make perfect treats for parties, potlucks, and as thoughtful homemade gifts for family and friends. Imagine the smiles when someone receives a box of these delicious, handcrafted cookies! If you’re looking for more edible gift ideas, be sure to check out my Easy Homemade Christmas Gift Ideas (food). Beyond their festive appeal, these cookies are renowned for being quick and incredibly easy to prepare, with the added benefit of no refrigeration required for the dough. They stand proudly alongside other beloved recipes like my Peanut Butter and Jelly Thumbprint Cookies and these Easy Peanut Butter Blossoms, offering a rich chocolate alternative that’s just as satisfying.
Key Ingredients for Perfect Chocolate Thumbprint Cookies
Creating truly exceptional chocolate thumbprint cookies begins with understanding the role each ingredient plays. Here’s a breakdown of the essential components that contribute to their delightful texture and rich flavor:
- All-Purpose Flour: The foundational ingredient that provides structure to our cookies. Using all-purpose flour ensures a tender crumb that holds its shape beautifully.
- Cocoa Powder: This is where the deep chocolate flavor in the cookie dough comes from. Opt for a high-quality unsweetened cocoa powder for the best, most intense chocolate taste. The better the cocoa, the more decadent your dessert will be.
- Granulated Sugar: Essential for both sweetening the cookie dough and for rolling the dough balls. Rolling in sugar contributes to that delightful crispy exterior and a subtly sparkling finish.
- Unsalted Butter: The fat component that adds richness, flavor, and tenderness to the cookies. Always use unsalted butter to control the overall saltiness of the recipe. Ensure it’s at room temperature for optimal creaming with sugar.
- Baking Powder and Baking Soda: These are our leavening agents. They work in tandem to give the cookies their perfect lift and slightly chewy texture. Without them, your cookies would be flat and dense.
- Salt: A crucial flavor enhancer that balances the sweetness of the sugar and deepens the chocolate notes. Don’t skip it, as it prevents the cookies from tasting bland or overly sweet.
- Vanilla Extract: A splash of vanilla extract adds a warm, aromatic depth that complements and enhances the chocolate flavor. Use pure vanilla for the best results.
- Eggs: Large eggs, at room temperature, act as a binder, providing structure and moisture to the dough. Room temperature eggs emulsify better with other ingredients, leading to a smoother, more uniform dough.
- Chocolate Ganache Filling: The crowning glory of these cookies! This rich, creamy filling takes classic thumbprint cookies to an entirely new level of indulgence. It’s surprisingly easy to make and provides a luxurious counterpoint to the cookie.
- Decoration (Semisweet Chocolate): Roughly chopped semisweet chocolate pieces are perfect for garnishing the ganache-filled centers, adding extra texture and a beautiful presentation.
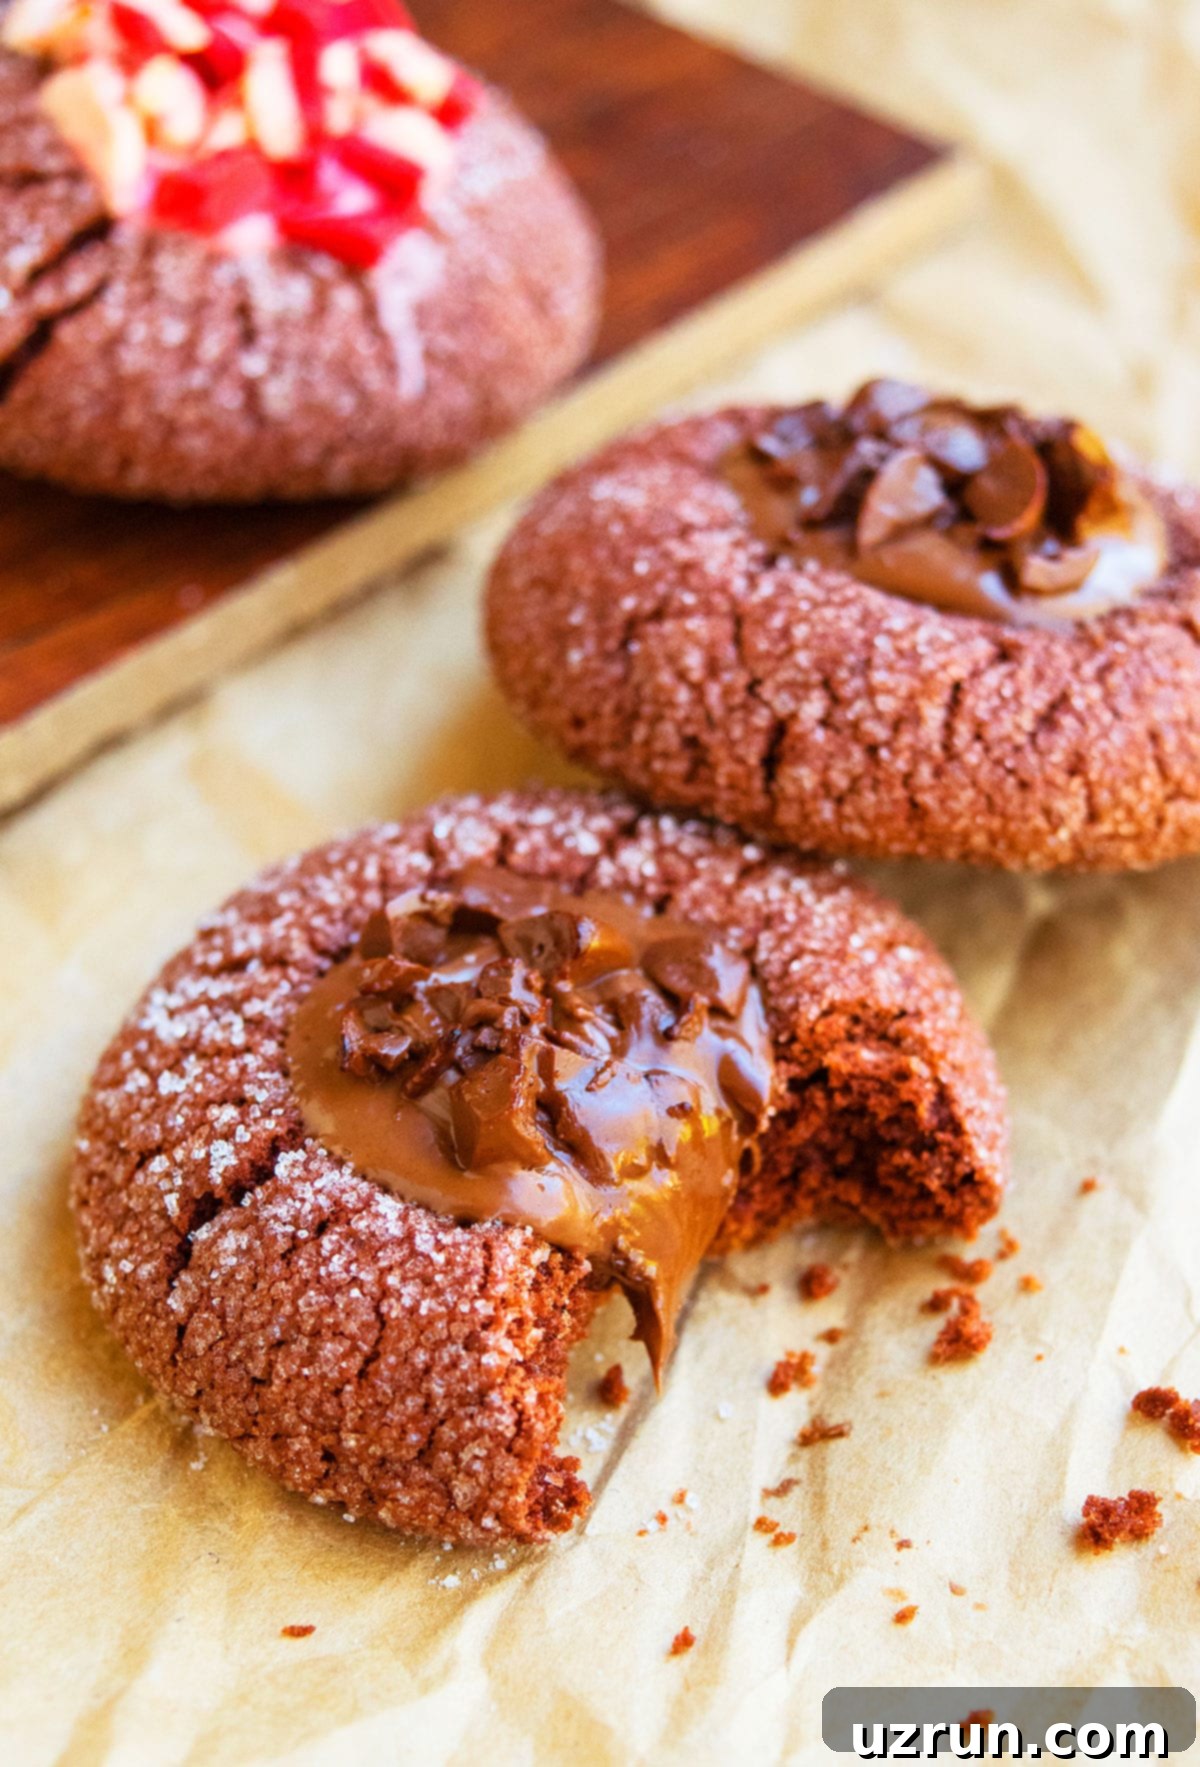
Creative Variations for Your Chocolate Thumbprint Cookies
While these chocolate thumbprint cookies are absolutely delicious as is, they are also incredibly versatile, offering endless possibilities for customization. Get creative and tailor them to different seasons, occasions, or simply your personal preferences:
- Sugar Coatings: Instead of granulated sugar, try rolling the cookie dough balls in powdered sugar before baking. This creates a beautiful, delicate crackly appearance, adding visual appeal. For holiday parties or themed events, swap it out for vibrant green and red sanding sugar or a mix of colorful sprinkles to make them truly festive.
- Crushed Peppermint Bliss: Embrace the holiday spirit by incorporating crushed peppermint. During Christmas, melt peppermint-flavored chocolate for the filling and adorn the tops with festive peppermint chips. The combination of rich chocolate and cool, minty freshness is simply delightful and visually stunning.
- Salted Caramel Indulgence: Transform these into a caramel lover’s dream! You can either gently press a soft caramel candy into the thumbprint before baking (it will melt into a gooey center) or drizzle a generous amount of my Homemade Caramel Sauce over the baked and cooled cookies, finishing with a sprinkle of flaky sea salt for that irresistible sweet-and-salty balance.
- Hershey’s Kiss Surprise: For an instant classic, place a Hershey’s Kiss into the indentation immediately after the cookies come out of the oven. The residual heat will slightly melt the chocolate, creating a soft, fudgy center and a charming appearance. With so many Hershey’s Kiss flavors available now (milk chocolate, dark, peppermint, caramel), the possibilities are endless!
- Nutella Dream: Swap the ganache for a creamy hazelnut chocolate spread like Nutella. Fill the thumbprints generously with Nutella after the cookies have cooled. For an even more intense hazelnut flavor, you can also drizzle my super easy, two-ingredient Nutella Syrup over the top.
- Chopped Candy Bar Fillings: Get creative with your favorite candy bars! Instead of plain semisweet chocolate pieces for decoration, chop up Snickers, Reese’s Peanut Butter Cups, Butterfingers, or M&M’s and sprinkle them over the ganache for a fun and textural addition.
- Diverse Chocolate Chips & Toppings: Don’t limit yourself to semisweet chocolate chips. Experiment with dark chocolate chips for a more intense flavor, white chocolate chips for a sweeter contrast, milk chocolate chips for classic appeal, or even toffee bits or peanut butter chips for unique flavor combinations. You can also melt these chips and drizzle them over the cookies for a simple yet elegant finish.
- Salty Pretzel Crunch: For a fantastic sweet and salty dynamic, press crushed pretzels into the ganache filling. This adds a wonderful textural contrast and a delightful savory note that balances the sweetness of the chocolate.
- Nutty Additions: Enhance the flavor and texture by incorporating nuts. Finely chop peanuts, cashews, almonds, pecans, or walnuts and either mix them into the cookie dough (for texture throughout) or sprinkle them over the ganache filling for a nutty crunch.
- Colorful Sprinkles: Sprinkles aren’t just for cupcakes! Pour colorful sprinkles into the divot of the ganache-filled cookies. This is a fantastic way to customize them for birthdays, holidays (think red and green for Christmas, pastels for Easter), or any themed event, adding a playful touch.
- Dried Fruit Options: For a slightly healthier and less intensely sweet option, consider dried cranberries or raisins. These can be mixed into the dough or carefully placed into the thumbprint before baking, offering a chewy, fruity burst.
- Fresh Berry Brightness: Introduce a burst of fresh flavor with berries. Halved maraschino cherries, fresh raspberries, or finely diced strawberries can be nestled into the ganache, adding color and a juicy, tangy counterpoint.
- Classic Jams and Preserves: If you love traditional thumbprint cookies, fill the indentations with your favorite fruit jams or preserves. This will make them more akin to my classic Jam Thumbprint Cookies. For an extra homemade touch, use my recipe for Easy Homemade Strawberry Jam.
- Peanut Butter Perfection: Chocolate and peanut butter are an iconic duo! Fill the thumbprints with a dollop of creamy or crunchy peanut butter for an irresistible flavor combination that’s always a crowd-pleaser.
- Frosting Fun: Explore different frosting fillings for a unique twist. Instead of ganache, try a dollop of rich Chocolate Ganache Frosting, sweet Caramel Frosting, or even a refreshing Mint Frosting to create a variety of flavors and textures within your cookies.
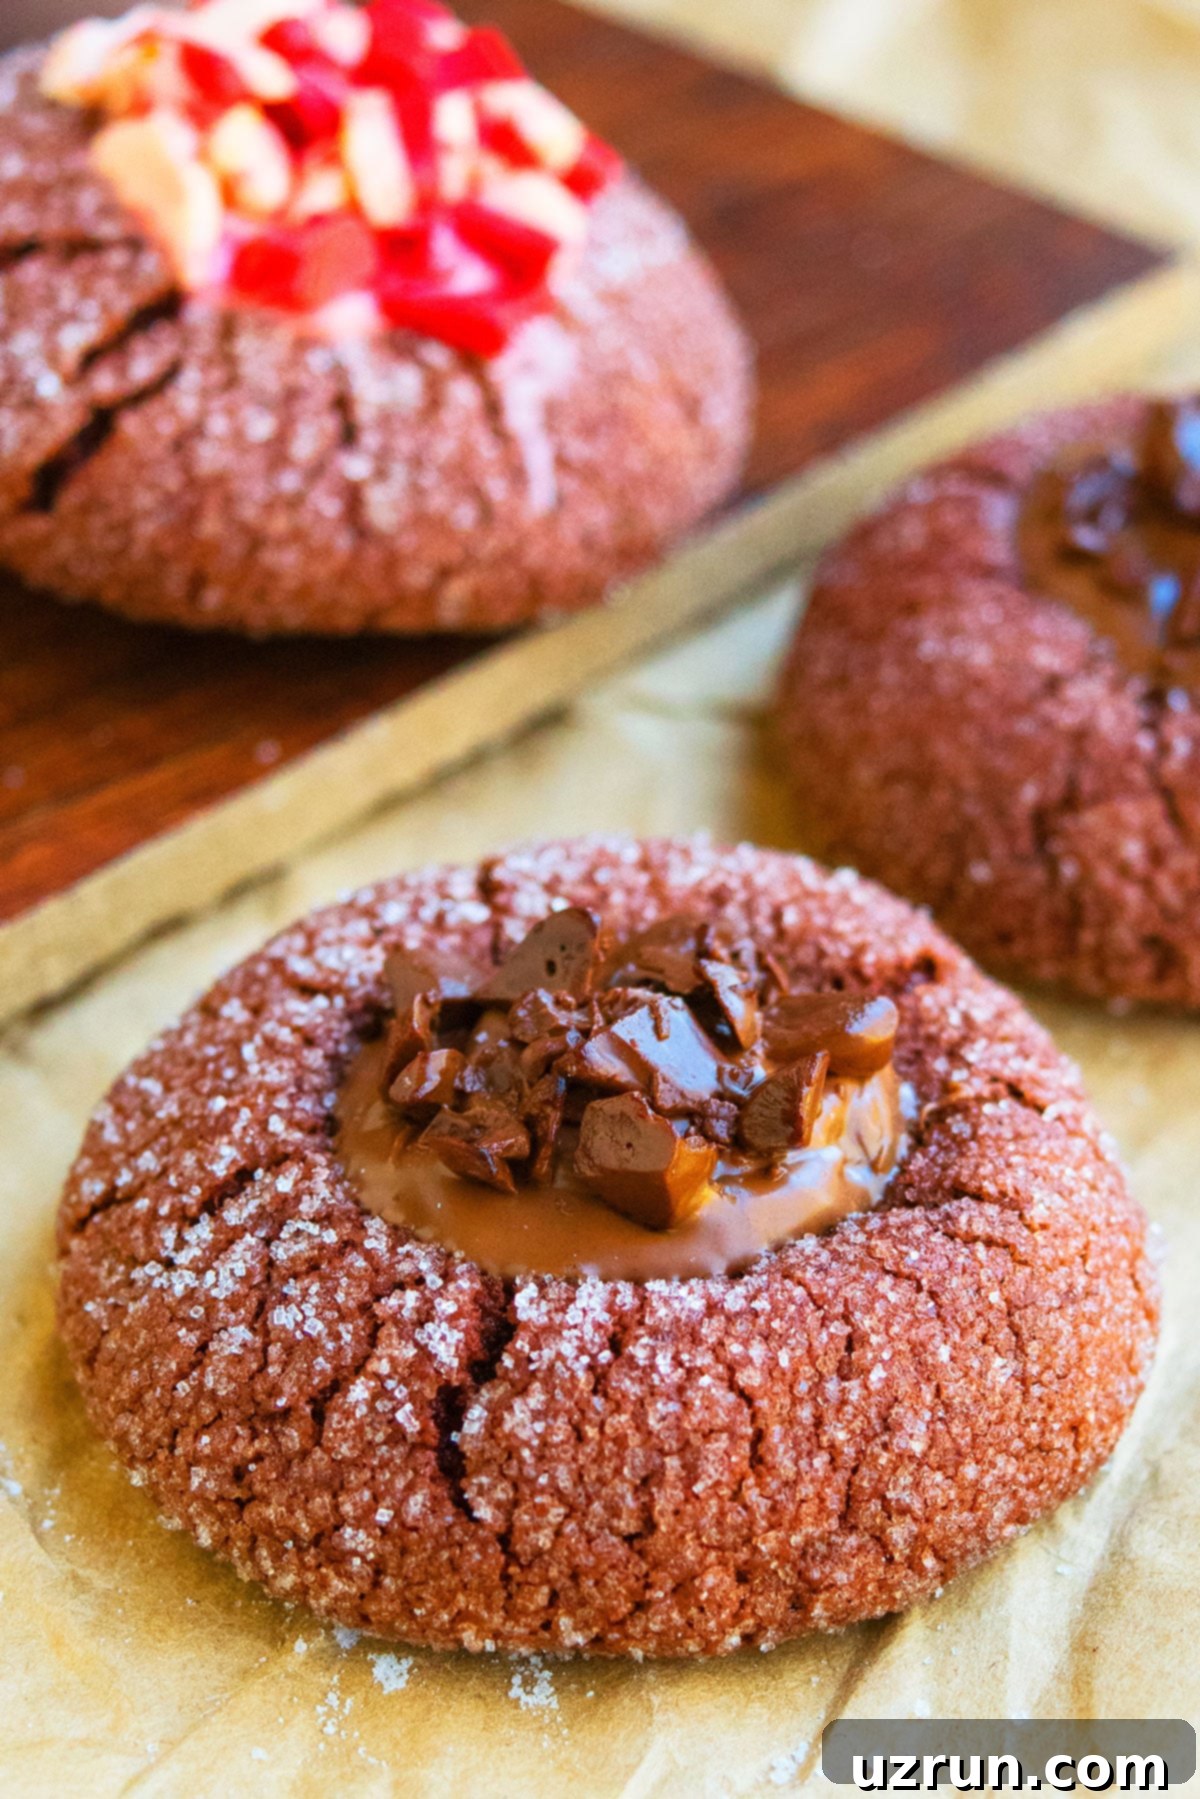
How to Make Delicious Chocolate Thumbprint Cookies
Creating these delightful chocolate thumbprint cookies is a straightforward process that yields impressive results. Follow these simple steps for perfect homemade treats:
- Cream Wet Ingredients: In a large mixing bowl, begin by creaming together the softened unsalted butter and granulated sugar until the mixture becomes light, fluffy, and pale in color. This step incorporates air, which contributes to the cookies’ tender texture. Next, beat in the room temperature eggs one at a time, followed by the vanilla extract, mixing until just combined and smooth.
- Whisk Dry Ingredients: In a separate, medium-sized bowl, whisk together the all-purpose flour, cocoa powder, baking powder, and baking soda. This ensures all the leavening agents and flavorings are evenly distributed throughout the dry mixture, preventing pockets of unmixed ingredients in your final dough.
- Combine Wet and Dry: Gradually add the dry ingredient mixture to the wet mixture, mixing on low speed until just combined. Be careful not to over-mix the dough, as this can develop the gluten in the flour too much, resulting in tough, dry cookies. Stop mixing as soon as no streaks of flour remain.
- Form and Roll Dough Balls: Using a small cookie scoop or your hands, scoop out portions of the dough and roll them into uniform, small balls. Then, roll each dough ball in a bowl of additional granulated sugar, ensuring a thorough coating. This sugar coating will create that signature crispy exterior.
- Prepare and Indent Cookies: Place the sugared cookie dough balls onto a prepared baking sheet lined with parchment paper, leaving enough space between them for slight spreading. Using your thumb or the back of a small measuring spoon, gently press into the center of each dough ball to create an indentation. Don’t press too deep, just enough to form a well for the filling.
- Bake to Perfection: Bake the cookies in a preheated oven at 350°F (175°C) for approximately 12-15 minutes, or until the edges are lightly golden and the centers are set. Avoid over-baking to keep the cookies soft and chewy inside.
- Deepen Indents & Cool: As soon as the cookies come out of the oven, use the back of a wooden spoon or a round measuring spoon to gently press and deepen the indentations again. This is crucial because the cookies tend to puff up slightly during baking, diminishing the wells. Do this quickly while the cookies are still warm and pliable. Allow the cookies to cool completely on the baking sheet before transferring them to a wire rack.
- Fill and Decorate: Once the cookies are fully cooled, prepare your rich chocolate ganache filling (instructions below or in the full recipe card). Carefully spoon or pipe the thickened ganache into the center of each thumbprint cookie. For an elegant finish, sprinkle some roughly chopped semisweet chocolate over the ganache. Now, your decadent chocolate thumbprint cookies are ready to be enjoyed!
Expert Tips and Techniques for Flawless Chocolate Thumbprint Cookies
Achieving bakery-quality chocolate thumbprint cookies is simple with a few key techniques. These tips will help you bake perfect, delicious treats every time:
- Use Unsalted Butter: Always opt for unsalted butter in baking recipes. This allows you to control the exact amount of salt in your cookies, preventing them from becoming overly salty and ensuring a balanced flavor profile. If you only have salted butter, reduce the added salt in the recipe by about ¼ teaspoon.
- Room Temperature Ingredients are Key: For a smooth, well-emulsified batter, ensure all cold ingredients like butter and eggs are at room temperature. Room temperature butter creams with sugar more easily, trapping air for a lighter texture, and eggs incorporate more uniformly, preventing curdling.
- Don’t Skip the Leavening Agents: Both baking powder and baking soda are crucial for the proper rise and texture of these cookies. Baking soda reacts with the acidic cocoa powder to tenderize the cookie, while baking powder provides consistent lift. Using both ensures the perfect crispy edge and soft, chewy center.
- Prevent Over-Baking: Over-baking is the quickest way to dry out cookies and make them tough. Keep a close eye on your oven; cookies are done when the edges are set and lightly golden, and the centers still look slightly soft. They will continue to set as they cool.
- Deepen Indentations Immediately: The indentations you create before baking will naturally puff up and become shallower in the oven. To ensure ample space for your delicious filling, gently press the back of a wooden spoon or a round measuring spoon into the center of each cookie immediately after they come out of the oven, while they are still warm and pliable. If you wait until they cool, they will harden and might crack.
- Save Time with Prep: To streamline your baking process, prepare the chocolate ganache filling while the cookies are baking or cooling. This allows the ganache to cool and thicken to the ideal consistency for filling, so everything is ready at the same time.
- Avoid Over-Mixing the Dough: Mix the wet and dry ingredients only until they are just combined. Over-mixing develops the gluten in the flour, which can lead to tough, dense, and less tender cookies. Stop as soon as no dry streaks of flour are visible.
- Calibrate Your Oven: Ovens can vary widely in temperature. Consider using an oven thermometer to ensure your oven is truly heating to 350°F (175°C). This precision can make a big difference in baking consistency and preventing over- or under-baked cookies.
- Parchment Paper is Your Friend: Always line your baking sheets with parchment paper or silicone baking mats. This prevents sticking, ensures even baking, and makes cleanup a breeze.
- Cool Completely Before Filling: Resist the urge to fill warm cookies. The heat will cause your ganache (or any other filling) to melt and run, creating a messy result. Allow the cookies to cool completely on a wire rack before adding any filling.
Chocolate Thumbprint Cookies: Recipe FAQs
If your chocolate cookie dough feels too dry and crumbly, making it hard to form into balls, try adding a very small amount of water or milk, about ½ to 1 teaspoon at a time. Mix it in until the dough just comes together and is pliable enough to roll without cracking excessively. Be careful not to add too much liquid, which could make the dough too sticky.
Sticky dough can be a challenge to work with, especially when trying to roll it into neat balls. The easiest solution is to simply chill the dough in the refrigerator. Wrap it tightly in plastic wrap and let it chill for about 30-40 minutes. This will firm up the butter and make the dough much easier to handle and shape into perfect spheres.
No, you don’t *have* to, but I highly recommend it! As cookies bake, they tend to puff up, and the initial thumbprints can become quite shallow. By gently pressing the back of a wooden spoon or a rounded measuring spoon into the center of the warm cookies immediately after removing them from the oven, you create a deeper, more defined well. This not only allows you to fill them with a more generous amount of delicious ganache or other goodies, but it also makes them look much more appetizing and professional. It’s a small step that makes a big difference in both taste and presentation!
Absolutely! While ganache is fantastic, these cookies are incredibly versatile. You can fill them with a variety of options such as creamy peanut butter, Nutella, fruit jams or preserves, melted caramel, or even a small Hershey’s Kiss pressed into the warm indent. Check out the “Variations” section above for even more creative filling ideas to suit any taste or occasion.
Cookies can spread too much for several reasons. The butter might have been too soft or melted, or the dough might have been too warm. Ensure your butter is softened but not melted. If the dough feels overly soft or sticky after mixing, chilling it for 30 minutes before shaping can help. Also, check that your baking soda and baking powder are fresh and active, and avoid over-greasing your baking sheets if not using parchment paper.
Storage Solutions for Your Chocolate Thumbprint Cookies
Proper storage is key to keeping your chocolate thumbprint cookies fresh and delicious. Here’s how to store them for maximum enjoyment:
- Make Ahead: These cookies are excellent for preparing in advance. You can bake the cookies, allow them to cool completely, and then store them in an airtight container at room temperature for up to 3 days before filling. If you plan to fill them, the filled cookies can be stored in an airtight container in the fridge for up to 3 days.
- Room Temperature: Once filled, I generally don’t recommend leaving these cookies out at room temperature for more than 5-6 hours, especially due to the creamy ganache filling. If your kitchen is particularly warm, it’s best to refrigerate them sooner.
- Refrigerate: For optimal freshness and to keep the ganache firm, store the filled chocolate thumbprint cookies in a sealed, airtight container in the refrigerator for up to 3 days. If stacking, place parchment paper between layers to prevent sticking and mess.
- Freeze (Dough & Baked Cookies):
- Freezing Dough: You can absolutely freeze the raw cookie dough! Form the dough into balls, create the indentations, and then place them on a parchment-lined tray to freeze until solid. Once solid, transfer the dough balls to a freezer-safe airtight container or bag for up to 2-3 months. When ready to bake, thaw the dough in the refrigerator overnight, then roll in sugar, re-indent if needed, and bake as per instructions.
- Freezing Baked Cookies (Unfilled): Bake the cookies as directed, make the indentations, and let them cool completely. Freeze the unfitted cookies in a single layer on a baking sheet until solid, then transfer to a freezer-safe container or bag. They can be frozen for up to 2 months. Thaw at room temperature and then fill with fresh ganache.
- Freezing Baked Cookies (Filled): I generally don’t recommend freezing these cookies with a chocolate ganache filling, as ganache can sometimes change texture (becoming grainy or separating) upon thawing. However, if your filling is a jam or preserve, you can freeze individual filled cookies by wrapping each one tightly in plastic wrap, then placing them in a freezer-safe container for up to 1 month. Thaw unwrapped at room temperature.
Discover More Easy Chocolate Cookie Recipes
If you’ve enjoyed these chocolate thumbprint cookies, you’re in for a treat! Explore my other fantastic chocolate cookie recipes that are just as simple and satisfying:
- Classic Chocolate Sugar Cookies
- Spicy Mexican Hot Chocolate Cookies
- Decadent Triple Chocolate Truffle Cookies
- Effortless Chocolate Cake Mix Cookies
- Irresistible Chocolate Peanut Butter Cookies
Recipe Card
Easy Chocolate Thumbprint Cookies (Ganache)
Abeer Rizvi
Pin Recipe
Want to Save This Recipe?
Enter your email & I’ll send it to your inbox. Plus, get great new recipes from me every week!
By submitting this form, you consent to receive emails from CakeWhiz
Ingredients
Cookie dough
- 3 cups All-purpose flour
- 1 cup Cocoa powder
- 2 cups Granulated sugar
- 1 cup Butter Unsalted, Room temperature
- ½ teaspoon Baking powder
- ½ teaspoon Baking soda
- ½ teaspoon Salt
- 2 teaspoon Vanilla extract
- 2 Eggs Large, Room temperature
- 1 cup Additional granulated sugar For rolling cookie dough balls
Ganache filling
- 1 cup Semisweet chocolate chips
- 1 cup Heavy cream
Decoration
- ½ cup Roughly chopped semisweet chocolate
Instructions
-
In a mixing bowl, cream softened butter and granulated sugar together until the mixture is light, fluffy, and pale. This usually takes about 2-3 minutes with an electric mixer.
-
Add the room temperature eggs one at a time, mixing well after each addition, then stir in the vanilla extract until fully incorporated. Scrape down the sides of the bowl as needed to ensure everything is evenly mixed.
-
In a separate, medium-sized bowl, whisk together the flour, cocoa powder, baking powder, and baking soda. Whisking ensures these dry ingredients are thoroughly combined and evenly distributed.
-
Gradually add the whisked dry ingredient mixture to the wet mixture in the mixing bowl. Mix on low speed until just combined, being careful not to over-mix. Stop as soon as no dry streaks of flour are visible. Over-mixing can lead to tough cookies.
-
Scoop out small, uniform portions of the dough (about 1 tablespoon each) and roll them into neat little balls between your palms. Place the granulated sugar in a shallow bowl and roll each dough ball in the sugar until completely coated. This gives the cookies a lovely sparkle and a crispy edge.
-
Arrange the sugared cookie dough balls onto a cookie tray lined with parchment paper, leaving about 2 inches between each cookie. Use your thumb or the back of a small measuring spoon to press a gentle indentation into the center of each cookie.
-
Bake in a preheated oven at 350 degrees F (175°C) for approximately 12-15 minutes, or until the edges are lightly set and the centers look just firm. Avoid over-baking.
-
Note: When you remove the cookies from the oven, you will notice the indentations have likely puffed up and are not as deep anymore. Immediately use the back of a wooden spoon or the round bottom of a measuring spoon to gently press into the center again, deepening the wells. You must do this quickly before the cookies have a chance to cool down and set, otherwise, they may crack.
-
While the cookies are cooling completely on a wire rack, prepare the chocolate ganache. In a nonstick saucepan, gently heat the heavy cream over medium heat until it just begins to simmer. Remove from heat and pour it over the semisweet chocolate chips in a heatproof bowl. Let sit for 5 minutes, then whisk until smooth and glossy. Allow the ganache to cool down and thicken slightly at room temperature before filling.
-
Once the cookies are completely cool and the ganache has thickened to a spoonable consistency, carefully fill each thumbprint cookie with a generous dollop of ganache. For a final touch, decorate with roughly chopped chocolate pieces for added texture and visual appeal. Enjoy these delightful, homemade chocolate thumbprint cookies!
Video
Notes
- For optimal blending and mixing, ensure all ingredients, especially butter and eggs, are at room temperature. This leads to a smoother, more uniform cookie dough.
- To prevent dry, crumbly cookies, avoid over-baking. Remove them from the oven when the edges are set and the centers still look slightly soft. They will continue to firm up as they cool.
- Beyond ganache, these cookies are incredibly versatile! Explore other delicious filling options such as rich peanut butter, creamy Nutella, Biscoff spread, homemade caramel sauce, classic Hershey’s kisses, or various fruit jams and preserves.
- If your cookie dough is too crumbly and difficult to bring together, add a tiny bit of water (½ – 1 teaspoon at a time) until it becomes pliable. Conversely, if the dough is too sticky to roll into neat balls, chill it in the refrigerator for 30-40 minutes to firm it up.
- Customize the coating! Cookies can be rolled in powdered sugar for a lovely crackly finish, or in vibrant green and red sanding sugar or sprinkles for a festive holiday appearance.
- To create delightful Peppermint Chocolate Thumbprint Cookies, melt approximately 3 peppermint chocolate bars and spoon a small amount into the center of each cooled cookie. Top with additional crushed peppermint pieces or peppermint chocolate bits for a refreshing minty twist.
- Refer to the “Tips and Techniques” and “Variations” sections above for even more detailed advice and creative ideas to enhance your baking.
- Store any leftover chocolate thumbprint cookies in a sealed, airtight container in the refrigerator for up to 3 days to maintain their freshness and the quality of the ganache filling.
Nutrition
An automated tool is used to calculate the nutritional information. As such, I cannot guarantee the accuracy of the nutritional information provided for any recipe on this site.
