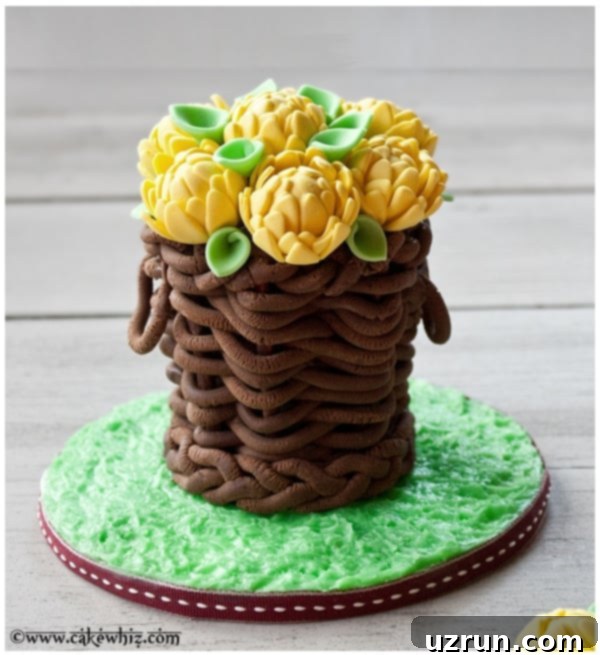
Master the Art of Fondant Basket Cakes: A Step-by-Step Guide to Edible Basketweave Creations
Unleash your inner cake artist and learn how to create a breathtaking, completely edible fondant basket cake. This stunning dessert, filled with layers of delicious cake and luscious frosting, and adorned with delicate fondant flowers, is far simpler to achieve than you might imagine. Whether you’re looking for an impressive centerpiece, a unique cake topper, or simply a delightful treat, this guide will walk you through crafting a beautiful basketweave design without needing any special piping tips or nozzles. Prepare to impress with this charming and delicious creation!
The joy of making edible containers is truly unmatched. Remember the fun of crafting these Cookie Bowls or our popular Brownie Bowls? This elegant fondant basketweave cake offers another fantastic and versatile way to present your desserts. You can scale the design to create adorable mini versions perfect for individual servings or cupcakes, or go grand with a larger basket to hold a full-sized cake, making it an ideal choice for celebrations and special occasions. The basket isn’t just a decoration; it’s an integral, delicious part of the dessert experience!
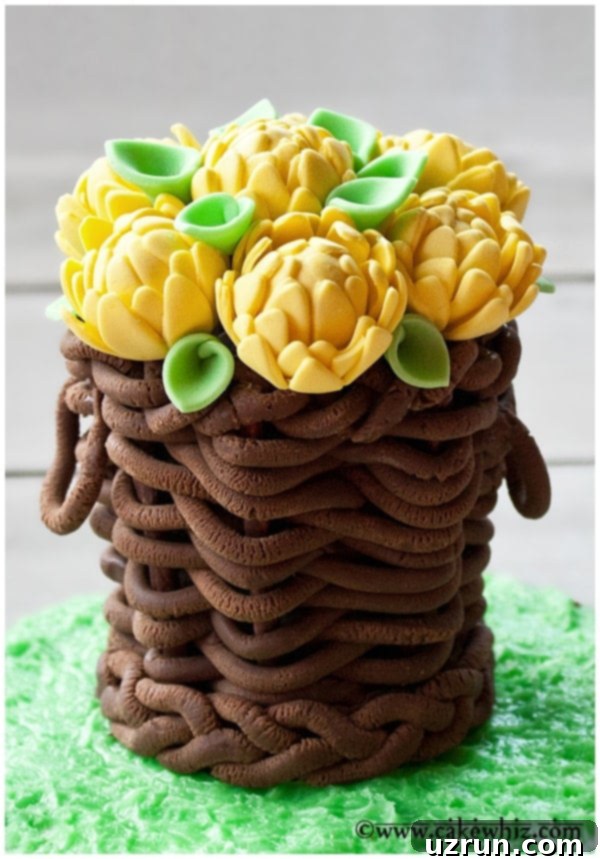
How to Make a Stunning Fondant Basket Cake with Edible Flowers from Scratch
Creating this beautiful fondant basket cake involves a few key steps, from baking your favorite cake to meticulously crafting the edible basket and adding the final decorative touches. Here’s a comprehensive overview of the process:
- Bake Your Chosen Cake: Begin by baking a delicious cake base. For this particular creation, a vibrant pineapple cake was selected, offering a wonderful fruity contrast to the rich frosting. Ensure your cake is baked to perfection, with a tender crumb and a level top.
- Allow Cake to Cool Completely: This step is crucial for the success of your basket cake. After baking, let your cake cool thoroughly to room temperature. Attempting to frost or assemble a warm cake will lead to melted frosting and a unstable structure. Patience here is key!
- Prepare Your Icing: While your cake cools, whip up a batch of your favorite frosting. American buttercream, with its classic smooth texture and sweet flavor, makes an ideal pairing with the pineapple cake, providing a delightful balance. Ensure your frosting has a good, workable consistency.
- Craft the Edible Basket: This is where the magic happens! Using either modeling chocolate or fondant, you’ll meticulously interweave ropes to form the basket structure. Modeling chocolate is often preferred for its ease of handling and realistic texture when extruded, making the basketweave truly come to life.
- Fill the Basket with Layers of Delight: Once your basket is ready, it’s time to fill it. Carefully layer circular cutouts of your cooled cake with generous dollops of the prepared frosting. This creates a delightful surprise inside your edible basket.
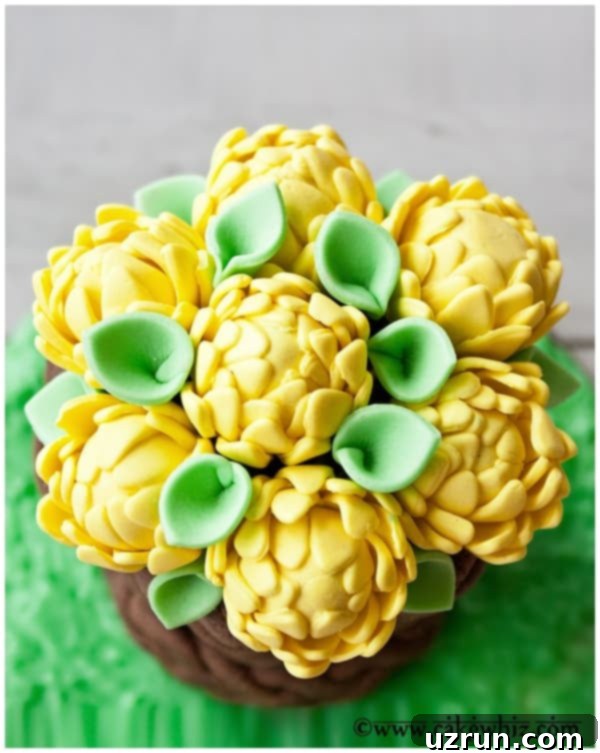
- Add the Final Decorative Toppings: Complete your masterpiece by adorning the top of your cake with beautiful edible decorations. Hand-crafted fondant flowers provide an elegant touch, transforming your basket into a charming floral display. Alternatively, fresh berries can be arranged for a vibrant, natural look, resembling a bountiful fruit basket.
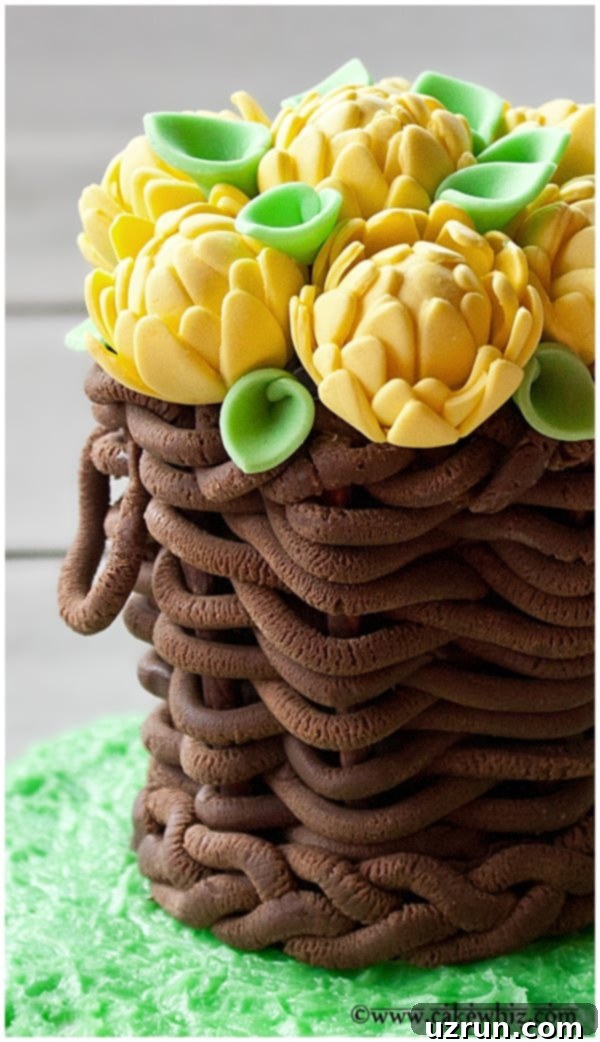
Creative Variations for Your Basket Cake Design
While the classic fondant basket cake is beautiful, there’s ample room for customization to truly make it your own. Explore these exciting variations to personalize your edible basket creation:
Scale Up for a Larger Cake: This tutorial focuses on a charming mini basket cake, but the techniques are easily scalable. You can follow the exact same instructions to construct a larger, impressive 6-inch or 8-inch basket cake. Remember that a larger cake will require more structural support and a bit more modeling chocolate or fondant for the basket weave.
Experiment with Other Cake Flavors: Don’t limit yourself to pineapple! The beauty of this design is its adaptability. Consider using a rich Vegan Chocolate Cake (Eggless Cake) for a dairy-free option, or a decadent Chocolate Marshmallow Cake for an extra indulgence. Light vanilla, lemon, or even a classic red velvet would also be fantastic choices, allowing you to tailor the flavor profile to any preference or occasion.
Try Different Frosting Flavors: Just like with the cake, the frosting offers another layer of flavor creativity. Beyond American buttercream, you could opt for a delicate Easy Maple Frosting for a hint of autumn, or a healthier Sugar Free Frosting. Cream cheese frosting, ganache, or a fruit-flavored buttercream would also complement many cake bases beautifully.
Infuse Flavor into Fondant or Modeling Chocolate: Elevate your basket by flavoring the modeling chocolate or fondant itself. A few drops of food-grade extracts like almond, vanilla bean, coffee, or even orange can add an unexpected depth of flavor that perfectly complements your cake and frosting. Just be mindful not to add too much liquid, which can alter the consistency.
Craft a Square Version of the Basket: While a classic round basket has a timeless appeal, a square or rectangular basket can offer a modern twist. The weaving technique remains the same, simply adapting to the straight edges of your cake base and lollipop sticks. This variation is particularly striking for geometric-themed events or as a unique gift presentation.
Choose a Different Color for Your Basket: The original design uses chocolate or brown modeling chocolate for a rustic look, but your imagination is the limit! Utilize colored Candy Melts or tint your fondant/modeling chocolate with food coloring to create baskets in any hue imaginable. Think a pastel basket for a baby shower, a vibrant red for Valentine’s Day, or a sophisticated black for a formal event. The possibilities are endless!
Enhance the Filling with Additional Layers: Beyond cake and frosting, add an extra layer of surprise and texture to your basket. A thin spread of fruit jam, luscious preserves, tangy fruit curd, or even fresh, finely diced fruits can be tucked between cake layers for an explosion of flavor and moisture.
Decorate with Fresh Berries for a Fruit Basket Aesthetic: If you prefer not to make fondant flowers or are short on time, fresh berries offer a simple yet elegant alternative. Arrange a colorful medley of fresh strawberries, raspberries, blueberries, and cherries on top of your cake. This instantly transforms your creation into a beautiful “fruit basket” cake, bursting with natural sweetness and visual appeal.
Essential Tips and Techniques for a Perfect Fondant Basket Cake
Achieving a flawless and sturdy fondant basket cake requires a few clever tricks and careful execution. Keep these invaluable tips in mind to ensure your edible creation looks professional and holds up beautifully:
Fondant vs. Modeling Chocolate – Choosing Your Medium: Both fondant and modeling chocolate can be used for the basketweave, but they each have distinct characteristics. Modeling chocolate is generally more pliable, less prone to cracking, and holds intricate shapes better, making it ideal for the weaving process. When pushed through an extruder, ropes made with modeling chocolate often display a more realistic texture, enhancing the basket’s appearance. It also has the added advantage of being easily flavored. For this recipe, modeling chocolate was chosen not only for its superior workability but also because its natural brown color eliminated the need for additional coloring.
Homemade vs. Store-Bought Flowers – Your Decorative Choice: The decision to use homemade or store-bought edible flowers depends on your time, skill level, and desired aesthetic. Store-bought options offer convenience and consistency. However, crafting your own flowers allows for endless customization in color, shape, and size, adding a deeply personal touch. If you’re eager to try your hand at edible flower making, consider exploring these fantastic tutorials: Fondant Flowers, Buttercream Flowers (Russian Piping Tips), Flower Cupcakes (Fondant Pansy), Royal Icing Flowers (Sugar Flowers), Fondant Flower Cake, Wafer Paper Flowers, Fondant Daisies, and Easy Fondant Roses (Ribbon Roses). For an even more natural feel, fresh, edible flowers can also be incorporated.
Avoid Using Gum Paste for the Basketweave: While gum paste is excellent for very delicate, structural decorations like intricate flowers that need to dry rock-hard, it is not suitable for the basket itself. Gum paste dries incredibly hard and brittle, which would result in an unpleasant, inedible texture that clashes with the soft cake and frosting. Stick to fondant or modeling chocolate for the basket structure to maintain a pleasant eating experience.
How to Soften Modeling Chocolate (if it becomes stiff): Modeling chocolate can sometimes become firm, especially in cooler environments. To soften it and restore its pliability, simply knead it in your hands for a couple of minutes. The natural warmth from your fingers will quickly make it soft, smooth, and easy to work with again.
The Indispensable Clay Extruder: This tool is not just helpful; it’s practically essential for creating a uniform and professional-looking basketweave. A clay extruder with a small round disk attachment ensures that all your modeling chocolate or fondant ropes are consistently the same thickness. Attempting to roll ropes freehand will inevitably lead to variations in thickness, resulting in a less polished and potentially messy-looking basket.
Never Fill the Basket with Warm Cake: This is a critical warning! Always ensure your cake layers are completely cooled to room temperature before assembling and filling the basket. Introducing warm cake to your modeling chocolate basket will cause the chocolate to soften, melt, and become sticky, compromising the structural integrity of your beautifully woven creation. This could lead to the basket collapsing or losing its shape, ruining your hard work.
Storage and Make-Ahead Guidance for Your Basket Cake
Proper storage is key to keeping your beautiful fondant basket cake fresh and delicious. Here’s how to store it effectively:
Room Temperature Storage: If your basket cake contains no perishable fillings (like fresh cream, custard, or fresh fruit), it can be safely left at room temperature for up to 24 hours. Keep it covered loosely to prevent it from drying out or absorbing ambient odors. This is ideal if you plan to serve it within a day of decorating.
Refrigeration for Leftovers: Any leftover cake, especially if it contains perishable fillings, should be stored in a sealed airtight container in the refrigerator for up to 3 days. Be aware that fondant and modeling chocolate decorations can become slightly sticky or tacky from the moisture and condensation within the fridge. To minimize this, you can place a piece of paper towel in the container to absorb excess moisture.
Freezing for Long-Term Preservation: For longer storage, unfrosted cake layers and prepared frosting can be stored separately in sealed, freezer-safe containers for up to 1 month. When you’re ready to enjoy this delightful dessert, simply transfer them to the fridge to thaw overnight. Once thawed, you can assemble and decorate the basket cake according to the instructions provided, ensuring maximum freshness and taste.
Make-Ahead Instructions for Convenience: This basket cake is an excellent candidate for making ahead. You can bake the cake layers and prepare the frosting up to 1-2 days in advance. The entire cake can be assembled and decorated 1 day prior to serving and stored at room temperature (if no perishables) or in the fridge until your event. This allows for stress-free preparation and more time to enjoy your celebration.
More Decorated Cake Inspiration
If you loved creating this fondant basket cake, you might enjoy exploring these other beautifully decorated cake recipes:
- Fondant Flower Cake
- Butterfly Cake
- Bumblebee Cake (Spring Cake)
- Easy Fondant Bows Cake
- Modern Abstract Cake
- Blue Ombre Cake
Recipe
Fondant Basket Cake (Basketweave)
Abeer Rizvi
Pin Recipe
Want to Save This Recipe?
Enter your email & I’ll send it to your inbox. Plus, get great new recipes from me every week!
By submitting this form, you consent to receive emails from CakeWhiz
Ingredients
- 1 Pineapple cake (or your preferred cake flavor, baked and completely cooled)
- 2 cups American buttercream frosting (or your favorite frosting, prepared)
- 1 cup Melted chocolate (for assembly and adhering details)
- 2 cups Modeling chocolate Or brown fondant (modeling chocolate is recommended for texture and ease of use)
- Shortening (for greasing the glass)
- Wax paper
- Brown lollipop sticks or pretzel rods (for basket framework)
- Corn syrup (optional, for adhering base)
- Fondant flowers and leaves (homemade or store-bought, for decoration)
Instructions
-
First, bake your chosen cake and ensure it cools completely to room temperature. This is essential to prevent melting of chocolate and frosting during assembly.
-
While the cake is baking and cooling, take the opportunity to prepare your buttercream or chosen frosting to the desired consistency.
-
Set both the cooled cake and prepared frosting aside. You’ll need them later for filling the basket, but the next focus is on creating the basket itself.
-
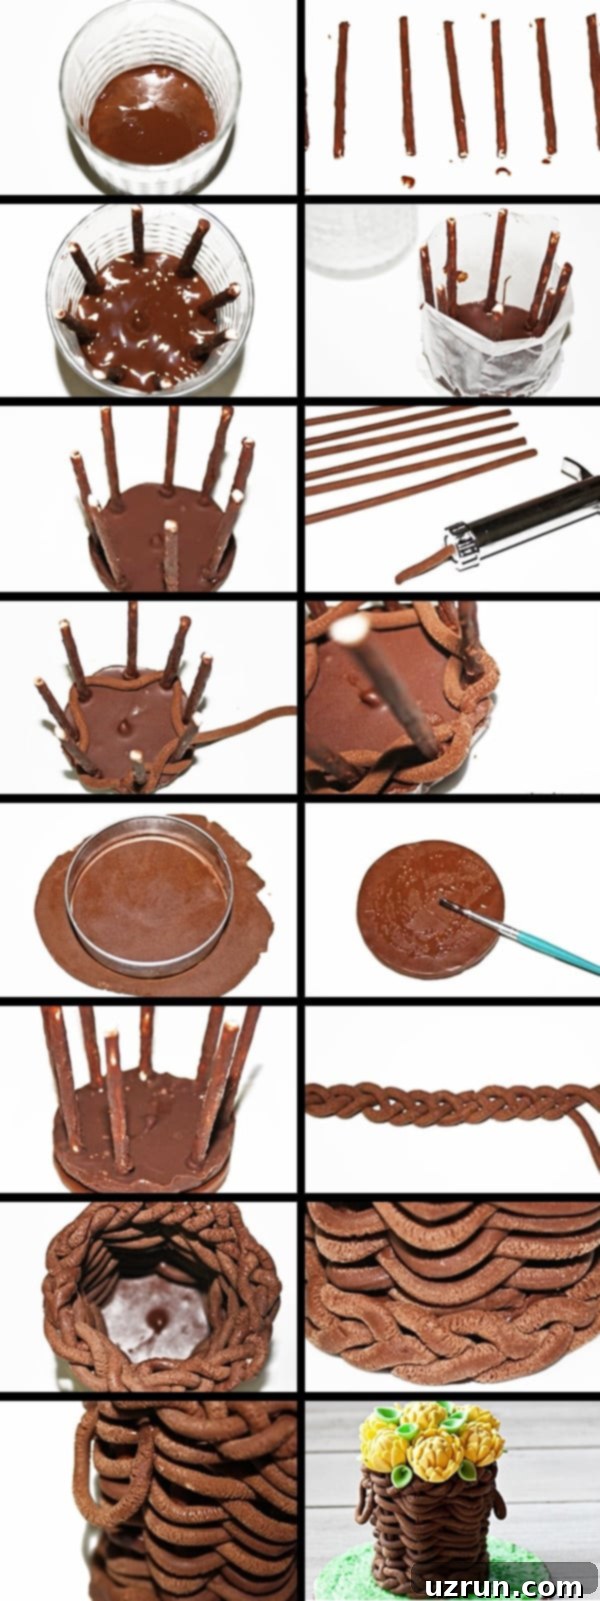
To create the basket mold, lightly rub shortening on the inside of a clean glass cup. Then, cut strips of wax paper and press them firmly against the greased interior of the glass. The shortening will act as a temporary adhesive, helping the wax paper cling smoothly to the glass, making removal easier later.
-
Carefully pour about 1 cup of melted chocolate (e.g., candy melts or tempered chocolate) into the base of the prepared glass. This layer should be approximately 1 inch thick, forming the sturdy base of your basket.
-
Prepare your vertical supports: Cut brown lollipop sticks or pretzel rods to a height that is slightly less than your glass, leaving enough room for the top braided edge. You will need an even number of sticks for a balanced weave.
-
Immediately after pouring the melted chocolate, insert the lollipop sticks into the liquid chocolate base within the glass. Ensure they are evenly spaced around the perimeter. Place the entire glass in the freezer for about 15 minutes to allow the chocolate to harden quickly and securely anchor the sticks.
-
Once the chocolate base is firm, remove the glass from the freezer. Gently twist and pull to remove the entire chocolate structure (base with sticks) from the glass. The wax paper should help in this process.
-
Carefully peel off the wax paper strips from around the chocolate sticks. Position the entire chocolate structure onto a clean sheet of wax paper or parchment paper on your work surface, ensuring it remains stable.
-
Optional Step for Added Security: To create a more robust base for your basket, roll out a piece of modeling chocolate (or fondant) to about a quarter-inch thickness. Use a circle cutter that matches the size of your chocolate base to cut out a corresponding piece. Lightly brush some corn syrup or a tiny amount of melted chocolate onto this modeling chocolate circle, then carefully place your entire lollipop stick structure on top, pressing gently to adhere. Allow this to dry and firm up for 15-20 minutes before proceeding, ensuring a very secure base.
-
Using a clay extruder fitted with a small circular disc, extrude many long, consistent ropes of modeling chocolate or fondant. These will form the woven sides of your basket.
-
Begin the basketweave: Take one of your extruded ropes and carefully weave it around the vertical lollipop sticks. Start by going *in* through one stick (behind it) and then *out* past the next stick (in front of it). Continue this “in and out” pattern around the entire perimeter of the basket, creating your first row of weaving. Once the row is complete, trim any excess rope with a sharp knife and gently pinch the ends together with the warmth of your fingers to seamlessly join them.
-
For the second row, take another rope and repeat the weaving process, but this time, reverse the pattern. If you went “in and out” on the first row, you will now go “out and in.” This creates the classic alternating basketweave pattern. Again, trim excess and use the warmth of your fingers to join the ends.
-
Continue alternating the weaving pattern with additional ropes, building up the sides of your basket. Work your way steadily upwards until you reach near the top of the lollipop sticks, leaving a small space for the top braided edge.
-
To create the decorative border, extrude three long ropes of modeling chocolate or fondant and gently braid them together.
-
Carefully adhere this braided piece around the very top edge of your woven basket using a small amount of melted chocolate or corn syrup as an adhesive. This provides a neat finish and covers the tops of the lollipop sticks.
-
For a complete look, create another braid (as in step 14) and attach it around the very base of the basket, just above the chocolate foundation. Secure it with melted chocolate.
-
To add handles, cut out two elegant loops from rolled modeling chocolate. Attach one loop to each side of the basket using a dab of melted chocolate, ensuring they are positioned symmetrically.
-
Allow the assembled basket to firm up overnight at room temperature. This will ensure all the modeling chocolate has set completely, making the basket sturdy enough to hold the cake.
-
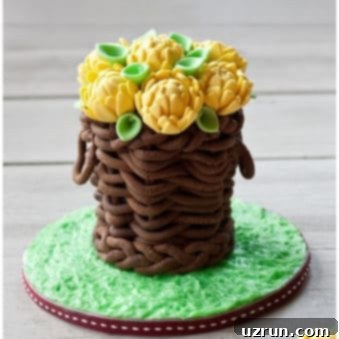
Finally, it’s time to fill and finish! Use a circle cutter to cut out perfectly round cake layers from your cooled cake. Place one cake layer inside the firm basket, then generously spread a layer of frosting on top. Repeat with another cake layer and more frosting, ensuring the top is smoothed. Artfully arrange a few fondant flowers and leaves on the top layer to conceal any imperfections and add a beautiful final flourish. Your stunning edible basket cake is now ready to be admired and enjoyed!
Notes
- For best results and a smooth experience, please thoroughly read all the tips and techniques detailed in the article above before you begin.
- Leftover portions of this delightful basket cake can be stored in a sealed airtight container in the fridge for up to 3 days to maintain freshness.
Nutrition
An automated tool is used to calculate the nutritional information. As such, I cannot guarantee the accuracy of the nutritional information provided for any recipe on this site.
