The Ultimate Guide to Easy No-Bake Oreo Pie Crust: Perfect for Any Dessert
Craving a delightful dessert with minimal effort? Look no further than this homemade, classic, quick, and incredibly easy Oreo pie crust recipe. Requiring just two simple ingredients, this no-bake wonder is a game-changer for anyone who loves delicious pies, cheesecakes, tarts, brownies, and bars without the fuss of traditional pastry. Forget complicated techniques and long baking times – this recipe delivers a perfect, crunchy, chocolatey base every single time.

Just like my No-Bake Graham Cracker Crust and Flaky Butter Pie Crust, this Oreo version offers a delightful texture and holds creamy fillings exceptionally well. Its rich chocolate flavor and satisfying crunch make it an ideal foundation for almost any sweet creation. Whether you’re a seasoned baker or a kitchen novice, you’ll find this recipe incredibly straightforward and rewarding.
Why Choose This No-Bake Oreo Pie Crust?
There are countless reasons why this 2-ingredient Oreo pie crust should be your go-to for dessert bases:
- Simplicity: With only two ingredients and a few steps, it’s practically foolproof.
- No Baking Required: Perfect for hot summer days or when you just don’t want to turn on the oven. A quick chill in the fridge is all it needs.
- Irresistible Flavor: The classic chocolatey goodness of Oreos provides a rich, satisfying base that complements a wide array of fillings.
- Versatile: It’s not just for pies! Use it for cheesecakes, tarts, parfaits, and even as a crumb topping.
- Time-Saving: From start to finish, you can have a ready-to-fill crust in under an hour.
- Kid-Friendly: It’s a fun recipe to make with children, as there’s no sharp knives or hot ovens involved in the no-bake method.
The Magic of Two Simple Ingredients: Oreos and Butter
The beauty of this recipe lies in its minimalist approach. You only need two components, but their interaction creates pure magic:
- Oreo Cookies: The star of the show! You’ll use the entire cookie, including the creamy filling. The filling plays a crucial role in binding the crumbs together, reducing the amount of butter needed and enhancing the flavor and texture. Any variety of Oreo cookies will work, from classic to double-stuffed, allowing for creative flavor variations.
- Melted Butter: This acts as the glue that holds your cookie crumbs together. Unsalted butter is generally recommended as it gives you more control over the overall saltiness of your crust, ensuring the chocolate flavor truly shines. The fat in the butter combines with the cookie crumbs and the Oreo filling to create a firm, yet tender crust that won’t fall apart when sliced.
That’s it! No flour, no sugar (beyond what’s in the Oreos), no eggs, and no complicated techniques. Just pure, unadulterated deliciousness waiting to be transformed into your next dessert masterpiece.
How to Make Easy No-Bake Oreo Pie Crust from Scratch
Creating this perfect base is incredibly simple. Here’s a detailed breakdown of the steps:
- Prepare the Oreo Crumbs: Start by crushing your Oreo cookies. For the finest and most consistent crumbs, a food processor is your best friend. Simply add the entire cookies (no need to remove the cream) to the food processor and pulse until fine, sand-like crumbs form. If you don’t have a food processor, a Ziploc bag and a rolling pin or even a heavy-bottomed pan will do the trick. Just make sure the crumbs are as fine as possible for a smooth crust.
- Combine with Melted Butter: Transfer the finely crushed Oreo crumbs to a mixing bowl. Pour in the melted unsalted butter. Mix thoroughly with a spoon or your hands until all the crumbs are evenly coated. The mixture should resemble wet sand and hold together when pressed. This ensures every crumb binds together properly.
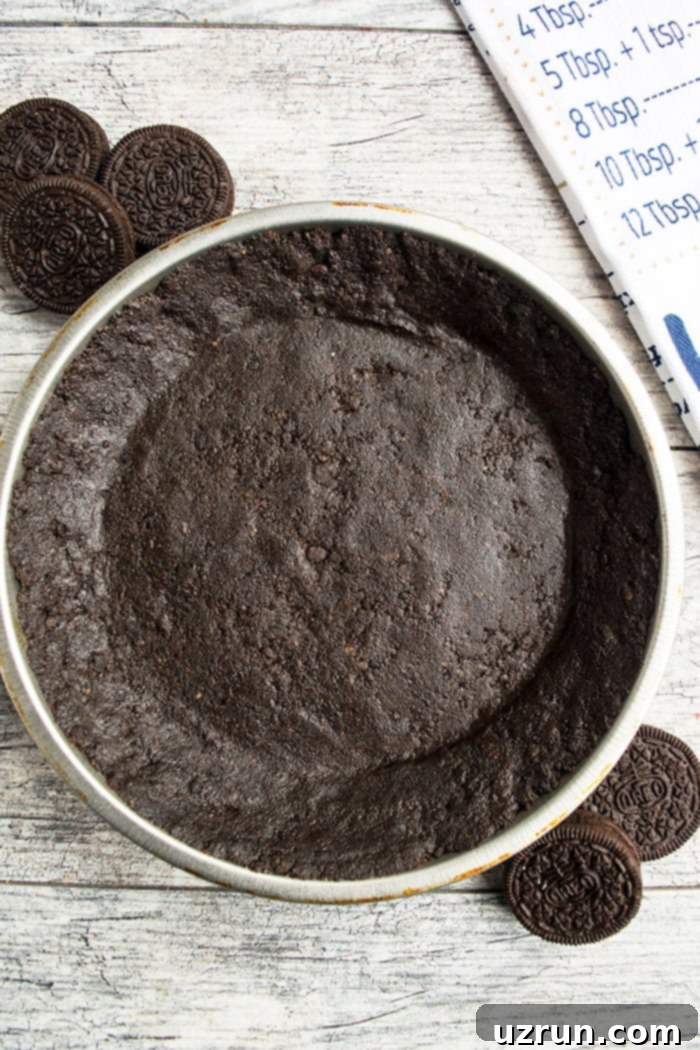
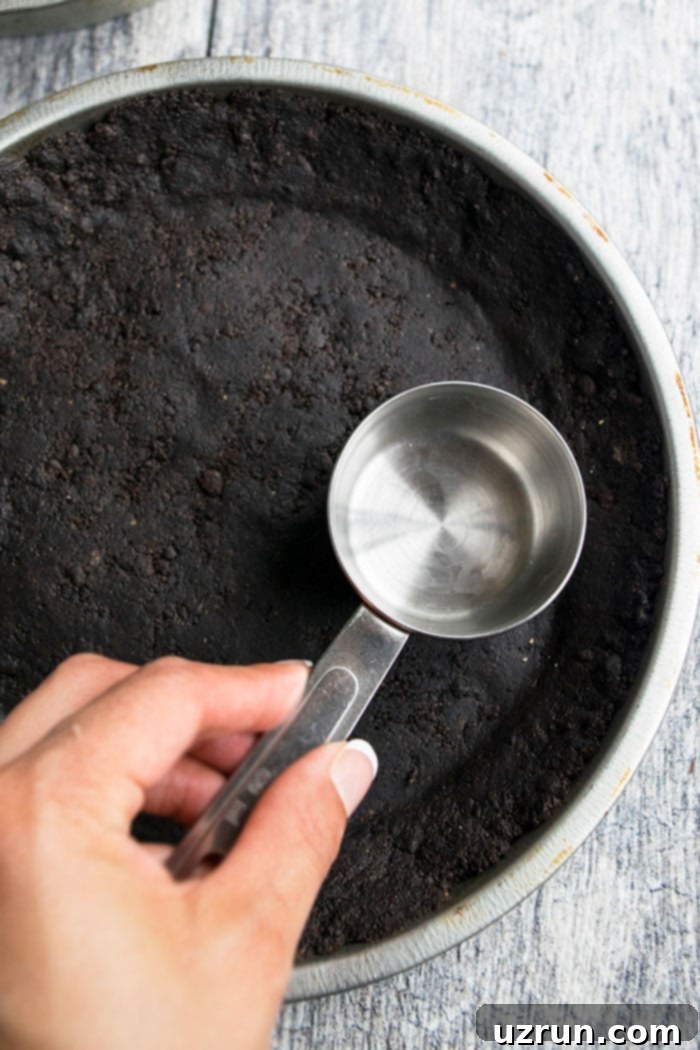
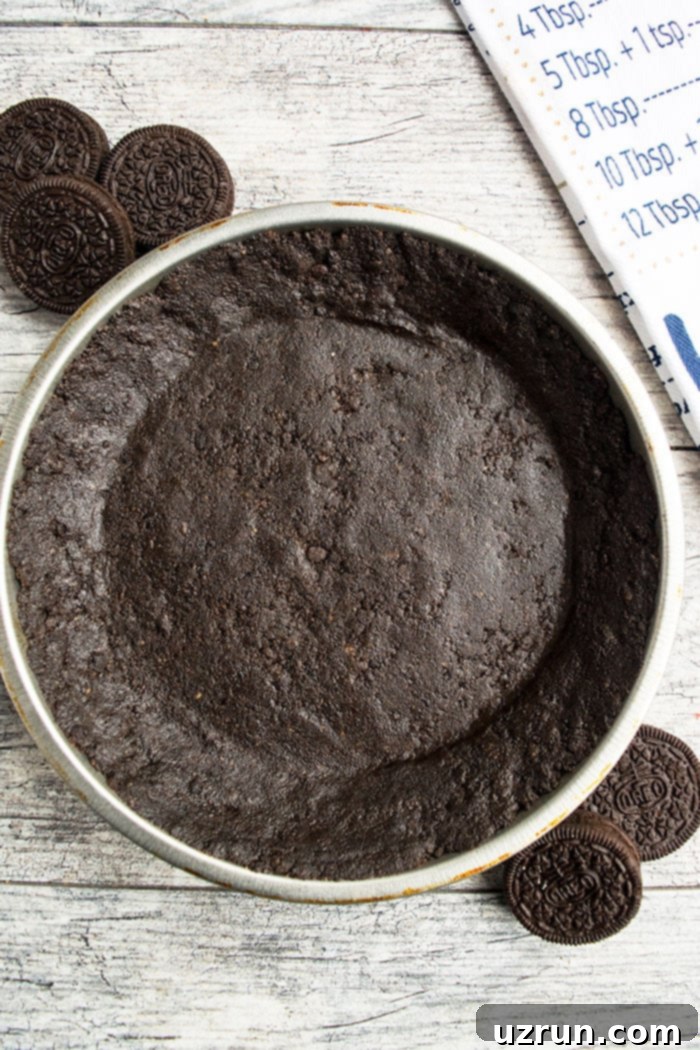
- Press into a Pie Dish: Lightly grease your chosen pie dish (a 9-inch round pie dish is standard). Pour the crumb mixture into the dish. Start by using your fingers to spread the crumbs evenly across the bottom and up the sides of the pie dish. Then, for a truly firm and even crust, use the flat bottom of a drinking glass or a measuring cup to firmly press the crumbs down. Pay extra attention to the edges and corners to ensure a solid structure that won’t crumble when you slice your pie.
- Chill or Bake: The beauty of a no-bake crust is right here!
- Chill: For a true no-bake experience, simply place the pie dish in the refrigerator and chill for at least 30 minutes. This allows the butter to solidify and bind the crumbs, resulting in a firm crust ready for your filling.
- Bake (Optional for extra crunch): If you prefer a slightly crispier and more robust crust, you can bake it. Preheat your oven to 350°F (175°C) and bake the pressed crust for 8-10 minutes. Afterward, let it cool completely on a wire rack before adding any filling. Baking adds an extra layer of crunch and helps prevent sogginess with very wet fillings.
- Add Fillings and Enjoy: Once your crust is chilled or cooled, it’s ready for your favorite sweet fillings!

Making a Decadent Oreo Cream Cheese Filling
While this crust pairs well with almost any filling, a rich Oreo cream cheese filling is a match made in heaven. Here’s how to create a simple yet incredibly satisfying filling that highlights the Oreo flavor:
- Prepare the Base: In a large mixing bowl, combine softened cream cheese with powdered sugar. Beat until light, fluffy, and well combined, ensuring no lumps remain.
- Fold in Whipped Cream and Oreos: Gently fold in freshly whipped cream (or thawed whipped topping) until just combined. Then, add roughly chopped Oreo pieces. The contrast between the creamy filling and crunchy Oreo bits is divine.
- Fill the Crust: Spoon the creamy Oreo filling into your prepared (chilled or baked and cooled) cookie crust. Spread it evenly using a spatula.
- Garnish and Serve: For an extra touch of indulgence, sprinkle chocolate chips and additional roughly chopped Oreos on top. A drizzle of homemade or store-bought chocolate ganache takes it to the next level. Chill the filled pie for at least 2-4 hours, or until firm, before slicing and serving.
Creative Pie Filling Ideas for No-Bake Oreo Crust
The dark chocolate flavor of the Oreo crust provides a fantastic contrast to a myriad of fillings. Here are some popular and delicious ideas:
- Homemade Apple Pie Filling: Imagine warm, spiced apples nestled in a chocolatey crust – a delightful twist on a classic.
- Strawberry Pie Filling: The sweetness and slight tartness of fresh strawberries beautifully cut through the richness of the Oreo.
- Blueberry Pie Filling: Similar to strawberry, blueberries offer a fruity brightness against the chocolate.
- Cherry Pie Filling: A classic combination of cherry and chocolate is always a winner.
- Peach Pie Filling: Sweet, juicy peaches and chocolate create a surprisingly harmonious summer dessert.
- Chocolate Mousse: Double down on the chocolate for an ultimate indulgence.
- Key Lime Pie: The tangy lime filling offers a refreshing contrast to the sweet chocolate crust.
- Peanut Butter Pie: Chocolate and peanut butter are a match made in dessert heaven.
- Banana Cream Pie: Creamy banana pudding and fresh slices of banana will be elevated by the Oreo base.
- No-Bake Cheesecake: Any no-bake cheesecake recipe will find a perfect home in this crust.
Top Tips and Variations for a Flawless Oreo Pie Crust
Achieving a perfect Oreo pie crust is easy, but a few expert tips can elevate your results:
- Choose Unsalted Butter: Always opt for unsalted butter. Oreos already contain salt, and using salted butter can make your crust overly salty, detracting from the chocolate flavor.
- Coconut Oil Alternative: If you’re looking for a dairy-free option or a subtle coconut flavor, melted coconut oil can be a fantastic substitute for butter. Ensure it’s fully melted and warm when mixing.
- Avoid Shortening or Margarine: While tempting, do not substitute butter with shortening or margarine. These alternatives often result in a greasier crust with a less desirable texture and flavor profile.
- Butter Ratio is Key:
- Too Soft/Greasy: If your pie crust feels too soft and greasy, you’ve likely added too much butter. Unfortunately, this can’t easily be fixed once mixed, so try to be precise with your measurements.
- Too Dry/Crumbly: If the mixture is too dry and won’t come together, you haven’t added enough butter. Add a little more, one tablespoon at a time, mixing thoroughly until it reaches the consistency of wet sand.
- Keep the Oreo Filling: Do not remove the white cream filling from the Oreos! This creamy center is essential. Along with the butter, it acts as a binder, helping the crumbs adhere together and contributing to the overall rich flavor and smooth texture of the crust.
- Pack it Down Tightly: This is arguably the most critical step for a sturdy crust. To prevent the pie crust from breaking apart or crumbling when you slice it, you must pack it down very tightly. Start by using your hands and fingers to distribute and press the crumbs firmly into the dish. Then, use the flat bottom of a drinking glass or a sturdy measuring cup to press and smooth everything out evenly, especially along the bottom and up the sides. The firmer you pack, the better your crust will hold.
- Always Chill Before Filling: Whether you bake your crust or not, chilling is non-negotiable. This step makes the crust firm and stable, preventing it from becoming soggy when you add your wet fillings. Aim for at least 30 minutes in the refrigerator.
- Crushing Methods: For the finest crumbs, a food processor or blender is ideal. If these aren’t available, place Oreos in a sturdy Ziploc bag, seal it, and crush them with a rolling pin or even a meat mallet/hammer until very fine.
- Flavor Variations with Oreos: Get creative with different Oreo flavors!
- Golden Oreo Crust: Use Golden Oreos for a vanilla-flavored crust, perfect for fruit tarts or lemon meringue pies.
- Mint Oreo Crust: A mint Oreo crust would be divine with chocolate or key lime fillings.
- Peanut Butter Oreo Crust: Ideal for chocolate or banana-based desserts.
- Seasonal Flavors: Experiment with seasonal Oreo flavors like pumpkin spice or red velvet for unique holiday desserts.
- Doubling the Recipe: This recipe can easily be doubled or even tripled to make more pies or larger crusts. Just adjust the ingredients proportionally.
- Miniature Crusts: Use cupcake liners in a muffin tin to create individual mini Oreo crusts, perfect for small tarts or cheesecake bites.
- Gluten-Free Option: Oreo now offers gluten-free cookies, making this a fantastic option for those with dietary restrictions.
Recipe FAQs: Your Common Questions Answered
No, you absolutely don’t have to! This is a classic no-bake recipe. The crust typically only needs to be chilled in the fridge for about 30 minutes until it becomes firm. Chilling allows the melted butter to solidify, binding the crumbs together effectively. However, if you desire an even firmer, crispier, and more robust crust that holds up exceptionally well to very wet fillings, you can bake it. Bake at 350 degrees F (175°C) for 8-10 minutes. Always let it cool completely before adding any filling to prevent it from softening.
There are a few common reasons for a crumbly Oreo pie crust. Firstly, it might not have been packed down tightly enough. This is crucial for structural integrity; ensure you use a flat-bottomed glass or measuring cup to press the crumbs firmly. Secondly, you might not have used enough melted butter, or conversely, too much cookie crumbs were used in relation to the butter. The butter acts as the binder, so an insufficient amount will prevent the crumbs from sticking together. Ensure your butter-to-crumb ratio is correct, adding a tablespoon more melted butter if the mixture still feels too dry.
Absolutely! This crust is perfect for making in advance. You can prepare and chill the crust up to 2-3 days before you plan to fill it. Store it tightly covered in the refrigerator. This can be a huge time-saver when preparing for parties or holiday gatherings, allowing you to focus on your filling closer to serving time.
Yes, you can! An unbaked or baked (and cooled) Oreo pie crust can be wrapped tightly with plastic wrap and then with aluminum foil and frozen for up to 1-2 months. When you’re ready to use it, thaw it in the refrigerator overnight before filling. This is a great way to always have a quick dessert base on hand.
More Delightful Pie Recipes to Inspire You
If you love this easy Oreo pie crust, you might also enjoy these other fantastic pie recipes:
- Easy Homemade Apple Pie: A classic comfort dessert everyone loves.
- Easy Caramel Apple Pie: A sweet and sticky twist on traditional apple pie.
- Easy French Silk Pie: Indulge in a rich, creamy chocolate delight.
- Chocolate Pecan Pie Bars: All the flavor of pecan pie in a convenient bar form.
- Easy Pecan Pie (No Fail Recipe): A reliable recipe for a beloved Southern classic.
- Apple Pie Cake: When you can’t decide between pie and cake, have both!
- Boston Cream Pie Cupcakes: Miniaturized versions of a dessert favorite.
- Pumpkin Fudge (Microwave): A quick and easy festive treat.
Recipe Card

Easy Oreo Pie Crust Recipe
Abeer Rizvi
Pin Recipe
Want to Save This Recipe?
Enter your email & I’ll send it to your inbox. Plus, get great new recipes from me every week!
By submitting this form, you consent to receive emails from CakeWhiz
Ingredients
- 24 Oreo cookies
- 4 tablespoon Butter Unsalted, Melted
Instructions
-
Add the Oreos (entire cookies, including cream) to a food processor and pulse until you have fine, sand-like crumbs. Alternatively, place them in a Ziploc bag and crush with a rolling pin.
-
Dump these Oreo cookie crumbs into a mixing bowl and pour in the melted unsalted butter. Mix thoroughly with a spoon or your hands until all crumbs are evenly coated and the mixture resembles wet sand.
-
Spread this mixture into a round 9-inch pie dish. Use your fingers to distribute evenly, then use the flat bottom of a drinking glass or measuring cup to truly pack down the crumbs firmly on the base and along the sides. This is crucial for a stable crust.
-
Chill in the fridge for at least 30 minutes before adding any filling. This allows the butter to set and prevents the crust from becoming soggy.
-
If you prefer a baked pie crust for extra crunch, bake this pressed crust at 350 degrees F (175°C) for 8-10 minutes. Let it cool completely before adding any filling. Enjoy!
Notes
- For best results and troubleshooting, refer to all the detailed tips provided in the sections above.
- This recipe yields enough crust for one standard 9-inch pie.
- Extra pie crusts, or a prepared but unfilled crust, can be stored in a sealed container in the fridge for up to 2-3 days, or frozen for up to 1-2 months.
Nutrition
An automated tool is used to calculate the nutritional information. As such, I cannot guarantee the accuracy of the nutritional information provided for any recipe on this site.
This easy no-bake Oreo pie crust recipe is truly a dessert hack that everyone should have in their culinary repertoire. It’s incredibly adaptable, consistently delicious, and requires minimal effort for maximum reward. So next time you’re planning a dessert, skip the complicated steps and embrace the simplicity and deliciousness of this two-ingredient wonder. Happy baking (or rather, no-baking)!
