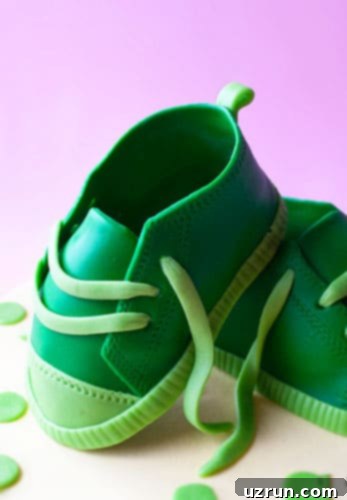
Master the Easy Fondant Baby Shoe Cake: A Step-by-Step Sneaker Cake Tutorial with Free Template
Welcome to the ultimate guide for creating an absolutely charming and surprisingly easy baby shoe cake! Whether you call it a shoe cake, a sneaker cake, or an adorable baby bootie cake, this design featuring delightful fondant baby shoe toppers is an absolute showstopper for any celebration. Perfect for baby showers, gender reveal parties, or a child’s birthday, this cake design allows you to impress your guests without the daunting task of complex cake carving. We’ll walk you through every step, from baking the foundation to crafting those intricate little shoes using a simple, printable template. Get ready to bake a masterpiece that’s as delicious as it is visually appealing!
When it comes to shoe-themed cakes, there are typically two main approaches. The first involves carving a cake into the shape of a shoe, which, while impressive, demands significant practice, precision, and a fair amount of structural engineering. For many home bakers, this can be quite intimidating. The second, and arguably much easier, method involves creating a traditional round or rectangular cake and adorning it with beautifully crafted fondant sneaker toppers. This tutorial focuses on the latter, simpler technique, eliminating the need for any carving whatsoever. The end result? Adorable toppers that bear a striking resemblance to classic Converse sneakers, adding a personalized and heartwarming touch to your dessert table. If you’re enchanted by this cute cake concept, you’ll also adore our Crying Baby Cake, the charming Twins Cake, and of course, our popular Gender Reveal Cake (Baby Shower) for even more celebratory inspiration.
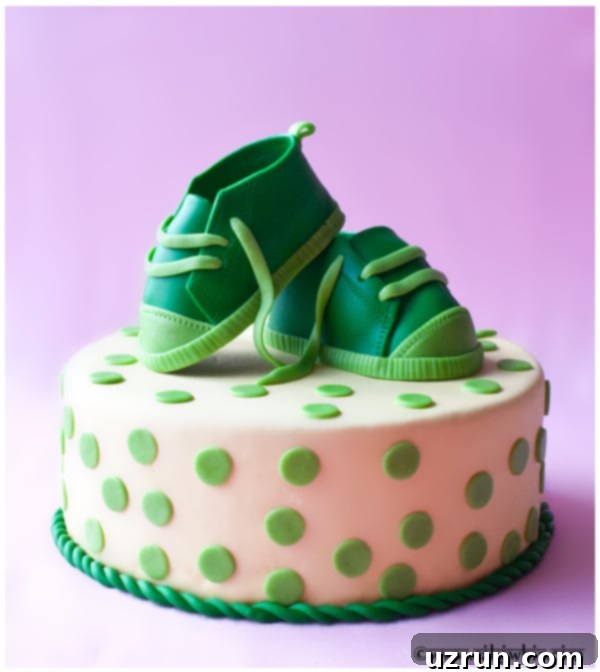
How to Make a Fondant Baby Shoe Cake (Sneaker Cake)
Creating this charming shoe cake involves a series of manageable steps, focusing on both the cake’s delicious base and the detailed fondant decorations. Here’s a general overview of the process:
- Bake Your Cakes: Begin by baking your cake layers. For a vibrant and fitting theme, a green pistachio cake offers a beautiful color contrast and delightful flavor. Ensure your cakes are completely baked through and rise evenly.
- Achieve Perfect Cooling: Allow the baked cakes to cool thoroughly to room temperature. This crucial step prevents your frosting from melting and ensures a stable structure for decoration.
- Prepare Your Icing: Whip up a batch of American buttercream frosting. Its smooth texture and classic flavor make it an ideal choice for both filling and crumb coating, providing a perfect canvas for fondant.
- Assemble the Cake Layers: Carefully place your first cake layer on a cake stand or sturdy cake board. Apply an even layer of buttercream, then gently position the second cake layer on top. Cover the entire stacked cake with a smooth, generous layer of frosting, ensuring all sides are even.
- Decorate the Cake’s Base: Once frosted, drape your cake with vibrant yellow fondant. Smooth it out, trimming any excess at the base. Add decorative elements like contrasting green polka dots and an elegant green rope detail around the base to enhance its visual appeal.
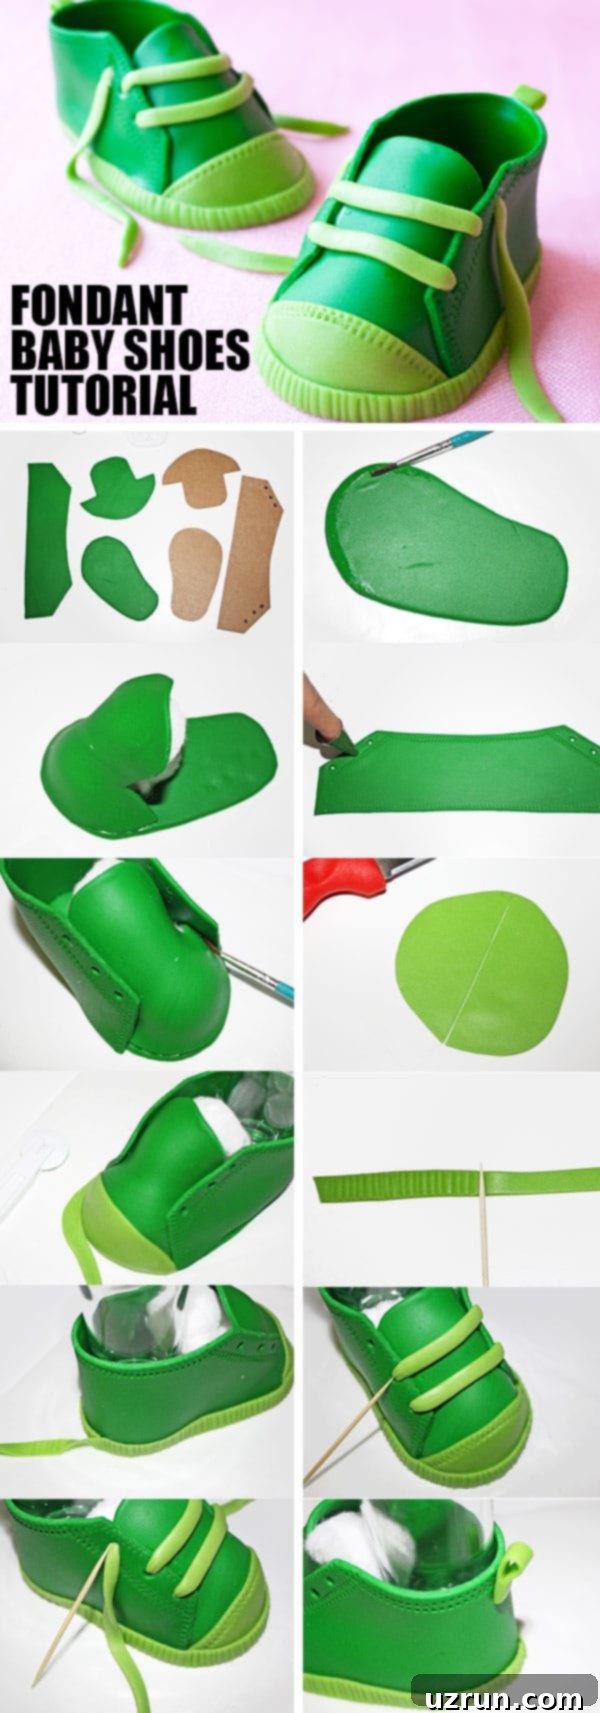
- Craft Edible Fondant/Gum Paste Shoes: This is where the magic happens! Utilize a printable template to cut out the various components of your baby shoes from a fondant/gum paste mixture.
- Allow Shoes to Dry and Firm Up: After assembling, let your edible shoe toppers dry completely. This process can take several hours or even overnight, ensuring they hold their shape perfectly and are firm enough to place on the cake.
- Final Touches and Placement: Once your fondant shoes are fully dry and sturdy, carefully position them on top of your decorated cake. Arrange them artfully to create that adorable, ready-to-wear look.
For a complete, step-by-step recipe with precise measurements and detailed instructions for each stage, please refer to the comprehensive recipe card below.
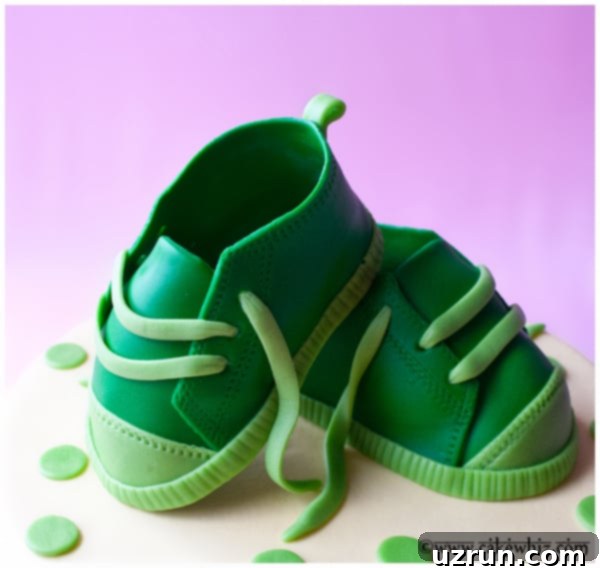
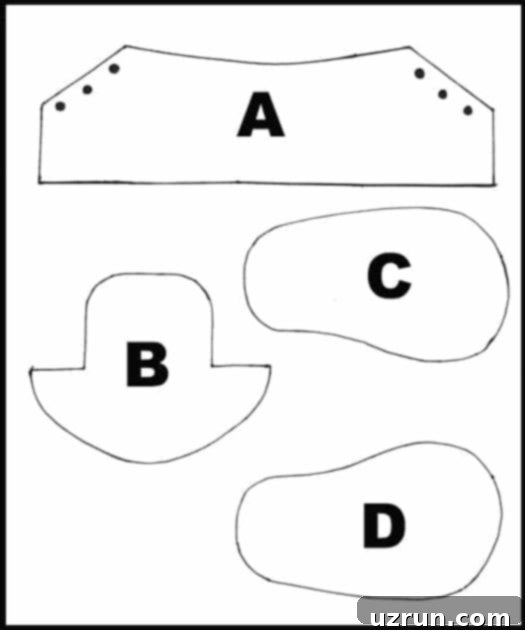
How to Effectively Use Your Fondant Baby Shoes Template
The printable template is your secret weapon for creating perfectly shaped fondant baby shoes without freehand challenges. Here’s how to use it effectively:
- Print the Template: Start by printing your template on thick paper or cardstock. This provides a durable and stable guide that won’t tear or bend easily during the cutting process.
- Precision Cutting: Using sharp scissors, meticulously cut out each individual piece from the printed template. Take your time to ensure clean, precise edges, as this will directly impact the final look of your fondant shoes.
- Guide for Fondant/Gum Paste: Place these paper cutouts onto your rolled-out gum paste or fondant. Use a sharp knife or a pastry wheel to carefully cut around each paper piece, creating the edible components of your shoes. This method guarantees uniformity and accuracy.
- Assemble with Care: Begin assembling the cut fondant pieces into the three-dimensional shape of a shoe. Corn syrup acts as an excellent edible adhesive, helping the pieces stick together securely. Apply it sparingly to avoid mess.
- Customize and Resize: Remember that this template is incredibly versatile! You can save the digital file to your computer, open it in image editing software (like Photoshop or even a simple photo editor), resize it to your desired dimensions, and then print it. This allows you to create shoes of various sizes, from tiny cupcake toppers to larger, more prominent cake decorations.
Creative Variations for Your Shoe Cake
This shoe cake design offers a fantastic canvas for your creativity. Don’t be afraid to experiment with different elements to personalize your creation:
Explore Other Color Palettes: While this tutorial showcases a sophisticated neutral theme with two shades of green, the possibilities for color combinations are endless! For a classic baby boy look, opt for blues and grays. For a girl, soft pinks, purples, or yellows are perfect. You can also mix and match vibrant hues for a playful, modern aesthetic that truly stands out.
Transform into a Gender Reveal Cake: This design is ideal for a gender reveal! Craft pink sneakers for an expectant girl or blue sneakers for a boy. For an extra surprise, you can also tint the cake batter or the inner frosting layers in the corresponding color, revealing the baby’s gender when the cake is sliced.
Experiment with Cake Flavors: The base cake can be any flavor you desire! Beyond our suggested pistachio, consider popular choices like a light and airy Easy Rainbow Cake for a whimsical touch, or a rich and elegant Moist Red Velvet Cake. Chocolate, vanilla bean, lemon, or even a funfetti cake would also be delicious complements to your fondant art.
Diversify Frosting Flavors: The frosting doesn’t have to be limited to American buttercream. Enhance the cake’s flavor profile with a tropical Mango Frosting, a zesty Orange Frosting, a classic cream cheese frosting, or a luxurious chocolate ganache. Just ensure the frosting provides a smooth surface for fondant application.
Infuse Fondant with Flavor: Add a layer of taste to your fondant by incorporating extracts! A little almond, vanilla, or even a fruit extract can make your edible decorations even more delightful. Remember to use clear extracts, especially when coloring white fondant, to prevent any unwanted discoloration and maintain the purity of your chosen hues.
Incorporate Jumbo Sprinkles: For a quick and playful alternative to cutting out individual fondant polka dots, use store-bought jumbo sprinkles! These larger sprinkles come in a variety of shapes and colors and can be easily affixed to your fondant-covered cake using a dab of frosting or a touch of melted white chocolate for a secure hold.
Build a Tiered Cake: For a grander presentation, consider making a tiered cake. Add a larger tier at the bottom to create a more imposing and celebratory centerpiece. When stacking, always remember to use dowels or other structural supports within the bottom tier to prevent it from collapsing under the weight of the upper layers.
Add Delicious Cake Fillings: Elevate the taste experience by filling your cake layers with exciting flavors. Options include sweet jams and preserves, a luscious Homemade Caramel Sauce, rich Dulce De Leche, or various nut butters for a creamy texture. You can also incorporate fresh berries, finely chopped nuts, or even crushed candy bars for added texture and surprise.
Craft Mini Shoes for Cupcakes: The versatility of the template extends to miniature creations! Resize the template to a smaller scale to create adorable mini fondant shoes, perfect for decorating individual cupcakes. The process remains the same, just on a smaller scale, making them ideal party favors or complementary treats.
Expert Tips and Techniques for Fondant Shoe Success
Achieving perfectly shaped and durable fondant shoes, as well as a beautifully decorated cake, requires a few key insights and techniques:
The Ideal Material: Fondant, Gum Paste, or a Mix? This is a common question, and the answer lies in balance. While gum paste dries quickly and holds intricate shapes well, it can be unforgiving and brittle. Fondant is softer and more pliable but takes longer to dry and may not hold sharp edges as firmly. The optimal choice is often a 50/50 combination of fondant and gum paste (also known as “half-and-half”). This mixture offers the best of both worlds: it provides enough flexibility to work with without drying too rapidly, yet it firms up nicely to hold its shape. You can even try a 70/30 ratio (70% gum paste, 30% fondant) for a slightly faster drying time and firmer finish. Avoid using only gum paste if you’re a beginner, as its fast drying time makes correcting mistakes difficult. Similarly, solely using fondant can lead to shoes that take too long to dry and might sag due to softness.
Never Frost or Decorate Warm Cakes: This is a golden rule in cake decorating. Always ensure your cakes are cooled completely to room temperature before applying any frosting or fondant. Warm cakes will cause your icing to melt, leading to a sticky, unstable mess and compromising the entire decoration process. Patience in cooling is paramount for success.
Homemade vs. Store-bought Fondant: Both homemade and store-bought fondants have their merits. Store-bought fondant offers unparalleled convenience and is readily available in pre-colored options, saving you time. However, many bakers find that homemade marshmallow fondant, while requiring a little more effort, offers a superior taste and a more pliable texture. Choose the option that best fits your schedule and taste preferences.
Opt for Gel Colors for Vibrant Fondant: When coloring fondant or gum paste, always reach for gel food colors over liquid food colors. Gel colors are highly concentrated and much thicker, meaning you’ll need only a small amount to achieve vivid hues. Liquid colors, conversely, can add too much moisture to your fondant, making it sticky, difficult to work with, and prone to tearing.
Minimal Water for Sticking Pieces: When assembling your fondant shoe components or attaching decorations to the cake, use water very sparingly as an adhesive. Too much water can cause dark colors to bleed into lighter ones, creating unsightly smudges. Excess water also makes fondant incredibly sticky and difficult to manage. A small paintbrush dipped lightly in water is usually all you need.
Provide Support for Heavy Toppers: If your fondant sneakers are particularly large or heavy, they can sink into or deform the cake. To prevent this, insert bubble tea straws (which are wide and sturdy) or wooden dowels into the cake where the shoes will sit. Cut the straws/dowels to the exact height of your cake layer to create a stable platform.
Work on Wax Paper: To prevent your fondant or gum paste pieces from sticking to your work surface and to allow for easy transfer, always roll out and assemble your shoe components on a sheet of wax paper or a silicone mat. This non-stick surface simplifies the entire process.
Understand Drying Time Variability: The drying time for your fondant shoes can vary significantly. Factors such as the humidity and moisture level in your local environment play a crucial role. High humidity means a slower drying time. To accelerate the process, especially in humid conditions, consider placing a table fan pointed gently towards your fondant pieces to encourage air circulation.
Utilize Thick Scrapbook Paper for Templates: When printing your template, opting for thick scrapbook paper or cardstock is highly recommended. Its rigidity ensures that the template holds its shape much better, providing a more reliable guide for cutting out your fondant or gum paste pieces with precision.
Proper Storage for Your Decorated Cake
To ensure your beautiful shoe cake remains fresh and delicious, proper storage is key:
Room Temperature Storage: A decorated cake without perishable fillings (like fresh cream, custard, or fruit compote) can generally be left at cool room temperature for up to 24 hours. This is often preferred for fondant-covered cakes, as refrigeration can sometimes affect the fondant’s texture.
Refrigeration for Leftovers: Any leftover cake with or without perishable fillings should be stored in a sealed, airtight container in the refrigerator for up to 3 days. Be aware that the moisture in the fridge can cause fondant decorations to become slightly sticky or tacky. To mitigate this, you can place a piece of paper towel in the container to absorb some moisture, but it may still occur.
Freezing for Longer Preservation: Unfrosted cake layers and buttercream frosting can be stored separately in sealed, freezer-safe containers for up to 1 month. When you’re ready to enjoy, transfer them to the fridge overnight to thaw, and then proceed with frosting and decorating as per the instructions.
Make-Ahead Instructions: This entire cake can be baked and fully decorated 1 day in advance. Store it at cool room temperature, covered loosely to protect the fondant from dust, until you are ready to serve. This makes party planning much less stressful!
Discover More Unique Decorated Cakes
- Erupting Volcano Cake (With Dry Ice Smoke)
- Easy Monster Cake
- Peacock Cake
- Butterfly Cake
- Bumblebee Cake (Spring Cake)
- Fondant Basket Cake (Basketweave)
Recipe
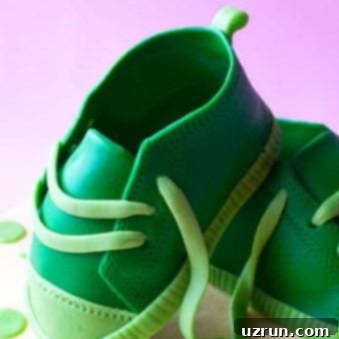
Easy Shoe Cake (Fondant Baby Shoes)
Abeer Rizvi
Pin Recipe
Want to Save This Recipe?
Enter your email & I’ll send it to your inbox. Plus, get great new recipes from me every week!
By submitting this form, you consent to receive emails from CakeWhiz
Ingredients
- 2 Pistachio cake Use this recipe to make 2 round cakes. Dimensions: 8×2 each.
- 4 cups American buttercream frosting
- 4 cups Marshmallow fondant Yellow, Dark green, Light green, For covering and decorating cake
- 3 cups Gum paste Or 50/50 (equal combination of fondant and gum paste), Dark green, Light green, For making shoes
- 2 tablespoon Corn syrup For sticking pieces
Instructions
-
Bake cakes and allow them to cool completely.
-
While cakes are baking and cooling, prepare frosting.
-
Place one cake on a cake board or cake stand and use a spatula to spread icing on top.
-
Place the other cake on top and press gently to secure into place.
-
Use a spatula to cover the entire cake smoothly in frosting.
-
Roll out yellow fondant.
-
Spread it over the frosted cake and cut off excess along the base with a pizza cutter.
-
Roll out dark green fondant into two long ropes and intertwine them.
-
Stick this rope around the base of the cake with some water.
-
Roll out dark green fondant and use a small circle cutter to cut out round shapes.
-
Stick them randomly all over the cake with some water.
-
Keep this decorated cake aside as you work on the shoes.
-
Print the shoe template on thick scrapbook paper. You can resize the image in Photoshop and make it bigger or smaller depending on how big or small you want the shoe to be.
-
Roll out dark green 50/50 or gum paste and cut out all the relevant shapes with a knife or pastry cutter.
-
Use the quilting tool to create stitch marks on Piece A.
-
Use Wilton’s Tip#3 to cut out three little circles around either side of Piece A. Keep aside.
-
Place Piece C on a sheet of wax paper and brush corn syrup halfway around the top edge.
-
Stick Piece B on top of the corn syrup. Fill the hollow space with crumpled tissue so that this piece holds its shape.
-
Brush corn syrup around the remaining edge of Piece C.
-
Stick Piece A on top of the corn syrup.
-
Brush some more corn syrup along the sides of Piece A so that it sticks to Piece B. Use your fingers to smooth out the joint where Piece A is glued to Piece B.
-
All this pressing and sticking of pieces makes the base of this shoe spread a little. To fix this, cut any excess near the back of the shoe.
-
Fill the hollow space inside the shoe with tissue paper or a small plastic glasses.
-
Roll out light green gum paste and use a large circle cutter to cut out a piece. Then, use a knife to cut it in half.
-
Brush corn syrup on the front of the shoe and place this light green piece until it sticks into place. Smooth it out with your fingers and cut excess with a knife.
-
Use the quilting tool to create stitch marks of top of the light green piece.
-
Now, cut out a long strip of light green gum paste and press a toothpick all over the strip until you have vertical indentations.
-
Brush corn syrup around the base of your shoe and stick the green strip. Cut excess strip and smooth the joint with your fingers.
-
Most sneakers have a small loop near the back. To make this, cut a light green strip of gum paste and bend it into the shape of a loop and stick it at the back of the shoe with corn syrup.
-
To make laces, use a clay extruder with a rectangular plate and push out strips of light green gum paste. Brush corn syrup in the holes. Then use a toothpick to push the laces into the holes. They don’t have to go all the way in but it should still look like the lace is inside the hole.
-
To make the hanging laces, brush corn syrup in the holes and use your clay extruder to make 2 long strips and push each strip into the final hole and then let them just hang.
-
Your shoe is ready. Allow it to dry for 24- 48 hours.
-
Repeat these steps for the other shoe.
-
Once dry, place the shoes on top of the decorated cake.
Nutrition
An automated tool is used to calculate the nutritional information. As such, I cannot guarantee the accuracy of the nutritional information provided for any recipe on this site.
