Irresistible Cookie Monster Cupcakes: The Ultimate Easy Sesame Street Recipe for Kids’ Parties
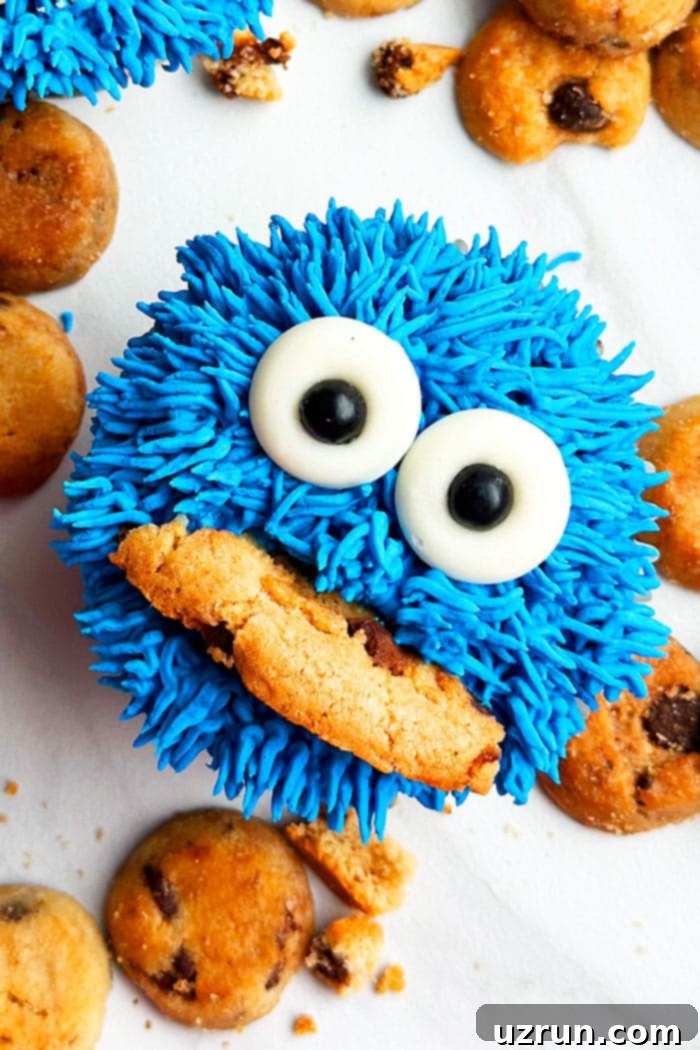
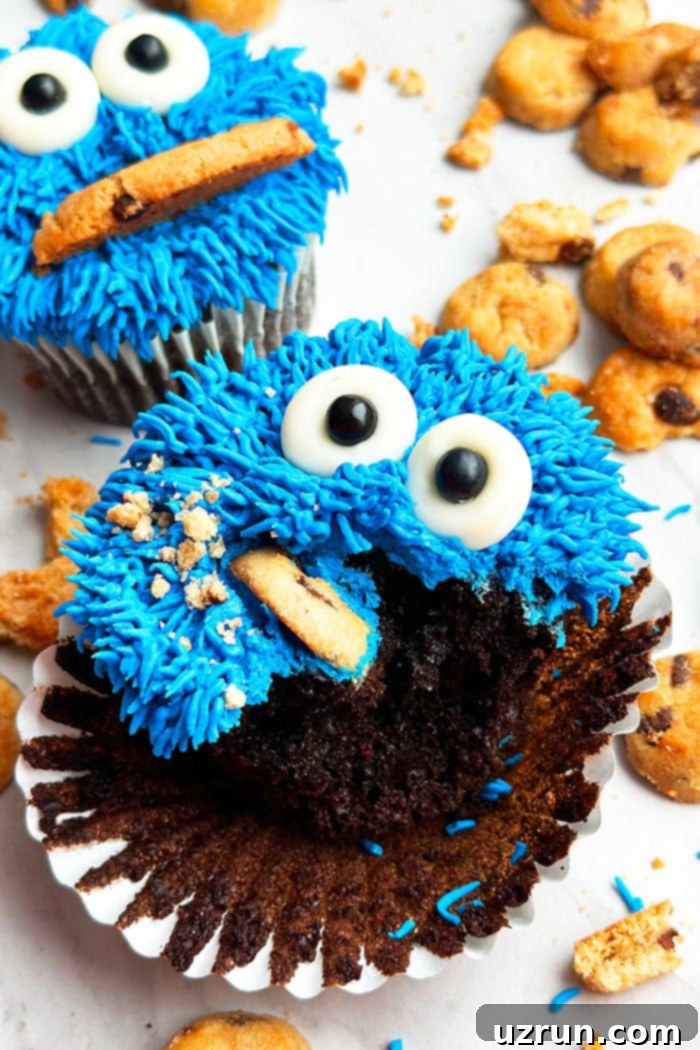
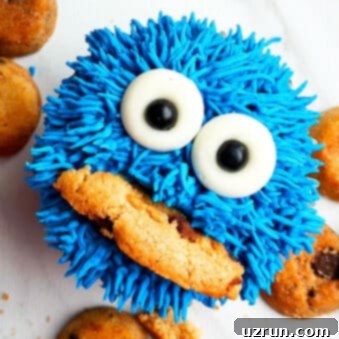
Step into the delightful world of Sesame Street with these utterly **irresistible Cookie Monster Cupcakes**! Imagine fluffy chocolate cupcakes crowned with a vibrant swirl of blue buttercream “fur,” a classic chocolate chip cookie for a hungry mouth, and playful candy eyes that bring everyone’s favorite cookie-loving monster to life. This isn’t just a recipe; it’s an invitation to create joy, perfect for **kids’ birthday parties**, themed celebrations, or simply a fun afternoon activity with your little ones.
What makes these **homemade Cookie Monster cupcakes** truly special is their incredible ease. You don’t need to be a seasoned baker or a master decorator to achieve stunning results. The simple steps are perfect for **beginner decorators**, making it a fantastic project to involve children from start to finish – from mixing the batter to carefully placing those iconic cookie mouths. Double the fun, double the memories, and definitely double the deliciousness! Serve these alongside a Cookie Monster Cake {Sesame Street} for a truly unforgettable dessert table that will have everyone reaching for “Cooookies!”
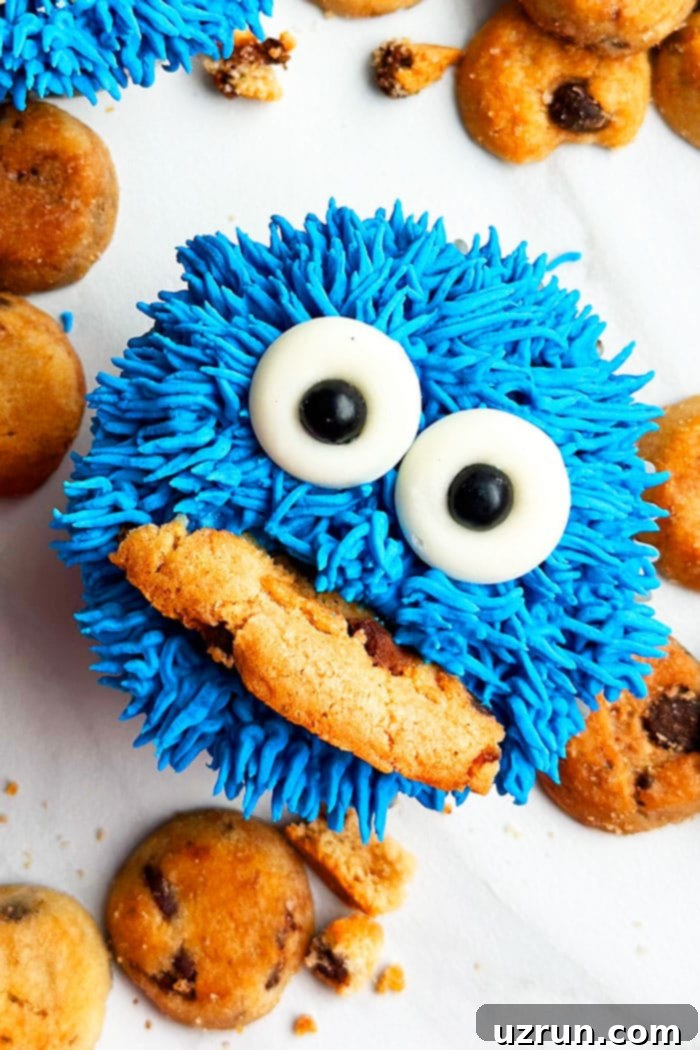
Why These Cookie Monster Cupcakes Are a Must-Try
Beyond their undeniable cuteness, these **Cookie Monster treats** offer a host of reasons to become your go-to party dessert:
- Effortlessly Adorable: The design is simple yet incredibly effective, guaranteed to bring smiles to every face, young and old. These character cupcakes instantly transform any dessert table into a playful celebration.
- Beginner-Friendly: Even if you’ve never piped frosting before, the “fur” technique is forgiving and fun. With just a few squeezes of the piping bag, you’ll create a fluffy, textured look that perfectly captures Cookie Monster’s charm.
- Deliciously Homemade: Using simple, wholesome ingredients means you get a fresh, flavorful treat every time. You have complete control over the quality of your chocolate cupcakes and rich buttercream.
- Interactive Fun: A fantastic baking project for families, allowing kids to participate in decorating and express their creativity. From choosing cookie pieces to placing candy eyes, children will love being part of the magic.
- Customizable: From cupcake flavors to cookie types and even transforming them into other Sesame Street characters, there are endless ways to personalize your Cookie Monster crew to suit any taste or theme.
- Party Perfect: They are individual portions, easy to serve, and always a highlight at any gathering, especially birthday celebrations where their vibrant blue color and playful design truly shine.
How to Make Easy Cookie Monster Cupcakes from Scratch
Creating these delightful **Sesame Street cupcakes** is a straightforward process that yields fantastic results. Here’s a quick overview of the essential steps involved in bringing your cookie-loving monsters to life:
- Bake and Cool Cupcakes: The foundation of any great cupcake is a perfectly baked, completely cooled base. Start with your favorite chocolate cupcake recipe – whether it’s a trusty homemade one or a convenient high-quality box mix. Ensure they are absolutely at room temperature before you even think about frosting them. While they cool, you can get a head start on preparing your vibrant blue buttercream frosting.
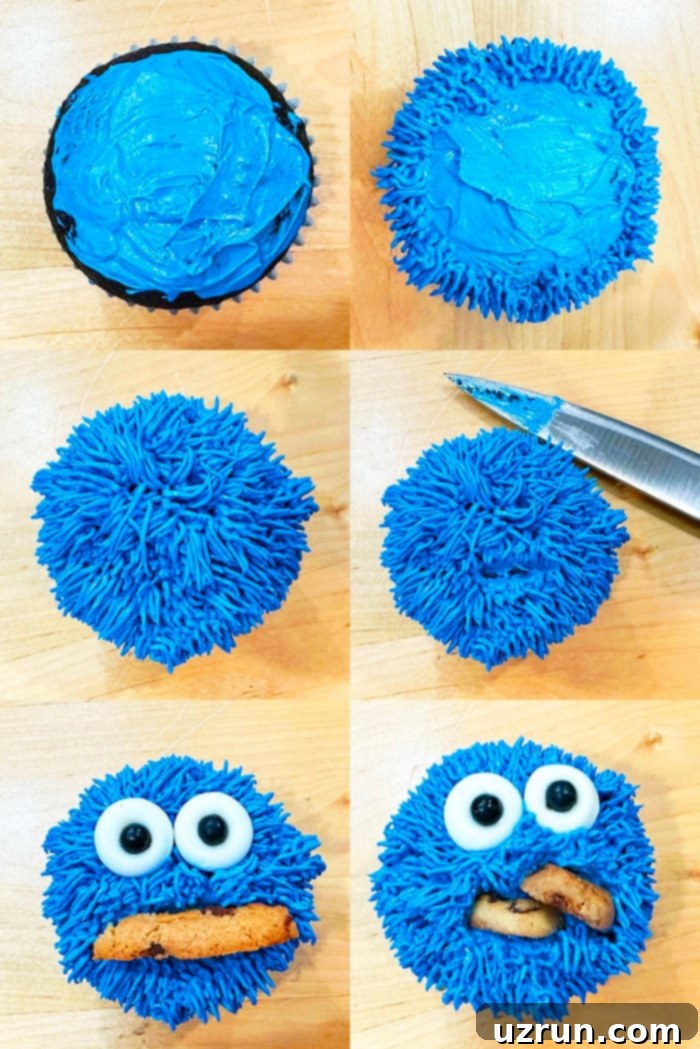
- Pipe Blue Fur: This is where the magic happens! Using a specialized grass tip (or a suitable alternative), you’ll create Cookie Monster’s iconic shaggy blue fur. The technique involves a simple squeeze and pull motion, making it surprisingly easy for even novice decorators to achieve that signature fluffy texture across the entire cupcake.
- Add a Cookie Mouth: What would Cookie Monster be without his beloved cookies? With a small, strategic cut on the lower half of each cupcake, you’ll create the perfect slot. This allows you to snugly insert a chocolate chip cookie, giving your monster his signature perpetually hungry and adorable expression.
- Add Eyes: The final touch that truly brings these characters to life are the candy eyes. Simply place two edible candy eyes near the top of each cupcake, above the cookie mouth. Adjust their placement slightly to give each Cookie Monster a unique and playful personality. Then, they are ready to be devoured!
How to Pipe Cookie Monster: Getting That Perfect Fur Texture
The secret to Cookie Monster’s shaggy, adorable appearance lies in the right piping technique and tip. For that classic “fur” look, the **grass tip #233** is your best friend. This tip has multiple small holes that create many tiny strands of frosting simultaneously, perfectly mimicking the textured fur of our favorite blue monster. It’s surprisingly easy to use, even for those new to piping!
If you don’t have a grass tip, don’t fret! A **small star tip** (like Wilton’s Tip #18) can also work beautifully. While it will produce a slightly different texture, creating small, defined stars or shells, it still results in an equally charming and recognizable Cookie Monster. Even a **small round tip** (such as Tip #10) can be employed to create a series of small dots or squiggles that, when applied closely together, give a similar textured effect, though less overtly “fur-like.” The key is to build up layers of frosting to create volume.
Here’s a detailed guide on how to achieve that fluffy texture, no matter which tip you choose:
- Prepare your Piping Bag: First, ensure your piping bag is fitted with your chosen tip. Then, fill the bag about two-thirds full with your vibrant blue buttercream. Avoid overfilling, as this can make the bag difficult to handle and control. Twist the top of the bag to seal the frosting and prevent it from squeezing out the wrong end.
- Hold at an Angle: Hold the piping bag at a comfortable 45-degree angle, with the tip pointed directly above the surface of the cupcake. This angle helps the frosting strands stand upright, contributing to the fluffy “fur” effect.
- Squeeze and Pull: Apply steady, even pressure to the piping bag with your dominant hand. As the frosting begins to emerge from the tip, gently pull the bag away from the cupcake. The goal is to create short, individual strands or puffs of frosting, mimicking hair. Release pressure as you pull away to create a clean break in the frosting.
- Cover the Surface: Continue this squeeze-and-pull motion, working your way around and across the entire top surface of the cupcake. Overlap your piped sections slightly to ensure full coverage and create a truly shaggy, full appearance for Cookie Monster’s fur. Don’t worry about absolute uniformity; a slightly irregular texture often looks more natural for fur!
Key Ingredients for Sesame Street Cupcakes
Crafting these iconic **Sesame Street cupcakes** requires just a few simple, yet essential, components. Each ingredient plays a crucial role in both the flavor and the visual appeal of your adorable Cookie Monsters:
- Cupcakes: For a true Cookie Monster experience, I highly recommend using a rich and moist **chocolate cupcake** base. The deep, dark chocolate flavor provides a lovely contrast to the sweet blue frosting and perfectly complements the classic chocolate chip cookies. You can choose to bake your favorite homemade chocolate cupcake recipe from scratch, or for added convenience, a good quality box mix will also yield delicious results. The most important thing is to ensure your cupcakes are completely cooled before any decorating begins – warm cupcakes and buttercream do not mix!
- Icing: The vibrant blue “fur” is undeniably the most striking feature, and it’s created using **blue buttercream** frosting. American buttercream is ideal for this project because it holds its shape exceptionally well, which is crucial for piping defined strands of fur. You’ll want a vibrant, medium-to-dark blue hue to perfectly capture Cookie Monster’s signature color. To achieve this intense color without altering the frosting’s consistency, **gel food coloring** is absolutely essential. Liquid food coloring can make your frosting too runny and won’t produce the same depth of color.
- Cookies: What’s Cookie Monster without his cookies? **Chocolate chip cookies** are the quintessential choice, perfectly aligning with his character and providing that authentic touch. You’ll typically need a mix of medium-sized cookies to form the “mouths” of your monsters. You might also want some mini chocolate chips or broken cookie crumbs to scatter around his perpetually hungry expression for extra visual appeal. Store-bought cookies work wonderfully for convenience and save time, but if you’re feeling ambitious and want to add an extra layer of homemade goodness, whipping up a batch of soft and chewy chocolate chip cookies would be a delicious addition.
- Candy Eyes: These are the magical finishing touch that instantly brings your Cookie Monsters to life! Edible **candy eyes/eyeballs** are widely available at most craft stores, baking supply shops, or even large supermarkets in the baking aisle. Their simple yet effective design, when strategically placed near the top of the cupcake, gives each monster its unique, wide-eyed and slightly goofy personality.
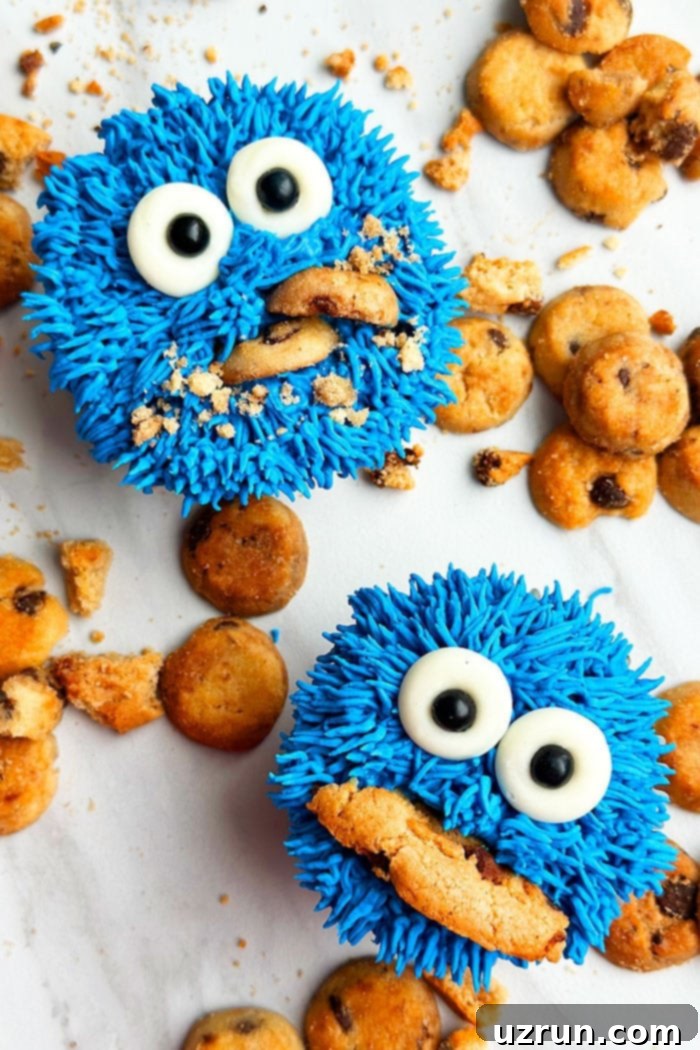
Variations to Customize Your Cookie Monster Cupcakes
While the classic Cookie Monster look is always a hit, there are plenty of creative ways to put your own spin on these **fun cupcakes**. Feel free to experiment with different flavors, decorations, and even other characters to make them uniquely yours!
- Explore Other Decorating Options (Beyond Piping): If piping isn’t your preferred method, or you’re looking for an alternative texture, you still have fantastic choices!
- Shredded Coconut or Sprinkles: For a quick and easy textural alternative, you can tint shredded coconut blue with food coloring and gently press it onto a layer of blue frosted cupcakes for a textured, fluffy look. Alternatively, a generous scattering of blue sprinkles (or even blue and white sprinkles) can provide a festive and appealing decorative touch without any piping.
- Fondant or Modeling Chocolate: For a smoother, sculpted look, consider using blue fondant or modeling chocolate. You can make your own vibrant blue fondant using this How to Make Marshmallow Fondant (Fondant Recipe for Cakes) recipe, or create blue modeling chocolate with this How to Make Modeling Chocolate {Candy Clay}. Roll it out, cut out circles for the face, and add details like eyes and a mouth with smaller pieces for a more refined finish.
- Fill Cupcakes for a Sweet Surprise: Elevate your cupcakes by adding a delicious filling inside! Use an apple corer or a small knife to carefully hollow out the center of each cooled cupcake.
- Cookie Dough Truffles: An excellent and thematically appropriate choice would be to fill them with Chocolate Chip Cookie Dough Truffles (Eggless) or Mocha Caramel Cookie Dough Truffles. Just pop a small, safe, edible eggless dough ball into each hollow before frosting.
- Other Filling Ideas: Consider other delicious options such as chocolate ganache, a dollop of whipped cream, caramel sauce, or even a fruit preserve like strawberry jam for a different flavor profile.
- Try Other Cupcake Flavors: While a chocolate base is classic for Cookie Monster, feel free to experiment with different cupcake bases to suit various preferences:
- Oreo Cupcakes {With Cake Mix} for an extra cookie crunch right in the cupcake!
- Rainbow Cupcakes {With Cake Mix} could offer a colorful surprise when bitten into (just make sure to still use blue frosting on top).
- Chocolate Chip Cupcakes (With Mint Frosting) would be delicious – simply swap the mint frosting for your signature blue buttercream.
- Experiment with Frosting Flavors: The key here is to use a frosting that starts white or light-colored so it can be easily tinted blue. Consider these delicious options for your buttercream:
- White Chocolate Buttercream Frosting for a rich, sweet, and luxurious taste that pairs beautifully with chocolate cupcakes.
- Marshmallow Frosting Recipe for a light, fluffy, and incredibly sweet texture that adds another layer of fun.
- Best Cream Cheese Frosting offers a delightful tangy counterpoint to the sweetness, creating a more complex flavor profile.
- Make Elmo Cupcakes: With just a few simple changes, you can transform your Cookie Monsters into his cheerful red friend, Elmo! Simply use **red frosting** instead of blue and pipe a black mouth (using black gel icing or melted chocolate applied with a small round tip) in place of the cookie. An orange candy nose (like a peanut M&M, an orange Reese’s Pieces, or a small orange gumball) will complete the iconic Elmo look. All other decorating instructions remain the same.
- Frost Them Without Piping: If you’re short on time, don’t have piping bags, or prefer a smoother finish, you can still create adorable Cookie Monster cupcakes. Simply frost the cooled cupcakes smoothly with blue buttercream using an offset spatula or butter knife. Then, add the candy eyes and the cookie mouth. While you won’t get the signature “fur” texture, they will still be clearly recognizable, delicious, and a huge hit!
- Add Blue Sanding Sugar: For an extra touch of sparkle and a slightly different texture, gently sprinkle blue sanding sugar over the piped blue “fur” while the frosting is still fresh and tacky. This adds a whimsical glitter effect that children particularly love and makes the cupcakes even more eye-catching.
- Use Another Cookie Instead of Chocolate Chip: While chocolate chip cookies are classic, other cookie varieties can also be used for Cookie Monster’s mouth, adding a unique twist:
- Oreo cookies (either whole or broken into halves/quarters depending on the desired size and effect).
- Small Batch Peanut Butter Cookies {With Chocolate Chips} for a delightful nutty flavor.
- Best Oatmeal Raisin Cookies- Soft and Chewy for a more wholesome twist.
- Create a Pull-Apart Cupcake Cake: Instead of individual cupcakes, arrange your frosted cupcakes (with a flat layer of blue icing already applied) into a large circle or the general shape of Cookie Monster’s head. Once arranged, pipe the blue fur over the entire collective surface of the cupcakes, treating them as one large canvas. Start from the outside and work your way inward for consistent coverage. For this larger format, use larger candy eyes and a larger cookie (or multiple cookies) for a more dramatic and proportional “mouth.” This creates one giant, impressive Cookie Monster cake that’s surprisingly easy to serve, as guests simply pull off their desired cupcake. Check out my similar designs in Football Cupcakes Cake {And Football Party} and Watermelon Cupcakes {Pull Apart Cupcakes} for inspiration on how this technique works.
Essential Tips and Techniques for Perfect Cookie Monster Cupcakes
Achieving bakery-worthy **Cookie Monster cupcakes** is all about paying attention to a few key details. These tips and techniques will ensure your decorating process is smooth, your buttercream holds its shape beautifully, and your final treats are picture-perfect:
- Work in a Cool Kitchen: This is perhaps the most critical tip for any buttercream-based decoration. If your kitchen is too warm, especially during summer months, your beautiful buttercream frosting will quickly become soft, greasy, and melt. This makes it incredibly difficult, if not impossible, to pipe neat “fur” strands that stand up. Work in a cool, comfortable environment (ideally below 70°F / 21°C) for the best results, as it helps the buttercream maintain its structure and prevents it from sliding off the cupcakes.
- Cool Cupcakes Completely Before Frosting: Patience is a virtue here, and rushing this step is a common mistake. Frosting warm or even slightly warm cupcakes is a recipe for disaster. The residual heat from the cupcakes will immediately melt the buttercream, causing it to slide right off, ruining your design and creating a sticky, unappetizing mess. Ensure your cupcakes are completely at room temperature, or even slightly chilled in the refrigerator for about 15 minutes, before you begin any decorating.
- Store-Bought Frosting vs. Homemade: Both options are viable for these cupcakes, depending on your preferences, skill level, and available time.
- Homemade Buttercream: Offers superior flavor and texture control. I generally prefer piping homemade buttercream (like American buttercream) because it tends to be sturdier, smoother, and holds its shape better, which is absolutely crucial for creating a well-defined “fur” effect with the grass tip.
- Store-Bought Frosting: A convenient time-saver, especially for busy schedules. If you opt for this, choose a good quality white frosting. It’s often beneficial to whip it briefly in a stand mixer or with a hand mixer to lighten its texture and incorporate some air. If it seems too soft for piping, you might need to gradually add a tablespoon or two of powdered sugar to thicken it slightly until it reaches a pipeable consistency.
- Add a Flat Base Layer of Blue Frosting: Before you begin the intricate piping of the fur, use a small offset spatula or a butter knife to spread a thin, even layer of blue frosting over the entire top surface of each cupcake. This simple step is a game-changer. It provides a uniform blue canvas, ensuring that no bare spots of chocolate cupcake show through the piped fur, and helps the “fur” adhere better, resulting in a fuller, more professional, and vibrant look for your Cookie Monster.
- Use Gel Food Coloring for Vibrant Color: This cannot be stressed enough when aiming for Cookie Monster’s iconic blue. Liquid food coloring, commonly found in grocery stores, tends to be watery and can dilute your frosting, significantly affecting its consistency and making it runny. More importantly, it often struggles to achieve the intense, vibrant, and deep blue needed for Cookie Monster without adding too much liquid. **Gel food coloring** (or paste food coloring) is highly concentrated, allowing you to achieve rich, deep, and consistent colors with just a tiny amount, without thinning your buttercream.
- Homemade Chocolate Chip Cookies vs. Store-Bought:
- Homemade Cookies: If you have the time and desire, making your own Best Chocolate Chip Cookies {Soft & Chewy} will undoubtedly add an extra layer of deliciousness and pride to your Cookie Monster creations. The fresh-baked aroma and taste are unmatched.
- Store-Bought Cookies: A fantastic and perfectly acceptable option for convenience and saving valuable time, especially when you’re preparing a large batch of cupcakes for a party. Just pick your favorite brand of chocolate chip cookies!
- Size Your Cookies Appropriately: When selecting cookies for the mouth, consider the size of your cupcakes. If you’re using larger chocolate chip cookies, it’s essential to use a sharp knife to carefully cut them into a smaller, semi-circle or crescent shape. This ensures they are proportionate to the cupcake and fit neatly into Cookie Monster’s mouth without overpowering the design, significantly improving the overall visual appeal and balance of your character.
- Definitely Use a Knife to Make the Cut for the Cookie: This is a crucial step for a neat finish. Do not try to simply push the cookie into the frosting. Attempting to force a cookie into the piped fur will inevitably mess up your beautifully textured design, creating jagged edges, smudged frosting, and an untidy look. A small, clean cut with a sharp knife on the lower half of the cupcake creates a perfect, neat slot for the cookie, preserving your detailed piping and ensuring a professional finish.
- Practice Your Piping: If you’re new to using a piping bag and a grass tip, take a moment to do a quick practice run. Pipe a few “fur” strands onto a piece of parchment paper, a paper plate, or even an overturned bowl. This helps you get a feel for the amount of pressure and the motion needed to create consistent and well-formed “fur” strands before you commit to decorating your actual cupcakes.
- Don’t Overmix Buttercream: Once your buttercream has been colored blue, avoid overmixing it. Excessive mixing can incorporate too much air, which can sometimes make the buttercream less stable and harder to pipe, or introduce tiny air bubbles that make the texture less smooth. Mix just enough to evenly distribute the color and achieve a uniform consistency.
Storage of Homemade Decorated Cupcakes
To keep your adorable **Cookie Monster cupcakes** fresh, moist, and delicious, proper storage is key. Following these guidelines will ensure they remain enjoyable for as long as possible:
- Refrigerate Decorated Cupcakes: Once fully decorated, your cupcakes, especially those with buttercream frosting, should be stored in a sealed, airtight container. Place them in the refrigerator for up to 3 days. The airtight container prevents them from drying out and absorbing odors from the fridge. For the best flavor and texture, allow the cupcakes to come to room temperature for about 15-30 minutes before serving. This softens the buttercream and makes the cupcake base more tender.
- Freeze Undecorated Cupcakes (Ahead of Time): If you want to prepare the cupcake bases significantly ahead of your event, you can freeze undecorated cupcakes. Once completely cooled, place them in a single layer in a freezer-safe container, or wrap each individually in plastic wrap and then in aluminum foil to prevent freezer burn. They can be frozen for up to 1 month. When ready to use, thaw them completely at room temperature before you begin the decorating process.
- Freezing Decorated Cupcakes (with Caution): While it is technically possible to freeze fully decorated cupcakes, it’s generally recommended to do so with caution. Freezing can sometimes affect the texture of the buttercream (making it slightly grainy) and the cookies (potentially making them a bit soggy upon thawing). If you must freeze them decorated, ensure they are fully frozen on a tray first before carefully placing them in an airtight container to prevent smudging or damage to the frosting. Thaw them slowly in the refrigerator overnight before bringing them to room temperature.
More Fun & Decorated Cupcakes to Explore
If you loved making these **Sesame Street-themed treats**, you’ll surely enjoy exploring other creative cupcake ideas from my collection. Whether you’re planning another themed party or just looking for a fun baking project, these recipes offer delightful decoration opportunities:
- Galaxy Cupcakes {With Buttercream Icing} for a cosmic celebration with swirling colors.
- Easter Cupcakes {Chick Cupcakes} for springtime joy and adorable fluffy designs.
- Easy Fondant Daisies {Daisy Cupcakes} for elegant floral touches perfect for garden parties or showers.
- Bee Cupcakes {Bumblebee or Honey Bee} for a buzzing good time with charming little insects.
- Easy Dinosaur Cupcakes {Fondant Toppers} to delight any dino enthusiast with simple yet effective toppers.
Recipe
Cookie Monster Cupcakes (Sesame Street Cupcakes)
Abeer Rizvi
Pin Recipe
Want to Save This Recipe?
Enter your email & I’ll send it to your inbox. Plus, get great new recipes from me every week!
By submitting this form, you consent to receive emails from CakeWhiz
Ingredients
- 24 Chocolate cupcakes
- 4 cups Buttercream icing Colored blue (ensure vibrant blue using gel food coloring)
- 1 cup Chocolate chip cookies Medium sized (for mouth) and mini size (for crumbs, optional)
- 2 tablespoon Candy eyes/ eyeballs
Instructions
-
1. Prepare Cupcakes: Bake your chocolate cupcakes according to your chosen recipe (homemade or box mix). Allow them to cool completely on a wire rack. This step is critical; warm cupcakes will melt your frosting. Ensure they are at room temperature or slightly chilled.
-
2. Prepare Frosting: While the cupcakes are cooling, prepare your buttercream frosting. Tint it a vibrant blue using gel food coloring, mixing until the color is consistent throughout. Refer to the “Tips and Techniques” section for advice on achieving the best color.
-
3. Apply Base Layer: Using a small offset spatula or butter knife, spread a thin, even layer of blue icing on top of each cooled cupcake. This creates a solid blue base and helps the piped “fur” adhere better and look fuller.
-
4. Set up Piping Bag: Fill a piping bag with the blue buttercream and attach a grass tip (Wilton Tip #233) or a small star tip (e.g., Wilton Tip #18). Do not overfill the bag.
-
5. Pipe the Fur: Hold the piping bag at a 45-degree angle above the cupcake. Apply steady pressure, squeezing the bag to create short strands of frosting, then gently pull away. Work from the outer edges of the cupcake inwards, covering the entire top to create Cookie Monster’s signature fluffy “fur” texture.
-
6. Create the Mouth: Use a sharp knife to make a single, clean cut on the lower half of each cupcake. This cut should be wide enough to snugly fit your chosen cookie without tearing the cupcake or smudging the frosting.
-
7. Add Cookies: Gently insert a few mini chocolate chip cookies, or a medium-sized chocolate chip cookie (cut in half if too large) into the cut you just made. For an extra touch of authenticity, you can scatter some cookie crumbs around the mouth area, making it look like Cookie Monster just took a big, messy bite!
-
8. Place the Eyes: Finally, stick two candy eyes near the top of each cupcake, above the cookie mouth. Adjust their position slightly to give each Cookie Monster a unique and expressive personality. Serve immediately and enjoy the cheers!
Notes
- For best results and a smooth decorating process, thoroughly read all the tips and techniques provided in the article above before you begin.
- Leftover decorated cupcakes should be stored in a sealed, airtight container in the fridge for up to 3 days to maintain freshness. Bring to room temperature for optimal flavor and texture before serving.
- If using store-bought chocolate chip cookies for the mouth, consider slightly breaking some to create “crumbs” for an even more authentic Cookie Monster look.
- Always use gel food coloring for the best, most vibrant blue color without thinning your buttercream.
Nutrition
An automated tool is used to calculate the nutritional information. As such, I cannot guarantee the accuracy of the nutritional information provided for any recipe on this site.
