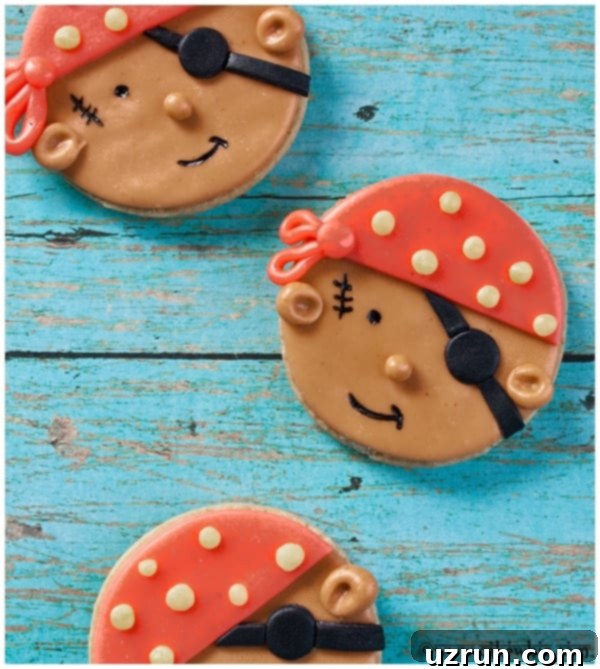
Swashbuckling Sweets: Easy Fondant Pirate Cookies for Unforgettable Kids’ Parties
Ahoy, mateys! Embark on a delicious adventure with this comprehensive, step-by-step cookie decorating tutorial to craft the most charming and easy pirate cookies. These delightful treats are perfect for adding a touch of adventure to any celebration, especially for boys’ birthday parties. You won’t need any fancy equipment – just basic cutters, freshly baked round sugar cookies, and versatile marshmallow fondant. Get ready to transform simple cookies into edible treasures that will captivate all your little buccaneers!
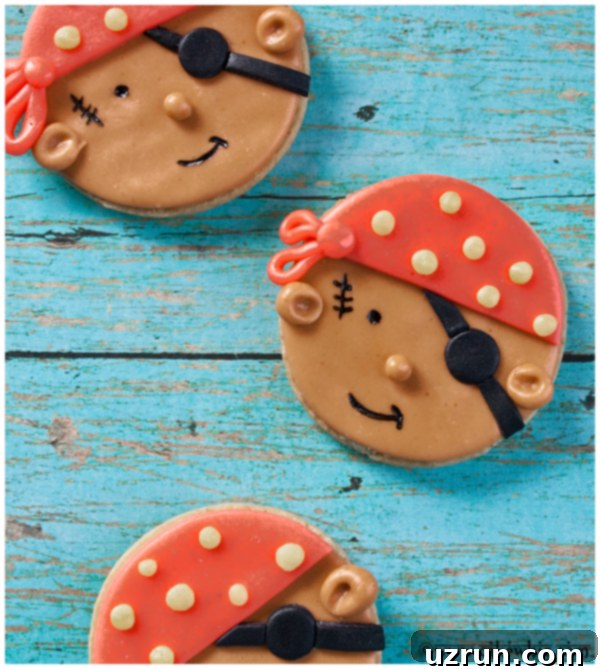
These homemade decorated cookies are not only fun to make but also serve as a fantastic centerpiece or party favor. Imagine the excitement as children discover these adorable pirate faces! Much like our popular Easy Dinosaur Cookies, these pirate-themed delights are designed to be approachable for bakers of all skill levels. To complete your pirate-themed feast, consider serving these alongside my show-stopping Easy Treasure Chest Cake (Kit Kat), creating an unforgettable dessert table.
Why Choose Fondant for Decorating Your Pirate Cookies?
When it comes to creating detailed and vibrant designs on cookies, fondant is a game-changer, especially for beginners. Unlike royal icing, which can be tricky to master with its precise consistencies and piping techniques, fondant offers a forgiving and sculptural medium. You can roll it out, cut shapes, layer colors, and even mold small details like the eyes and noses of your pirate characters. It dries to a smooth, firm finish, making your pirate cookies easy to handle, transport, and stack (once completely dry!). Plus, marshmallow fondant, in particular, tastes far superior to traditional store-bought fondant, adding a lovely, sweet chewiness to your sugar cookies.
Essential Tools for Your Pirate Cookie Adventure
Before you dive into decorating, gather these basic tools to ensure a smooth sailing experience:
- Rolling Pin: For evenly rolling out your fondant.
- Circle Cutters: Various sizes for the cookie base and different elements of the pirate’s face and hat.
- Sharp Knife or X-Acto Knife: For precise cuts, like shaping the pirate’s bandana or eye patch.
- Small Paintbrush: Essential for applying edible glue (corn syrup or water) with precision.
- Edible Food Markers (Black): For drawing details like eyes and mouths.
- Drying Rack: To allow decorated cookies to set without smudging.
- Non-Stick Mat or Powdered Sugar: To prevent fondant from sticking while rolling.
Key Ingredients for Your Delicious Pirate Cookies
The success of your decorated pirate cookies starts with quality ingredients. Here’s a closer look at what you’ll need and why each component is important:
- Cookies: The foundation of any great decorated cookie is a sturdy and flavorful base. Cut-out sugar cookies are undeniably the best choice for cookie decorating. Their firm texture holds up well to handling, and their smooth surface provides a perfect canvas for fondant. Ensure your cookies are baked to a consistent thickness for optimal presentation and even drying.
- Fondant: This is where the magic happens! You can use either homemade or store-bought fondant. For a superior taste and a delightful aroma, I highly recommend homemade marshmallow fondant. It’s surprisingly easy to make and much more pliable and tastier than many commercial brands. For these pirate cookies, you’ll need various colors like brown (for the face), red (for the bandana), yellow (for accents), and black (for the eye patch and details).
- Corn Syrup: This sticky, sweet ingredient acts as your “edible glue” to adhere fondant decorations to the cookies and to each other. A tiny amount goes a long way, ensuring your pirate’s features stay put without making the fondant overly wet or sticky.
- Water: Another simple yet effective “edible glue.” For lighter applications and sticking smaller pieces, a dab of water with a paintbrush is often sufficient. Be mindful not to use too much, as excess moisture can dissolve the fondant or make it tacky.
How to Make Easy Pirate Cookies with Fondant: A Step-by-Step Guide
Ready to set sail? Follow these simple steps to bring your pirate cookies to life:
- Bake Your Cookie Canvas: Start by baking your favorite sugar cookies. It’s crucial that they cool completely to room temperature before you begin decorating. Warm cookies will melt or distort the fondant, leading to a sticky, frustrating mess. Patience is key here!
- Color Your Fondant: If you’re using plain white fondant, now is the time to color it. Use high-quality gel food colors for vibrant, concentrated hues that won’t thin out your fondant. Alternatively, save time by purchasing pre-colored fondant in brown, red, yellow, and black. Knead the color into the fondant until it’s evenly distributed.
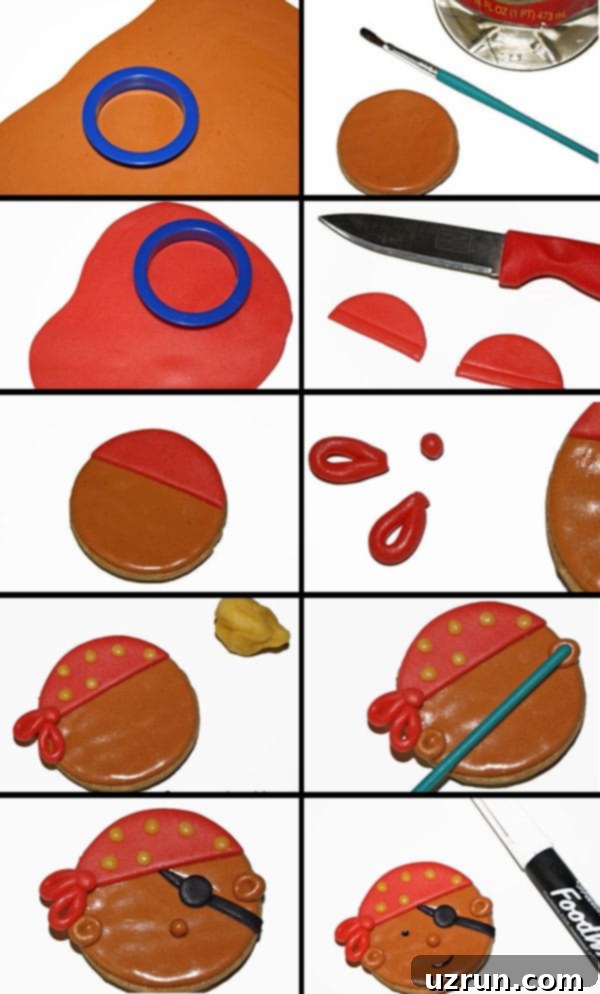
- Decorate with Precision: With your cooled cookies and colored fondant ready, you’ll use a knife, a small paintbrush, and various cutters to bring your pirate characters to life. Each step involves rolling, cutting, and carefully adhering pieces to build the pirate’s face and iconic accessories.
Creative Variations for Your Pirate Cookies
While our classic pirate design is charming, don’t hesitate to unleash your creativity! Here are some variations to customize your pirate cookies:
- Experiment with Other Cut-Out Cookie Bases: While classic sugar cookies are excellent, feel free to try other sturdy cut-out cookie recipes. These Chocolate Sugar Cookies would make for a rich, dark base, perfect for a more dramatic pirate look. Or, for a festive touch, these Cut Out Funfetti Cookies could add a hidden burst of color. Even our Best Shortbread Cookies (3 Ingredients) offer a delicious, buttery alternative.
- Pipe Decorations Instead of Fondant: If you’re an experienced piper or simply prefer the look of icing, you can create all the decorations with Royal Icing or Glace Icing. This method allows for finer lines and intricate details, though it requires more skill and drying time. You could pipe the bandana, facial features, and even a skull and crossbones emblem directly onto the cookie.
- Try Different Color Schemes: Who says pirates can only wear red bandanas? You don’t have to stick to the traditional color scheme. Get creative and use whatever colors you like to match your party theme or personal preference. Teal, purple, or even striped bandanas could add a unique twist to your pirate crew.
- Flavor Your Fondant: Elevate the taste of your cookies by mixing an extract of your choice into the fondant. Vanilla, almond, lemon, or even a hint of rum extract (for adult pirates!) can add an extra layer of flavor that complements the cookie base. Always choose an extract whose flavor would enhance, not overpower, the cookie.
- Add Edible Details: Enhance your pirate cookies with edible glitter for a touch of sparkle, or edible gold dust on eye patches for a truly “treasure-worthy” look. Small candy pearls can also be used as earring details or buttons on a pirate’s coat.
Expert Tips and Techniques for Perfect Pirate Cookies
Achieving perfectly decorated pirate cookies is easier with a few insider tips:
- Always Use Gel Colors: When coloring fondant, always opt for gel food colors over liquid food coloring. Gel colors are more vibrant, highly concentrated, and will not introduce excess moisture into your fondant, which can make it sticky and alter its consistency.
- Control the Use of Water and Corn Syrup: Both corn syrup and water act as edible glue, but too much can be detrimental. Use a small paintbrush and apply as little quantity as you can manage. Excess moisture or corn syrup can make the fondant very sticky, messy, and significantly prolong the drying time. A thin, even layer is all you need.
- Homemade vs. Store-Bought Marshmallow Fondant: While either can be used, the homemade marshmallow fondant version consistently tastes and smells amazing. It’s also often more pliable and less prone to cracking than some store-bought varieties, making it easier to work with.
- Do Not Decorate Warm Cookies: This tip is paramount! Cookies must cool completely to room temperature before decorating. If you apply fondant to warm cookies, the heat will cause the fondant to soften, melt, and turn into a sticky, unmanageable mess. Plan ahead and ensure your cookies have ample time to cool.
- Avoid Stacking Freshly Decorated Cookies: Once your pirate cookies are adorned with fondant, they should not be stacked for several hours, or even overnight, depending on humidity. Fondant needs time to set and harden. Stacking them too soon will inevitably lead to smudges, dents, and ruined decorations. Store them in a single layer until completely dry.
- Work on a Clean, Dry Surface: Fondant can be sensitive to moisture and crumbs. Work on a clean, dry surface, lightly dusted with powdered sugar or cornstarch to prevent sticking.
- Keep Fondant Covered: Fondant dries out quickly when exposed to air. Always keep any unused fondant tightly wrapped in plastic wrap or an airtight container to maintain its pliability.
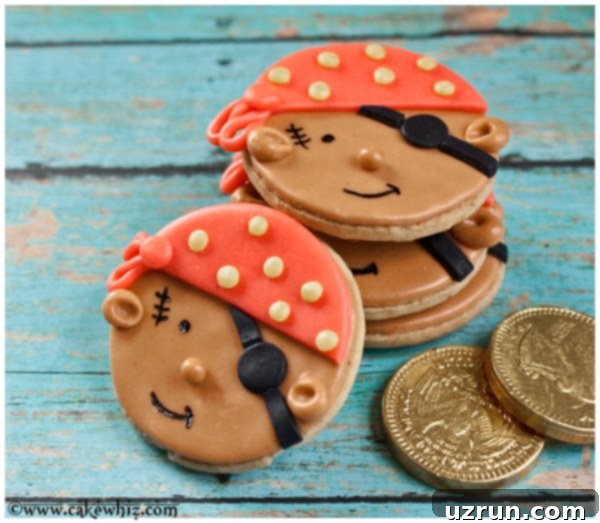
Storage Tips for Your Pirate Cookie Treasures
Proper storage is essential to keep your decorated pirate cookies fresh and looking their best. Here’s how to store them effectively:
- Room Temperature: The best way to store decorated cookies is at room temperature in a covered cardboard box. Cardboard allows for some air circulation, preventing moisture build-up that can make fondant sticky. Keep them away from moisture, direct sunlight, and heat. Stored this way, they will remain fresh for up to 1 week.
- Refrigeration: This is generally not recommended for fondant-decorated cookies. The moisture and condensation in the fridge can cause the fondant to become sticky, dull, and sometimes even bleed colors.
- Freezing: Undecorated cookies can be frozen for up to 1 month in a sealed, airtight container. Thaw them at room temperature before decorating. However, decorated cookies, especially those with fondant, cannot be frozen. The freezing and thawing process will cause the fondant to become very sticky, wet, and potentially damaged, making your pirate cookies lose their charm.
More Easy Decorated Cookies to Explore
Loved making these pirate cookies? Here are some other fun and easy decorated cookie ideas you might enjoy:
- Acorn Cookies (Nutter Butter)
- Easy Oreo Turkey Cookies
- Sports Cookies (Baseball, Basketball, Soccer)
Recipe: Easy Fondant Pirate Cookies

Easy Pirate Cookies (Fondant)
Abeer Rizvi
Pin Recipe
Want to Save This Recipe?
Enter your email & I’ll send it to your inbox. Plus, get great new recipes from me every week!
By submitting this form, you consent to receive emails from CakeWhiz
Ingredients
- 6 Sugar Cookies (Round, baked and completely cooled)
- 1 cup Marshmallow fondant (Colored brown, red, yellow, black using gel colors)
- 2 tablespoon Corn syrup
- 2 tablespoon Water
- Black Edible Food Marker
Instructions
-
Bake your chosen sugar cookies according to your recipe and allow them to cool completely on a wire rack. This is a critical step before decorating to prevent fondant from melting.
-
On a clean surface lightly dusted with powdered sugar, roll out the brown fondant to about ⅛ inch thickness. Use a circle cutter (the same size as your cookies) to cut out one piece of brown fondant for each cookie.
-
Brush a very thin layer of corn syrup onto the top of each round sugar cookie. Carefully place the brown fondant circle on top, pressing gently to adhere it smoothly without any air bubbles. This forms the pirate’s face.
-
Next, roll out the red fondant and use a circle cutter (slightly smaller than your cookie) to cut out a circular piece. Using a sharp knife, cut this circular piece in half to create two semi-circles. You may need to trim these semi-circles a little more with your knife to create the desired bandana shape, fitting it across the top portion of the brown fondant face. Brush a small amount of water near the top edge of the cookie and stick the red semi-circle here to form the pirate’s bandana.
-
To create the bandana’s knot, roll out two thin ropes using a small piece of red fondant. Fold these ropes into small loops. Also, roll out one tiny red ball for each cookie. Each pirate cookie will require two loops and one very small red ball. Using a tiny dab of water, stick these loops onto the left side of the red semi-circle, near the edge. Press the tiny red ball firmly into the center of these loops to secure the “knot.”
-
For added detail, roll out small yellow fondant balls. Using a tiny dot of water, press them onto the red bandana to resemble decorative studs or buttons.
-
Form two small balls of brown fondant for the ears. Stick one on either side of the brown fondant face, just below the bandana, using a tiny amount of water.
-
Use the back (non-brush end) of your paintbrush or a small modeling tool to gently indent the center of each brown ear, giving them a more realistic shape.
-
To create the eye patch, roll out black fondant and cut a thin strip. Gently curve it and stick it along the right side of your pirate’s face, using a tiny brush of water or corn syrup, ensuring it covers one “eye” area. Use a knife to carefully trim off any excess fondant, making it neat.
-
Roll out a very small ball of black fondant. This will represent the securing knot for the eye patch. Press it lightly onto the black strip of fondant, towards the top right edge of the cookie.
-
Roll out a small ball of brown fondant for the nose. Stick it gently in the center of the brown fondant face, just below where the eyes would be.
-
Finally, use a black edible food marker to carefully draw the pirate’s visible eye (on the left side) and a curved mouth. Add any other desired details like scars or stubble, and your swashbuckling pirate cookies are done! Allow them to dry completely for several hours before handling or storing.
Notes
- For best results, read all the detailed tips and techniques provided above before you begin decorating.
- Store finished pirate cookies in a covered cardboard box at room temperature for up to 1 week. Keep them away from any moisture, direct sunlight, and sources of heat to maintain their decoration.
- Avoid refrigerating or freezing decorated fondant cookies, as this can cause the fondant to become sticky and ruin the design.
Nutrition
An automated tool is used to calculate the nutritional information. As such, I cannot guarantee the accuracy of the nutritional information provided for any recipe on this site.
