Classic Red Velvet Crinkle Cookies: Your Ultimate Guide to Homemade Perfection
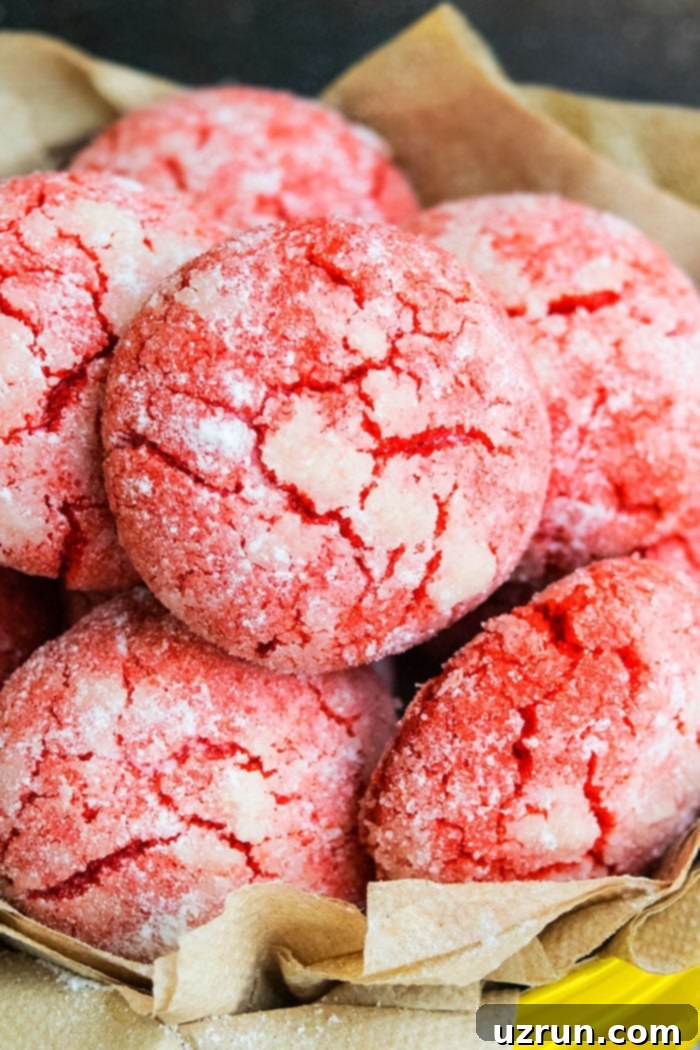
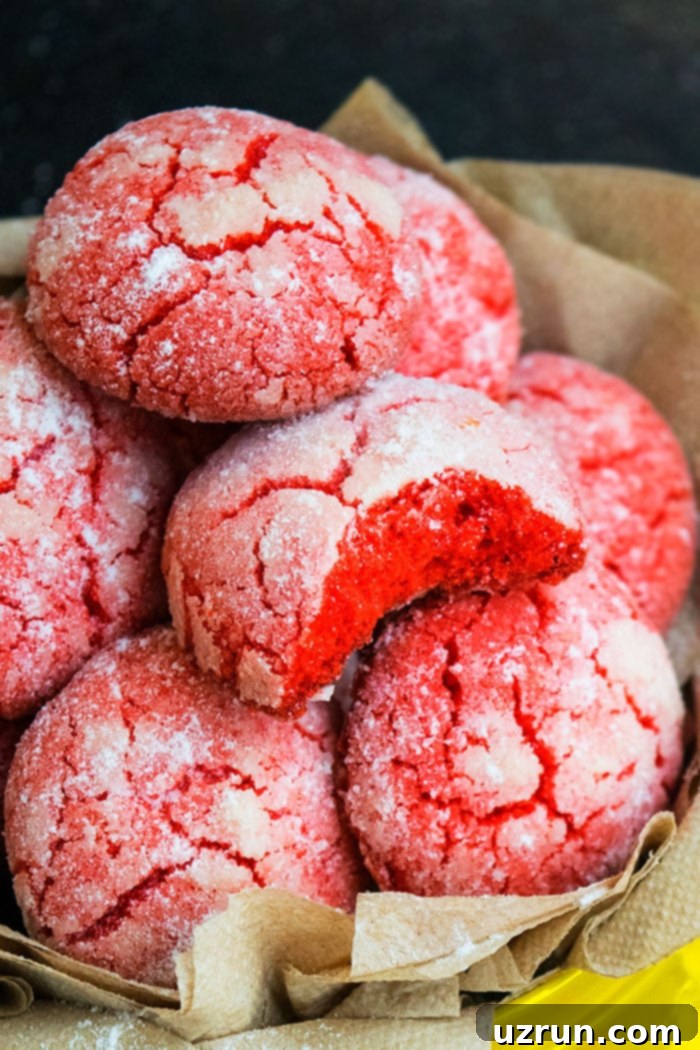
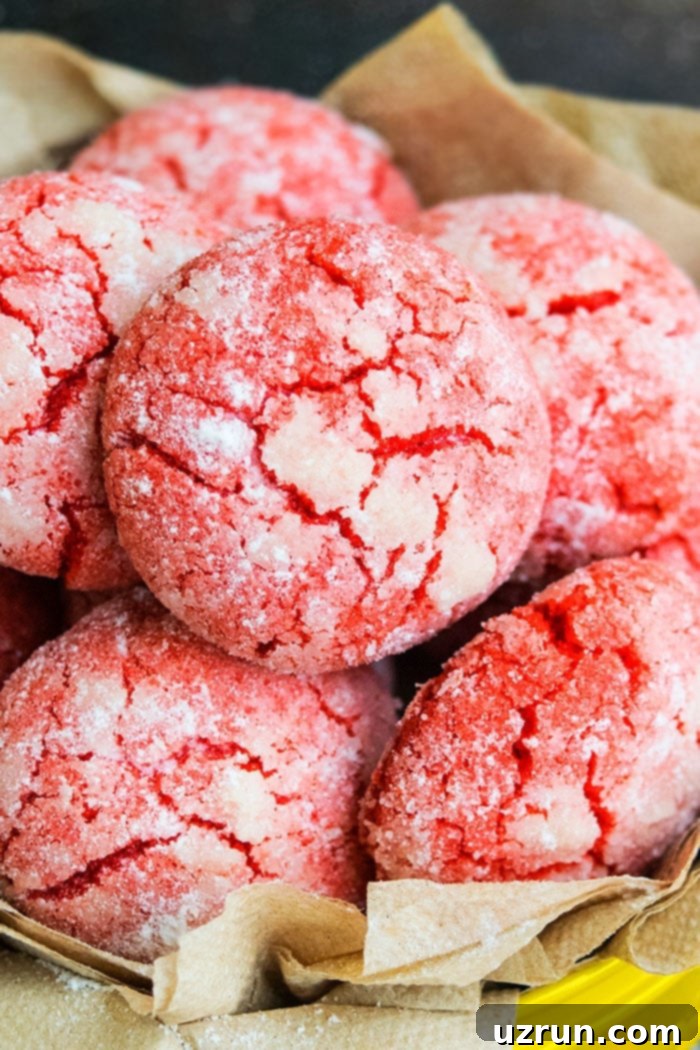
Embark on a delightful baking journey with this easy, classic red velvet crinkle cookies recipe, crafted from scratch using simple, readily available ingredients. These cookies are a celebration of contrasting textures and a vibrant, captivating color. Imagine a delicate crispness on the outside, yielding to a wonderfully soft and slightly chewy interior, all beautifully adorned with a distinctive crackled powdered sugar topping. They offer a rich, yet subtly balanced chocolate or cocoa flavor that is never overwhelming, making them an irresistible treat for any occasion.
Over the years, I’ve experimented with a myriad of red velvet cookie recipes, exploring variations made with oil, cool whip, and even different cake mixes like Duncan Hines, Pillsbury, and Betty Crocker. However, my heart always returns to this simple, from-scratch version. It stands out not only for its ease of preparation – requiring ingredients typically found in any well-stocked kitchen pantry – but also for its superior taste and texture. The interplay of the sugary-crisp exterior and the tender, soft, and slightly chewy inside is simply divine.
Beyond their exquisite flavor and texture, these classic cookies boast a stunning vibrant red hue that makes them truly stand out. They are an absolute showstopper for Christmas holiday cookie exchanges, bringing a festive cheer to any spread. Their romantic color also makes them perfect for Valentine’s Day, cherished anniversaries, or even as elegant wedding party favors. To complement these delightful crinkle cookies, consider adding other red velvet favorites like these Best Red Velvet Cupcakes {With Cream Cheese Frosting}, Red Velvet Cookies {With Cake Mix}, Red Velvet Truffles, and Best Red Velvet Cake {From Scratch} – each offering its unique charm to your special gatherings.

Table of contents
- How to Make Red Velvet Crinkle Cookies from Scratch
- Essential Ingredients for Perfect Crinkle Cookies
- Creative Variations for Red Velvet Crinkles
- Expert Tips and Techniques for Flawless Red Velvet Crackle Cookies
- Troubleshooting: Why Don’t My Cookies Have Crinkles and Cracks?
- Optimal Storage for Homemade Red Velvet Crinkle Cookies
- More Classic Cookie Recipes to Explore
How to Make Red Velvet Crinkle Cookies from Scratch
Creating these stunning red velvet crinkle cookies is a straightforward process, broken down into a few key steps that ensure perfect results every time. Follow these simple instructions to achieve cookies that are as delicious as they are beautiful:
- Cream Butter and Sugar: Begin by creaming together softened unsalted butter and granulated sugar until the mixture becomes light, fluffy, and pale in color. This step incorporates air, which contributes to the cookies’ tender texture.
- Add Wet Ingredients: Incorporate large eggs one at a time, ensuring each is fully blended before adding the next. Then, mix in whole milk, lemon juice (or vinegar), and a generous amount of red gel food coloring. The acidity from the lemon juice or vinegar reacts with the cocoa powder and baking soda, enhancing the red hue and characteristic “velvet” texture.
- Whisk Dry Ingredients: In a separate bowl, thoroughly whisk together all-purpose flour, unsweetened cocoa powder, baking powder, and baking soda. This ensures that the leavening agents and cocoa are evenly distributed throughout the dough.
- Combine Mixtures: Gently add the dry ingredient mixture to the wet ingredients. Mix until just combined, being careful not to over-mix. Over-mixing can develop the gluten in the flour too much, leading to tough, dense cookies instead of soft ones.
- Chill the Dough: This is a crucial step! Chill the cookie dough for at least 2 hours, or preferably overnight. Chilling firms up the dough, making it easier to handle and preventing the cookies from spreading too much during baking, thus preserving their shape and promoting those beautiful crinkles.
- Roll Dough Balls: Once chilled, scoop out small portions of the dough and roll them into uniform balls. First, roll each ball in granulated sugar, which helps to draw out moisture and intensify the crinkle effect. Then, roll them generously in powdered sugar to create the classic white crackled topping.
- Bake to Perfection: Arrange the prepared dough balls on a baking sheet lined with parchment paper. Bake in a preheated oven until the edges are lightly firm, but the centers still appear soft. This ensures a chewy interior. Allow them to cool slightly on the baking sheet before transferring to a wire rack. Enjoy the fresh, homemade goodness!
Essential Ingredients for Perfect Crinkle Cookies
The beauty of these red velvet crinkle cookies lies in their simplicity, using ingredients you likely already have. Let’s delve into why each component is crucial:
- Unsalted Butter (Room Temperature): Using unsalted butter allows you to control the total salt content. Room temperature butter creams beautifully with sugar, creating a light, airy base for your cookies.
- Granulated Sugar: Not only does it provide sweetness, but it also aids in creaming with butter, contributing to the cookie’s texture. An extra cup is used for rolling, creating the initial layer that helps in developing the crinkles.
- Large Eggs (Room Temperature): Eggs bind the ingredients, add moisture, richness, and structure to the cookies. Room temperature eggs emulsify better with other ingredients.
- Whole Milk: Adds richness and helps achieve the desired dough consistency.
- Lemon Juice or Vinegar: This acidic component is key to the “red velvet” reaction. It reacts with cocoa and baking soda, creating the signature subtle tang and enhancing the red color.
- Vanilla Extract: Essential for rounding out the flavors and adding a warm, aromatic note.
- Red Gel Food Coloring: For that iconic, vibrant red color! Gel coloring is preferred as it’s highly concentrated and doesn’t thin the dough like liquid coloring can.
- All-Purpose Flour: The structural backbone of the cookie. Proper measurement is crucial to avoid dry or tough cookies.
- Unsweetened Cocoa Powder: Provides the subtle chocolate flavor that defines red velvet. Use a good quality cocoa for best results.
- Baking Powder & Baking Soda: These leavening agents work together with the acidic ingredients to give the cookies their rise and characteristic crackled surface.
- Powdered Sugar (for rolling): This fine sugar coating is what creates the beautiful white “crinkles” or “cracks” as the cookies bake and spread. It’s the visual hallmark of a crinkle cookie!
Creative Variations for Red Velvet Crinkles
While the classic red velvet crinkle cookie is undeniably perfect, there are many ways to customize and elevate this recipe to suit your taste or occasion:
Add white chocolate chips: For an unbelievably delicious twist, stir in ¾ to 1 cup of high-quality white chocolate chips into the cookie batter. The creamy sweetness of white chocolate perfectly complements the subtle cocoa notes of the red velvet.
Add a cream cheese filling: Transform these crinkles into gourmet cookie sandwiches! Once cooled, spread a layer of the best cream cheese frosting between two cookies for an indulgent treat reminiscent of red velvet cake.
Cake mix version: For a quick and convenient alternative, adapt this recipe using a red velvet cake mix. Follow the method for this Chocolate Cake Mix Cookies Recipe, with one essential additional step: remember to roll the cookie dough balls generously in powdered sugar prior to baking to achieve the crinkle effect.
Add mini marshmallows: Introduce an extra layer of texture and a playful visual with mini marshmallows. Stir about ½ cup into the dough just before chilling for little pockets of gooey sweetness.
Incorporate nuts: For a delightful crunch and nutty flavor, fold in half a cup of finely chopped nuts. Pistachios offer a subtle color contrast, macadamia nuts provide buttery richness, and walnuts add an earthy depth.
Add a drizzle on top: Once the cookies are cooled, a drizzle of melted white chocolate or a simple glaze can add an elegant touch. Note that this might cause the powdered sugar coating to absorb slightly, so it’s best done just before serving.
Dip in white chocolate: For a truly stunning presentation, dip the cooled cookies halfway into melted white chocolate. Allow the chocolate to set on parchment paper. For an even more festive version, sprinkle crushed candy canes onto the wet white chocolate before it hardens, perfect for the holiday season.
Expert Tips and Techniques for Flawless Red Velvet Crackle Cookies
Achieving those picture-perfect crinkles and the ideal texture requires a few key techniques and careful attention to detail. Here are some expert tips to ensure your red velvet crinkle cookies turn out beautifully every time:
Preventing Powdered Sugar Disappearance
One common issue with crinkle cookies is the powdered sugar topping absorbing into the cookie after a few hours, diminishing the visual appeal. To prevent this, implement a double-rolling technique: first, roll the cookie dough balls thoroughly in granulated sugar, ensuring an even coat. This initial layer creates a barrier and helps draw moisture from the dough. Immediately after, roll them generously in powdered sugar before baking. The granulated sugar layer protects the powdered sugar, allowing it to remain distinct and creating those beautiful, lasting crinkles.
Achieving a Vibrant Red Color
The iconic vibrant red color is essential for red velvet cookies. You will likely need to add a significant amount of red food coloring. I highly recommend using gel food coloring over liquid food coloring. Gel colorings are much more concentrated, allowing you to achieve a deep, rich red without altering the dough’s consistency. If you opt for liquid food coloring, you might need to add 4-5 teaspoons or more to get a similar intensity, which could make your dough too wet. Insufficient food coloring will result in a muted, unappealing brownish-red hue.
The Importance of Chilling Cookie Dough
Do not skip chilling this cookie dough! Chilling is a critical step for several reasons. Firstly, it firms up the dough, making it much easier to handle and roll into balls. Secondly, and perhaps most importantly, chilling prevents the cookies from spreading excessively in the oven. When the dough is cold, the butter takes longer to melt, allowing the cookies to set and develop their structure before spreading out too much. This ensures your cookies maintain their round, puffy shape and develop those signature cracks as they bake.
Butter vs. Oil: Why Butter is Best
For this recipe, it’s crucial not to replace butter with oil. Butter provides a distinct richness and flavor that oil simply cannot replicate. Furthermore, butter’s solid fat content at room temperature contributes significantly to the dough’s consistency and how it behaves during baking, directly impacting the final texture and the formation of the crinkles. Using oil would change the consistency of the dough dramatically and compromise both the texture and the flavor profile.
Using Room Temperature Ingredients
Always use room temperature ingredients, especially butter and eggs. This allows them to emulsify properly, creating a smooth, homogenous dough. Cold ingredients can cause the batter to curdle or appear lumpy, resulting in an inconsistent texture in the final cookie.
Why Unsalted Butter?
Opt for unsalted butter. This gives you complete control over the salt content in your cookies. Different brands of salted butter can vary significantly in their sodium levels, leading to cookies that are either too salty or not salty enough. With unsalted butter, you can add salt precisely to your taste and recipe requirements.
Avoid Over-Mixing the Dough
Once you combine the wet and dry ingredients, mix only until they are just incorporated. Over-mixing develops the gluten in the flour, leading to tough, chewy cookies that lack that desirable soft, melt-in-your-mouth quality. A few streaks of flour are better than an over-mixed, dense dough.
Knowing When Your Cookies Are Done
The key to perfectly soft and chewy crinkle cookies is not to overbake them. They are done when the edges appear firm and slightly golden, but the centers still look a little soft and slightly underbaked. They will continue to set as they cool on the baking sheet. Overbaking will result in dry, hard cookies.

Troubleshooting: Why Don’t My Cookies Have Crinkles and Cracks?
The distinct crinkles are what make these cookies so special. If your red velvet crinkle cookies aren’t cracking as expected, there could be several reasons:
- Insufficient Baking Temperature: If the oven temperature is too low, the tops of the cookies might not dry out quickly enough to create those desired cracks as the cookies expand. Ensure your oven is accurately calibrated and preheated to the specified temperature.
- Dough Not Chilled Enough: As mentioned, chilling the dough is paramount. If the dough is not sufficiently chilled, it will spread too rapidly in the oven before the surface has a chance to set and crack. Cold dough allows the exterior to bake and firm up first, causing the softer interior to push through and create cracks as it continues to expand.
- Expired Leavening Agents: Baking powder and baking soda are responsible for the cookie’s rise and expansion. If these agents are old or expired, they won’t react properly, leading to flat cookies without any crinkles. Always check the expiration dates of your leavening agents.
- Skipping the Granulated Sugar Roll: Coating the dough balls first in granulated sugar before powdered sugar is not just for appearance. The granulated sugar layer helps to draw moisture out from the cookie’s surface as it bakes, which significantly contributes to the formation of those beautiful cracks. Do not skip this crucial double-rolling step!
- Over-mixing the Dough: An over-mixed dough can develop too much gluten, resulting in a denser, tougher cookie that is less likely to expand and crack correctly. Mix just until ingredients are combined.
- Too Much Moisture in Dough: While rare with this specific recipe, if the dough is too wet (perhaps due to incorrect ingredient measurements or too much liquid food coloring), it might not form a firm enough crust to crack effectively.
Optimal Storage for Homemade Red Velvet Crinkle Cookies
Proper storage ensures your delicious red velvet crinkle cookies remain fresh and enjoyable for as long as possible:
Room temperature: Once completely cooled, leftover cookies can be stored in an airtight cookie jar or container at room temperature for up to 3 days. To maintain their softness, you can place a slice of bread in the container; the cookies will absorb moisture from the bread.
Refrigerate: For slightly extended freshness, store the cookies in a covered, airtight container in the refrigerator for up to 5 days. While refrigeration helps preserve them, the texture might become a little firmer, and the powdered sugar might slightly absorb moisture.
Freeze: Freezing is an excellent option for long-term storage, especially if you want to enjoy fresh-baked cookies on demand. However, be aware that the powdered sugar topping will become wet and sticky upon thawing if the cookies are frozen after baking. Therefore, I highly recommend freezing just the cookie dough balls for up to 1 month. To do this, scoop and roll the dough balls (after their initial granulated sugar coating, but *before* the powdered sugar) and place them on a parchment-lined tray to freeze solid. Once frozen, transfer them to a freezer-safe bag or container. When you’re ready to bake, remove the desired number of dough balls from the freezer, let them sit for 10-15 minutes, then roll them generously in powdered sugar and bake as directed. Since the dough is frozen, you may need an additional 2-3 minutes of baking time.
More Classic Cookie Recipes to Explore
If you’ve enjoyed baking these red velvet crinkle cookies, you’ll love these other timeless cookie recipes that are perfect for any occasion:
- Italian Almond Cookies (Ricciarelli): Delicate, chewy almond cookies with a beautiful crackled top, perfect for espresso.
- Ginger Molasses Cookies (Soft and Chewy): A comforting classic, these cookies are spiced to perfection with a wonderfully soft and chewy texture.
- Peppermint Filled Cookies (Stuffed): Indulgent chocolate sugar cookies with a delightful peppermint surprise inside, great for holidays.
- Pizzelle Cookies (Thin and Crispy): Traditional Italian waffle cookies, thin, crispy, and often flavored with anise or vanilla.
- Oatmeal Raisin Cookies (Soft and Chewy): A wholesome and satisfying treat, these are famously soft, chewy, and packed with plump raisins.
- Church Window Cookies: A vibrant, no-bake classic with colorful marshmallows resembling stained-glass windows.
- Classic No Bake Cookies: Quick and easy chocolate and peanut butter oat cookies that require no oven.
Recipe

Red Velvet Crinkle Cookies {Crinkles}
Abeer Rizvi
Pin Recipe
Want to Save This Recipe?
Enter your email & I’ll send it to your inbox. Plus, get great new recipes from me every week!
By submitting this form, you consent to receive emails from CakeWhiz
Ingredients
- ¾ cup Butter Unsalted, Room temperature
- 1⅓ cups Granulated sugar
- 3 Eggs Large
- 1 tablespoon Whole milk
- 2 teaspoon Lemon juice Or vinegar
- 2 teaspoon Vanilla extract
- Red gel coloring
- 3 cups All-purpose flour
- ¼ cup Cocoa powder
- 2 teaspoon Baking powder
- ¼ teaspoon Baking soda
- 1 cup Granulated sugar For rolling cookie dough balls
- 1 cup Powdered sugar For rolling cookie dough balls
Instructions
-
In a mixing bowl, cream together butter and granulated sugar until mixture is light and fluffy.
-
Add eggs, milk, lemon juice or vinegar,
and red gel coloring and mix until smooth.
-
In a separate mixing bowl, whisk together the flour, cocoa powder, baking powder and baking soda.
-
Dump the dry mixture into the wet mixture and mix until just combined. Do not over-mix!
-
Chill the dough for 2 hours or overnight.
-
Scoop out small portions of the dough and make small balls. Roll them in granulated sugar first and then, roll in powdered sugar. Place them on a baking tray, lined with parchment paper.
-
Bake at 350 degrees for 10-12 minutes or until the cookies are firm around the edges. Enjoy!
Video
Notes
- The recipe in today’s post is adapted from Cooking Classy.
- Read my tips above.
- When the cookies cool down completely, store in a cookie jar at room temperature for up to 3 days.
Nutrition
An automated tool is used to calculate the nutritional information. As such, I cannot guarantee the accuracy of the nutritional information provided for any recipe on this site.
