Easy Homemade Cherry Pie Filling: The Ultimate Guide to Perfect Cherry Desserts
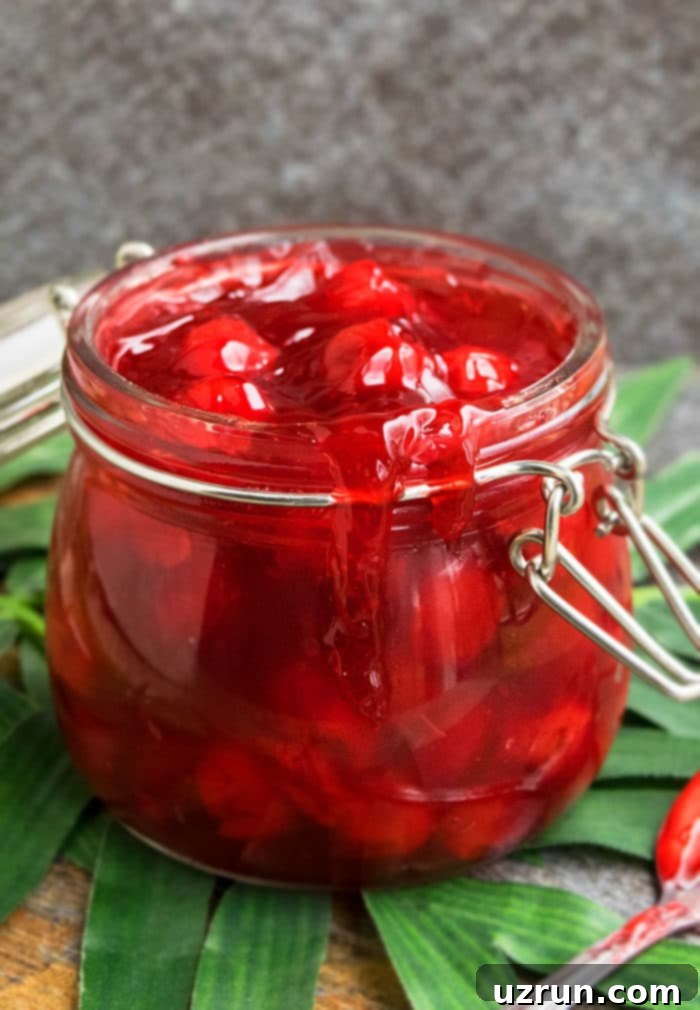
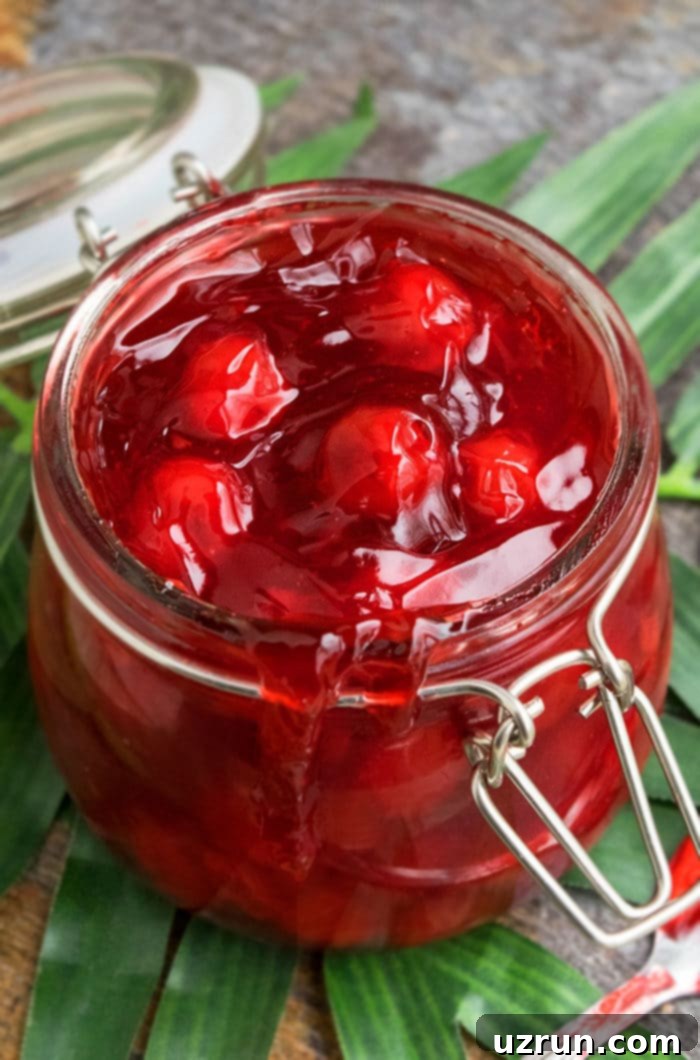
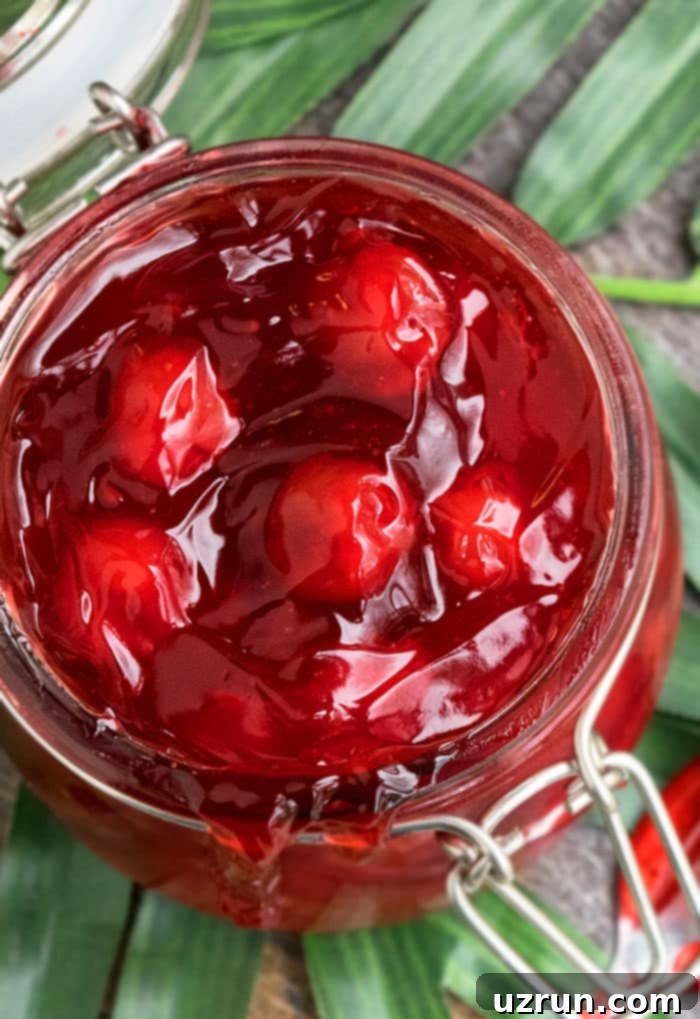
Unlock the secret to irresistible desserts with our incredibly quick and easy homemade cherry pie filling recipe. Crafted from scratch with just 6 simple ingredients, this vibrant and luscious filling is a game-changer for any baker. Forget store-bought options; once you taste the fresh, bright flavor of this homemade version, you’ll never go back! It’s perfectly versatile, ready to elevate your pies, crumbles, cakes, tarts, and so much more.

Today, we’re diving into a beloved family recipe – my Mom’s cherry pie filling – and trust me, it’s truly the best you’ll ever make! This recipe is incredibly straightforward, requiring only six common ingredients, making it ideal for both novice and experienced bakers alike. Its rich, fruity flavor and perfect texture make it an indispensable component for a classic Easy Cherry Pie {With Homemade Pie Filling}, a delightful swirl in Gooey Chocolate Cherry Brownies, or any dessert craving a burst of cherry goodness. The beauty of making your own filling is the control you have over sweetness and consistency, ensuring a customized taste that always hits the spot.
Making homemade pie filling might sound daunting, but this recipe simplifies the process, transforming fresh, juicy cherries into a vibrant, thick, and utterly delicious filling in no time. Whether you’re a seasoned baker or just starting out, this guide provides all the tips and tricks to achieve a perfect batch every single time. Get ready to impress your friends and family with the freshest cherry flavor!
[feast_advanced_jump_to]
Why Homemade Cherry Pie Filling Is Best
While canned cherry pie filling offers convenience, making your own at home provides a superior flavor and texture that simply cannot be matched. Here’s why you should choose homemade:
- Freshness: You control the quality of ingredients, starting with fresh, ripe cherries. This ensures a brighter, more natural cherry flavor without any artificial taste.
- Customization: Adjust the sweetness, tartness, and spice level to your exact preference. Want it tarter? Add more lemon juice. Prefer a hint of almond? Stir in some almond extract.
- Texture Control: Achieve the perfect thickness. No more overly gelatinous or runny fillings. Our recipe helps you get that ideal, spoonable consistency.
- No Unnecessary Additives: Avoid high-fructose corn syrup, artificial colors, and preservatives often found in store-bought options.
- Cost-Effective: When cherries are in season, making your own filling can often be more economical than buying multiple cans.
Key Ingredients for Your Perfect Cherry Filling
This simple recipe relies on just a few essential ingredients, each playing a crucial role in creating the ultimate cherry pie filling:
- Cherries – Fresh is always best for the most vibrant flavor and texture. Tart cherries (like Montmorency) are traditionally preferred for pies due to their intense flavor, which balances beautifully with sugar. Sweet cherries (like Bing or Rainier) can also be used, but you might want to slightly reduce the sugar amount. Pitting them can be a fun family activity or made easier with a cherry pitter!
- Sugar – Granulated sugar sweetens the filling, balancing the tartness of the cherries and enhancing their natural fruit flavor. The amount can be adjusted based on the sweetness of your cherries and your personal preference.
- Cornstarch – This is our thickening agent, crucial for achieving that wonderfully thick and luscious consistency that holds up beautifully in a pie. It creates a smooth, clear sauce around the cherries.
- Water – A small amount of water helps to dissolve the sugar and cornstarch, creating the initial liquid base for the sauce before the cherries release their own juices.
- Lemon Juice – A splash of fresh lemon juice brightens the overall flavor, preventing the filling from tasting too sweet and adding a subtle tang that complements the cherries perfectly. It’s a key ingredient for a balanced taste.
- Vanilla Extract – Added at the end, vanilla extract provides a warm, aromatic note that rounds out the flavors and adds depth to the cherry filling.
- Red Food Coloring (Optional) – While optional, a touch of red food coloring can enhance the visual appeal, giving your filling that signature vibrant cherry-red hue.
How to Make Easy Cherry Pie Filling from Scratch with Fresh Cherries
Creating this delicious filling is a straightforward process, broken down into a few simple steps. Follow these instructions for a perfect batch:
- Combine & Boil Ingredients – In a sturdy non-stick saucepan, combine your pitted fresh cherries, water, fresh lemon juice, granulated sugar, and cornstarch. Whisk well to ensure the cornstarch is fully dissolved and there are no lumps. Bring the mixture to a gentle boil over medium heat, stirring constantly to prevent sticking and ensure even cooking. The heat will activate the cornstarch, starting the thickening process.
- Reduce Liquid & Thicken – Once boiling, reduce the heat to low and continue to simmer the mixture. Stir frequently for about 10 minutes. During this time, the liquid will start to reduce, and the filling will noticeably thicken. Look for a glossy, syrupy consistency that coats the back of a spoon. Remember, it will thicken further as it cools.
- Add Remaining Liquids – Remove the saucepan from the heat. Stir in the vanilla extract for a delightful aroma and flavor. If you desire a more vibrant red color, now is the time to add a few drops of red food coloring. Mix until the color is evenly distributed.
- Cool & Use – Transfer the hot filling to a heat-safe bowl or jar. Allow it to cool completely at room temperature before using it in any treats. As it cools, the filling will set further, reaching its ideal, thick texture. Once cooled, it’s ready to be incorporated into your favorite desserts!
Beyond Pies: Versatile Ways to Enjoy Your Cherry Filling
This homemade cherry pie filling is incredibly versatile and can be used in a multitude of delightful desserts, not just pies! Its sweet-tart flavor and thick texture make it a perfect complement to almost any sweet treat. Here are some ideas to inspire your next baking adventure:
- Pies: The classic choice! Use it as the star of a traditional double-crust pie, a lattice-top pie, or even a deep-dish pie.
- Tarts: Fill individual tart shells or a large tart crust for an elegant and flavorful dessert.
- Galettes: A rustic, free-form pie where the filling is spooned onto a pastry round and the edges are folded over.
- Crumbles: Top with a buttery, oat-filled crumble for a comforting dessert, often served warm with ice cream.
- Cobblers: Similar to a crumble, but often topped with biscuits or a dumpling-like batter.
- Crisps: Another variation of a crumble, typically with an oat-based topping.
- Bars: Spread a layer between shortbread or oat-based crusts for delicious dessert bars.
- Cakes: Use as a luscious filling between cake layers, a topping for a simple vanilla cake, or swirled into the batter. This is especially fantastic in a Black Forest Cake!
- Cupcakes: Core cupcakes and fill them with cherry goodness, or simply dollop on top of frosting.
- Puff Pastries: Fill puff pastry shells or turnovers for a quick and impressive dessert or breakfast pastry.
- Crepes, Waffles, or Pancakes: A warm, fruity topping or filling for breakfast or brunch.
- Scone Topping: Spread over freshly baked scones with a dollop of clotted cream.
- Ice Cream Topping: Transform a simple scoop of vanilla ice cream into a gourmet treat.
- Trifles: Layer with cake, custard, and whipped cream for an indulgent trifle.
- Yogurt Topping: A healthy and delicious addition to your morning yogurt or parfait.
- Cheesecake Topping: Drizzle generously over a creamy cheesecake for an exquisite finish.

Creative Variations for Your Cherry Pie Filling
One of the best things about making your own cherry pie filling is the endless possibilities for customization. Don’t be afraid to experiment and make it truly your own! Here are some popular variations:
- Make it without cornstarch – While cornstarch is excellent for thickening, you can use other agents. Clear Jel is a fantastic alternative, especially if you plan to can the filling, as it holds up better to heat processing. You can also use tapioca flour (or tapioca starch) as a 1-to-1 substitution for cornstarch for a slightly different texture and shine.
- Make it with canned cherries – If fresh cherries are out of season or unavailable, use the same quantity of canned cherries. Ensure they are unsweetened and drain the liquid thoroughly before adding them to the recipe. You might need to adjust the sugar content slightly depending on the natural sweetness of the canned cherries.
- Make it with frozen cherries – Frozen cherries are a convenient option year-round. Use the same quantity, but do not thaw them completely before cooking. They will release more liquid as they cook, so you will likely need to cook the filling a little longer to reduce the excess liquid and achieve the desired thick consistency. Stirring occasionally is key.
- Make it with maraschino cherries – For a different flavor profile, you can use the same quantity of maraschino cherries. However, be sure to drain their syrupy liquid/cherry juice completely. Be aware that this will result in a much sweeter filling with a distinct, somewhat artificial flavor that many people are not fond of for traditional pies. It might be better suited for toppings or very specific desserts.
- Add it to a black forest cake – This filling is an absolute dream in a Black Forest Cake! Its rich, tart flavor perfectly complements the chocolate and whipped cream. Beyond Black Forest, it can be a scrumptious filling for other chocolate or vanilla layer cakes.
- Add zests – For a brighter, more aromatic filling, stir in a little lemon or orange zest. About ½ to 1 teaspoon of fresh zest can give this filling a wonderful zesty kick that beautifully enhances the cherry flavor.
- Add spices – Warm spices pair wonderfully with cherries. Try adding about ½ teaspoon of cinnamon powder, a pinch of nutmeg, or even a tiny amount of ground cloves to give it a subtle spiced flavor that’s perfect for autumn desserts.
- Try another extract – Almond extract is a classic pairing with cherries and can elevate the flavor profile significantly. Start with ¼ teaspoon and add more to taste. Other extracts like a touch of kirsch (cherry brandy) or even a hint of rose water can also create unique and delightful variations.
Expert Tips and Techniques for the Best Cherry Pie Filling
Achieving the perfect cherry pie filling is simple with these expert tips and techniques:
- How to make filling more tart? If you prefer a tarter filling, there are a few ways to achieve this. You can reduce the amount of granulated sugar slightly, add an extra splash of lemon juice, or, ideally, use naturally tart cherries from the start. Taste and adjust as you go!
- How to make filling from dried cherries? Yikes! This is generally not recommended for a traditional pie filling. Dried cherries have a different texture and rehydrate inconsistently, resulting in a less desirable consistency for a pie. It’s best to stick to fresh, frozen, or canned.
- What to do if you are not fond of pitting cherries because it is messy? Pitting cherries can indeed be a bit messy, but there are solutions! Invest in a special cherry pitter tool – they are inexpensive and make the job quick and clean. Alternatively, you can use frozen pitted cherries, which are a huge time-saver and eliminate the mess entirely.
- How to sweeten filling? If your filling isn’t sweet enough for your liking, simply stir in an additional tablespoon or two of granulated sugar while the mixture is still warm and dissolving. Taste again after it has dissolved and adjust further if needed.
- I like to add some red food coloring – While entirely optional, a tiny amount of red food coloring can significantly enhance the visual appeal of your cherry filling, making it even more vibrant and appealing. It doesn’t affect the taste.
- Make sure you are using a non-stick pan – This is a crucial tip! Using a good quality non-stick saucepan prevents the fruit and sugar from sticking to the bottom and burning, which can ruin the flavor and texture of your filling. Stirring frequently also helps.
- How to thicken filling? This filling will continue to thicken as it cools down. Don’t be alarmed if it seems a little thinner than desired right off the heat. If, after cooling, it’s still too thin, you can gently reheat it and add a slurry of cornstarch and a little water (1 tsp cornstarch mixed with 1 tsp cold water) and simmer for a minute or two. Be cautious not to add too much, as it can make the filling overly gooey or give it a starchy taste.
- How much does this make? This recipe yields enough delicious homemade cherry pie filling for a standard 9-inch pie, ensuring a generous and satisfying layer of fruit.
- Don’t Overcook: Overcooking can cause the cherries to break down too much and lose their distinct texture. Cook just until the sauce thickens and the cherries are tender but still hold their shape.
- Cool Completely: Allow the filling to cool to room temperature before using it in pies or other delicate desserts. Hot filling can make pastry soggy or melt other components.

Storage of Homemade Pie Filling
Proper storage ensures your delicious homemade cherry pie filling stays fresh and ready for your next baking project:
- Refrigerate – Once completely cooled, transfer the filling to an airtight container or a sealed jar. It will keep beautifully in the refrigerator for up to 5 days. This makes it a great make-ahead component for your holiday baking or weekend treats.
- Freeze – For longer storage, this filling freezes wonderfully. Allow it to cool completely, then transfer it into a sealed freezer bag, removing as much air as possible, or an airtight freezer-safe container. It can be stored in the freezer for up to 1 month. Thaw in the refrigerator overnight before use.
- Canning Caution: This specific recipe cannot be safely canned because of the use of cornstarch as a thickener. Cornstarch can break down during the high-heat canning process, leading to an inconsistent texture and potentially creating an environment conducive to the growth of harmful bacteria. If you intend to can your cherry pie filling for long-term pantry storage, you must use a tested recipe that specifies canning-safe thickeners like Clear Jel.
Recipe FAQs
To enhance your pie filling, consider adding various extracts (like almond or a touch of kirsch), spices (cinnamon, nutmeg), or zests (lemon, orange). These additions can create a whole range of delicious and complex flavors. Also, a little-known secret is that the longer this filling sits in the fridge (even just overnight), the flavors deepen and meld, making it taste even better!
Yes, commercially canned pie filling has already been cooked during the canning process. This means it can be eaten directly from the can without any further heating or cooking, making it convenient for quick desserts or toppings.
Pitting fresh cherries can be easy with the right tools. You can use special cherry pitter tools, which are relatively cheap and efficient. Alternatively, a chopstick or a sturdy straw can be used to push the seed out through the stem end. For a quicker, less messy option, consider buying pre-pitted frozen cherries.
Sour cherries, also known as tart cherries (such as Montmorency), are generally considered ideal for pie fillings and baking in general. Their intense tart flavor holds up well to cooking and balances beautifully with added sugar. Sweet cherries (like Bing) can also be used, but since they are naturally sweeter, you might need to adjust the amount of sugar in the recipe accordingly to prevent the filling from becoming overly sweet.
No, it is generally not necessary to thaw frozen cherries before using them in pie filling. You can add them directly to the saucepan. They will thaw and release their juices as they cook, though you may need to cook the filling a little longer to reduce the extra liquid.
Homemade cherry pie filling typically takes about 1-2 hours to cool completely at room temperature. For faster cooling, you can transfer it to a shallow dish, or even place it in the refrigerator once it has cooled slightly (after about 30 minutes at room temperature). Cooling is important for the filling to fully thicken and set.
Absolutely! This cherry pie filling is an excellent make-ahead component. Prepare it up to 5 days in advance and store it in an airtight container in the refrigerator. This can save you a lot of time on baking day, especially when preparing for holidays or special events.
More Delightful Pie and Filling Recipes
If you loved this cherry pie filling, be sure to explore more of our delicious pie and fruit filling recipes:
- Homemade Apple Pie Filling
- Blueberry Pie Filling
- Easy Pecan Pie Recipe
- Easy French Silk Pie
Recipe

Easy Homemade Cherry Pie Filling
Abeer Rizvi
Pin Recipe
Want to Save This Recipe?
Enter your email & I’ll send it to your inbox. Plus, get great new recipes from me every week!
By submitting this form, you consent to receive emails from CakeWhiz
Ingredients
- 6 cups Cherries Fresh, Pitted
- ½ cup Water
- 2 tablespoon Lemon juice
- ⅔ cup Granulated sugar
- 4 tablespoon Cornstarch
- ¼ teaspoon Vanilla extract
- Red food coloring Optional
Instructions
-
In a non-stick saucepan, add cherries, water, lemon juice, sugar and cornstarch and cook on medium heat until it comes to a boil.
-
Reduce the heat to low and cook and for 10 minutes, while stirring, until it becomes thick and liquid is reduced.
-
Remove from heat and stir in vanilla and red food coloring.
-
Let it cool down and then use it in pies, tarts, cakes e.t.c. Enjoy!
Notes
- Read all my tips above for the best results and troubleshooting.
- Leftovers can be stored in a sealed container or jar in the fridge for up to 5 days. Ensure it’s fully cooled before storing.
- Leftovers can also be frozen in sealed freezer bags for up to 1 month. Thaw in the refrigerator overnight before use.
Nutrition
An automated tool is used to calculate the nutritional information. As such, I cannot guarantee the accuracy of the nutritional information provided for any recipe on this site.
