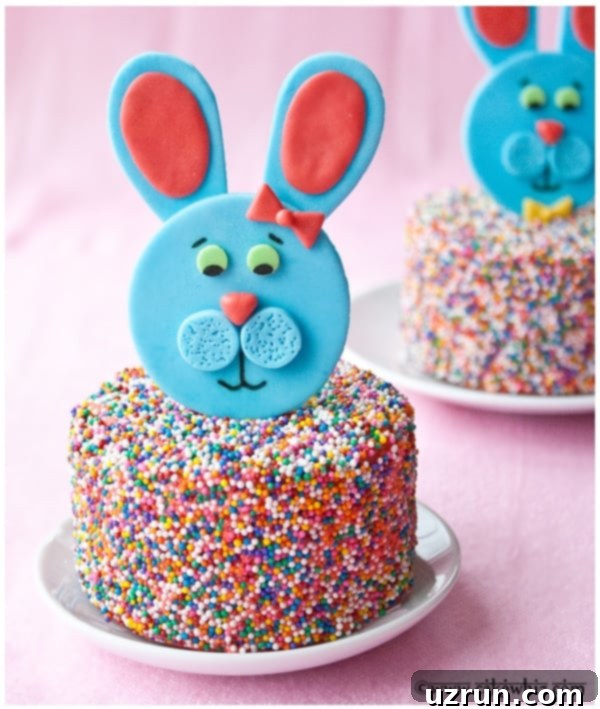
Easy DIY Marshmallow Fondant Easter Bunny Cake Topper Tutorial
Get ready to hop into Easter with this incredibly adorable and surprisingly simple Easter bunny cake topper! Crafted with forgiving marshmallow fondant, this decoration is perfect for adding a personalized, festive touch to any Easter celebration. Whether you’re a seasoned baker or a beginner in cake decorating, you’ll find this tutorial straightforward and fun. The best part? You won’t need any fancy tools to bring these cute bunnies to life, making it an accessible project for everyone.
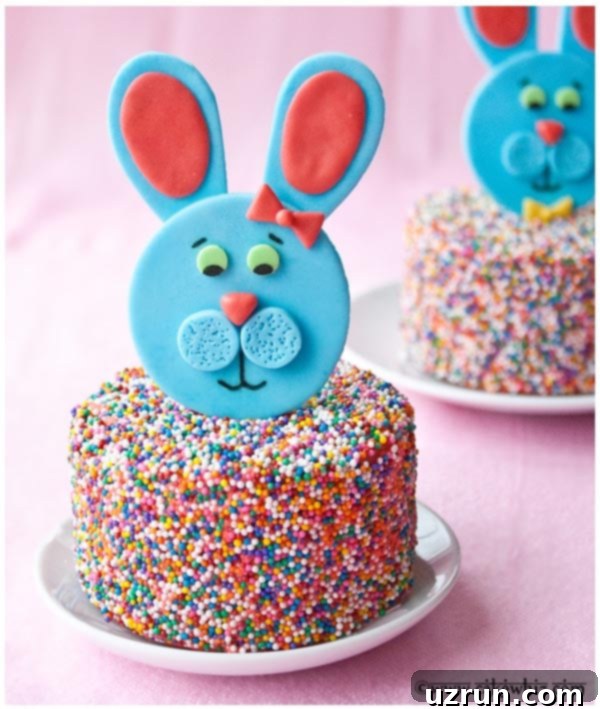
Easter is a time for joy, renewal, and, of course, delicious treats! While many find the idea of intricate cake decorations daunting, this easy fondant bunny cake topper simplifies the process, making it enjoyable for all skill levels. Forget complicated techniques and expensive gadgets; with a few basic kitchen tools and some colorful marshmallow fondant, you can create a centerpiece that will impress your guests and bring a smile to everyone’s face. This guide walks you through every step, from baking your cake to crafting the perfect little bunny face.
If you’re looking for more inspiration for your Easter dessert table, don’t miss our extensive collection of Easter Cake Ideas and tutorials. For those planning a larger, show-stopping dessert, consider making our full-size Easter Bunny Cake. While the internet is flooded with various rabbit cake decorations, many can be quite challenging. Our marshmallow fondant method is designed for simplicity, ensuring a beautiful result without the stress. It’s truly the easiest version you’ll find!
How to Make an Easy Easter Bunny Cake Topper: Step-by-Step Overview
Creating your enchanting Easter bunny cake topper involves a few straightforward steps. The magic really happens with the marshmallow fondant, which is pliable and a joy to work with. Here’s a quick outline of the process before we dive into the detailed instructions:
- Prepare your cakes: Bake your chosen cake flavor and allow them to cool completely.
- Mix your frosting: Prepare your favorite frosting, adding food coloring if desired, to match your festive theme.
- Decorate the cake base: Generously cover your cooled cake with vibrant sprinkles for a fun, festive look.
- Craft the topper: Using marshmallow fondant, shape and assemble your adorable bunny.
- Final assembly: Secure your dried bunny topper with a lollipop stick and gently insert it into the cake.
Let’s delve a bit deeper into each stage to ensure your Easter bunny topper is perfect. This project is not just about the final product; it’s about enjoying the creative process and making memories in the kitchen.
Why Marshmallow Fondant is Perfect for Your Easter Topper
Marshmallow fondant (MMF) is often preferred over traditional fondant for several reasons, especially for home bakers and beginners. It’s incredibly easy to make from scratch with just a few ingredients, including marshmallows, powdered sugar, and a touch of water. Unlike some store-bought fondants, MMF has a delightful, subtle marshmallow flavor that complements cakes wonderfully. Its elasticity and smooth texture make it forgiving to work with, allowing for easy shaping, cutting, and molding – ideal for crafting intricate or simple designs like our cute Easter bunny. It also tends to be less prone to cracking than some other fondants, which is a huge bonus when creating delicate details.
Creative Variations for Your Easter Bunny Cake Topper
While the classic Easter bunny is always a hit, there are countless ways to customize your cake topper and make it uniquely yours. Let your imagination run wild with these delightful variations:
- Create a Bunny Pair: Why stop at one? Make two adorable fondant bunnies – a charming boy bunny with a tiny fondant bow tie or tuxedo details, and a sweet girl bunny adorned with a dainty tiara or a small flower. They’ll look lovely side-by-side on a larger cake or as individual toppers on mini cakes.
- Experiment with Colors and Sprinkles: Don’t limit yourself to traditional pastels! Use vibrant blues, sunny yellows, or even a rainbow of colors for your bunny topper. Coordinate or contrast with your sprinkles – try iridescent, metallic, or even themed spring mixes to make your cake truly pop.
- Explore Different Cake Flavors: The beauty of this topper is its versatility. It pairs well with almost any cake! Consider a zesty Easy Key Lime Cake for a refreshing tang, or a bright Easy Orange Cake for a burst of citrus flavor. Vanilla, chocolate, or red velvet cakes are also classic choices that provide a perfect canvas.
- Luscious Filling Ideas: Elevate your cake’s flavor profile with exciting fillings. Think beyond simple frosting! Jams and preserves (like strawberry or raspberry), rich peanut butter, creamy Nutella, decadent ganache, sticky caramel sauce, sweet dulce de leche, or even a thick custard or pudding can add a wonderful surprise. For a textural element, incorporate fresh fruits or chopped-up candy bars.
- Try Other Frosting Flavors: The frosting is just as important as the cake itself. A delicate Maraschino Cherry Frosting offers a beautiful pink hue and a sweet, fruity taste that’s ideal for Spring. Other excellent choices include cream cheese frosting, buttercream with fruit purées, or even a light whipped cream frosting.
- Adjust Cake Size: The tutorial uses a smaller cake, but this fondant bunny topper can be scaled up! Make an 8-inch or 9-inch round cake and simply create a slightly larger bunny to maintain proportion. A bigger cake is perfect for larger gatherings.
- Design a Layer Cake: For a more impressive presentation, bake a 6-inch cake and stack a smaller 4-inch cake on top. Remember to use dowels or support sticks for stability, especially with multiple layers, to ensure your creation stands tall and proud.
- Surprise with a Piñata Cake: Add an element of surprise by turning your cake into a piñata! Carefully hollow out the center of your baked cake layers and fill them with small egg candies, colorful M&M’s, or an abundance of sprinkles. When cut, the candies will spill out, creating a delightful moment for everyone!
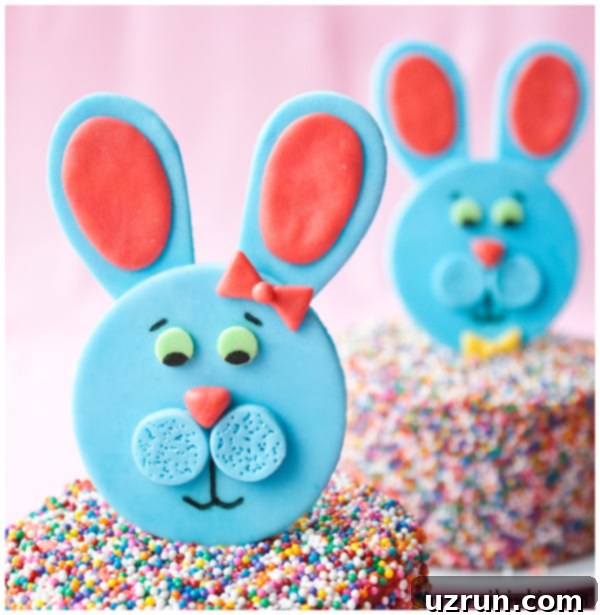
Essential Tips and Techniques for a Perfect Easter Bunny Cake Topper
Achieving a professional-looking and long-lasting cake topper is all about following a few key principles. These tips will help you avoid common pitfalls and ensure your edible art is a resounding success:
- Always Decorate Cooled Cakes: This is perhaps the most crucial rule in cake decorating. Attempting to frost or decorate a warm cake will cause your icing to melt and slide off, creating a sticky, unstable mess. Ensure your cakes are completely cool, preferably chilled slightly, before you begin applying frosting and sprinkles.
- For Faster Fondant Drying: Marshmallow fondant can take some time to firm up, especially in humid conditions. To speed up the drying process and ensure your bunny holds its shape, consider using gum paste or a 50/50 mixture of fondant and gum paste. Gum paste dries much harder and quicker. For an overnight dry, I highly recommend aiming a small table fan at your fondant pieces. This constant airflow significantly reduces drying time and helps prevent stickiness.
- Apply Sprinkles with a Gentle Touch: When covering your cake in sprinkles, be very gentle. If you press the sprinkles too hard into the frosting, you will inevitably create dents and marks in the smooth surface of your icing. These imperfections are difficult, if not impossible, to fix once the sprinkles are on. A light touch and rotating the cake will ensure even, beautiful coverage.
- Prevent Cakes from Sticking to Pans: There’s nothing worse than a perfectly baked cake that refuses to come out of the pan! To prevent this, always line your cake pans with parchment paper at the bottom. Additionally, grease and flour the sides of the pans very well. This dual approach creates a non-stick barrier, ensuring your cakes release cleanly every time.
- Keep Decorated Cakes Away from Moisture: Fondant is very sensitive to moisture. Once your cake is decorated and your fondant bunny topper is in place, keep it away from direct humidity or condensation (like from an open refrigerator door). Excess moisture will cause the fondant to become sticky and tacky, and the colors in your sprinkles can start to bleed, ruining the aesthetics. Store in a cool, dry place.
- Ensure the Topper is Fully Dry: This cannot be stressed enough! Before attempting to insert your fondant bunny into the cake, it absolutely must be completely dry and firm. If the fondant is still soft or pliable, it will bend, curve, or even break when you push the lollipop stick into the cake, or worse, sag once it’s on the cake. A fully dried topper will maintain its shape and stand proudly.
- Drying Time Varies: The exact drying time for your marshmallow fondant topper will depend heavily on your local climate. Areas with higher humidity will naturally experience much slower drying times. Homemade marshmallow fondant also tends to dry slower than professional, store-bought fondant. Plan ahead and give your topper ample time to firm up – often 12-24 hours or even longer if humidity is high.
Storage Solutions for Your Easter Dessert
Proper storage ensures your beautiful and delicious Easter cake remains fresh and picture-perfect for as long as possible:
- Refrigerate Leftovers: If you have any cake leftovers, they can be stored in a sealed airtight container in the fridge for up to 3 days. Be aware that the fondant decorations may become slightly sticky or tacky due to the moisture in the refrigerator environment. To minimize this, you can remove the topper before refrigerating the cake, or place a paper towel in the container to absorb some moisture.
- Freeze Unfrosted Cakes: For long-term storage or make-ahead convenience, unfrosted cake layers can be wrapped tightly in plastic wrap and then in aluminum foil, and stored in a sealed container in the freezer for up to 1 month. When you’re ready to decorate, simply let the cake thaw overnight in the fridge, then bring it to room temperature before frosting and decorating as per the instructions.
- Make-Ahead Instructions: This cake, including its delightful marshmallow fondant Easter bunny topper, can be baked and fully decorated 1 day in advance of your event. Store the decorated cake at cool room temperature (away from direct sunlight or heat) until you are ready to serve. This allows the fondant to fully set and gives you one less thing to worry about on party day.
More Festive Easter & Spring Dessert Ideas
Looking to expand your repertoire of holiday treats? Here are some other delightful Easter and spring-themed desserts that are sure to charm your family and friends:
- Easter Egg Cake
- Easter Chick Cupcakes
- Butterfly Cake
- Birds Nest Cookies (Chocolate Coconut Easter Bird Nests)
- Ladybug Cupcakes
- Peeps Cake
- Piñata Cake (Robin Egg Cake)
Recipe Card
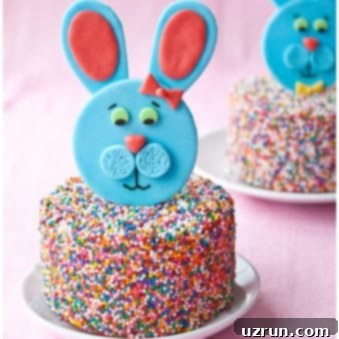
Easy Easter Bunny Cake Topper
Abeer Rizvi
Pin Recipe
Want to Save This Recipe?
Enter your email & I’ll send it to your inbox. Plus, get great new recipes from me every week!
By submitting this form, you consent to receive emails from CakeWhiz
Ingredients
- 1 Lemon Cake Baked in 4 mini cake pans (Dimensions: 4×2 inches)
- 3 cups Lemon frosting
- 1 cup Sprinkles Rainbow colored for a festive look
- 1 cup Marshmallow fondant Divided and colored blue and pink
- 2 tablespoons Royal icing Or melted chocolate for adhering pieces
Instructions
-
Bake your chosen lemon cakes in mini cake pans (4×2 inches), ensuring the pans are well-greased, floured, and lined with parchment paper to prevent sticking.
-
Allow the baked cakes to cool completely on a wire rack before attempting to handle them. This is crucial for frosting success.
-
Once cooled, carefully remove the cakes from their pans and discard the parchment paper.
-
Proceed to fill and evenly frost each cake with your prepared lemon icing, ensuring a smooth coating all around.
-
Gently cover all the frosted cakes generously with rainbow sprinkles. Set them aside while you prepare the topper.
-
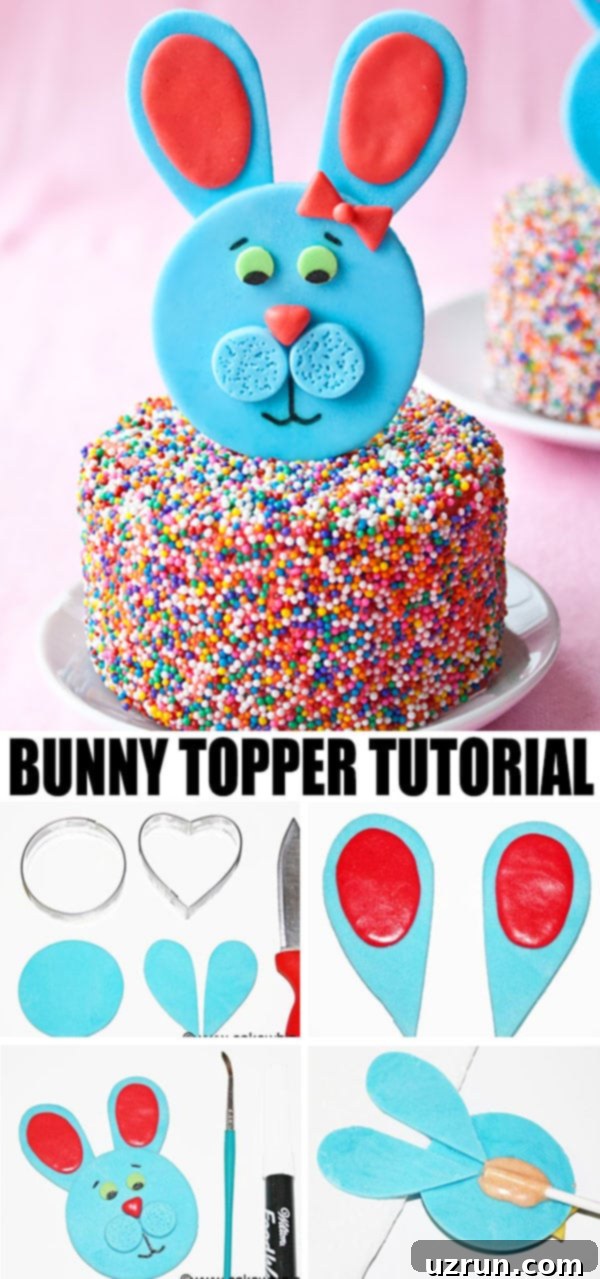
Roll out a portion of the blue marshmallow fondant to an even thickness. Use a round circle cutter for the bunny’s head and a heart-shaped cutter for the ears.
-
Take a heart-shaped piece and use a knife to carefully cut it in half vertically. This will create two petal-shaped pieces, which will form the outer part of the bunny’s ears.
-
Roll out the pink marshmallow fondant and cut out two smaller oval-shaped pieces. These will be the inner part of the bunny’s ears. Lightly dampen the back of the pink ovals with water and stick them onto the blue petal pieces.
-
Now, create the facial features: Cut out two small blue circles for the eyes and use a toothpick to poke tiny holes in the center for depth. Fashion a small pink triangle for the nose. For the pupils, use a black edible marker to draw eyes on two round confetti sprinkles. Adhere all these facial features onto the large blue circle (the bunny’s head) using a tiny amount of water as glue.
-
Carefully attach the assembled ears behind the large blue circle piece using royal icing or melted chocolate. This will hold them securely in place.
-
Using your black edible marker, draw a sweet mouth and delicate eyebrows onto the bunny’s face.
-
Allow this completed bunny topper to dry thoroughly overnight. It must harden completely to maintain its shape when placed on the cake.
-
The following day, once the bunny is completely dry, use melted chocolate to attach a lollipop stick securely to the back of the topper. Let the chocolate set and harden.
-
Finally, gently push the lollipop stick with the bunny topper into the top of your sprinkle-covered cake. Your delightful Easter bunny cake is now ready to be enjoyed!
Notes
- For best results and troubleshooting, remember to read all the detailed tips and techniques provided above in the article.
- Leftovers of the decorated cake can be stored in a sealed container in the fridge for up to 3 days, though fondant may become slightly tacky.
Nutrition
An automated tool is used to calculate the nutritional information. As such, I cannot guarantee the accuracy of the nutritional information provided for any recipe on this site.
