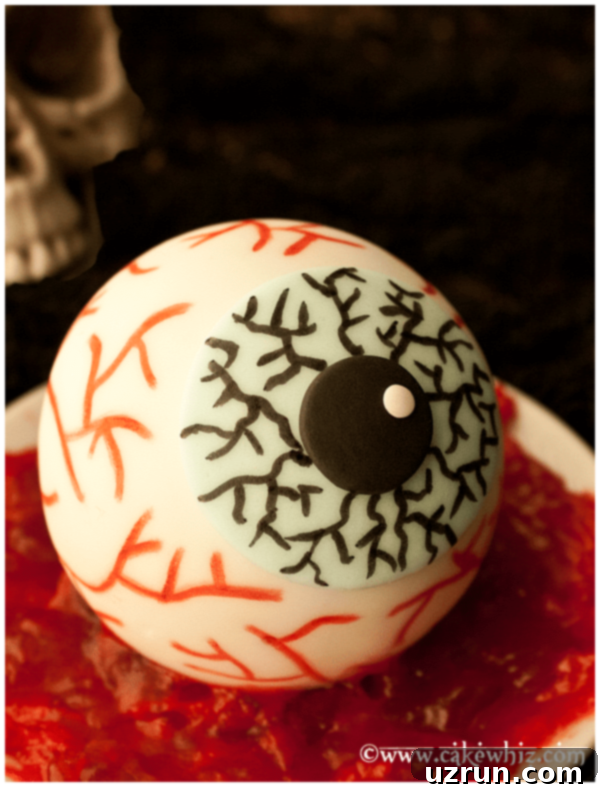
Spooktacular Halloween Eyeball Cake: An Easy, Creepy-Cute Tutorial & Recipe
Get ready to unleash your inner mad scientist in the kitchen this Halloween! This step-by-step tutorial will guide you through creating an easy, yet incredibly spooky, eyeball cake that’s guaranteed to be the centerpiece of any Halloween party. Whether you’re aiming for a show-stopping dessert or looking to craft unique mini cakes as party favors, this creepy-cute confection is surprisingly simple to make.
With Halloween just around the corner, there’s no better time to master this fun and festive treat. This eyeball cake is just as impressively eerie as our popular Easy Monster Cake, but with its own distinctively chilling charm. Be warned, though: its realistic (and slightly unsettling) appearance might even scare off the bravest of eaters! My own child, for instance, took one look at this cake and declared a firm “NO” – a phrase I’ve never heard him utter in the presence of cake before. So, prepare for some delightfully horrified reactions!
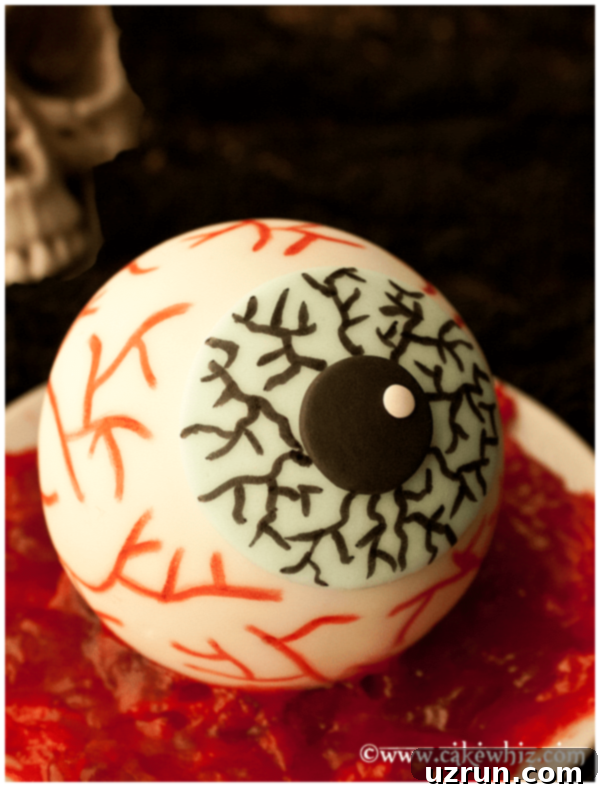
How to Make a Spooky Halloween Eyeball Cake?
Creating this eye-catching (pun intended!) Halloween dessert is a straightforward process, even for beginner bakers. Follow these simplified steps to bring your monstrous creation to life:
- Bake Your Round Cake: Start by baking your favorite round cake, ideally using a dome cake pan to achieve that perfect spherical “eyeball” shape. Once baked, it’s crucial to let the cake cool down completely to prevent any frosting disasters.
- Frost the Cake: Apply a generous layer of buttercream frosting evenly over your cooled cake. This layer acts as an adhesive for the fondant and adds another dimension of flavor and moisture.
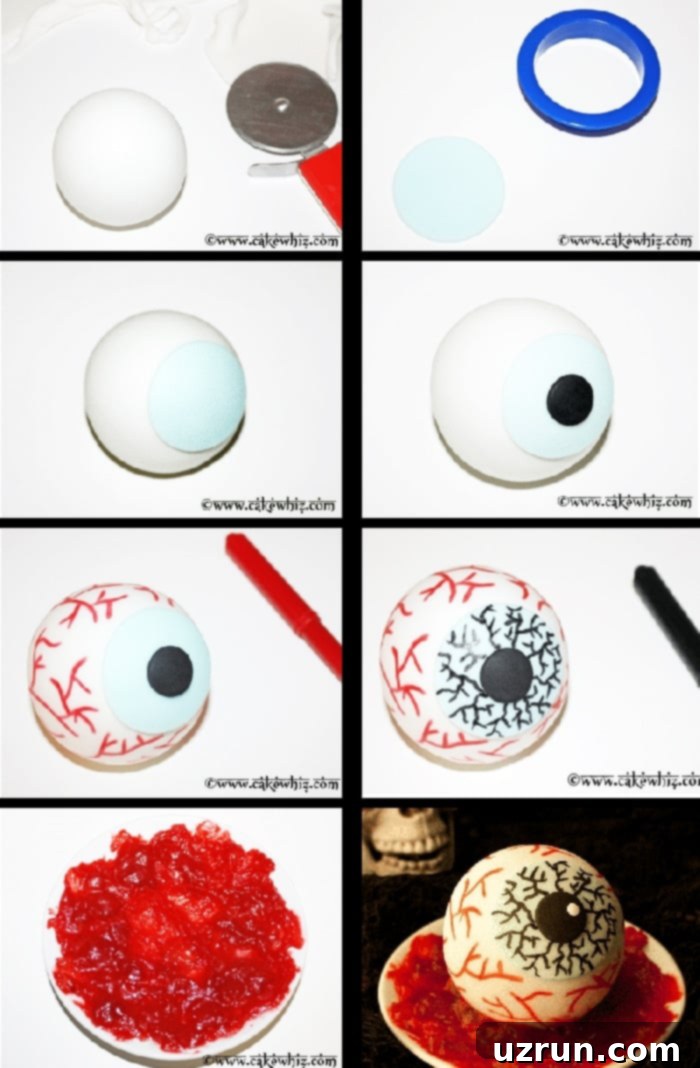
- Cover in White Fondant: Roll out a sheet of white fondant large enough to completely cover your frosted cake. Carefully drape it over the cake, smoothing it out with your hands or a fondant smoother to eliminate any air bubbles or wrinkles.
- Trim Excess Fondant: Using a sharp pizza cutter or a small paring knife, meticulously trim away any excess fondant from around the base of the cake, creating a clean, seamless edge.
- Craft the Fondant Eye Details: Roll out small pieces of colored fondant (blue for the iris, black for the pupil). Use circular cutters (or even a small decorating tip for the pupil) to cut out the shapes. Affix these circles to the top center of your white fondant-covered cake with a tiny brush of water to act as glue.
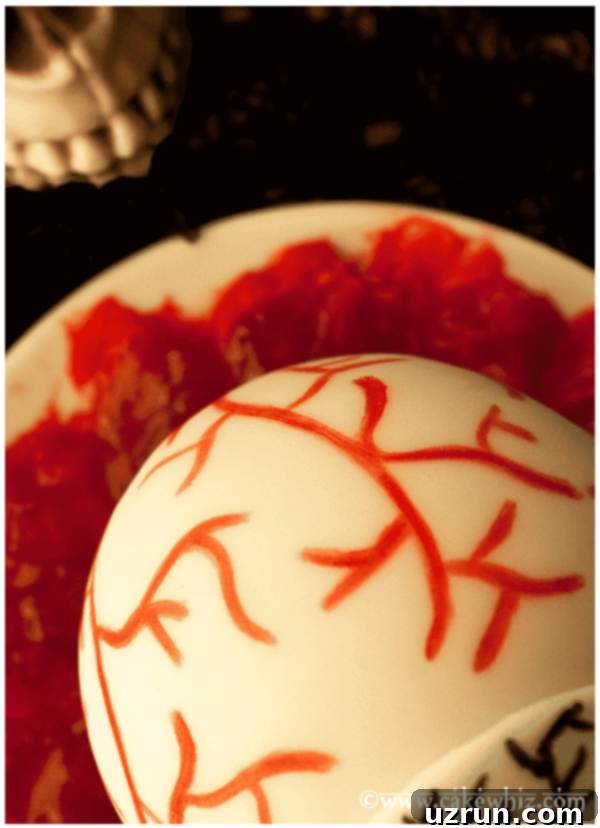
- Draw Realistic Veins: With a thin-tipped red edible marker, delicately draw a network of random, branching veins across the white portion of the “eyeball.” For added depth, use a black edible marker to draw subtle, finer veins within the colored iris.
- Prepare the “Fake Blood”: In a small bowl, mix seedless strawberry jam with a few drops of red gel food coloring until it achieves a vibrant, blood-like hue. The gel coloring provides a more intense color without altering the jam’s consistency too much.
- Present and Serve: Spread your eerie “fake blood” randomly on a serving platter. Carefully place your finished eyeball cake in the center of the jam-covered plate, and get ready to serve this ghoulishly delightful dessert!
Creative Variations for Your Halloween Eyeball Cake
While the classic eyeball design is fantastic, feel free to get creative and customize your Halloween cake. Here are some ideas to inspire you:
- Make Mini Eyeball Cakes: Instead of one large cake, create an army of smaller, individual eyeball cakes. Bake cupcakes or use mini dome pans, then follow the same decorating steps on a smaller scale. These mini versions make for even more unsettling (and adorable) additions to a dessert table or fantastic party favors for your guests to take home.
- Experiment with Different Cake Flavors: The base cake flavor is entirely up to you. While red velvet provides a great “bloody” interior when sliced, don’t hesitate to try other crowd-pleasing options. A rich Pistachio Cake (even with a cake mix for ease!) can offer a surprising color contrast, or a vibrant Rainbow Cake could reveal a burst of unexpected color. Chocolate, vanilla, or even pumpkin spice cakes are also excellent choices for a Halloween theme.
- Pair with Different Frostings: The buttercream is great for structure, but you can get adventurous with the flavor. Consider a rich Chocolate Whipped Cream for a darker, more intense flavor profile, or a nutty Brown Sugar Frosting for a cozy, autumnal twist. Just ensure your chosen frosting is firm enough to support the fondant.
- Vary the Eye Colors: Don’t limit yourself to blue irises! Use green, brown, purple, or even a vibrant yellow fondant to create a variety of eye colors. You can even add subtle specks of a contrasting color within the iris for more depth.
- Add More Ghoulish Details: For an extra level of creepiness, consider adding small, edible glitter to the iris for a “glistening” effect, or use tiny black fondant worms (made from rolled fondant) crawling on the “blood” platter.
Essential Tips and Techniques for Your Scary Eye Cake
Achieving a professional-looking and delicious eyeball cake is easier with these expert tips:
- Homemade vs. Store-bought Fondant: Both options are viable. Store-bought fondant offers convenience, while homemade marshmallow fondant often boasts a superior taste and a more pliable texture, making it easier to work with. If you have the time, homemade is highly recommended for flavor.
- Gel Coloring vs. Liquid Food Coloring: For vibrant and consistent colors in your fondant and “blood,” always opt for gel food colorings. They are highly concentrated, meaning you need less product, and their thick consistency won’t thin out your fondant or jam, preserving their texture. Liquid food colorings can dilute your ingredients and produce weaker colors.
- Let Cake Cool Completely Before Decorating: This is a golden rule in cake decorating! A warm cake will cause your buttercream frosting to melt and slide, making it impossible to apply fondant smoothly. Patience here will save you a lot of frustration. Ensure the cake is cool to the touch, ideally chilled for a short period, before frosting and decorating.
- Edible Markers vs. Painting for Veins: For drawing the intricate veins, edible markers with a thin tip are your best friend. They offer precision and are as easy to use as a regular pen. However, if you possess a steady hand and artistic flair, a fine-tipped food-safe paintbrush dipped in diluted gel food coloring (mixed with a tiny bit of clear alcohol like vodka or lemon extract for quick drying) can also create stunning, realistic veins.
- Make-Ahead Instructions: This cake is perfect for preparing in advance! You can bake and decorate the entire cake a day before your event. Store it carefully in a sturdy cardboard cake box at room temperature overnight. This allows the flavors to meld and the fondant to set. Add the “fake blood” (strawberry jam) to the serving dish just prior to serving for the freshest look.
- Can You Refrigerate Fondant Covered Cakes?: Generally, it’s not recommended to refrigerate fondant-covered cakes. The drastic change in temperature when moving the cake from the fridge to room temperature often causes condensation (sweating) to appear on the fondant. This can make the fondant sticky, cause colors to bleed, and potentially ruin your intricate decorations. If refrigeration is absolutely necessary due to specific filling requirements, try to store it in an airtight container to minimize moisture exposure, and allow it to come to room temperature slowly in its box.
Essential Tools for Your Eyeball Cake
Having the right tools makes cake decorating much smoother and more enjoyable. Here’s what you’ll need for this spooky creation:
- Dome Cake Pan: Crucial for achieving the characteristic rounded shape of an eyeball.
- Offset Spatula: Ideal for spreading buttercream frosting smoothly and evenly.
- Fondant Rolling Pin: A non-stick rolling pin designed for fondant helps you achieve an even thickness without sticking.
- Circle Cutters: A set of various sized circle cutters will be indispensable for creating the iris and pupil.
- Edible Markers: Red and black thin-tipped markers are essential for drawing the realistic veins.
- Pizza Cutter or Paring Knife: For neatly trimming excess fondant around the base of the cake.
- Small Paintbrush: For applying a tiny bit of water to stick fondant pieces together.
Troubleshooting Common Eyeball Cake Issues
Even seasoned bakers encounter challenges. Here are solutions to common problems you might face:
- Fondant Tearing or Cracking: This often happens if the fondant is rolled too thin, or if it’s too dry. If it feels stiff, try kneading in a tiny bit of vegetable shortening or a few drops of water. Ensure it’s rolled to about 1/8 inch thickness.
- Frosting Melting Under Fondant: This is a clear sign your cake wasn’t cool enough. Always chill your cake thoroughly after frosting and before applying fondant. A thin crumb coat followed by a solid final layer, then a chill, works best.
- Colors Bleeding: If your edible marker colors bleed, it could be due to excess moisture on the fondant surface (e.g., from condensation if the cake was refrigerated). Ensure the fondant is dry before drawing. Also, avoid pressing too hard with the markers.
Storage of Your Decorated Eyeball Cake
Proper storage ensures your Halloween masterpiece stays fresh and looks its best for as long as possible:
- Refrigerate Leftovers: If you have any leftover cake (which is a big “if” for this showstopper!), place it in a sealed, airtight container. It can be stored in the fridge for up to 3 days. Be aware that the fondant decorations might become slightly sticky or develop condensation marks due to exposure to the refrigerator’s moisture. This is normal and doesn’t affect the taste.
- Freezing Fondant-Covered Cakes: I generally do not recommend freezing a fully decorated fondant-covered cake. The thawing process can cause significant condensation, making the fondant extremely sticky, messy, and potentially ruining the delicate decorations.
- Freezing Components (Recommended for Advance Prep): For making ahead, you can bake the cake layers and prepare the frosting in advance. Wrap the cooled cake layers tightly in plastic wrap and then foil, and store them in the freezer for up to 2-3 months. Frosting can also be frozen in an airtight container. When you’re ready to assemble, simply thaw the cake and frosting to room temperature, and then proceed with the decorating instructions. This method allows for advanced preparation without compromising the final look of your fondant eyeball cake.
More Easy Halloween Cake Designs
Looking for more eerie inspiration? Check out these other fun and easy Halloween cake ideas:
- Easy Candy Cake (Perfect for using up Halloween leftovers!)
- Easy Mummy Cake (A classic, adorable Halloween treat)
- Candy Corn Cake (Layered perfection for a festive look)
- Halloween Cake (A fun and colorful Twizzler-themed cake)
Recipe
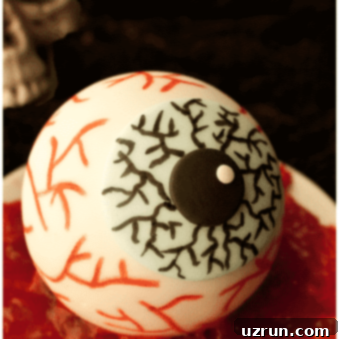
Easy Halloween Eyeball Cake
Abeer Rizvi
Pin Recipe
Want to Save This Recipe?
Enter your email & I’ll send it to your inbox. Plus, get great new recipes from me every week!
By submitting this form, you consent to receive emails from CakeWhiz
Ingredients
- 1 Red velvet cake Made in a dome cake pan
- 2 cups Buttercream frosting
- 3 cups Marshmallow fondant Colored black, white, blue
- 1 cup Strawberry jam Seedless
- Red gel coloring
Instructions
-
Prepare the red velvet dome cake and allow it to cool down completely.
-
Cover your dome cake with buttercream icing.
-
Roll out white fondant and spread it over the frosting. Cut off excess fondant around the cake with a pizza cutter.
-
Roll out light blue fondant and cut out a big circle piece and stick it on the side on the cake by brushing a little water. Then, roll out black fondant and cut out a small circle piece (I used a small decorating tip because that was the perfect size). Stick this on the blue piece with water.
-
Use a red edible marker to draw random veins on the white portion of the eyeball. Then, use a black edible marker to draw random veins on the blue portion of the eyeball.
-
Finally, mix some red gel coloring into seedless strawberry jam until it becomes bright red, like blood. Spread it randomly on a small dish.
-
Place the cake in the center of that jam and dig in!
Notes
- Read all my tips above for best results.
- Leftovers can be stored in a sealed container in the fridge for up to 3 days.
Nutrition
An automated tool is used to calculate the nutritional information. As such, I cannot guarantee the accuracy of the nutritional information provided for any recipe on this site.
Tried this recipe?Leave a comment below or rate and tag @cakewhiz on social
This Halloween Eyeball Cake is more than just a dessert; it’s a conversation starter and a memorable centerpiece that will impress your guests and delight trick-or-treaters (or maybe just terrify them, in the best possible way!). With its easy-to-follow steps and versatile decorating options, you’re all set to bake a ghoulishly great treat. Don’t be afraid to experiment with different colors and details to truly make it your own. Happy Halloween baking!
