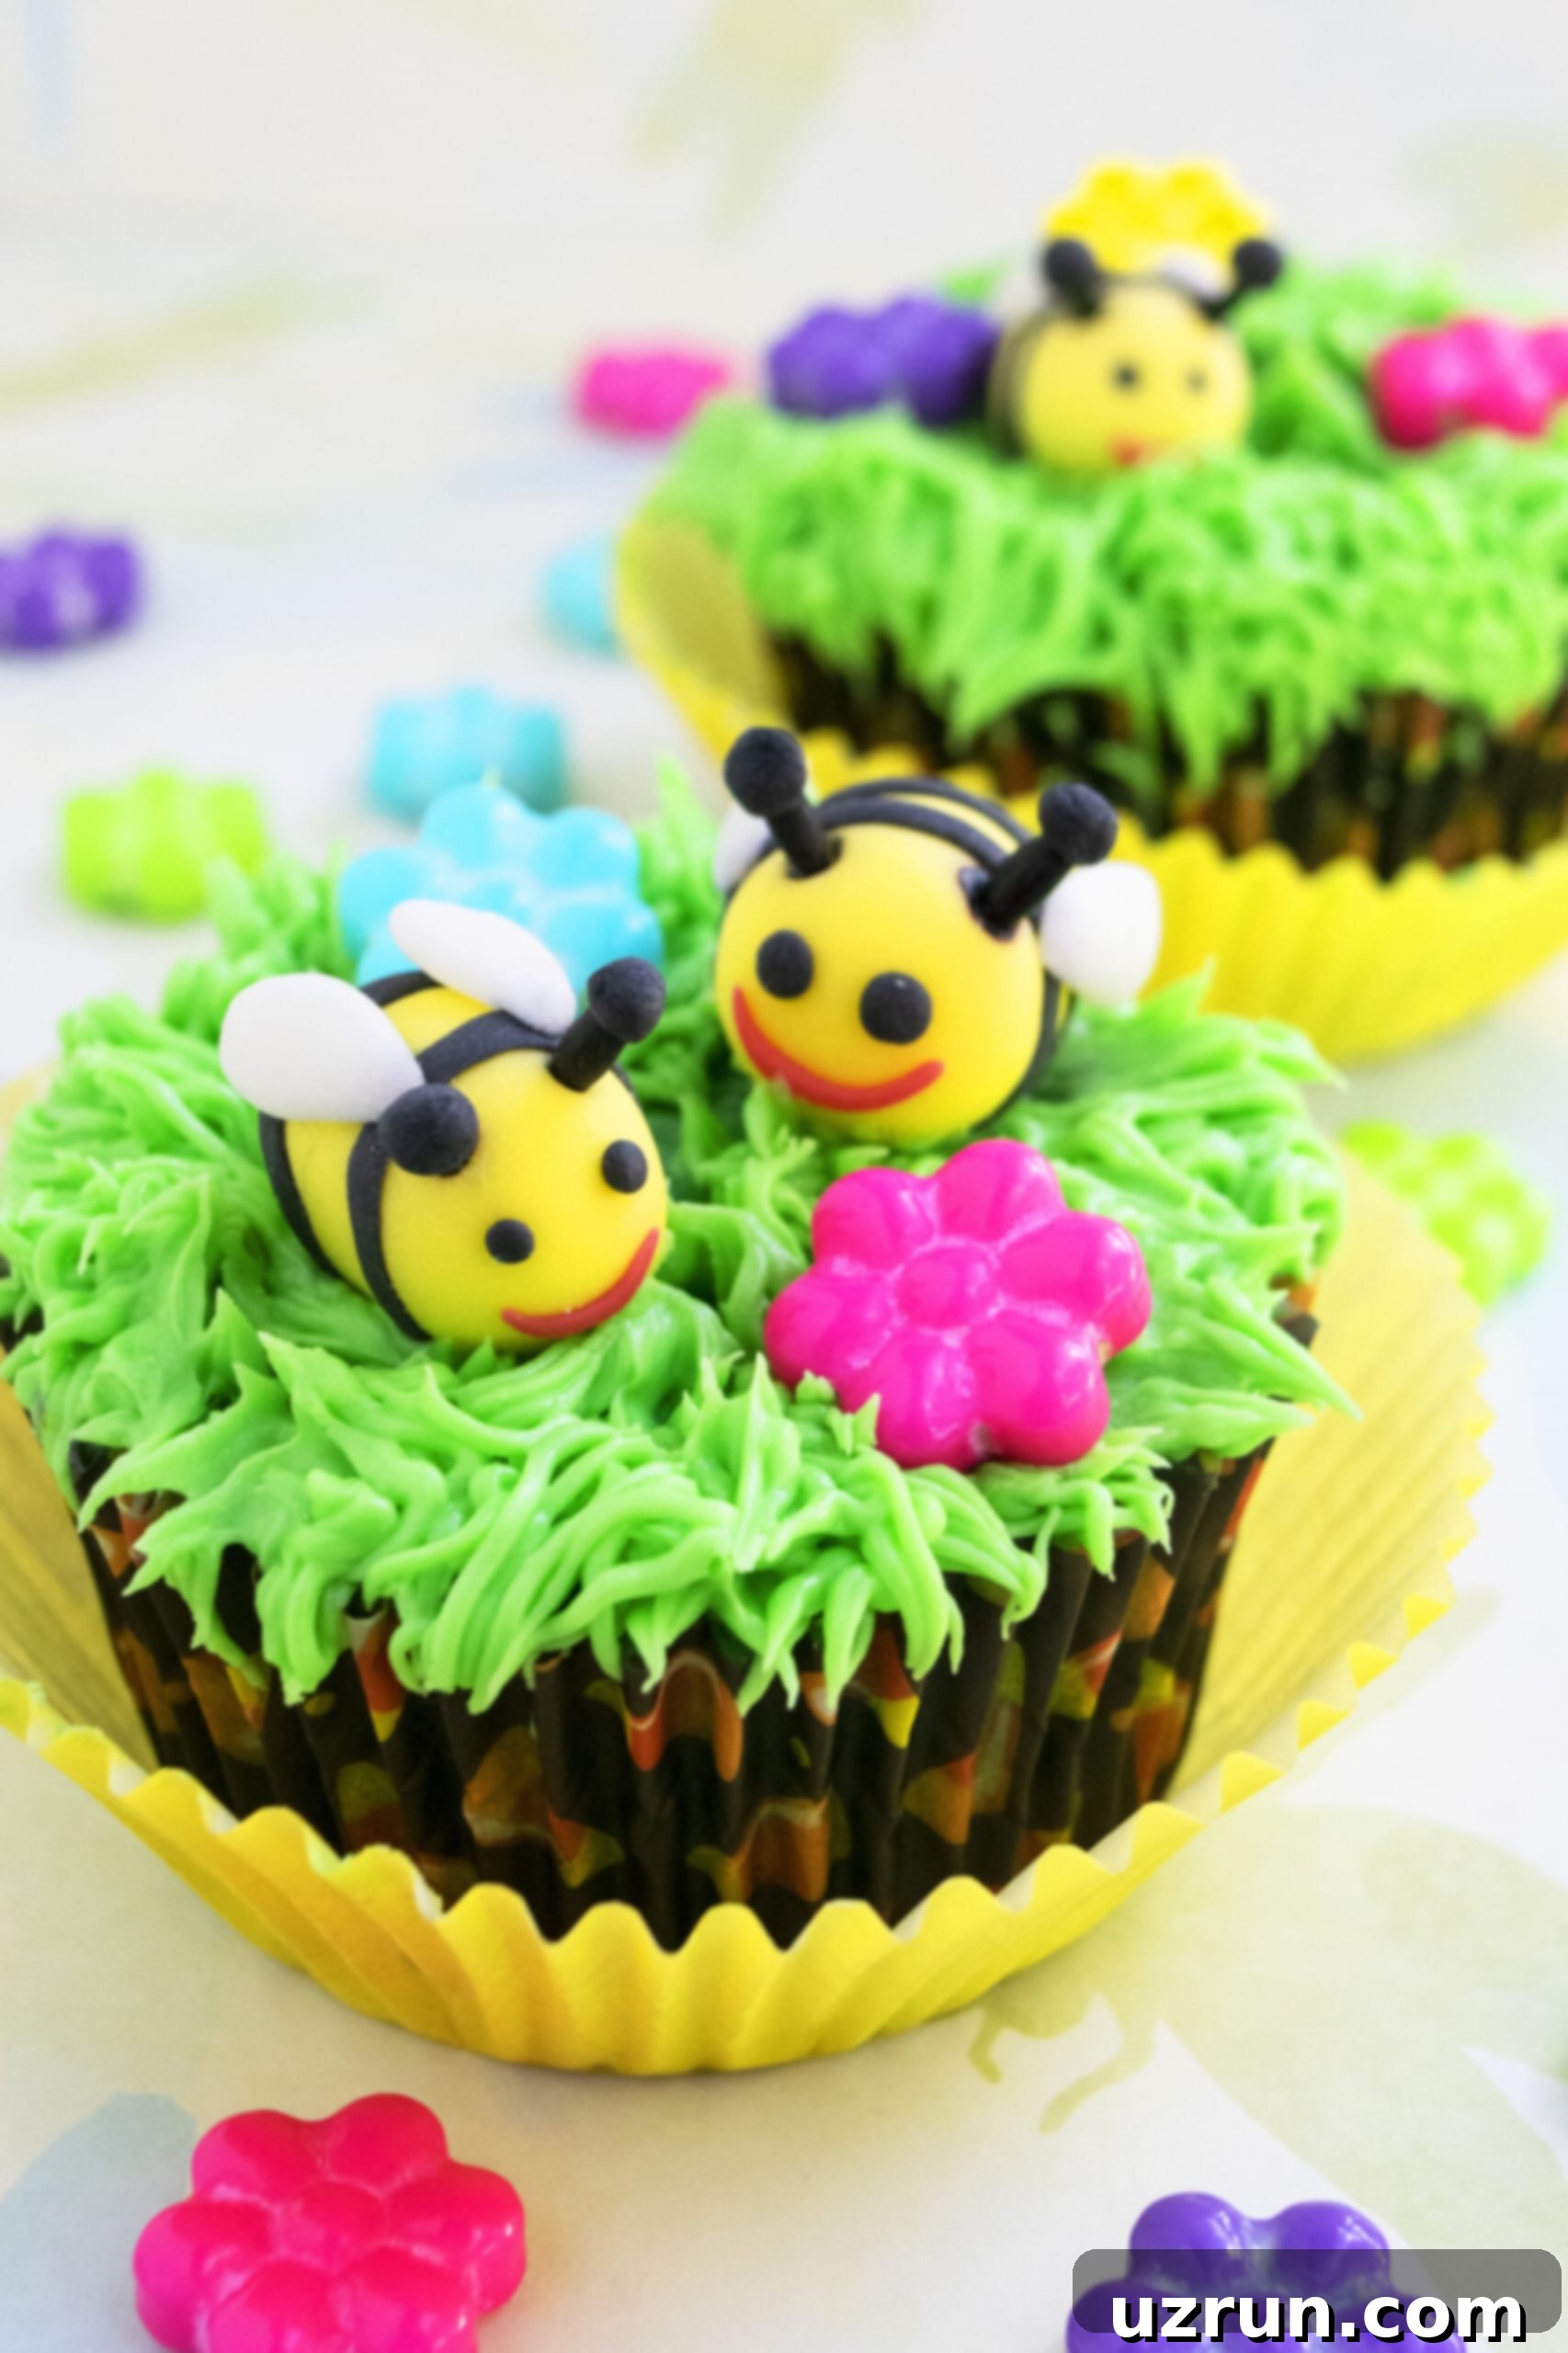
Easy Fondant Bee Cupcakes: A Buzz-Worthy Decorating Tutorial for All Skill Levels
Get ready to add a delightful touch of sweetness and charm to your next celebration with these absolutely adorable easy bee cupcakes! Whether you’re planning a vibrant spring party, a memorable birthday bash, or simply want to brighten someone’s day with a homemade treat, this comprehensive decorating tutorial will guide you through creating stunning fondant bee toppers that are sure to impress. The best part? You don’t need a professional baker’s toolkit or years of experience. Our method is simple enough for even beginners to master, making intricate-looking desserts accessible to everyone.
These delightful creations are incredibly versatile; they can serve as impressive standalone cupcake toppers or as charming decorations for a larger cake, such as our popular Bumblebee Cake (Spring Cake). Imagine the smiles these little buzzing beauties will bring! This guide focuses on using readily available ingredients and basic techniques, proving that stunning results are within everyone’s reach. We’ll cover everything from preparing your cupcake base and frosting to crafting your cute little fondant bees in detailed steps, ensuring your spring or birthday celebration is as sweet and picture-perfect as can be. Let’s dive in and create some buzz in your kitchen!
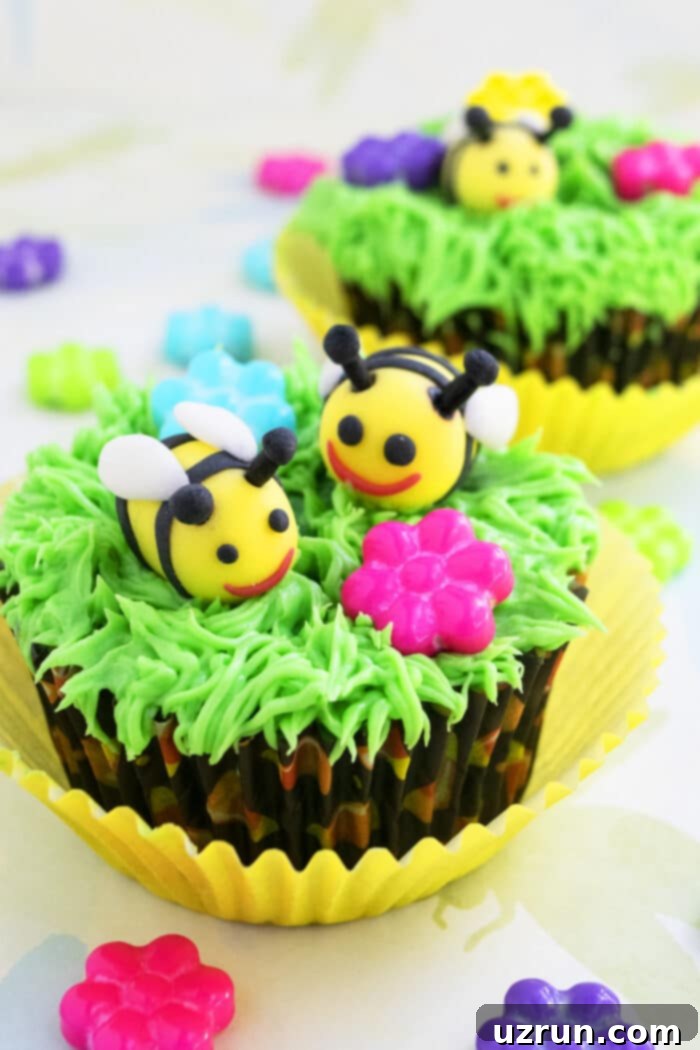
How to Make Adorable 3D Fondant Bee Cupcakes: A Simple Guide
Creating these charming bee cupcakes is a delightful and straightforward process, broken down into a few manageable steps. Follow along carefully to bring your sweet, buzzing vision to life with ease:
- Bake Your Favorite Cupcakes: Begin by baking a fresh batch of your preferred cupcakes. Whether you choose a classic vanilla, a rich chocolate, or a more adventurous flavor like lemon, the most crucial step here is to ensure they are completely cooled before you even think about decorating. Warm cupcakes will cause your delicate frosting and fondant decorations to melt, leading to a sticky, unappealing mess.
- Prepare and Color Your Buttercream Icing: While your cupcakes are cooling to perfection, prepare a batch of your favorite buttercream frosting. For a vibrant, “grassy” base that perfectly complements our bees, we recommend coloring your buttercream a bright green. Always opt for gel food coloring, as it provides a more concentrated color without thinning out the consistency of your beautiful frosting, unlike liquid food colors.
- Craft Your Fondant Bees: This is where the true magic of this tutorial unfolds! You’ll need to create a few fondant bees, typically about two per cupcake, depending on their size and the overall look you desire. Don’t worry, we’ll provide detailed, step-by-step instructions for shaping these adorable creatures in the dedicated section below, making it easy for you to follow along.
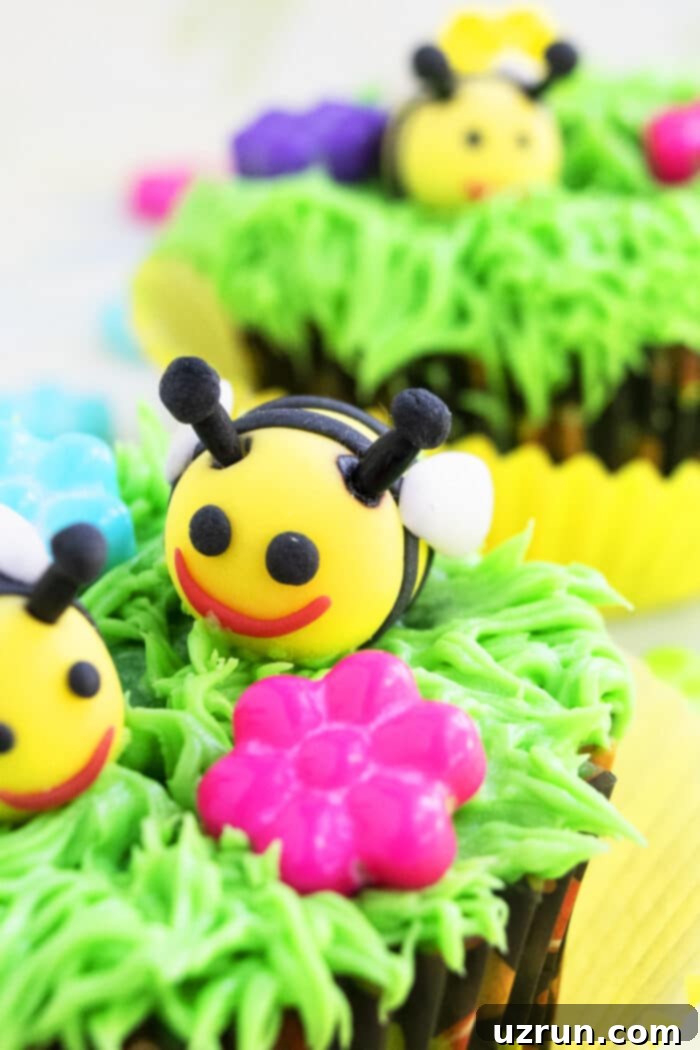
- Assemble and Decorate: Once your cupcakes are cool and your charming fondant bees are ready, it’s time to bring everything together. Using a grass decorating tip (such as Wilton Tip #233), pipe the vibrant green frosting on top of each cupcake to create a lush, grassy field. Then, carefully place your handmade fondant bees strategically on the “grass.” For an extra touch of spring and whimsy, sprinkle a few colorful flower candies around the bees.
This simple, sequential approach ensures a smooth and enjoyable decorating experience, even if you’re a novice in the kitchen. The key to success lies in allowing ample time for each component to set or cool properly before moving on to the next step, guaranteeing a flawless finish for your beautiful easy bee cupcakes.
Creative Variations for Your Adorable Bumblebee Cupcakes
Once you’ve mastered the basic technique for creating these delightful bumblebee cupcakes, don’t hesitate to unleash your creativity and personalize them further! Here are some inspiring ideas to help you experiment and make your sweet treats truly unique for any occasion:
- Miniature Masterpieces: For smaller, bite-sized delights, opt for mini cupcakes. Remember to use mini cupcake liners and adjust the baking time accordingly, as they will bake much faster. Naturally, your charming fondant bee toppers will also need to be scaled down to maintain perfect proportion.
- Delightful Fillings: Surprise and delight your guests with an unexpected burst of flavor by adding a delicious filling to your cupcakes. A spoonful of sweet Easy Homemade Strawberry Jam or bright, tangy Lemon Curd would beautifully complement the sweetness of the bees and the cake.
- Explore Alternative Cupcake Flavors: Don’t limit your creativity to just one cupcake flavor! These adorable bee toppers would look fantastic on a wide variety of cupcake bases. Consider something fun and colorful like our Rainbow Cupcakes (With Cake Mix) for an extra pop of joy and vibrancy.
- Consider a Different Frosting Palette: While the classic green grass icing provides a wonderful spring feel, explore other frosting options. An Easy Mint Frosting could offer a refreshing twist, or a light blue vanilla buttercream could evoke the clear skies of spring and summer.
- Swirled Frosting Base: If you don’t own a grass decorating tip, or simply prefer a different aesthetic, you can still create a beautiful base. Pipe a classic swirl of green frosting using a large star tip (such as Wilton Tip 1M). This creates an elegant and simple foundation for your charming fondant decorations.
These creative variations ensure your bee cupcakes can be customized for any event, theme, or personal preference, making them truly memorable and uniquely yours.
Essential Tips and Techniques for Perfect Spring Cupcakes
Achieving bakery-worthy results with your spring cupcakes is much easier when you’re armed with a few tried-and-true tips and techniques. Paying attention to these details will ensure your bee cupcakes are not only delicious but also visually stunning:
- Fondant Choice: Homemade vs. Store-bought:
- Homemade Marshmallow Fondant: If you have the time, making your own Marshmallow Fondant is a fantastic option. It generally tastes superior to most store-bought varieties and has a delightful aroma. Plus, its pliability makes it a joy to work with for shaping intricate details.
- Store-bought Fondant: For ultimate convenience and speed, store-bought fondant is a great choice. It’s readily available and often comes pre-colored, saving you a significant step. When purchasing, opt for a good quality brand for better flavor and workability, as some cheaper options can be dry or overly sticky.
- Gum Paste vs. Fondant (or a 50/50 Blend):
- Fondant: Excellent for covering cakes or creating decorations that need to remain somewhat pliable, as it stays softer for longer. This makes it easier to handle for beginners.
- Gum Paste: Dries much harder and faster than fondant, making it ideal for intricate details that require structural integrity, like standing wings or delicate flowers.
- 50/50 Combination: Mixing half gum paste and half fondant gives you the best of both worlds. This blend offers improved drying time and firmness without sacrificing too much of fondant’s initial pliability, making it a favorite for many decorators.
- Cool Cupcakes are Crucial: This tip cannot be stressed enough! Always, always ensure your cupcakes are *completely* cooled to room temperature before you begin applying any icing or fondant decorations. Any residual heat will cause your buttercream to melt and your delicate fondant creations to become sticky, lose their shape, and ultimately lead to a messy, disappointing result. Patience is key!
- Opt for Gel Food Colors: When coloring your buttercream or fondant, always choose gel food colors over liquid ones. Gel colors are highly concentrated, meaning you’ll need only a tiny amount to achieve vibrant, rich hues. Crucially, they won’t alter the consistency of your frosting or fondant, which liquid colors can often do by adding excess moisture.
- Working with Sticky Fondant: If your fondant feels too sticky to work with, it’s easily remedied. Dust your work surface and your hands very lightly with cornstarch or powdered sugar. Be sparing, as too much can dry out the fondant, making it crumbly. Gently knead the fondant until it becomes smooth and more manageable.
- Adhering Fondant Pieces: For sticking small fondant pieces together (such as stripes or wings onto your bees), a tiny dab of water applied with a fine brush is usually sufficient. For more delicate or structural additions, a small amount of edible glue or corn syrup can provide a stronger, more secure bond, especially if the pieces need to hold their position.
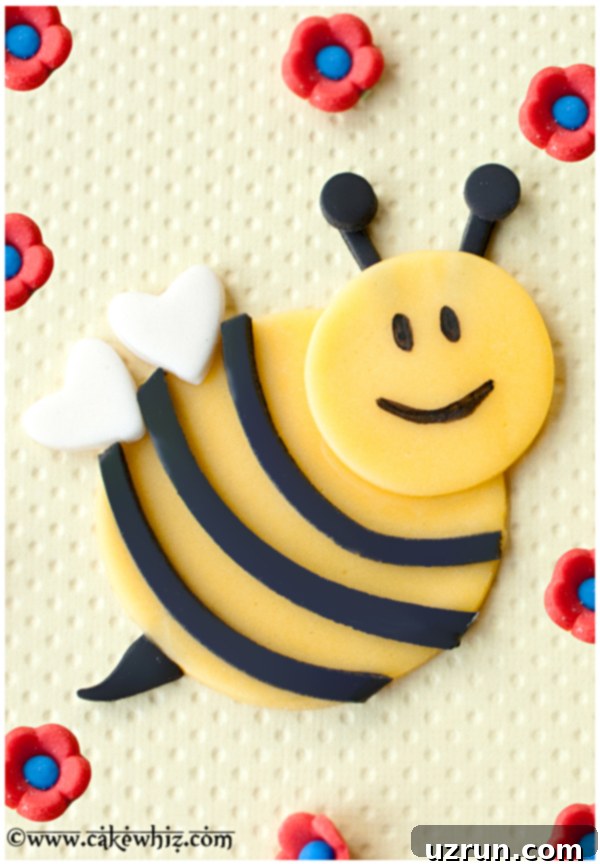
An Easier Alternative: Creating 2D Fondant Bee Toppers
While the 3D bees offer a charming sculptural quality, if you’re short on time, prefer a less intricate approach, or are just starting out with fondant, these 2D bee cupcake toppers are a fantastic and equally adorable alternative. They still provide a beautiful, custom touch to your treats with simplified shaping. Here’s how to create these lovely flat bee decorations:
- Shape the Body and Head: Roll out yellow fondant to an even thickness of about 1/8 inch. Use a large circular cutter (or the rim of a clean glass) to cut out the main body of your bee. Then, use a smaller circular cutter (or a round decorating tip) to cut a piece for the bee’s head.
- Assemble the Body Sections: Lightly moisten the top edge of the large yellow circle with a tiny drop of water. Carefully press the smaller yellow circle (the head) onto it, creating a single bee shape.
- Add Black Stripes: Roll out black fondant very thinly. Using a pizza cutter or a sharp knife, cut several thin strips. Gently curve these strips to mimic the natural, organic look of a bee’s stripes.
- Attach the Stripes: Moisten the large yellow body section again with a small amount of water. Carefully place the curved black strips onto it, spacing them evenly. Use a sharp knife to trim any excess fondant along the edges, ensuring a neat and polished finish.
- Craft the Stinger: Cut a small, pointed triangular piece from black fondant to form the bee’s stinger. Attach it to the back end of the large yellow circle with just a tiny amount of water.
- Form the Antennas: To create the antennas, cut two very thin, short strips of black fondant. Roll out two tiny black balls of fondant (you can use the small end of a decorating tip, like #12, for perfectly round dots). Attach the tiny balls to the ends of the strips with water, then gently stick the completed antennas to the back of the small yellow head piece using a tiny dab of corn syrup for a stronger, more lasting hold.
- Draw Facial Features: Using a black edible marker, carefully draw small, cheerful eyes and a friendly little smile on your bee’s head. For a touch of rosy cheeks, a tiny pink edible dust can be added.
- Create Wings: Roll out white fondant thinly. Using a small heart-shaped cutter, or freehand cutting two small heart shapes, create the bee’s wings. Place them near the top of the bee’s body, slightly overlapping the head, and secure them with a dab of water.
- Allow to Dry: It’s essential to let your finished 2D bumblebee cupcake toppers dry for at least an hour or two (or even longer for a firmer set, especially in humid conditions) before carefully placing them on your frosted cupcakes. This crucial step prevents them from losing their shape or sticking undesirably to the icing.
Proper Storage for Your Decorated Bee Cupcakes
Ensuring proper storage is crucial to keep your beautifully decorated fondant bee cupcakes fresh, delicious, and visually appealing for as long as possible. Here’s a detailed guide on how to store them effectively:
- Room Temperature Storage: For optimal freshness and to preserve the integrity of your fondant decorations, store decorated cupcakes in a covered, but importantly, *not airtight*, box for up to 2 days. An airtight container can trap moisture, which will cause your delicate fondant decorations to become sticky, tacky, and potentially weep or dissolve. A cake dome, a cardboard cupcake box, or any container with a slight vent is ideal to allow for minimal air circulation.
- Refrigeration: Generally, refrigeration is *not* recommended for cupcakes adorned with fondant decorations. The high humidity and fluctuating temperatures inside a refrigerator can cause the fondant to become excessively sticky, develop unsightly “sweat” or condensation, and even alter its texture when brought back to room temperature. If you absolutely must refrigerate your iced cupcakes (e.g., if the frosting requires it, but without the fondant bees), place them in a covered box. Always add the fondant bee toppers just before serving to maintain their pristine, dry condition.
- Freezing: Unfortunately, freezing cupcakes that are already decorated with fondant is also highly inadvisable. When frozen cupcakes thaw, the condensation process will almost certainly cause the fondant decorations to become sticky, lose their shape, and often completely ruin their appearance. If you plan to prepare cupcakes in advance, bake and freeze the undecorated cupcakes in an airtight container. Once thawed, then proceed with frosting and adding your fresh fondant decorations.
To ensure your hard work pays off, always prioritize keeping your fondant decorations dry and storing your cupcakes at a stable room temperature for the best appearance and texture. A little care in storage goes a long way in enjoying your adorable bee cupcakes!
Explore More Fun & Easy Decorated Cupcakes to Try
If you enjoyed the creative process of decorating these delightful bee cupcakes, then you’re in for a treat! The world of cupcake decorating is vast and full of endless possibilities, offering a chance to express your artistic side with delicious results. Here are some more inspiring and easy-to-follow ideas from CakeWhiz to spark your next baking adventure, perfect for various occasions and skill levels:
- Shirt Cupcakes (Perfect for Father’s Day or Dad’s Birthday)
- Watermelon Cupcakes (Creative Pull-Apart Cupcakes)
- Easy Flower Cupcakes (Featuring Delicate Fondant Pansies)
- Adorable Ladybug Cupcakes
- Fun & Easy Dinosaur Cupcakes
- Stunning Flower Cupcake Bouquet
Each of these tutorials provides unique decorating techniques and engaging themes, helping you expand your skills, boost your confidence, and create memorable, show-stopping desserts for any event or simple joyful moment.
Recipe: Easy Fondant Bee Cupcakes (Spring Cupcakes)
Easy Bee Cupcakes (Spring Cupcakes)
Abeer Rizvi
Pin Recipe
Want to Save This Recipe?
Enter your email & I’ll send it to your inbox. Plus, get great new recipes from me every week!
By submitting this form, you consent to receive emails from CakeWhiz
Ingredients
- 12 Brownie cupcakes
- 2 cups American buttercream frosting Colored green
- 1 cup Marshmallow fondant White, yellow and black
- ¼ cup Flower candies
Instructions
-
Bake your chosen cupcakes and ensure they are completely cool before proceeding with decoration.
-
While the cupcakes are cooling, prepare your buttercream frosting and color it a vibrant green using gel food coloring.
-
Using a grass tip (such as Wilton Tip #233), pipe the green frosting onto the cooled cupcakes to create a “grassy” effect. Set these aside.
-
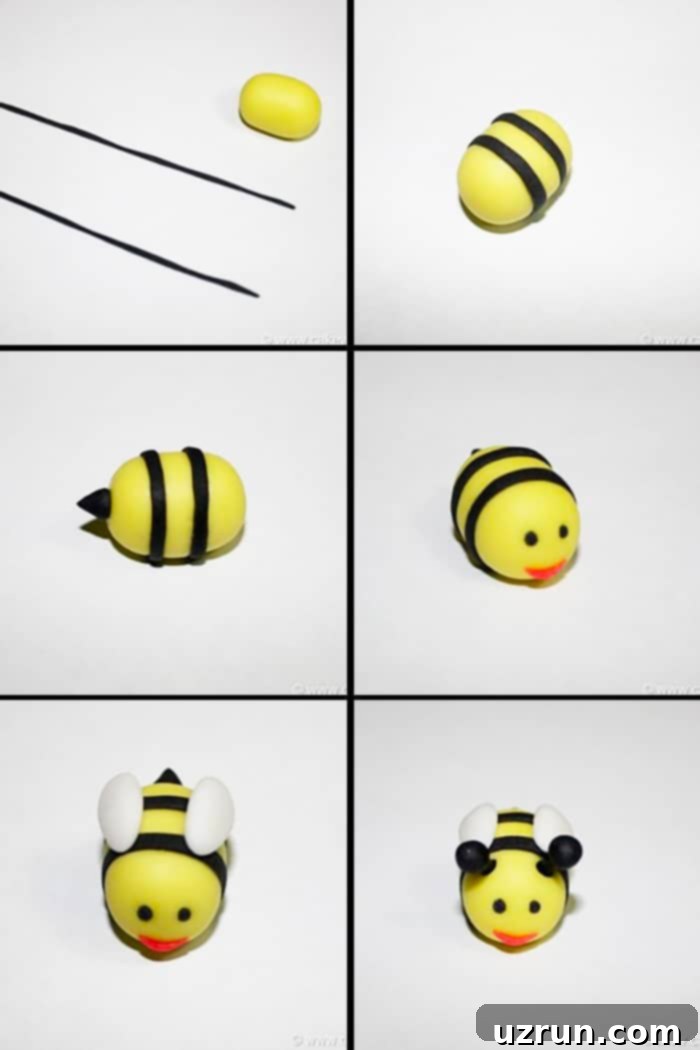
For the main body of the bee, roll out yellow fondant into a small cylinder shape. This will form the core of your 3D bee.
-
Next, roll out thin, long ropes of black fondant to create the bee’s distinctive stripes. Gently attach these stripes to the yellow bee body using a tiny dab of water. Alternatively, you can use a black edible marker to draw the stripes directly.
-
To make the stinger, roll a small ball of black fondant and shape it into a cone. Brush a tiny amount of water onto the back end of the yellow bee body and securely attach the stinger, holding it in place for a few seconds.
-
Using a black edible marker, draw small, friendly eyes on the bee’s face. For a cute touch, add a smile with a red edible marker.
-
For the wings, roll out two small balls of white fondant. Gently flatten and shape them into delicate petal-like forms using your fingers. Apply a small amount of water to both sides of the bee’s body where the wings will attach, then carefully place the fondant wings.
-
If you prefer a simpler bee, you can stop here. For bees with antennas, continue to the next step.
-
To create the antennas, break a toothpick into two small pieces and color them black with an edible marker. Carefully insert these into the bee’s head. Roll out two tiny black balls of fondant and press them onto the exposed ends of the toothpicks for the final touch.
-
Repeat the process to create as many fondant bees as you need for your cupcakes.
-
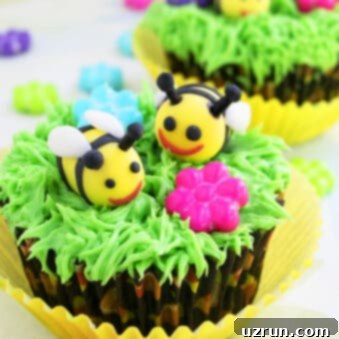
Finally, arrange your delightful fondant bees on top of the frosted “grassy” cupcakes. Add a scattering of flower candies to complete your buzzing masterpiece. Enjoy!
Notes
- Be sure to read all the detailed tips and techniques provided above for the best results, especially regarding working with fondant and frosting consistency.
- Leftover decorated cupcakes should be stored in a covered, non-airtight box at room temperature for up to 2 days. This specific storage method is crucial for preventing the fondant from becoming sticky due to condensation.
Nutrition
An automated tool is used to calculate the nutritional information. As such, I cannot guarantee the accuracy of the nutritional information provided for any recipe on this site.
