Master the Art of Smooth Cake Frosting: A Step-by-Step Guide for Flawless Results
Achieving perfectly smooth, crumb-free cake frosting with sharp edges is often considered the holy grail of cake decorating. It’s the mark of a truly professional-looking cake, transforming a simple dessert into a stunning centerpiece. While it might seem intimidating at first, with the right techniques and a little practice, anyone can master this essential skill. This comprehensive guide will walk you through an incredibly effective method, featuring an ingenious tip from an experienced baker, that promises to elevate your cake decorating game to new heights.
Every passionate baker and dedicated cake decorator knows that the journey to perfection is paved with countless trials, errors, and, most importantly, invaluable tips and tricks picked up along the way. These tried-and-true methods are what truly simplify the process, making it more enjoyable and less daunting. One of the most common challenges faced by enthusiasts, especially when starting out, is achieving that pristine, silky-smooth buttercream finish without a single crumb in sight. This is where expert advice becomes invaluable, providing shortcuts to professional results.
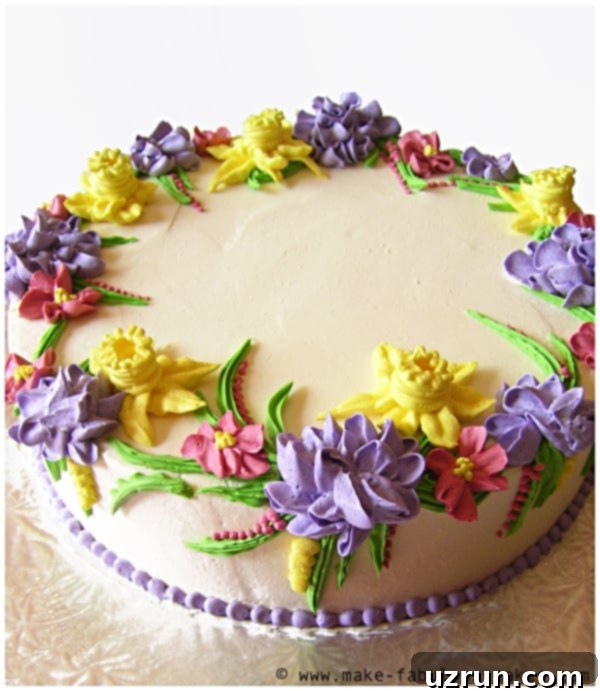
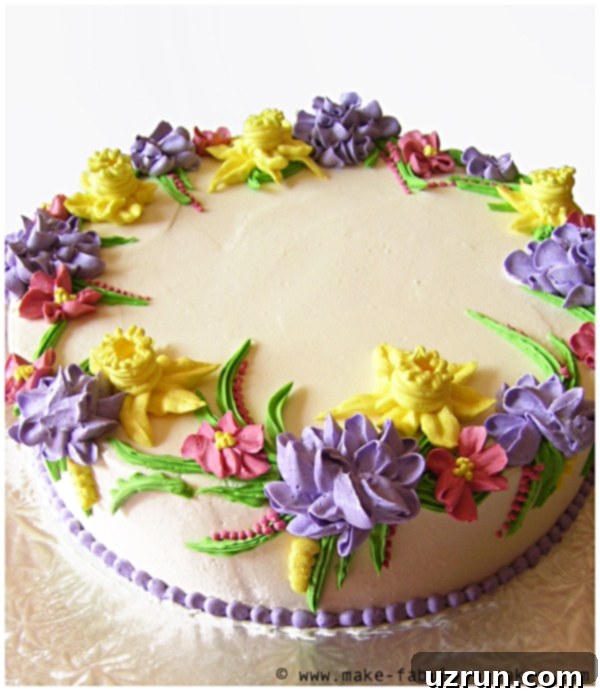
We’re thrilled to share an exceptional technique today, courtesy of Darlene, the talented blogger behind Make Fabulous Cakes. Darlene is a true artist in the world of baking, consistently sharing her wealth of knowledge through insightful cake decorating tutorials and delightful recipes. Her approach to achieving a smooth buttercream finish is not only effective but also brilliantly simple, promising to transform your cakes into edible works of art. Just take a moment to admire the exquisite finish on her cake below – a testament to the power of her method.

The Foundation: Preparing Your Cake for Frosting Success
Before you even think about applying buttercream, proper cake preparation is paramount. A beautifully frosted cake starts with a well-prepared base. Ensure your cake layers are completely cooled – ideally chilled in the refrigerator for at least 30 minutes. A cold cake is firmer and less prone to tearing or crumbling, making it much easier to handle. Next, level your cake layers using a serrated knife or a cake leveler to ensure a flat, even surface. This step is critical for a stable structure and uniform height, which directly contributes to sharp, straight edges in your final frosted cake. Once leveled, stack and fill your cake with your chosen filling, ensuring it’s evenly spread to maintain stability.
The Crucial Crumb Coat: Your First Line of Defense
Darlene, like many seasoned decorators, understands the importance of a good crumb coat. This seemingly simple step is, in fact, the secret weapon against rogue crumbs marring your final finish. A crumb coat is a very thin layer of buttercream applied to the entire cake. Its primary purpose is to trap any loose crumbs that might come off the cake during the frosting process. Without it, these crumbs would mix into your beautiful topcoat, creating an unsightly, textured finish.
To apply a crumb coat, use an offset spatula to spread a small amount of buttercream over the top and sides of your cake. Aim for a thin, even layer that just covers the cake. Don’t worry about perfection at this stage; its job is simply to seal in the crumbs. Once applied, chill the cake in the refrigerator for at least 15-20 minutes, or until the crumb coat is firm to the touch. This hardening locks the crumbs in place, creating a perfectly smooth, stable canvas for your final layer of frosting.
Applying the Main Frosting Layer: Darlene’s Buttercream Choice
Darlene explains her preferred choice for frosting: Italian Meringue Buttercream (IMBC). She states: “My tip to get smooth icing involves the use of a hardware tool! I use Italian Meringue Buttercream to frost my cakes. Since the IMBC does not crust, I find that this method works best with this type of buttercream. After torting and filling my cakes I frost the top and then the sides using an offset spatula.”
Italian Meringue Buttercream is renowned for its silky-smooth texture, stability, and its characteristic of not crusting over quickly. This non-crusting property is key to Darlene’s technique, as it allows more time to work and re-smooth the surface without worrying about cracks or dry spots. If you’re using another buttercream type, like Swiss Meringue Buttercream (SMBC), the method will still work beautifully. For American Buttercream, you might need to work a little faster or chill the cake periodically, as it tends to crust quicker.
Begin by applying a generous amount of your chosen buttercream to the top of your cake using an offset spatula. Spread it evenly, pushing some of it over the edges to create an overhang. Then, apply buttercream to the sides of the cake, ensuring full coverage. Don’t be shy with the amount; having enough buttercream allows for better smoothing and prevents dragging crumbs from the crumb coat. The goal here is to get a relatively even layer of frosting around the entire cake, preparing it for the next crucial step.

The Game-Changer: The Taping Knife Technique for Silky Sides
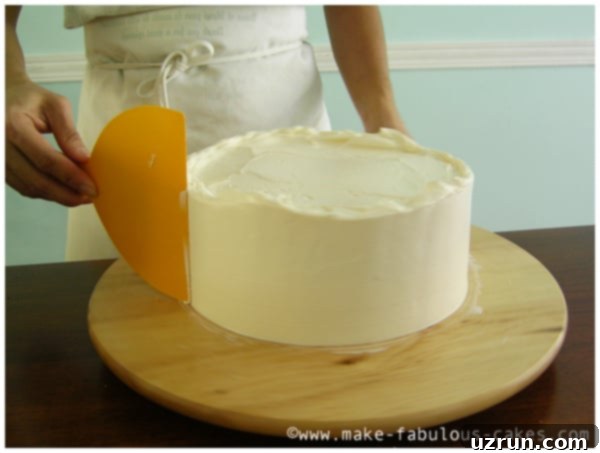
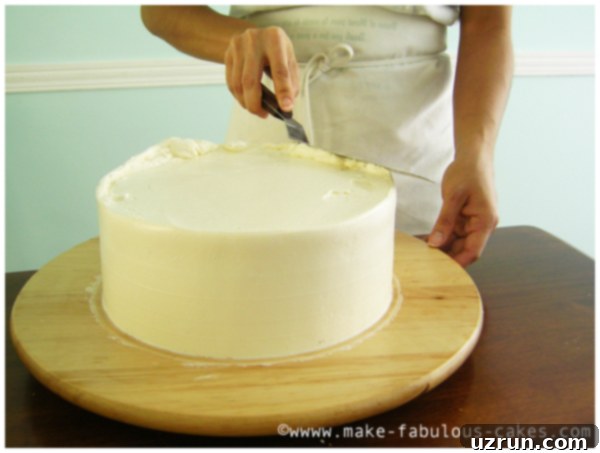
Now for Darlene’s ingenious secret weapon: the taping knife. She reveals: “Then I use a taping knife (found in the paint/drywall aisle of the hardware stores) and use it against the sides of the cake. It may take a few turns of the to get it smooth. Then I use the offset spatula to smooth the tops of the cake. Sometimes I dip my offset spatula in hot water to get the tops really smooth. And that’s it!”
A taping knife, typically used for drywall work, has a long, flat, rigid blade that is perfect for creating super-smooth cake sides. The key lies in its extended surface area, which provides a much broader contact point than a standard offset spatula, allowing you to achieve unparalleled smoothness and sharp edges with remarkable efficiency. This tool acts as a giant bench scraper, but with the added benefit of a comfortable handle for better control.
How to Use the Taping Knife:
- Positioning: Hold the taping knife vertically against the side of your cake. Ensure the entire length of the blade is in contact with the buttercream.
- Angle: Keep the blade at a slight angle (around 45 degrees) towards the cake, applying gentle, consistent pressure. The goal is to remove excess buttercream and smooth the surface, not to dig into the cake.
- Rotation: If you’re using a turntable, slowly rotate the cake while holding the taping knife stationary. If you don’t have a turntable, carefully move the knife around the cake, ensuring each pass overlaps slightly with the previous one.
- Multiple Passes: It will likely take a few turns or passes to achieve the desired smoothness. Don’t rush this step. After each pass, wipe any excess buttercream off the taping knife with a clean cloth or paper towel to prevent reintroducing imperfections.
- Sharp Edges: As you smooth the sides, buttercream will naturally build up slightly on the top edge of the cake. This is good! It provides extra material to create those coveted sharp edges later.
This method significantly reduces the time and effort required to achieve perfectly smooth sides, especially on larger cakes, and results in incredibly sharp, professional-looking edges.
Perfecting the Top Surface with a Hot Spatula
Once the sides are beautifully smooth and sharp, it’s time to perfect the top of the cake. Darlene’s tip of using a hot offset spatula for this step is another stroke of genius. The warmth from the spatula subtly melts the very top layer of buttercream, creating an incredibly smooth, almost glass-like finish, and helping to seamlessly blend the top edge with the sides.
How to Use the Hot Offset Spatula:
- Heat the Spatula: Dip your offset spatula into a mug of very hot water.
- Wipe Dry: Immediately wipe the spatula completely dry with a clean cloth or paper towel. It’s crucial that no water gets onto your buttercream, as water can cause it to break down.
- Smooth the Top: Gently glide the warm, dry spatula across the top surface of the cake, starting from the outside edge and working your way inward. The heat will melt any tiny bumps or imperfections, leaving behind a pristine finish.
- Clean and Reheat: After each pass (or every few passes), clean the spatula of any buttercream, re-dip it in hot water, and wipe it dry again. This ensures you’re always working with a clean, warm tool.
- Refining Edges: Use the tip of the hot spatula to gently clean up any excess buttercream that may have built up along the top edge, pulling it towards the center of the cake for a super crisp finish.

Essential Tips for Flawless Frosting Success
Beyond Darlene’s brilliant technique, several general tips can significantly improve your chances of frosting perfection:
- Buttercream Consistency: Your buttercream should be smooth, pliable, and spreadable. If it’s too stiff, it will tear the cake; if it’s too soft, it won’t hold its shape or smooth out effectively. If needed, thin it with a tiny bit of milk or cream, or thicken it by chilling it slightly and re-whipping.
- Room Temperature: Work in a cool environment. A warm kitchen can cause your buttercream to soften too quickly, making it difficult to work with and prone to sweating.
- Patience and Practice: As with any skill, practice makes perfect. Don’t get discouraged if your first attempt isn’t flawless. Each cake is an opportunity to learn and improve.
- Use a Turntable: A good quality cake turntable is an indispensable tool for achieving smooth sides and sharp edges, allowing you to rotate the cake smoothly while keeping your smoothing tool steady.
- Clean Your Tools: Always wipe your spatula or taping knife clean after each pass. This prevents crumbs and excess buttercream from being redeposited onto the cake, ensuring a pristine finish.
- Address Air Bubbles: Sometimes, tiny air bubbles can appear in your buttercream. Gently tap the cake on your counter or use a clean spatula to smooth them out before they set.
Why This Method is a Must-Try for Every Baker
Darlene’s technique, particularly the incorporation of the taping knife, is truly excellent. It offers several significant advantages:
- Crumb-Free Finish: Combined with a proper crumb coat, this method ensures no stray crumbs mar your final frosting.
- Sharp Edges: The long, flat blade of the taping knife is ideal for creating those coveted, crisp edges that define a professional cake.
- Efficiency: Once mastered, this technique can significantly speed up the frosting process, especially for larger or multi-tiered cakes.
- Professional Aesthetics: The result is a consistently smooth, polished surface that screams professionalism and attention to detail.
This method truly unlocks the potential for stunning cake presentations. Wouldn’t you agree that a simple hardware tool could be the secret to your best cakes yet?
Conclusion: Embrace the Smooth Frosting Journey
Mastering the art of smooth cake frosting doesn’t have to be a daunting task. By following Darlene’s expert advice and incorporating a few key techniques like the essential crumb coat, the innovative taping knife method, and the hot spatula trick, you’re well on your way to creating beautifully finished cakes every single time. This approach not only simplifies the process but also elevates the aesthetic appeal of your baked creations, allowing you to proudly present cakes that look as incredible as they taste.
We highly encourage you to try this method on your next baking adventure. Experiment with different types of buttercream, adjust your technique slightly, and discover what works best for you. With a little practice, you’ll be frosting cakes with the confidence and precision of a seasoned professional.
For more incredibly useful baking tips and cake decorating inspiration, be sure to explore the archives and visit Darlene’s blog at Make Fabulous Cakes. There’s always something new to learn to enhance your baking skills.
Until next time, happy baking!
