The Ultimate Guide to Making Fluffy, Stabilized Chocolate Whipped Cream Frosting
Welcome to the ultimate guide for crafting the most delightful chocolate whipped cream frosting! If you’re someone who adores the rich flavor of chocolate but prefers a lighter, airier topping over heavy buttercream or dense fondant, then you’ve found your perfect recipe. This homemade chocolate whipped cream frosting is incredibly quick and easy to prepare, relying on just three simple ingredients: heavy cream, cocoa powder, and powdered sugar. The result is a wonderfully creamy, irresistibly fluffy, and surprisingly stable icing that holds its shape beautifully, making it ideal for piping onto cakes, cupcakes, tarts, and a myriad of other desserts.
Forget about dense, overly sweet frostings that can sometimes overpower your dessert. This chocolate whipped cream offers a delicate balance of sweetness and deep chocolate flavor, with a texture that melts in your mouth. It’s not just delicious; its stabilized nature means it’s far less prone to deflating, giving you a reliable and elegant finish for all your baking projects. Whether you’re decorating a celebratory cake or simply topping a bowl of fresh berries, this recipe is a game-changer.
But what if you’re not in the mood for chocolate, or need a different color for a special occasion? This recipe serves as a fantastic foundation! You can easily adapt it for other flavors. For a classic, vibrant white option, or to explore a spectrum of other tastes, be sure to check out my Homemade Stabilized Whipped Cream recipe. It’s equally versatile and just as easy to make, opening up a world of dessert possibilities beyond chocolate.

How to Make Homemade Chocolate Whipped Cream Frosting from Scratch (Step-by-Step)
Creating this decadent chocolate whipped cream is surprisingly simple. Follow these three fundamental steps, and you’ll be enjoying a light, chocolatey topping in no time. The key is to pay attention to temperature and mixing technique for optimal fluffiness and stability.
- Chill Your Equipment: This crucial first step ensures your whipped cream reaches its full, stable potential. Place your mixing bowl and beaters (or the whisk attachment for a stand mixer) in the freezer for at least 10 to 15 minutes before you begin. A cold environment helps the fat molecules in the cream firm up more effectively, allowing them to trap air and create stiff peaks much faster and more reliably. Don’t skip this step – it truly makes a difference in achieving that perfectly stable, pipeable texture.
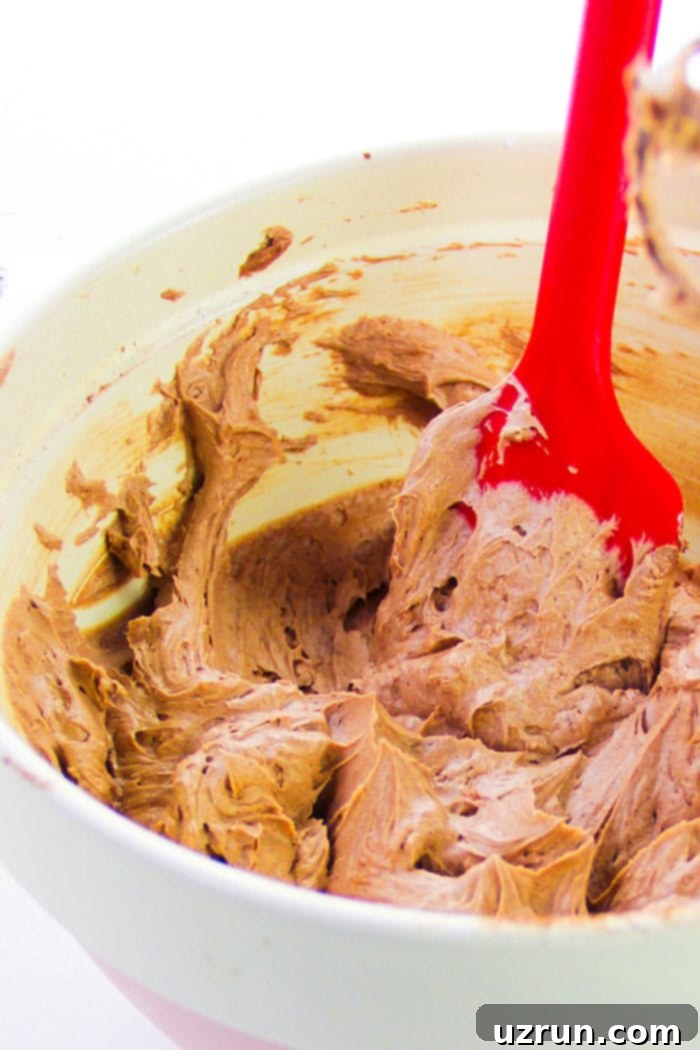
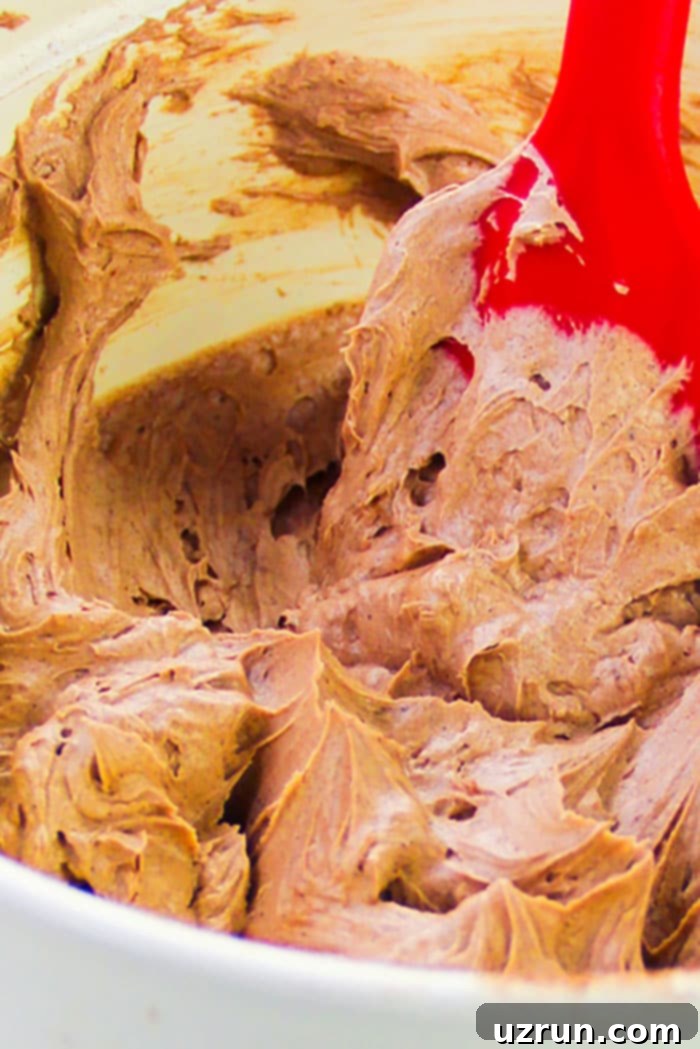
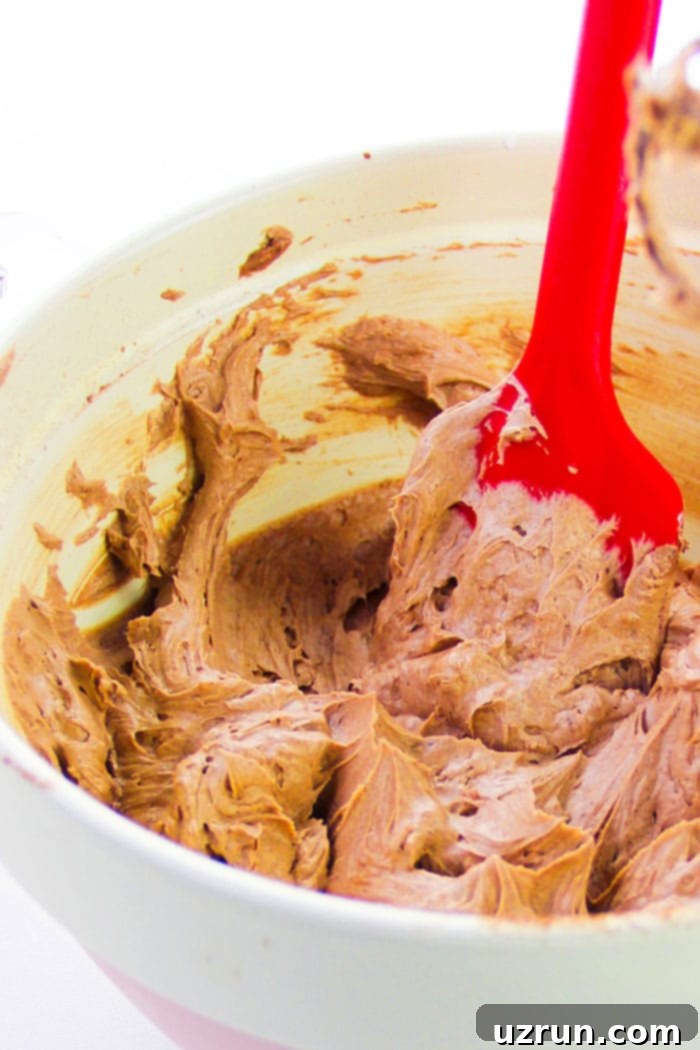
- Combine and Mix Ingredients: Once your equipment is thoroughly chilled, pour your very cold heavy cream into the mixing bowl. Add the cocoa powder, powdered sugar, and if desired, espresso powder. Espresso powder is optional but highly recommended as it deepens and intensifies the chocolate flavor without adding a coffee taste. Start mixing on low speed to gently combine the ingredients, preventing the cocoa powder from flying out of the bowl. Gradually increase the speed to medium-high. Continue beating until stiff peaks form. Stiff peaks mean that when you lift the beaters, the whipped cream holds its shape firmly and doesn’t droop. Be vigilant during this stage, as over-mixing can quickly lead to undesirable results.
- Spread or Pipe and Serve: As soon as stiff peaks are achieved, stop mixing immediately. Your luscious chocolate whipped cream frosting is now ready to be used! You can spread it generously over cakes, cupcakes, brownies, or any other dessert that calls for a light, fluffy topping. For a more decorative finish, transfer the whipped cream to a piping bag fitted with your favorite nozzle and pipe beautiful swirls and designs. Enjoy this freshly made, airy chocolate treat with your favorite desserts.
Dark Chocolate vs. Milk Chocolate Flavor: Choosing Your Cocoa Powder
The type of cocoa powder you choose will significantly impact the flavor profile and color of your chocolate whipped cream frosting. Understanding the difference between Dutch-process and natural cocoa powder is key to achieving your desired chocolate intensity.
- Dutch-Process Cocoa Powder: This cocoa powder has been treated with an alkali to neutralize its acidity. This process results in a darker color and a mellower, less bitter, and often more “chocolatey” or “earthy” flavor. If you’re aiming for a rich, deep dark chocolate flavor in your whipped cream, Dutch-process cocoa is the way to go. It tends to be less astringent and provides a smooth finish.
- Natural Process Cocoa Powder: Untreated and acidic, natural cocoa powder is lighter in color and has a sharper, more fruity, and slightly bitter chocolate flavor. This is what you typically find labeled simply as “cocoa powder” in most grocery stores. I generally recommend natural cocoa powder for this recipe if you prefer a taste that leans more towards a “milk chocolate” vibe – it offers a bright chocolate flavor that pairs wonderfully with the sweetness of the powdered sugar. Its slight acidity can also subtly enhance the overall taste, making the chocolate notes pop.
Ultimately, the choice is yours! Experiment with both to find your preferred intensity and flavor. You can also adjust the amount of cocoa powder slightly to make it more or less chocolatey to your liking.
Is Whipping Cream the Same as Heavy Cream?
This is a common question in the baking world, and for the most part, the answer is yes, they are essentially interchangeable for recipes like whipped cream frosting! The primary difference often lies in branding and a slight variation in milk fat content, though both are excellent for making delicious, airy desserts.
Both “heavy cream” and “heavy whipping cream” must contain at least 36% milk fat in the United States. “Whipping cream” (or light whipping cream) typically has a slightly lower milk fat content, usually between 30% and 35%. For our purposes, making a stabilized, pipeable whipped cream frosting, heavy cream (or heavy whipping cream) is preferred because its higher fat content contributes to a more stable, thicker, and longer-lasting whipped product. This extra fat ensures that your whipped cream holds stiff peaks beautifully and resists deflating for a longer period, which is particularly important if you plan on piping decorations or serving your dessert over several hours. So, while “whipping cream” will work, “heavy cream” will give you the best, most reliable results for a frosting that truly holds its own.
Why Did My Whipped Cream Frosting Curdle?
The curdling of whipped cream is almost always a sign of over-mixing. When you whip cream, you’re essentially aerating it and forming an emulsion of fat and air. If you continue to mix beyond the point of stiff peaks, the fat globules will begin to clump together, squeezing out the liquid (buttermilk). This process eventually leads to the separation of the cream into solid butter and liquid buttermilk, resulting in a chunky, curdled texture that is no longer suitable for a smooth frosting.
To prevent curdling, it’s crucial to pay close attention to the texture as you mix. Start with your chilled bowl and beaters, and mix on medium-high speed. Watch closely as the cream thickens; it will go from soft peaks (where the peaks gently fall over) to stiff peaks (where the peaks stand upright). As soon as you reach stiff peaks, stop mixing immediately. There’s a very fine line between perfectly whipped cream and over-whipped, curdled cream, so careful observation is your best friend here. Unfortunately, once whipped cream has curdled into a buttery consistency, it cannot be reversed back into smooth whipped cream for frosting. You might still be able to use it as homemade butter, but it won’t work for your original frosting purpose.
Why Is My Cocoa Whipped Icing Runny and Watery?
A runny or watery cocoa whipped icing is generally due to one or a combination of factors, primarily under-mixing or insufficient chilling. Here’s a breakdown:
- Under-Mixing: The most common reason for runny whipped cream is that you haven’t mixed it long enough to form those crucial stiff peaks. Whipping cream requires enough agitation to trap air and create a stable structure. If you stop too early, the cream will remain loose and won’t hold its shape. Continue mixing until the cream is thick enough to hold distinct peaks when you lift the beaters.
- Insufficient Chilling: Warm cream simply won’t whip properly. The fat globules in heavy cream need to be cold and firm to emulsify effectively and create a stable structure. If your heavy cream was not sufficiently cold, or if your mixing bowl and beaters were warm, the cream will struggle to thicken and may remain runny. Always start with very cold cream and chilled equipment.
- Too Much Liquid: While this recipe is straightforward, adding extra liquid (like too much extract that’s water-based, or using cream with a lower fat content) can sometimes dilute the mixture and make it harder to achieve stiff peaks. Stick to the specified ingredient ratios.
- Humidity: High humidity in your kitchen can also make it more challenging for whipped cream to stabilize and hold its form. If you’re working in a humid environment, ensure everything is extra cold and work quickly.
The solution is often to simply continue mixing (carefully, to avoid curdling!) with thoroughly chilled equipment until you see those nice, firm stiff peaks. Be patient, but always watch closely to avoid the dreaded over-mixing!
What Happens if You Mix Melted Chocolate and Cream (Heavy Cream or Whipping Cream)?
Mixing melted chocolate with cream, particularly heavy cream, is the fundamental process for creating Chocolate Ganache. This is a distinct dessert component from simple whipped cream frosting, though it shares some similarities in its ingredients.
Ganache is typically made by pouring hot cream over chopped chocolate, allowing the chocolate to melt, and then stirring until smooth and emulsified. The ratio of chocolate to cream dictates its consistency:
- Pourable Ganache: A higher cream-to-chocolate ratio results in a thinner ganache that can be used as a glaze or sauce for cakes, tarts, and other desserts. It provides a rich, glossy coating.
- Whipped Ganache (Ganache Frosting): If you use a higher chocolate-to-cream ratio (or sometimes an equal ratio), and then allow the ganache to cool completely and chill, you can whip it to create a pipeable Ganache Frosting. This results in a much richer, denser, and more intensely chocolatey frosting compared to regular whipped cream, with a texture similar to a light buttercream. It’s a fantastic alternative for those who love deep chocolate flavor and a more substantial frosting.
While both this chocolate whipped cream and ganache frosting involve chocolate and cream, they achieve different textures and flavor intensities. Our chocolate whipped cream is lighter and airier, while whipped ganache is richer and denser, making it important to choose the right one for your dessert’s desired outcome.

Creative Variations for Chocolate Whipped Cream Frosting for Cakes and Cupcakes
One of the best things about this chocolate whipped cream frosting is how easily it can be customized with various flavors. These variations can transform a simple dessert into something truly extraordinary, perfect for any occasion or palate.
- Peanut Butter Chocolate Whipped Cream: This classic combination is always a winner! Simply mix in 1-2 tablespoons of creamy peanut butter (adjust to taste) after your whipped cream has started to thicken. It creates a rich, nutty, and slightly salty counterpoint to the sweet chocolate, making it perfect for chocolate cakes, brownies, or even banana bread.
- Peppermint Chocolate Whipped Cream: Ideal for the festive Christmas holiday season, this variation brings a refreshing cool minty kick. Stir in 1 teaspoon of peppermint extract (or to your desired strength) during the final stages of whipping. It’s fantastic on chocolate cupcakes, hot cocoa, or as a filling for chocolate sandwich cookies.
- Mexican Hot Chocolate Whipped Cream: For a unique and mildly spiced experience, try this exotic flavor. Mix in 1 teaspoon of ground cinnamon and ¼ teaspoon of chili powder. You can also add a tiny pinch of cayenne pepper for a subtle warming heat and a dash of nutmeg for added complexity. This mildly spiced chocolate whipped cream is incredible on rich chocolate desserts, pumpkin pie, or a warm mug of hot chocolate.
- Caramel Chocolate Whipped Cream: Elevate your frosting with the sweet, buttery notes of caramel. Swirl in 1-2 tablespoons of delicious Homemade Caramel Sauce after the cream has thickened. Be careful not to add too much liquid, as it can thin the whipped cream. This is divine on apple tarts, chocolate caramel cakes, or even coffee-flavored desserts.
- Coffee or Mocha Whipped Cream: Boost the chocolate flavor and add a sophisticated touch by incorporating 1-2 teaspoons of instant coffee granules or espresso powder (beyond what’s already in the recipe for intensifying chocolate). This creates a delightful mocha-flavored whipped cream that pairs perfectly with almost any chocolate dessert, or even vanilla and hazelnut treats.
- Nutty Extracts: Experiment with other extracts to introduce new dimensions of flavor. Maple extract provides a warm, comforting taste, coconut extract offers a tropical twist, and almond extract adds a delicate, sophisticated nuttiness. Mint extract (different from peppermint) offers a fresh, cooling sensation. Start with ¼ to ½ teaspoon and add more to taste.
- Fresh Citrus Zest: For a bright and zesty contrast to the rich chocolate, mix in some freshly grated zest from oranges, limes, or lemons. Orange chocolate is a classic pairing, while lime or lemon zest can offer an unexpected, refreshing zing, especially in lighter desserts.
These variations are just starting points! Feel free to mix and match or invent your own to suit your taste and the specific dessert you’re creating.
What to Pair with Homemade Cocoa Whipped Cream?
This versatile chocolate whipped cream frosting isn’t just for cakes and cupcakes! Its light, fluffy texture and rich chocolate flavor make it an exceptional companion for a wide array of desserts. Here are some fantastic pairing ideas:
- Pies: It will taste unbelievably delicious with a rich and creamy pie. Imagine a generous dollop on top of this Chocolate Peanut Butter Pie, where the lightness of the whipped cream beautifully balances the density of the pie.
- Tarts: Spread or swirl it elegantly on top of a tart for an instant upgrade. It’s a perfect match for this No Bake Chocolate Tart (Tartlet), adding a delicate finish without overwhelming the tart’s flavors.
- Cakes: The classic choice! This frosting is heavenly on almost any chocolate cake. Try it with this Chocolate Raspberry Cake for a delightful fruit and chocolate combination, or generously frost this elegant Chocolate Cake Roll for a stunning presentation.
- Cheesecake: A light, airy counterpoint to the rich and tangy profile of cheesecake. Try it on top of this New York Cheesecake for an added layer of indulgence and beautiful visual appeal.
- Cupcakes: Transform simple cupcakes into gourmet treats. It will taste especially delicious on these Yellow Cupcakes, providing a vibrant contrast in color and flavor.
- Waffles: For an indulgent breakfast or dessert, pile it high on warm waffles. Pair it with these Chocolate Waffles for a double dose of chocolatey goodness that’s simply irresistible.
- Pancakes: Take your breakfast or brunch to the next level by serving this whipped cream with pancakes. It’s a fantastic topping for these Chocolate Chip Pancakes, turning a casual meal into a luxurious experience.
- Crepes: Use it as a delectable filling for delicate crepes. Fill these Chocolate Crepes with the fluffy chocolate whipped cream for a lighter, yet incredibly satisfying dessert or breakfast.
- Brownies and Bars: Spread a layer of this dreamy frosting over your favorite brownies or dessert bars. It adds an incredible lightness and richness to treats like these Fudgy Avocado Brownies, creating a two-layer delight.
- Hot Chocolate: For the ultimate cozy beverage, you definitely need to drop a few spoonfuls on top of this Mexican Hot Chocolate. The melting whipped cream adds a creamy texture and extra chocolate flavor, making your drink even more comforting.
Don’t be afraid to experiment! This chocolate whipped cream is a versatile topping that can enhance almost any sweet treat, adding a touch of elegance and irresistible flavor.
Essential Tips and Techniques for Perfect Whipped Chocolate Frosting
Achieving perfectly stable and fluffy chocolate whipped cream is all about technique and a few key considerations. Follow these tips for consistent success every time:
- Chill Your Equipment Thoroughly: This is arguably the most critical step. Cold environments are essential for whipping cream successfully. Place your metal mixing bowl (metal bowls get colder faster than glass or plastic) and your beaters or whisk attachment in the freezer for at least 10-15 minutes, or even up to 30 minutes, before you begin. The colder the equipment, the faster and more efficiently your cream will whip, and the more stable it will be.
- Always Use Cold Heavy Cream: Just like your equipment, your heavy cream must be straight from the refrigerator, as cold as possible. Warm cream will struggle to whip, resulting in a loose, unstable product that quickly deflates. The cold temperature helps the fat molecules in the cream firm up, allowing them to trap air and create those desirable stiff peaks.
- How to Thicken Whipped Cream (If Too Thin): If your whipped cream isn’t thickening as desired, it likely hasn’t been whipped long enough. Continue beating it on medium-high speed. However, be extremely careful not to over-mix, as this can lead to curdling. Watch closely for the formation of stiff peaks where the cream holds its shape firmly.
- How to Make Whipped Cream Thinner (If Too Thick): If you’ve accidentally whipped your cream a bit too far and it’s almost too stiff or slightly grainy (but not yet curdled), you can try to salvage it by gently folding in a tablespoon or two of cold, unwhipped heavy cream. Mix carefully by hand until it reaches your desired, smoother consistency.
- Use the Right Equipment: For the quickest and most consistent results, use either a stand mixer fitted with the whisk attachment or a hand-held electric mixer. Both should be thoroughly chilled, as mentioned. While you can whip cream by hand with a whisk, it requires significantly more effort, time, and might not yield the same level of stability, especially for larger batches.
- Powdered Sugar is a Must: Do not substitute granulated sugar for powdered sugar in this recipe. Powdered sugar (also known as confectioners’ sugar) contains a small amount of cornstarch, which acts as a natural stabilizer, helping the whipped cream hold its shape longer. More importantly, its fine texture dissolves smoothly into the cream, preventing any grainy or gritty mouthfeel that granulated sugar would cause.
- Use Unsweetened Cocoa Powder: Ensure you are using unsweetened cocoa powder, not a hot chocolate mix. Hot chocolate mixes contain sugar, milk solids, and sometimes other additives that will alter the texture and sweetness of your whipped cream in an undesirable way. Unsweetened cocoa powder provides the pure, intense chocolate flavor needed for this frosting.
- Don’t Over-Mix: This cannot be stressed enough. Over-mixing is the enemy of perfectly whipped cream. It will quickly turn your fluffy frosting into a grainy, curdled mess, eventually separating into butter and buttermilk. Stop as soon as stiff peaks form.
Storage of Homemade Stabilized Whipped Cream (Without Gelatin)
One of the benefits of this stabilized whipped cream recipe is its improved shelf life compared to traditional whipped cream. However, proper storage is still essential to maintain its freshness and texture.
- Fridge: Store any leftover chocolate whipped cream frosting in an airtight container in the refrigerator for up to 3 days. While it’s stabilized, it’s still a dairy product and will benefit from being kept cold. Before using stored whipped cream, you might notice it has slightly softened or lost a bit of its volume. You can gently re-whip it for a minute or two with a whisk or electric mixer until it regains its fluffy consistency. Be careful not to over-mix during this re-whipping process.
- Freezer: I do not recommend freezing this particular whipped cream frosting. While some whipped cream recipes that use gelatin or other heavy-duty stabilizers can be frozen, this recipe relies on the natural stability from cold ingredients and powdered sugar. Upon thawing, the icing can lose its airy texture, deflate significantly, and may even curdle or become watery as the water separates from the fat. For best results and optimal texture, it’s always best to enjoy this whipped cream fresh or within a few days from the refrigerator.
More Easy Frosting Recipes to Explore
If you loved making this chocolate whipped cream and are looking for more delicious and easy frosting options to complement your baked goods, here are some other fantastic recipes to try. Each offers a unique flavor and texture, perfect for expanding your baking repertoire:
- Creme Chantilly: A classic, lightly sweetened vanilla whipped cream that’s elegant and versatile.
- Easy Glace Icing: A simple, pourable icing perfect for cookies and pastries, offering a shiny, smooth finish.
- Chocolate Cream Cheese Frosting: A rich, tangy, and incredibly creamy frosting that perfectly balances the sweetness of chocolate.
- American Buttercream Frosting Recipe: A classic, sweet, and firm frosting that’s ideal for piping intricate designs.
- Marshmallow Frosting Recipe: A light, sticky, and incredibly delicious frosting with a distinct marshmallow flavor, perfect for s’mores-inspired desserts.
Recipe

Easy Chocolate Whipped Cream Frosting
Abeer Rizvi
Pin Recipe
Want to Save This Recipe?
Enter your email & I’ll send it to your inbox. Plus, get great new recipes from me every week!
By submitting this form, you consent to receive emails from CakeWhiz
Ingredients
- 2 cups Heavy cream Must be very cold for best whipping results.
- ¼ cup Unsweetened Cocoa powder Natural process cocoa powder is recommended for a milk chocolate flavor.
- ½ cup Powdered sugar Also known as confectioners’ sugar. Essential for smooth texture and stability.
- ½-1 teaspoon Espresso powder Optional, but highly recommended to intensify the chocolate flavor without adding a coffee taste.
Instructions
-
To ensure the best results, chill your mixing bowl (preferably metal) and beaters (or the whisk attachment for your stand mixer) in the freezer for at least 10 to 15 minutes. This step is crucial for achieving stiff peaks quickly and maintaining stability.
-
In your thoroughly chilled mixing bowl, combine the very cold heavy cream, cocoa powder, powdered sugar, and the optional espresso powder. Start mixing with a stand mixer (using the whip attachment) or a hand-held electric mixer on low speed to gently incorporate the powders without making a mess. Gradually increase the speed to medium-high and continue beating until firm, stiff peaks form. The cream should hold its shape perfectly when you lift the beaters.
-
It is very important not to over-mix the ingredients. As soon as stiff peaks are achieved, stop mixing immediately. Over-mixing can quickly cause your whipped cream to curdle, resulting in a chunky, grainy texture similar to butter, which is not suitable for frosting.
-
Your perfectly fluffy and stable chocolate whipped cream frosting is now ready! Spread this delectable icing generously on top of your favorite desserts or transfer it to a piping bag for elegant decorations. Enjoy immediately for the best taste and texture!
Notes
- For detailed explanations and troubleshooting, please refer to all the tips and techniques mentioned in the article above.
- Leftovers of this stabilized chocolate whipped cream can be stored in a sealed airtight container in the fridge for up to 3 days. If it loses some of its fluffiness upon storage, you can gently re-whip it for a minute or two before using to restore its airy texture.
Nutrition
An automated tool is used to calculate the nutritional information. As such, I cannot guarantee the accuracy of the nutritional information provided for any recipe on this site.
